

Table of Contents
- Photography Exposure Calculator
- Dial in Better Camera Settings
- Learn the Exposure Triangle Faster
- Why Use a Photography Exposure Calculator?
- Helpful for Beginners and Working Photographers
- Use Lighting Conditions as Your Starting Point
- Don't Forget About Your Creative Intent
- Exposure Settings for Different Types of Photography
- Exposure Is Only the Beginning
- Use the Calculator, Then Fine-Tune
- Start Calculating Your Exposure
- FAQs
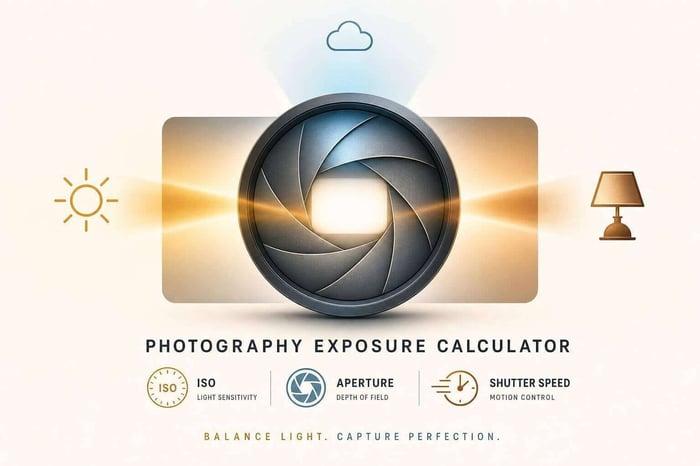
Photography Exposure Calculator
Dial in Better Camera Settings
A reliable photography exposure calculator makes it easier to balance ISO, aperture, and shutter speed without relying on guesswork. If you're new to manual mode, the tool gives you a straightforward way to understand how each setting affects brightness. If you've been shooting for years, it still saves time when light changes quickly and you need a fast, practical reference.
Getting the right exposure is one of the most important parts of taking a great photograph. Too much light can wash out details in your highlights, while too little light can leave your image dark and difficult to recover during editing. Understanding how to balance your camera settings gives you much more control over the final image.
Our photography exposure calculator gives you a practical starting point for balancing ISO, aperture, and shutter speed. Instead of relying entirely on guesswork, you can use the calculator to understand how different settings work together and make faster decisions when lighting conditions change.
Whether you're learning manual mode for the first time or you're an experienced photographer who needs a quick reference, an exposure calculator can help you get closer to the settings you need before pressing the shutter.
Learn the Exposure Triangle Faster
The core idea is simple: when one part of the exposure triangle changes, another part usually needs to move with it. Open the aperture and you may be able to use a faster shutter. Lower the ISO and you might need more light or a longer exposure. This exposure triangle calculator helps you see those relationships in a way that feels useful, not overly technical.
The exposure triangle describes the relationship between aperture, shutter speed, and ISO. These three camera settings work together to determine the exposure of your photograph.
If you change one setting, you will often need to adjust another to maintain a similar exposure. For example, opening your aperture lets more light into the camera. You could compensate by using a faster shutter speed, lowering your ISO, or using a combination of adjustments.
If you're still learning these fundamentals, our guide to aperture, shutter speed, and ISO provides a more detailed explanation of these essential photography settings.
Understanding the exposure triangle isn't about memorizing one perfect combination of settings. It's about learning how each adjustment affects the image so you can make intentional choices.
Aperture
Aperture controls the size of the opening inside your lens. A wider aperture, represented by a smaller f-number such as f/1.8 or f/2.8, allows more light to reach the camera sensor.
A wide aperture can also create a shallow depth of field, which is useful for portraits and other situations where you want your subject separated from the background.
A narrower aperture, such as f/8 or f/11, lets in less light but can keep more of the scene in focus. Landscape photographers often use narrower apertures when they want greater depth of field.
Shutter Speed
Shutter speed determines how long the camera sensor is exposed to light.
A fast shutter speed, such as 1/1000 second, can help freeze fast-moving subjects. This can be useful for sports, wildlife, action, or children who won't stay still.
A slower shutter speed allows more light into the camera but increases the risk of motion blur. Slow shutter speeds can be useful for night photography, long exposures, waterfalls, or creative motion effects when the camera is stabilized.
ISO
ISO controls the camera sensor's sensitivity to light. A lower ISO, such as ISO 100, generally produces cleaner images with less visible noise.
When you're shooting in darker conditions, increasing ISO can help you maintain a usable shutter speed or aperture. The tradeoff is that higher ISO settings can introduce more digital noise and reduce image quality.
The goal isn't necessarily to use the lowest ISO possible. Instead, choose an ISO that allows you to achieve the shutter speed and aperture you need for the photograph.
Why Use a Photography Exposure Calculator?
Calculating exposure manually becomes easier with experience, but even experienced photographers encounter situations where lighting changes quickly.
An exposure calculator can provide a useful starting point when you're moving between different environments. For example, you might be photographing outside in bright sunlight and then move indoors. The amount of available light changes dramatically, so the settings that worked outside may no longer be appropriate.
Rather than starting from scratch, you can use the calculator to see how changing one setting affects the others.
This can be particularly helpful when you're learning manual mode because it allows you to experiment with different combinations and see the relationship between the settings.
Helpful for Beginners and Working Photographers
With built-in lighting presets for sunny, cloudy, and indoor scenes, the tool offers a smart baseline before you fine-tune for motion, depth of field, or image quality. A good photography exposure calculator doesn't replace creative judgment, but it does give you a cleaner starting point. That means fewer missed shots, faster setup, and more confidence behind the camera.
Use Lighting Conditions as Your Starting Point
Light is one of the biggest factors affecting exposure. The same camera settings that work beautifully in bright sunlight may produce a severely underexposed image indoors.
Our calculator includes lighting presets that can help provide a baseline for common conditions, including sunny, cloudy, and indoor scenes.
These aren't strict rules. Think of them as starting points that you can adjust based on your subject, lens, camera, and creative goals.
For a deeper look at how light affects exposure, contrast, shadows, and the overall appearance of your images, see our guide to the science of light in photography.
Sunny Conditions
Bright sunlight provides plenty of available light, which usually allows you to work with a lower ISO and faster shutter speed.
However, harsh midday sunlight can create strong shadows and bright highlights. You may need to adjust your composition, use a diffuser, or change your exposure depending on the subject.
Cloudy Conditions
Cloudy skies reduce the amount of available light compared with direct sunlight. You may need to open the aperture, slow the shutter speed, or increase ISO.
The benefit is that overcast conditions can produce softer and more evenly distributed light, which can work particularly well for portraits.
Indoor Conditions
Indoor photography often presents more challenging lighting. Depending on the room and available light, you may need a wider aperture, slower shutter speed, or higher ISO.
If you're using a slower shutter speed, watch for camera shake and subject movement. Increasing ISO may introduce more noise, but a sharp, slightly noisy photograph is often preferable to a blurry one.
The Ultimate Presets.IO Bundle

$89.00
$1,662.00
The Ultimate Presets.io Bundle combines The Master Preset Bundle Volume I and The Master Preset Bundle Volume II into one complete collection, giving you every editing style you need in a single download. Save $37 vs. Volume I and II… continue reading
Don't Forget About Your Creative Intent
A calculator can help you balance exposure, but it can't decide what you want your photograph to look like.
Imagine you're photographing a person outdoors.
You could choose a wide aperture such as f/2.8 to create background blur. To compensate for the additional light entering the lens, you might use a faster shutter speed.
Alternatively, you might want the entire scene to remain sharp. In that case, you could use a narrower aperture such as f/8 and adjust your shutter speed or ISO accordingly.
Both photographs can have a correct exposure, but they'll look very different.
That's why an exposure calculator should be treated as a technical guide rather than an automatic answer. Use it to establish a sensible starting point, then make creative decisions based on your subject and the look you want.
Exposure Settings for Different Types of Photography
Your ideal exposure settings also depend on what you're photographing.
Portraits: A wider aperture can help separate your subject from the background. Keep an eye on shutter speed if your subject is moving.
Landscapes: A narrower aperture can provide greater depth of field. When shooting in low light, a tripod can allow you to use a slower shutter speed without introducing camera shake.
Sports and action: A fast shutter speed is usually the priority because you need to freeze movement. If lighting is limited, you may need to increase ISO or open the aperture.
Street photography: You'll often need to balance shutter speed and aperture quickly as lighting and subjects change.
Night photography: A tripod, slower shutter speed, wider aperture, or higher ISO may be necessary depending on the scene.
There isn't one universal combination of settings that works for every type of photography. The calculator helps you understand the available options so you can choose the combination that best suits the situation.
Exposure Is Only the Beginning
Getting a good exposure in-camera gives you a stronger foundation for editing. However, even a correctly exposed photograph may benefit from adjustments to contrast, highlights, shadows, color, and white balance.
This is where your post-processing workflow comes in.
For example, RAW files give you considerably more flexibility when making exposure and color adjustments. Once you've captured the image, you can use editing software to refine the final appearance.
If you're interested in streamlining that process, our guide to adjusting presets for different types of lighting explains how different lighting conditions can affect exposure, color temperature, contrast, and other editing adjustments.
You can also learn more about how Lightroom presets work and the parameters they adjust.
Use the Calculator, Then Fine-Tune
The best way to learn exposure is through practice.
Try entering different combinations into the calculator and pay attention to what happens when you change the aperture, shutter speed, or ISO. Then take those ideas into the real world and compare the results.
As you gain experience, you'll start to recognize common lighting situations and develop an instinct for the settings you need.
Remember:
- Aperture controls light entering the lens and affects depth of field.
- Shutter speed controls exposure time and affects motion blur.
- ISO affects sensor sensitivity and can influence image noise.
- Lighting conditions determine how much available light you have.
- Creative intent determines which settings are most appropriate for the photograph.
The calculator gives you a starting point. Your camera, subject, lighting, and creative decisions determine where you go from there.
Start Calculating Your Exposure
Whether you're learning photography or simply need a quick reference when lighting conditions change, an exposure calculator can take some of the guesswork out of choosing camera settings.
Use the calculator above to experiment with aperture, shutter speed, and ISO. Start with the suggested values for your lighting conditions, then adjust them according to your subject and creative goals.
The more you practice, the more naturally the exposure triangle will become part of your photography workflow.
FAQs
What is the exposure triangle, and why does it matter?
The exposure triangle is the relationship between ISO, aperture, and shutter speed. These three settings work together to control how bright or dark your photo appears. Aperture changes how much light enters the lens, shutter speed controls how long the sensor sees that light, and ISO adjusts how sensitive the sensor is. If you change one, you usually need to adjust at least one of the others to keep exposure balanced. Once you understand that tradeoff, it becomes much easier to shoot confidently in different lighting conditions.
Can this calculator tell me the exact best setting for every photo?
It gives you a strong technical starting point, but the best setting still depends on your creative goal. For example, you might want a fast shutter speed to freeze motion, a wide aperture for blurry background separation, or a lower ISO for cleaner image quality. The calculator helps you balance exposure based on the values you enter, then you can fine-tune for style, subject movement, and lens limitations.
How do lighting presets like sunny, cloudy, and indoor help?
Lighting presets are useful because they give you realistic baseline settings before you start making creative adjustments. Bright sun usually supports lower ISO and faster shutter speeds, while indoor scenes often need a wider aperture, slower shutter, or higher ISO. These presets save time and make the tool friendlier for beginners who may not know where to begin. Think of them as a smart starting point, not a fixed rule.
Should I always use the lowest possible ISO?
Not necessarily. A low ISO can help produce cleaner images with less visible noise, but using too low an ISO can force you to use a shutter speed that's too slow or an aperture that doesn't suit your photograph.
For example, when photographing a moving subject in low light, increasing ISO may allow you to use a faster shutter speed and capture a sharper image.
The best ISO is the one that helps you achieve the shutter speed and aperture you need while maintaining acceptable image quality.
Is a correct exposure enough to create a great photograph?
Correct exposure is an important starting point, but it isn't the only factor that makes a photograph successful.
Composition, lighting direction, subject placement, focus, depth of field, color, and creative intent all contribute to the final image.
Once you've captured a well-exposed photograph, editing can help you refine its appearance further. Presets can also speed up your workflow by providing a consistent starting point for adjustments.