
The Most Common Photography Terms Explained for Beginners
- Aperture: Controls light and focus. Use a low f-stop (e.g., f/1.4) for blurred backgrounds or a high f-stop (e.g., f/16) for sharp landscapes.
- Shutter Speed: Determines motion. Use fast speeds (e.g., 1/2000 sec) to freeze action or slow speeds (e.g., 30 sec) for creative motion blur.
- ISO: Adjusts light sensitivity. Lower ISO (e.g., 100) gives sharp images; higher ISO (e.g., 1600+) brightens dark scenes but adds noise.
- Rule of Thirds: Align subjects with grid lines for balanced compositions.
- Golden Hour: Shoot during sunrise or sunset for soft, warm lighting.
- RAW vs. JPEG: RAW offers more editing flexibility, while JPEG is ready to share.
Quick Tip: Practice photography with your camera in Aperture Priority Mode to control depth of field while letting your camera handle the rest.
This guide covers essential settings, composition tricks, lighting tips, and editing basics to help you improve your photography skills step by step.
Aperture, Shutter Speed & ISO: The Exposure Triangle made EASY!
Basic Camera Settings
Learn how to control light and adjust your camera settings to capture the perfect shot for your photography.
Aperture: F-stops and Focus
Aperture works like your camera's pupil, controlling how much light enters and how much of the scene is in focus. A wide aperture (low f-stop number) allows more light in and creates a shallow depth of field, making your subject stand out against a blurred background. A narrow aperture (high f-stop number) lets in less light but keeps more of the scene sharp and detailed.
Here's a quick breakdown:
| Aperture | Ideal For | Effect |
|---|---|---|
| f/1.4 - f/2.8 | Portraits, low light | Subject stands out with a blurred background |
| f/5.6 - f/8 | Everyday shots | Balanced focus across the scene |
| f/11 - f/16 | Landscapes | Sharp details from foreground to background |
Shutter Speed: Capturing Motion
Shutter speed controls how motion is captured in your photos. Faster speeds freeze action, while slower speeds can create artistic motion blur. For handheld shots, aim for a shutter speed that matches or exceeds your lens's focal length to avoid blur.
Examples of shutter speed use:
- 1/2000 sec: Freeze fast action, like birds in flight.
- 1/250 sec: Capture quick movements, such as dancing or jumping.
- 21-30 seconds: Long exposures for star trails or nighttime scenes [2].
ISO: Balancing Light and Noise
ISO adjusts your camera's sensitivity to light. A low ISO produces sharper, more detailed images, while higher ISO settings brighten darker scenes but introduce digital noise.
"You want your ISO to be as low as possible while still freezing the action, even if you want some grain for stylistic reasons. The lower the ISO, the more detailed the photo."
- Derek Boyd, Photographer [3]
Here's how ISO settings typically work:
| ISO Setting | Best For | Image Quality |
|---|---|---|
| ISO 100 | Bright outdoor settings | Clean, detailed shots |
| ISO 400-800 | Overcast days or indoor settings | Minimal noise |
| ISO 1600+ | Dimly lit scenes | More noise, less detail |
The Exposure Triangle
Aperture, shutter speed, and ISO form the exposure triangle. Adjusting one setting in photography often requires tweaking another to maintain proper exposure. For instance, many lenses perform best at around f/5.6 [1], making it a great starting point for balance.
Modern cameras often include an Auto ISO feature, which adjusts sensitivity based on lighting. Photographer Stephen Klise suggests, "Set the camera to auto ISO and look back at your work to see what ISO was recorded. It will help you understand the relationship between real-life situations and ISO." [3]
Once you’ve got these basics down, you’re ready to dive into photo composition and take your photography to the next level.
Photo Composition Basics
Good composition can turn a simple snapshot into a photograph that grabs attention. Here are three key techniques to elevate your images.
Rule of Thirds Grid
The rule of thirds is a classic way to make your photos more visually appealing. Imagine dividing your image into nine equal sections with two horizontal and two vertical lines. Placing important elements along these lines or at their intersections creates a more balanced and interesting composition.
| Subject Type | Recommended Placement | Effect |
|---|---|---|
| Portraits | Eyes on the upper third line | Makes portraits feel natural and engaging |
| Landscapes | Horizon on the upper or lower third | Highlights either the sky or the foreground |
| Action Shots | Subject at intersection points | Adds energy and movement to the image |
"It's not really a rule. It's more of a guideline or best practice." - Shawn Ingersoll, Photographer and Designer [4]
Most cameras and smartphones offer a rule-of-thirds grid overlay. Turn it on to practice while shooting. Keep in mind, the grid is just a guide - your subject doesn’t need to align perfectly. Beyond the grid, natural lines in the scene can also direct the viewer’s attention.
Using Lines in Photos
Once you’ve got the grid down, start using lines to guide the viewer’s eye. Leading lines - like roads, fences, or rivers - naturally draw attention through your photo. Look for these in your surroundings and use them intentionally.
Different types of lines create different effects:
- Horizontal lines: Suggest calm and stability
- Vertical lines: Convey strength and power
- Diagonal lines: Add energy and movement
- Curved lines: Bring a sense of flow and softness
"Leading lines can be anything. They can be a road or a line of trees leading you somewhere. They can be people and repetitive objects, like railroad tracks." - Felipe Silva, Photographer [5]
When using lines, aim to have them lead toward your main subject. This technique not only guides the viewer’s gaze but also adds depth to your photo.
Working with Empty Space
Negative space, or the area around your subject, plays a big role in refining composition. It helps your subject stand out and gives the image a clean, uncluttered feel. Many photographers recommend that negative space take up at least half of the frame for a stronger impact [6].
"If the model or the performer is the noun, the negative space is the adjective." - Jimmy Marble, Photographer [6]
To make the most of negative space:
- Simplify backgrounds: Remove any distractions
- Create contrast: Use light and dark areas to highlight your subject
- Play with scale: Adjust the empty space to change how your subject is perceived
- Use depth of field: Blur the background with a wide aperture to enhance the effect
"Negative space is an immensely powerful element of every photograph... it is a case when less (subject) becomes more (feeling)." - Romanas Naryškin, Photographer [7]

Light in Photography
Understanding how light works is key to taking great photos, whether you're shooting indoors or outdoors. Let’s dive into how natural light, color temperature, and the golden hour can transform your images.
Once you've got your camera settings and composition down, learning to work with light can take your photography to the next level.
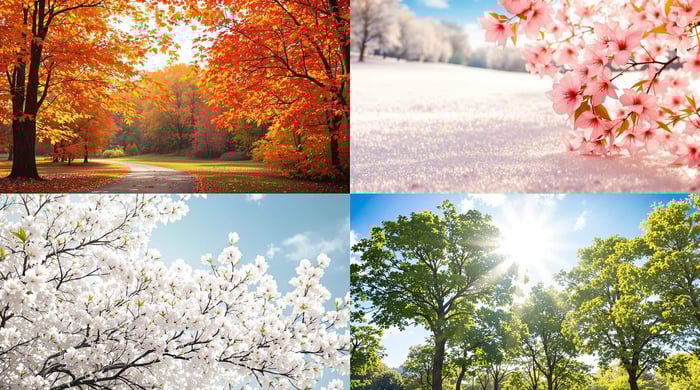
Working with Daylight
Natural light shifts throughout the day, and these changes can dramatically affect your photos. The sun's angle and intensity create different lighting conditions, each offering unique opportunities.
| Time of Day | Light Quality | Best For |
|---|---|---|
| Midday | Harsh, neutral white | Architecture, urban scenes |
| Morning/Evening | High contrast, warm | Portraits, landscapes |
| Golden Hour | Medium contrast, warm | Most subjects |
| Twilight | Soft, cool tones | Cityscapes, mood shots |
"In almost all photography it's the quality of light that makes or breaks the shot. For professional photographers, chasing the light, waiting for it, sometimes helping it, and finally capturing it is a constant preoccupation – and for some an obsession." - Michael Freeman [8]
Try changing your position relative to the sun to find the best lighting for your subject. Direct sunlight can create strong shadows, while overcast skies or diffused light produce softer, more flattering results.
Color Temperature Settings
Once you understand daylight, fine-tune your camera's color settings to get accurate tones. Color temperature, measured in Kelvins (K), helps you balance the warmth or coolness of your photos. Higher Kelvin numbers indicate cooler (bluer) light, while lower numbers represent warmer (orange) tones.
Here are some common color temperatures:
- Candlelight: 1,000–2,000K
- Indoor lighting: 2,500–3,500K
- Direct sunlight: 5,000–6,500K
- Overcast sky: 6,500–8,000K
"There are two sides to manipulating white balance. There's color correction, which is the science side of it, and then there's color grading, which is the art of it." - Mike Leonard, Cinematographer [9]
Start with your camera's preset white balance options, like "daylight" or "tungsten", and tweak further in RAW mode for more precise adjustments.
Sunrise and Sunset Light
The golden hours around sunrise and sunset provide some of the most flattering natural light. During these times, the sun sits low in the sky, creating warm, soft light that works beautifully for many subjects.
Tips for shooting during golden hour:
- Arrive at least 30 minutes early to set up your gear.
- Use a tripod to keep your shots sharp in lower light.
- Set your white balance to "Shade" or "Cloudy" for warmer tones.
- Try graduated neutral-density filters to balance bright skies with darker foregrounds.
Sunrise and sunset offer slightly different vibes. Sunrise often comes with clearer air, fewer people, and atmospheric touches like morning mist and dew. Sunset, on the other hand, builds to a dramatic, warm glow. Each sunrise or sunset presents new possibilities, so revisit your favorite locations to capture their changing moods.
Photo Editing Basics
Editing your photos helps improve their overall look and gives you more creative control.
RAW or JPEG Files
The file format you choose impacts how much flexibility you’ll have during editing.
| Feature | RAW | JPEG |
|---|---|---|
| File Size | 2–6× larger | Smaller, compressed |
| Color Depth | Up to 68.7 billion colors | Up to 16.8 million colors |
| Editing Flexibility | High | Limited |
| Storage Needed | More | Less |
| Requires Processing | Yes | No |
| Ready to Share | No | Yes |
"RAW files are more forgiving to your mistakes. If you did not get a proper exposure during the shoot, RAW images give you a much better chance of recovering the images during post-processing." – Viktor Elizarov [10]
If you're just starting out, JPEG might be easier. For more flexibility, try shooting in RAW + JPEG.
Common Photo Adjustments
Here are some essential tweaks to improve your photos:
- Exposure and Contrast: Adjust brightness and refine the difference between light and dark areas.
- Highlights and Shadows: Bring back details in overly bright or dark sections.
- Temperature and Tint: Add warmth or coolness and fix unwanted color casts.
- Clarity and Texture: Sharpen details and create depth by enhancing local contrast.
- Saturation: Increase or decrease the intensity of your colors.
For faster results, you can use presets to apply these adjustments in one go.
Presets.io: Quick Photo Editing
Presets simplify editing and help keep your photos consistent. Tools like Lightroom offer three main types:
- Recommended: AI-generated suggestions customized for your image.
- Premium: Professionally designed sets for specific looks or styles.
- User: Your personal saved settings for future use.
Even after applying a preset, you can tweak individual settings to get the exact look you want.
Next Steps
Now that you've explored camera settings, composition, and lighting techniques, it's time to put them into practice. Start by using Aperture Priority Mode to control depth of field while your camera automatically adjusts the shutter speed [11].
Here are some practical exercises to sharpen your photography skills:
- Natural Light Portraits: Use a room with windows and move your subject around to observe how the changing light impacts your photos [13].
- Settings Practice: Experiment with these scenarios to get comfortable with your camera's controls:
| Scenario | Suggested Settings | Goal |
|---|---|---|
| Indoor Portraits | f/1.8, 1/125 sec | Isolate the subject with a blurred background |
| Moving Subjects | f/2.4, 1/250 sec | Capture motion sharply |
| Landscape Shots | f/8–f/11, Auto ISO | Achieve sharpness across the entire scene |
These exercises will help you better understand your camera's settings. Once you're comfortable with shooting, try editing your photos to refine them further.
For editing, start with beginner-friendly tools like Fotor or Pixlr Editor [12]. These platforms let you explore basic adjustments and learn the fundamentals of post-processing.
To continue improving, consider joining photography communities, either online or in person. These groups often share tips, settings, and composition techniques, offering plenty of examples to learn from.
When you're ready, take things up a notch by experimenting with Manual Mode. Snap a few test shots, review them on your camera's LCD screen, and tweak the settings as needed. This hands-on approach will help you build confidence and deepen your understanding of the concepts you've learned.