

Table of Contents
- Ultimate Guide to Faster Lightroom-Capture One Flow
- 1. Prepare and Transfer Your Lightroom Library Without Losing Control
- 2. Match Lightroom Presets to Capture One Styles
- Lightroom & Capture One Together: How To Share A Project Between Applications
- 3. Set Up Performance, Storage, and Cache for Day-to-Day Speed
- 4. Batch Edit and Export With a Clear Delivery Plan
- FAQs
- FAQs
Ultimate Guide to Faster Lightroom-Capture One Flow
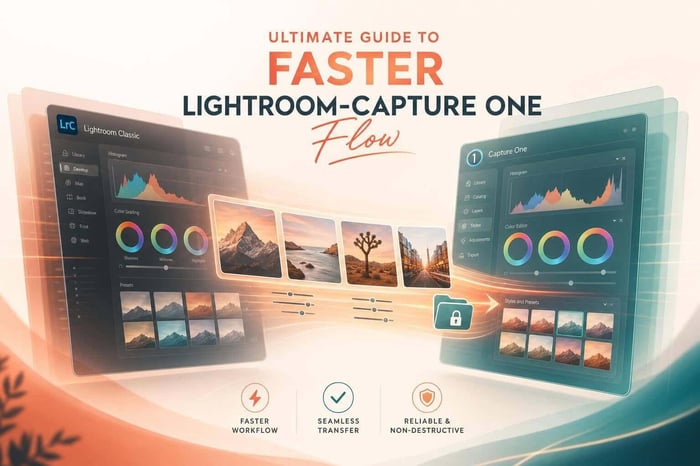
The slow part usually isn’t editing. It’s the move between Lightroom(LR) and Capture One(C1). If I want this flow to run better, I keep it simple: move only active folders, keep file paths clean, rebuild looks as Capture One styles, and lock in export folders before I finish editing.
Here’s the short version:
- I import my Lightroom catalog into C1 without changing the original catalog.
- I expect metadata like ratings, labels, keywords, EXIF, and some IPTC data to come over.
- I do not expect most Lightroom Develop edits to carry over.
- I rebuild the look in Capture One with exposure, white balance, color tools, curves, and grain.
- I keep active jobs on a fast SSD, use the right preview size, and keep exports in fixed folders.
- I batch by lighting setup, not by the whole shoot.
- I use export presets in Lightroom or process recipes in C1 so delivery stays the same every time.
For many photographers, this cuts down wasted clicks more than buying new gear or adding more presets. And since 1:1 previews, Smart Previews at 2,560 px, and Capture One preview sizes around 3,840 px can affect how smooth daily work feels, setup matters as much as editing.
Quick comparison:
| Area | Lightroom | Capture One |
|---|---|---|
| Catalog import | Source app | Imports Lightroom catalog |
| What comes over | Folders, ratings, labels, keywords, EXIF, some IPTC | Receives that imported data |
| What does not come over well | Most Develop edits, local tools, profile-based looks | These need to be rebuilt |
| Look building | Presets | Styles + tool presets |
| Batch output | Export presets | Process recipes |
| Best speed fix | Preview setup, Smart Previews, fewer loaded presets | Fast SSD, preview size, cache, export timing |
So if I had to sum it up in one line, it would be this: a fast Lightroom-Capture One flow comes from a clean transfer, a rebuilt look, and a fixed batch export plan.
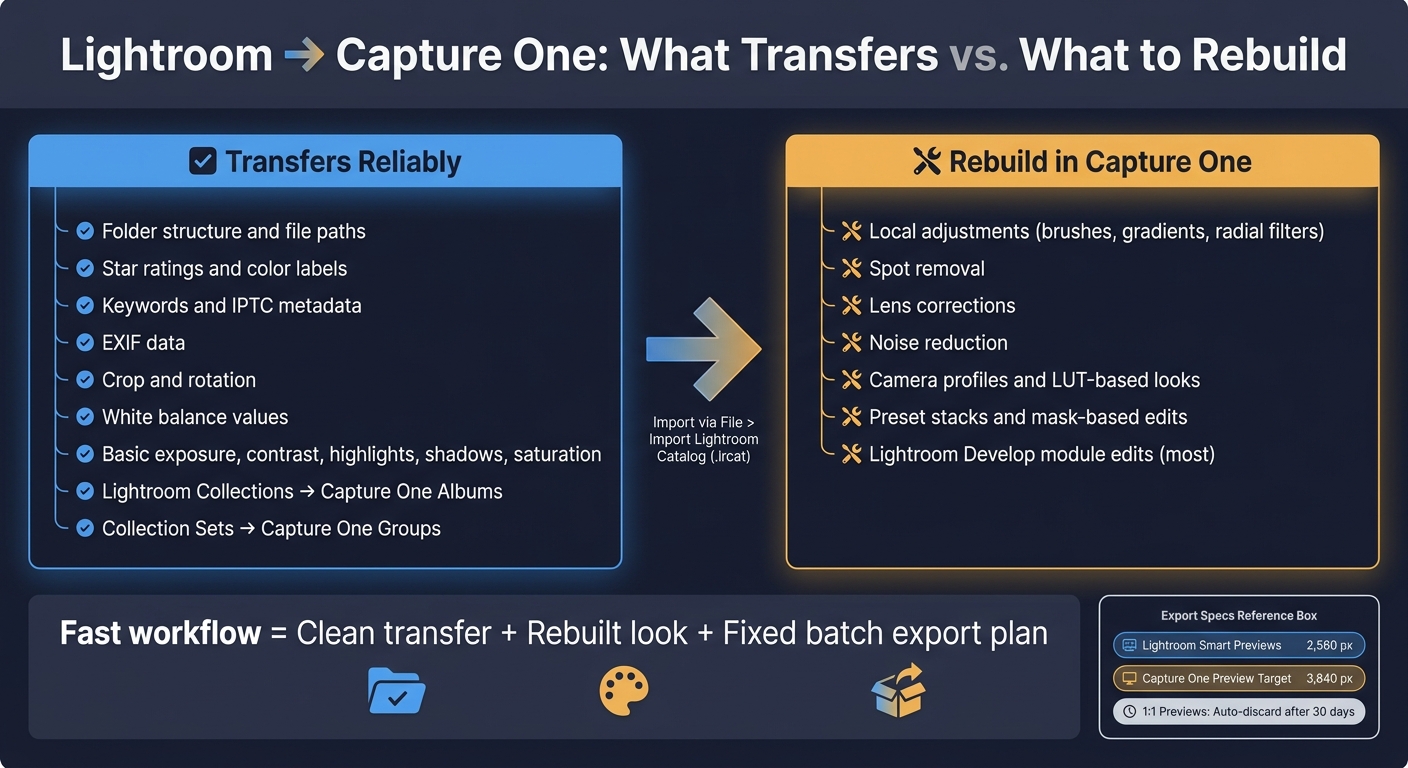
Lightroom vs Capture One: What Transfers and What to Rebuild
1. Prepare and Transfer Your Lightroom Library Without Losing Control
Move only the folders and shoots you still use
Before you bring anything into C1, cut down the library. Import, search, and backup all stay faster when you move only active jobs and portfolio sets. Old test shoots, duplicate catalogs, and archives you almost never open can stay where they are. Fewer active folders means fewer relinks, faster search, and a much cleaner start in C1.
Start in Lightroom by flagging rejects with the X key. Then delete those files from disk, not just from the catalog. After that, check your RAW file paths in the Folder panel with Show in Explorer/Finder. If a folder points to a temporary drive or a disconnected volume, fix it now before you touch the move.
A simple naming pattern helps more than most people expect: YYYY-MM-DD_Client-Name_Job-Type. For example, 2026-08-04_Jones-Family-Session. That format keeps shoots sorted by date, easy to find by client, and less likely to break when you move drives or switch computers.
Before migration, turn on Automatically write changes to XMP. That writes ratings, labels, and IPTC data to file sidecars, which gives you a better shot at keeping key organizational data intact.
Use the Lightroom catalog import path in Capture One
Once the library is trimmed, import only the catalog you still plan to work from. In C1, go to the File menu, choose Import Lightroom Catalog, and select your .lrcat file. C1 imports the catalog, keeps the folder structure, and places the imported content into a Group named after the original Lightroom catalog.
That smaller, cleaner import is easier to check afterward. Do a quick spot check on:
- Folder paths: Make sure no volumes show as offline in the Library tool.
- Albums: Lightroom collections and smart collections become Albums, while Collection Sets become Groups.
- Ratings and color labels: These usually transfer, and they matter if you want to keep your culling work in place.
Open a few recent shoots and make a quick test edit. It’s a simple way to catch mapping problems early, before you get deep into the new setup.
Know which edits survive the move
This is the part that trips people up: Capture One ignores most Lightroom develop adjustments. Local adjustments, spot removal, lens corrections, noise reduction, and any look built with Lightroom camera profiles or preset stacks will not transfer. If you know that from the start, you won’t waste time hunting for edits that never came across.
For jobs where you must keep the Lightroom look, export those files from Lightroom first as high-quality TIFFs or JPEGs. Then bring them into C1 as reference files or final deliverables.
| Transfers reliably | Needs rebuilding in Capture One |
|---|---|
| Crop and rotation | Local adjustments (brushes, gradients, radial filters) |
| White balance | Spot removal |
| Basic exposure, contrast, highlights, shadows, and saturation | Lens corrections and noise reduction |
| Metadata and organization | Camera profiles, LUT-based looks, preset stacks, and other mask-based edits |
With the library in place, the next move is rebuilding the look as a C1 style or using vintage preset collections to maintain a consistent aesthetic.
sbb-itb-b27063b
2. Match Lightroom Presets to Capture One Styles
Lightroom presets vs. Capture One styles and tool presets
Once your files are in C1, rebuild the look with native tools instead of trying to mirror slider values one by one.
Here’s why: Lightroom presets package several Develop adjustments into one preset. Capture One handles that a bit differently. It splits that job into styles, which can affect multiple tools at once, and tool presets, which save settings for a single tool. That one change matters a lot when you're trying to rebuild a look and use it again later.
| Lightroom Preset | Capture One Style | Capture One Tool Preset | |
|---|---|---|---|
| Best used for | Applying a complete look | Recreating an overall aesthetic | Saving a repeatable single adjustment |
The goal is to match the look’s visual intent - brightness, color mood, and contrast - not the exact slider values.
Rebuild the core look with exposure, color, and curves
The parts that carry over best, measured against the original Lightroom image, are the big visual traits: exposure direction, contrast intent, color mood, shadow and highlight balance, tone curve shape, and grain. Adobe color rendering and profile-based looks usually need to be rebuilt by hand.
A set order helps. Big tonal choices affect how color and texture feel after that.
Start with exposure and contrast. Get the image close to the same overall density and brightness as your Lightroom reference. Then adjust white balance and tint by eye instead of copying the numbers. Lightroom and C1 process RAW files in different ways, so matching the look matters more than matching the settings.
Once tone and white balance are close, move to the Color Editor. Use it to fine-tune hue and saturation in specific ranges, like skin tones or foliage. A lot of preset looks rely on slight channel shifts, not just a blanket saturation bump, so this step usually gets you much closer. Then use the Curve tool to shape tonal response. If the original preset leans on texture, finish with grain or a light touch of clarity.
When you land on the look you want, save it right away. A style makes sense when several tools work together to create the look. A tool preset makes more sense for one repeatable piece you’ll use again and again, like a certain curve. Name both in a way that makes sense during a batch session - by genre, lighting setup, or client type.
Use Presets.io for ready-made styles and installation guides
If you want a ready-made starting point, Presets.io offers Lightroom presets and Capture One styles, including cinematic, film, and vintage looks, plus installation guides. It’s a good place to begin, then tweak the look inside C1 to get it where you want it.
The Ultimate Presets.IO Bundle

$89.00
$1,662.00
The Ultimate Presets.io Bundle combines The Master Preset Bundle Volume I and The Master Preset Bundle Volume II into one complete collection, giving you every editing style you need in a single download. Save $37 vs. Volume I and II… continue reading
Lightroom & Capture One Together: How To Share A Project Between Applications
3. Set Up Performance, Storage, and Cache for Day-to-Day Speed
Once the handoff and look are set, day-to-day speed mostly comes down to previews, cache, and where your files live.
Speed up Lightroom with faster previews and fewer active presets
In Lightroom, previews do a lot of the heavy lifting. Build 1:1 previews on import for big shoots like weddings or events, especially when you're doing a heavy first-pass cull. For smaller jobs, skip them and let Lightroom render as needed.
Set Standard Preview Size to match your monitor’s long edge. If you’re editing from a slower external drive or a laptop, turn on Smart Previews and enable "Use Smart Previews instead of Originals for image editing." Smart Previews are 2,560 px on the long edge, which is enough for most editing moves without constantly pulling data from the full RAW file. Set 1:1 previews to auto-discard after 30 days so disk space doesn’t get out of hand.
Preset overload can also drag down Develop performance. A simple fix: keep only the presets you use every day loaded, then turn other packs back on only when you need them.
The same basic idea applies in Capture One: keep preview load down and avoid having too many things fighting for the same system resources.
Speed up Capture One editing and export
Capture One tends to stay snappier when previews, cache, and exports are managed carefully. File location still matters a lot, so keep your active session or catalog on a fast internal drive. In Image preferences, set Preview Size to at least the long edge of your display. If you use a high-resolution monitor, 3,840 px is a good target.
Try to finish your selects and edits before starting exports. And before closing C1, open a small collection so fewer previews need to rebuild the next time you launch the app.
Choose a storage layout that stays fast and easy to maintain
Keep active RAW files, the current catalog or session, previews, and cache on your fastest SSD. In Lightroom, fast catalog and preview storage usually make the biggest day-to-day difference.
For exports, use folder names that clearly match the delivery stage, such as:
- Web
- Proofs
- Client Selects
- Archive
Keep those separate from active RAW folders so browsing stays clean. When a shoot is finished, move it off the working SSD and onto slower long-term storage. That keeps the fast drive lean and makes your editing setup feel steady from one job to the next.
With storage dialed in, batch edits and exports tend to move with less friction. The next piece is batch editing and export planning, where speed starts to show up in delivery.
4. Batch Edit and Export With a Clear Delivery Plan
Batch edits in Lightroom and Capture One
After the catalog move and style rebuild, the next time-saver is simple: repeat the same edit and export flow for each lighting group. Once the look is dialed in, the job gets faster when you group matching frames and use one edit across the set.
Batch similar frames first. One edit should carry across the group.
In Lightroom Classic, edit one strong frame, then use Sync Settings or Auto Sync to apply exposure, white balance, tone curve, and lens corrections to the rest of the group. Use Copy/Paste Settings (Ctrl+Shift+C / Command+Shift+C, then Ctrl+Shift+V / Command+Shift+V) when you want more control over what gets applied.
In Capture One, select all frames from the same lighting setup, turn on Edit All Selected Variants, and make the adjustment once. C1 applies it at once to every selected variant. The key here is to sync by scene, not across the full wedding. If you push one setting too far, color casts can spread fast.
If you start with a Presets.io style, apply it to one master image in each lighting group, then sync it across the matching frames.
Once the edits are synced, set the delivery plan in stone so export doesn't turn into a hand-sorting chore.
Plan export queues, presets, and destination folders before you finish editing
Set export destinations before editing starts. Use delivery-based subfolders - Exports_Social, Exports_Proofs, and Exports_Archive - and keep them separate from active RAW folders so the file browser stays clean.
| Deliverable | Format | Long Edge | Quality | Color Space | Destination Folder |
|---|---|---|---|---|---|
| Social media | JPEG | 2,048–3,000 px | 80–85% | sRGB | Exports_Social |
| Client proofs | JPEG | 2,400–3,600 px | 80–90% | sRGB | Exports_Proofs |
| Full-res archive | JPEG or 16-bit TIFF | Native | 100% | Adobe RGB or ProPhoto | Exports_Archive |
In Lightroom, save one Export Preset for each deliverable and point each one to the right folder. In Capture One, build three Process Recipes and run them at the same time. That lets you output social, proof, and archive files from the same image in a single pass. It's the kind of setup that saves you from doing the same boring task twice.
Start the export queue before a break or at the end of the day.
Conclusion: The Fastest Lightroom-Capture One Flow Is One You Can Repeat
This flow stays fast when the same groupings and folders show up on every job. A fast Lightroom-Capture One workflow depends on batching by lighting and exporting through fixed destinations.
FAQs
Should I migrate my whole Lightroom library or just active folders?
For a smoother migration, move your Lightroom library in smaller, logical chunks instead of importing the entire catalog in one shot. Sorting files by year, project, or client can help Capture One run better.
A hybrid setup can work well too: use Sessions for active projects, and keep a master Catalog for long-term archived folders. Before you import anything, clean up duplicates and remove files you don’t need.
Which Lightroom edits will I need to rebuild in Capture One?
Basic edits like exposure, white balance, and contrast usually carry over. But a lot of the more complex Lightroom work does not.
You’ll need to rebuild local adjustments by hand, including radial filters, graduated filters, and masks, using Capture One’s layers and masking tools.
A few other items also need to be remade from scratch:
- Camera calibration
- Red-eye correction
- Spot removal
- Smart Collections
And there’s one more catch. Lightroom and Capture One use different processing engines, so settings like Blacks, Texture, and Clarity often won’t look the same after the move. If you want a close match, you’ll likely need to tweak those effects by hand.
What setup changes make this workflow faster day to day?
Prioritize a clean, custom setup. In Capture One, start with the Migration workspace or build your own. Turn on GPU acceleration, and keep catalogs responsive by splitting large libraries by year or project.
It also helps to standardize how you organize and export files. Use sessions for portable projects, set Process Recipes to match your Lightroom exports, and make a base style that mirrors your default Lightroom corrections on import.
FAQs
Should I migrate my whole Lightroom library or just active folders?
For a smoother migration, move your Lightroom library in smaller, logical chunks instead of importing the entire catalog in one shot. Sorting files by year, project, or client can help Capture One run better.
A hybrid setup can work well too: use Sessions for active projects, and keep a master Catalog for long-term archived folders. Before you import anything, clean up duplicates and remove files you don’t need.
Which Lightroom edits will I need to rebuild in Capture One?
Basic edits like exposure, white balance, and contrast usually carry over. But a lot of the more complex Lightroom work does not.
You’ll need to rebuild local adjustments by hand, including radial filters, graduated filters, and masks, using Capture One’s layers and masking tools.
A few other items also need to be remade from scratch:
Camera calibration
Red-eye correction
Spot removal
Smart Collections
And there’s one more catch. Lightroom and Capture One use different processing engines, so settings like Blacks, Texture, and Clarity often won’t look the same after the move. If you want a close match, you’ll likely need to tweak those effects by hand.
What setup changes make this workflow faster day to day?
Prioritize a clean, custom setup. In Capture One, start with the Migration workspace or build your own. Turn on GPU acceleration, and keep catalogs responsive by splitting large libraries by year or project.
It also helps to standardize how you organize and export files. Use sessions for portable projects, set Process Recipes to match your Lightroom exports, and make a base style that mirrors your default Lightroom corrections on import.