Photography and the Science of Light: How Lighting Affects Your Shots
Lighting is everything in photography - it determines exposure, mood, and the overall feel of your shots. Here's what you need to know:
- Key Factors of Light: Intensity (brightness and contrast), direction (shadows and highlights), and color (warm or cool tones).
- Natural vs. Artificial Light: Natural light is free and dynamic but uncontrollable; artificial light is consistent and adjustable.
- Techniques: Use tools like reflectors, diffusers, and three-point lighting setups to shape light effectively.
- Style-Specific Tips: Portraits need soft, flattering light; product shots require even, controlled light; landscapes thrive during golden hour.
Quick Comparison: Natural vs Artificial Light
| Characteristic | Natural Light | Artificial Light |
|---|---|---|
| Reliability | Limited by time/weather | Available anytime |
| Control | Minimal | Full control |
| Cost | Free | Equipment required |
| Quality | Soft, organic look | Can be harsh without tools |
Mastering light is the foundation of great photography. Whether you're using sunlight or studio setups, understanding and controlling light can transform your photos.
The Science Behind Light in Photography
How Light Properties Shape Your Photos
The way light behaves - its intensity, direction, and color temperature - plays a key role in exposure, mood, and contrast. Learning to control these aspects gives you greater command over your photography. For example, the inverse-square law explains that doubling the distance between a light source and your subject reduces the light's intensity to a quarter, which can drastically change the exposure.
Color temperature, measured in Kelvin (K), also influences the mood of your photos. A candle’s glow (~2000K) gives a warm, intimate feel. Tungsten bulbs (~3000K) add a cozy ambiance, while the midday sun (~5500K) offers a more neutral and balanced tone.
The Physics of Light and Photography
When light interacts with surfaces, it reflects, refracts, or diffuses - each interaction shaping shadows, highlights, and textures in your image. Knowing that light reflects at the same angle it strikes a surface helps photographers:
- Position shadows for dramatic or subtle effects
- Highlight textures for added depth
- Create a sense of dimension
- Draw attention to specific details
The type of light also affects the final look. Direct light results in sharp shadows and strong contrast, ideal for bold, dramatic shots. On the other hand, diffused light softens shadows and provides a more even, gentle illumination, perfect for capturing a balanced and natural feel. For striking visual impact, contrasty light with well-defined shadow edges can create a more dramatic result.
4 Tips for Natural Light Portraits
Natural Light vs Artificial Light in Photography
Knowing the differences between natural and artificial light helps photographers make smarter choices to achieve their creative goals.
Comparing Natural and Artificial Light
Natural light, which comes from the sun, changes throughout the day and offers a dynamic range of qualities. On the other hand, artificial light provides consistent and adjustable illumination, making it a dependable option for controlled environments.
| Characteristic | Natural Light | Artificial Light |
|---|---|---|
| Reliability | Limited to daylight; affected by weather | Available anytime; consistent |
| Color Temperature | Around 5500-6000K at midday | 2800-3200K (tungsten) to 5500K (LED) |
| Control | Minimal control | Full control over intensity and direction |
| Cost | Free | Requires investment in equipment |
| Quality | Soft, organic look | Can be harsh without modifiers |
Choosing the Right Light Source
Natural light works beautifully for outdoor photography, especially during the golden hour. This time of day produces warm, soft light that’s ideal for landscapes or environmental portraits.
Artificial light, however, is a must-have for studio settings. It allows precise control over brightness and direction, making it perfect for product photos or professional portraits where consistency matters.
Here’s what to think about when deciding between the two:
- Location: If your shoot is indoors with little access to natural light, artificial lighting might be necessary.
- Time: For projects that require stable lighting throughout the day, artificial light is more reliable.
- Mood: Natural light gives a soft, organic feel, while artificial light can create dramatic or stylized effects.
Both natural and artificial light are valuable tools for photographers. Knowing how to use each one effectively gives you the flexibility to handle any situation and bring your vision to life.
Now that you understand the basics of light sources, it’s time to dive into lighting techniques to elevate your photography.
Lighting Techniques to Improve Your Photos
Whether you're working with natural or artificial light, knowing how to shape and control it can make a big difference in your photography. Let’s break down some tried-and-true techniques, supported by expert advice and research.
Popular Lighting Setups Explained
Three-point lighting is a go-to method in professional photography. It uses three light sources: the key light (main light source), the fill light (to reduce shadows), and the backlight (to add separation and depth). This setup creates a balanced look and adds dimension to your shots.
The role of color temperature in photography is equally important. The Institute of Photography emphasizes:
"Colour temperature is an essential consideration for photographers as it can dramatically impact the mood and tone of a photo." [3]
Tools to Shape and Control Light
A few key tools can help you manipulate light for the perfect shot:
- Reflectors: Bounce light to create even illumination.
- Diffusers: Soften harsh light for a more flattering effect.
- Light shapers: Direct light beams for creative results.
When it comes to specific scenarios, adjusting color temperature can set the right mood:
- Use warm tones (around 2000K) for cozy, intimate scenes.
- Opt for tungsten light (2800-3200K) for indoor portraits.
- Take advantage of overcast daylight (6000-7000K) for a natural, soft look.
By playing with light intensity, direction, and these tools, you can dramatically enhance exposure, contrast, and the overall feel of your photos. Tailor your lighting to suit your subject and style for the best results.
Next, let’s dive into how these techniques can be applied to different photography styles.
Lighting Tips for Different Photography Styles
Understanding how light behaves can help you adjust your approach to suit various photography styles and achieve the best results.
Lighting Tips for Portraits
Creating flattering portraits often relies on precise lighting techniques. One classic method is Rembrandt lighting, which forms a small triangle of light under the subject's eye - perfect for adding drama to your shots.
Adjusting the color temperature can also set the mood:
- Warm tones (3200K) create a cozy, intimate feel.
- Daylight tones (5500K) offer natural, true-to-life skin tones.
- Cool tones (6500K) can give a sleek, modern vibe.
For smoother skin tones and softer shadows, try using diffused light sources like softboxes or natural window light.
Lighting for Product and Flat Lay Photos
When it comes to product or flat lay photography, consistent and even lighting is crucial. A 90-degree lighting angle often works well, paired with these essentials:
- A main light for overall illumination.
- A fill light, set at half the power of the main light, to minimize shadows.
- A background light to create separation between the subject and the backdrop.
For even better results, light tents or photo boxes can help ensure uniform lighting. Here's a quick reference:
| Light Position | Purpose | Best Practice |
|---|---|---|
| Main Light | Primary illumination | Position at 90° to the product |
| Fill Light | Reduce shadows | Use at 50% power of the main light |
| Background Light | Subject separation | Place behind the subject at 45° angle |
Using Light for Outdoor and Landscape Shots
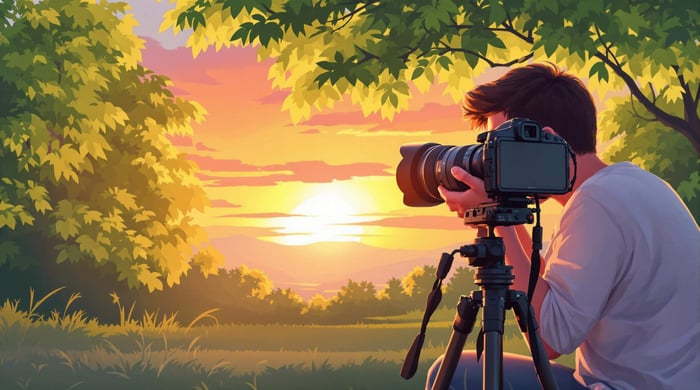
Outdoor photography thrives on natural light, but timing and conditions are everything. Shooting during the golden hour (just after sunrise or before sunset) gives you warm, directional light that enhances textures and details in landscapes.
In bright sunlight, managing harsh light is key:
- Use a polarizing filter to cut down glare and bring out richer colors.
- Position yourself so the sun provides side-lighting, adding depth to your composition.
- Consider shooting during the blue hour (6000K–7000K) for softer, more balanced lighting.
Key Points and Final Thoughts
Main Lessons from This Guide
Light is at the heart of photography - it shapes every image you create. As Travis Hale puts it, "light is the foundation of photography; without it, capturing images is impossible" [1].
Grasping the physical characteristics of light helps photographers make smart choices about placement and intensity. For instance, knowing the inverse-square law can guide you in adjusting light for the right exposure and mood [2].
Color temperature also plays a big role, influencing the emotional feel of your photos. It’s a key tool for adding personality and depth to your work.
Here’s a quick cheat sheet for practical use:
| Lighting Aspect | Impact on Photography | Application |
|---|---|---|
| Intensity | Affects exposure/mood | Adjust power output or distance |
| Direction | Adds depth/dimension | Position lights for desired shadowing |
| Color Temperature | Shapes emotional tone | Tweak white balance for creative effect |
| Light Source | Impacts consistency | Decide between natural or artificial |
Encouragement to Practice Lighting Techniques
The science and methods discussed earlier are just the beginning. Hands-on practice is what truly helps you understand how light interacts with your subject.
Here are two practical ways to get started:
- Experiment with Natural Light: Use window light or outdoor settings before diving into artificial lighting gear. It’s a great way to learn the basics.
- Keep a Lighting Journal: Take notes on your setups, including distance, intensity, and color temperature, and observe how light behaves with different materials or surfaces.
The more you experiment, the better your grasp of lighting will become.
How Presets.io Can Help with Photo Editing
Why Use Presets for Editing?
Presets.io takes the hassle out of post-production by offering Lightroom presets that make editing faster and more effective. These presets act as a starting point for refining lighting effects, saving you time while keeping your edits consistent.
With presets, adjustments like exposure, contrast, and color temperature are automated, helping you achieve a polished look without spending hours tweaking settings. Think of it this way: just as mastering light is essential when taking a photo, presets help you fine-tune those lighting elements during editing, preserving the essence of your original shot.
Discover Presets for Every Photography Style
Presets.io offers options tailored to specific photography needs:
| Photography Style | Lighting Adjustments | What It Does |
|---|---|---|
| Portrait | Softens harsh shadows | Brings out natural skin tones |
| Landscape | Enhances sky colors | Balances bright and dark areas |
| Cinematic | Tweaks contrast levels | Adds dramatic flair |
| Vintage | Alters color tones | Creates a timeless, retro feel |
When choosing a preset, think about how it aligns with your lighting approach. Presets are tools to enhance your photos, not replace strong lighting techniques. By incorporating them into your workflow, you can elevate your images while staying true to your creative vision.


.png)


