
Editing Photos: The Complete Beginner's Guide
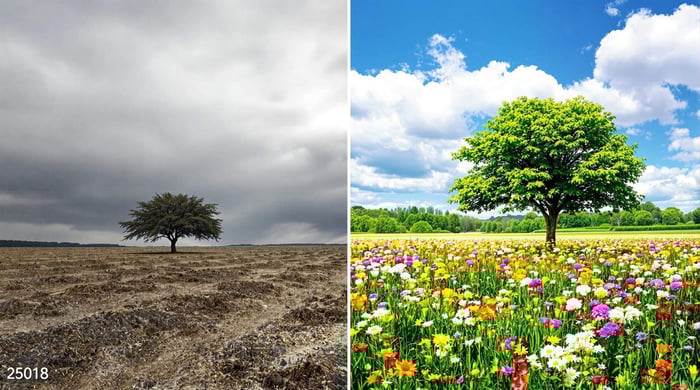
Editing photos helps improve your photos by adjusting brightness, colors, and removing distractions, making them look polished and professional. Here's what you need to know to get started:
- Key Basics: Adjust exposure, contrast, white balance, and color correction.
- Best Tools for Beginners:
- Adobe Lightroom ($14.99/month) – Easy and powerful.
- ON1 Photo RAW ($99.99 one-time) – Budget-friendly with all-in-one features.
- Free options: GIMP and Paint.NET for basic edits.
- Start with RAW Files: They capture more detail than JPEGs, giving you more control over edits.
- Use Presets: Quickly apply styles and learn how adjustments work.
- Basic Steps: Begin with exposure and contrast tweaks, crop for better composition, and export based on your needs (e.g., JPEG for web, TIFF for print).
Quick Comparison of Beginner Tools
| Software | Cost | Key Benefits | Best For |
|---|---|---|---|
| Adobe Lightroom | $14.99/month | Professional tools, cloud storage | Beginners with a budget |
| ON1 Photo RAW | $99.99 one-time | All-in-one features | Budget-conscious learners |
| GIMP | Free | Full-featured, open-source | Cost-conscious beginners |
| Paint.NET | Free | Simple interface | Quick edits and learning |
| Photoshop Elements | One-time purchase | Simplified Photoshop version | Guided editing enthusiasts |
Start small by practicing one skill at a time, like adjusting brightness, and work your way to advanced techniques like object removal and noise reduction. With consistent practice, you'll master photo editing in no time!
Beginner-Friendly Tools and Software
Best Software for Beginners
Picking the right software can make learning photo editing much easier. Adobe Lightroom is a popular option for beginners, thanks to its simple interface and powerful tools. It boasts a 4.5/5 rating on Trustpilot from over 2,000 users [4]. The subscription costs $14.99 per month [4].
If you're looking for a more budget-friendly option, ON1 Photo RAW offers a one-time purchase at $99.99 [4]. It combines photo organization and editing in one package.
Here’s a quick comparison of beginner-friendly editing tools:
| Software | Cost | Key Benefits | Best For |
|---|---|---|---|
| Adobe Lightroom | $14.99/month | Professional tools, cloud storage | Beginners with a budget |
| ON1 Photo RAW | $99.99 one-time | All-in-one features | Budget-conscious learners |
| GIMP | Free | Full-featured, open-source | Cost-conscious beginners |
| Paint.NET | Free | Simple interface | Quick edits and learning basics |
| Photoshop Elements | One-time purchase | Simplified Photoshop version | Guided editing enthusiasts |
Once you’ve chosen your software, consider using Lightroom presets to speed up your editing process.
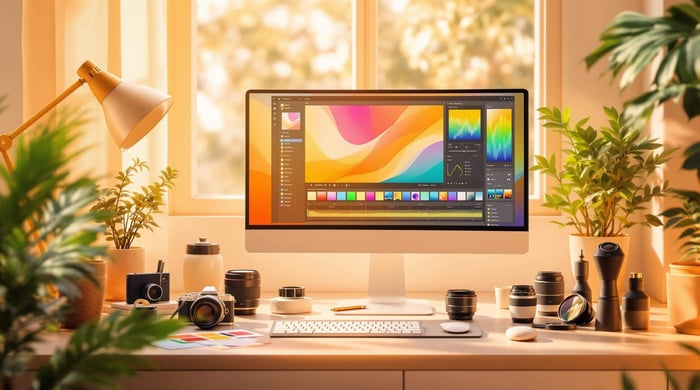
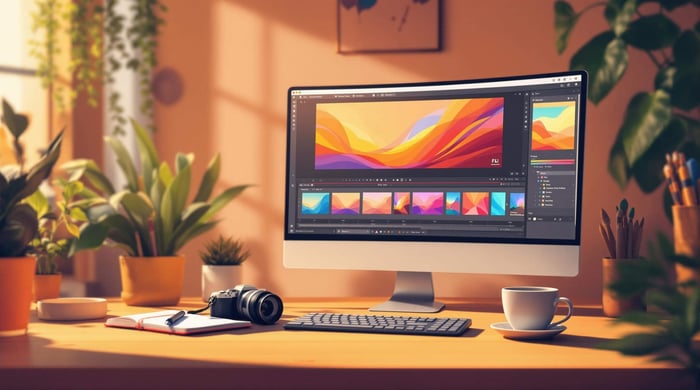
How to Use Lightroom Presets
Presets are a great way to apply multiple adjustments at once, giving your photos a polished look in seconds [4]. They’re especially helpful for beginners who want to experiment with different styles and learn how adjustments work.
Here’s how to use them:
- Install presets: Download presets from reliable sources like Presets.io, which offers collections such as cinematic, vintage, and aesthetic styles.
- Apply to photos: Open the Presets panel in Lightroom, select a preset, and watch your image transform instantly.
- Customize the look: Use Lightroom’s sliders to tweak the preset’s settings and make it your own.
Presets are a great learning tool. Many photographers start by experimenting with presets to see how adjustments impact their photos, and over time, they develop their own editing styles.
"ON1 Photo RAW offers an all-in-one solution for beginners with room to grow."
The best way to get comfortable with any editing software is through practice. Begin with simple adjustments, and as you gain confidence, dive into more advanced tools.
Adobe Lightroom Full Tutorial for Beginners 2024

Step-by-Step Guide to Editing Photos
Editing photos involves a series of steps, starting from selecting the right file format to exporting the finished image.
Why Use RAW Files
RAW files store much more data than JPEGs, making them ideal for detailed edits like color correction, white balance adjustments, and recovering details. Here's a quick comparison:
| Feature | RAW Files | JPEG Files |
|---|---|---|
| Color Depth | 12–14 bits per channel | 8 bits per channel |
| Color Adjustments | Wide range of tweaks | Limited flexibility |
| Detail Recovery | Excellent for shadows/highlights | Minimal recovery |
| File Size | Larger (25–35MB typical) | Smaller (5–10MB typical) |
Starting with RAW files gives you more control over your edits, setting the stage for professional results.
Basic Photo Adjustments
Begin your editing process with these essential tweaks:
- Exposure: Adjust the brightness using the histogram to avoid overexposure or underexposure [3].
- Contrast: Add subtle contrast (around 10–15%) to give your image depth and make the subject stand out [1].
- White Balance: Fine-tune to ensure natural-looking colors. Avoid extremes like overly warm or cool tones.
These adjustments lay the groundwork for a polished photo.
Final Steps: Cropping and Exporting
Cropping: Use cropping to refine composition. Turn on the rule-of-thirds grid in your editing software to align key elements effectively [1].
Export Settings: Tailor your export settings based on how you plan to use the image:
| Purpose | Format | Resolution |
|---|---|---|
| Web | JPEG | 72–150 DPI |
| TIFF | 300 DPI | |
| Archiving | RAW | Native |
For web use, set JPEG quality to 80–85% to balance quality and file size [1]. These finishing touches ensure your photo is ready for its intended purpose.
Tips for Advanced Photo Editing
Once you're comfortable with basic adjustments, you can elevate your photos with advanced editing techniques. These approaches help you achieve polished, professional results while keeping the images looking natural.
Removing Unwanted Objects
To remove distractions from your photos, use tools like the Repair Brush, Clone Stamp, or Object Eraser. Each tool is suited for different tasks:
| Tool | Best Used For | Key Technique |
|---|---|---|
| Repair Brush | Small blemishes, dust spots | Quick taps or short strokes |
| Clone Stamp | Textured areas, patterns | Sample from similar areas |
| Object Eraser | Larger objects on plain backgrounds | Ensure clean selection edges |
Always work on a duplicate layer or image to preserve the original file. When sampling areas, choose spots with similar lighting and texture for seamless results [1]. After removing unwanted elements, you can enhance the overall image by addressing noise and sharpness.
Reducing Noise and Sharpening Images
Noise can degrade image quality, especially in low-light photos. Apply noise reduction cautiously to avoid losing important details, particularly in shadowed areas where grain is most noticeable.
For sharpening:
- Save sharpening as the last step before exporting your image
- Use masking to protect smooth areas like skies
- Keep sharpening levels between 25-75% for a natural appearance[3]
Balancing noise reduction and sharpening ensures your photos retain clarity and detail without looking over-processed.
Using Presets for Consistent Edits
Once individual images are fine-tuned, presets can save time and maintain a uniform look across a batch of photos. Professional preset collections offer a variety of styles, such as vintage or cinematic tones.
Advanced preset tips:
- Build custom presets for specific lighting or styles
- Layer multiple presets for unique effects
- Adjust presets seasonally or to match different moods
- Keep a record of preset tweaks for future use [4]
Wrapping Up and Next Steps
Summary of Key Points
Photo editing is a process that evolves from mastering the basics to tackling more advanced techniques. In this guide, we’ve covered the essential tools and workflows that set the stage for effective photo editing. Here's a quick recap:
| Core Skills | Key Tools | Best Practices |
|---|---|---|
| Adjusting exposure, contrast | Adobe Lightroom | Work with RAW files |
| Correcting colors | Repair tools | Create backup copies |
| Removing objects | Preset systems | Use non-destructive editing |
| Reducing noise | Masking features |
With these skills in your toolkit, your next step is to put them into practice and refine them through hands-on experience.
Practice and Experiment
The best way to improve is by practicing consistently. Work on similar photos to focus on specific techniques and build confidence over time.
How to approach practice:
Dedicate 15–30 minutes daily to one skill at a time. For instance, spend a week focusing on exposure and contrast adjustments before moving on to advanced techniques like selective editing or color grading.
To stay organized and track your progress:
- Create a reference folder: Save unedited originals alongside your edited versions to see how far you’ve come.
- Join online communities: Share your edits and get feedback from seasoned editors.
- Document your workflow: Write down which methods work best for different photo types.
Pro tip: If you’re using Adobe Lightroom, take time to study professional presets. They can teach you a lot about achieving specific effects [4].
As you continue experimenting, try new approaches and challenge yourself with different editing styles. By focusing on one technique at a time and practicing regularly, you’ll not only sharpen your skills but also build the confidence to handle more advanced editing tasks [2].
FAQs
Which is better for beginners, Photoshop or Lightroom?
Lightroom is often the go-to choice for beginners thanks to its simple layout and tools designed specifically for photographers. It offers everything most photographers need for editing without overwhelming complexity [2][4]. On the other hand, Photoshop is better suited for advanced users who need more detailed and intricate editing capabilities.
Once you've picked the right software, focus on improving your editing skills step by step.
How can I learn basic photo editing?
Start with the basics: adjust white balance, exposure, and contrast. Once you're comfortable, move on to sharpening details, cropping, and exporting your work. Using presets, as mentioned earlier, can also help you see how different adjustments transform your photos.
Pro tip: Take it slow. Concentrate on one adjustment at a time - for instance, dedicate a week to practicing exposure tweaks before tackling other techniques [2][3].
For beginners, tools like Lightroom or GIMP are excellent starting points. They’re simple enough to learn quickly but also offer plenty of features to grow with as you gain confidence [2][4].