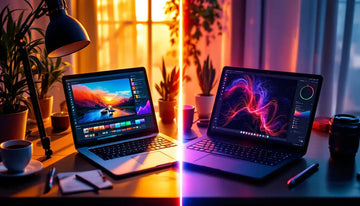
Want to give your digital photos that classic film look? Here's how to add authentic film grain in Lightroom:
- Open the Effects panel in Develop module
- Adjust Amount, Size, and Roughness sliders
- Use masks for targeted grain application
- Create custom presets for consistency
Quick settings to try:
| Setting | Value |
|---|---|
| Amount | 20-40 |
| Size | 25-35 |
| Roughness | 40-60 |
Key tips:
- Start subtle (Amount around 20)
- Add more grain to midtones/highlights
- Adjust based on viewing method (web vs print)
- Experiment to find your style
Remember: The goal is to enhance, not overpower. With practice, you'll nail that perfect balance between digital crispness and analog charm.
Related video from YouTube
What is Film Grain?
Film grain is the texture you see in photos taken with traditional film cameras. It's caused by tiny silver particles in the film that react to light.
Film Grain Basics
Film grain has a few key traits:
- Looks natural and random
- More visible in higher ISO films
- Shows up more in mid-tones and highlights
In Lightroom, you can fake this look. Try these settings for a classic film vibe:
| Setting | Value |
|---|---|
| Amount | 30-40 |
| Size | 28 |
| Roughness | 40-50 |
Film Grain vs. Digital Noise
Don't mix up film grain with digital noise. They're different beasts:
| Aspect | Film Grain | Digital Noise |
|---|---|---|
| What causes it | Silver crystals in film | Sensor issues in digital cameras |
| How it looks | Natural, random | Uniform, patterned |
| Where you see it | Mid-tones and highlights | Shadows and dark areas |
| Is it good or bad? | Part of the image | Unwanted problem |
| Can you get rid of it? | Nope, it's baked in | Yes, in editing |
Photographer Alexander Kladov puts it this way:
"In film, 'grain' forms the image, serving as the building blocks upon which the image is constructed – in other words, it carries information. Digital noise, on the contrary, carries no information; it distorts information."
Getting these differences is key to adding realistic film grain in Lightroom. It's all about giving your digital shots that classic, timeless film look.
Benefits of Adding Film Grain
Film grain in Lightroom can seriously level up your photos. Here's why it's so cool:
Visual Appeal
Film grain gives digital shots that old-school, artsy vibe. It's like a time machine for your pics:
- It adds texture, making images feel less flat
- It screams "classic film" without actually using film
- It can pump up the mood and feels of a photo
As photographer Les Anderson puts it:
"Even if some photographers still shoot film, we mostly associate film photography with the past."
That's why film grain is perfect for creating that vintage look.
Practical Uses
But film grain isn't just about looking good. It's got some tricks up its sleeve:
| Use | How It Helps |
|---|---|
| Focus fix | Hides minor focus issues |
| Color smooth | Blends harsh color transitions |
| Low-light boost | Makes high-ISO noise look intentional |
| Photo matching | Unifies shots from different cameras |
Here's a real-life example:
"A photographer used grain adjustments to mask a focus issue in a photograph of Jane and Cody, where the sharpest focus was on a rock behind the couple, making them appear slightly soft."
So grain can be your secret weapon for fixing tricky shots.
When adding grain, remember:
- Start small and build up
- Tweak Size and Roughness for a natural look
- Think about how far away people will view your image
Getting Your Image Ready
Before adding film grain in Lightroom, prep your photo. This step is crucial for authentic-looking grain.
Setting Light and Dark Areas
First, tackle exposure and contrast:
- Open the Light panel in Lightroom's Develop module
- Use Exposure slider for overall brightness
- Adjust Contrast to define light and dark areas
- Fine-tune with Highlights, Shadows, Whites, and Blacks sliders
Quick guide to these sliders:
| Slider | Right | Left |
|---|---|---|
| Exposure | Brightens image | Darkens image |
| Contrast | Increases contrast | Decreases contrast |
| Highlights | Brightens lights | Darkens lights |
| Shadows | Brightens darks | Darkens darks |
| Whites | Sets brightest to white | Reduces bright areas |
| Blacks | Lightens darks | Sets darkest to black |
Pro tip: Hold Alt (Option on Mac) while moving Whites and Blacks sliders to see clipping.
Choosing Color Tones
Next, pick grain-friendly color tones:
- Go to the Color panel
- Use White Balance presets or eyedropper tool for color casts
- Adjust Vibrance and Saturation for color intensity
Remember: Grain often looks best with slightly muted colors.
"I build different grain for web viewing like Instagram (more aggressive) and for printing (softer)." - Alik Griffin, Professional Video Editor and Photographer.
Finding Grain Tools in Lightroom

Let's get into the grain controls in Lightroom. These tools can add that film-like texture to your photos.
Opening the Effects Panel
To find the grain controls:
- Open the Develop module
- Scroll to the bottom of the right panel
- Click on Effects
The grain settings are just below Vignetting. Both are off by default (Amount at 0).
Grain Control Options
You've got three sliders to work with:
| Slider | Function | Range |
|---|---|---|
| Amount | Grain intensity | 0-100 |
| Size | Grain particle size | 0-100 |
| Roughness | Grain texture | 0-100 |
Start with Amount around 20 for a subtle effect. You can always bump it up later.
Size depends on your image resolution. Try 20 to 80. Pro tip: Check the full-sized photo, not zoomed in.
Roughness defaults to 50. Left for defined grain, right for softer.
"When those sliders get close to each other the grain typically gets softer." - Alik Griffin, Pro Video Editor and Photographer
For crisp grain, keep Size and Roughness apart. Play around to find what works for your image.
Grain can help smooth skin tones and hide blemishes in portraits. It can make small imperfections less noticeable, creating a more unified look.
Adding Film Grain Step-by-Step
Let's dive into how to add film grain to your photos in Lightroom.
Setting Grain Amount
The Amount slider is your starting point:
- Start low (around 20) for a subtle effect
- Bump it up slowly to find the sweet spot
- Max it out (100) for that super grainy look
Pro tip: Zoom in to 100% to really see what you're doing.
Changing Grain Size
Size matters when it comes to grain:
- Small (20-40): Fine, subtle grain
- Large (60-80): Chunky, in-your-face grain
- B&W photos? Go bigger
Try setting Size to 28 for that classic film feel.
Adjusting Grain Texture
Roughness is all about texture:
| Roughness | Look |
|---|---|
| 0-30 | Smooth |
| 40-60 | Balanced |
| 70-100 | Gritty |
Here's how to nail it:
1. Start at 50
2. Left for smooth, right for rough
3. Keep Roughness ≥ Size to avoid weird effects
Quick tip: Crank it up for web, tone it down for print.
sbb-itb-b27063b
Advanced Grain Techniques
Let's explore some advanced methods to make your film grain look more realistic.
Using Masks for Targeted Grain
Want grain only in specific areas? Here's how:
- Open the Masking panel in Lightroom
- Pick a mask type (Brush, Linear Gradient, or Radial Gradient)
- Apply the mask where you want grain
- Adjust the Grain Amount slider in the Effects panel
This technique is perfect for adding grain to shadows or backgrounds while keeping other parts clean.
"Targeted grain can make darker scenes look more film-like, as grain is usually more noticeable there."
Grain in Light and Dark Areas
Film grain looks different in highlights, midtones, and shadows. Here's how to mimic this:
- Create three masks: highlights, midtones, and shadows
- Adjust Grain Amount for each:
- Highlights: Low (5-15)
- Midtones: Medium (15-30)
- Shadows: Higher (30-50)
- Fine-tune Size and Roughness
This creates a more dynamic, realistic grain effect.
| Tonal Range | Grain Amount | Size | Roughness |
|---|---|---|---|
| Highlights | 5-15 | 25 | 50 |
| Midtones | 15-30 | 30 | 60 |
| Shadows | 30-50 | 35 | 70 |
These are starting points. Adjust based on your image and desired look.
Pro Tip: After adding grain, take a break. You might realize you've gone too far and need to tone it down.
Mistakes to Avoid
Adding film grain in Lightroom can be tricky. Here are some pitfalls to sidestep:
Too Much Grain
Overdoing grain? That's a fast track to ruining your photo. Start small and build up. Here's a quick guide:
| Image Type | Grain Amount |
|---|---|
| Portraits | 10-20 |
| Landscapes | 15-30 |
| Street | 20-40 |
Even Grain Distribution
Uniform grain across your image? That's not how film works. Instead:
- Use masks for specific areas
- More grain in shadows, less in highlights
- Mix up grain size and roughness
Losing Image Quality
Don't sacrifice sharpness for grain. Keep your photos crisp:
- Add grain last
- Keep Amount under 50
- Size slider below 40 (usually)
"When roughness is less than Size, grain looks weird. It never looks good to me." - Alik Griffin, Pro Video Editor and Photographer
Perfecting Your Grain Effect
Grain and Image Sharpness
Adding grain can make your photos pop, but you need to balance it with sharpness. Here's the trick:
- Add grain last in your editing
- Keep Amount under 50
- Set Size below 40 for most shots
"When roughness is less than Size, grain looks weird. It never looks good to me." - Alik Griffin, Pro Video Editor and Photographer
This keeps your image crisp while adding that sweet grain effect.
Grain for Different Viewing Methods
Tweak your grain based on where people will see your photo:
| Viewing Method | Grain Adjustment |
|---|---|
| Digital screens | Finer grain, lower Amount |
| Slightly more grain |
For digital:
- Think about image size and resolution
- Start with Amount at 20, then adjust
For print:
- Test different papers
- Bump up the grain a bit (paper soaks it up)
"I like to build a different grain for web viewing like Instagram, which is maybe a little more aggressive, then build a softer grain for printing, or just to take a little edge off." - Alik Griffin
Making Custom Grain Presets
Want to save time and nail your style? Create your own grain presets in Lightroom. Here's how:
Creating Your Grain Style
- Open an image in Develop
- Go to Effects panel
- Play with grain sliders:
- Amount: Start at 20
- Size: Keep under 40
- Roughness: Try 40-60
Pro tip: For web, use lower Amount and Size. For print, bump them up a bit.
Saving Grain Presets
Got your perfect grain? Save it:
- Click "+" in Presets Panel
- Hit "Create Preset"
- Name it (like "Soft Web Grain")
- Check ONLY "Effects (Grain)"
- Click "Create"
Boom! Your grain preset is ready to roll.
Here are some preset ideas:
| Preset Name | Amount | Size | Roughness | Best For |
|---|---|---|---|---|
| Subtle Web | 15 | 25 | 50 | Social media posts |
| Bold B&W | 40 | 60 | 45 | Black and white prints |
| Vintage Film | 30 | 35 | 55 | Retro-style photos |
Now you're set to grain it up, fast and consistent.
Lightroom Grain vs. Real Film Grain
Let's compare Lightroom's digital grain with actual film grain.
The Showdown
| Lightroom Grain | Real Film Grain |
|---|---|
| Adjustable (amount, size, roughness) | Fixed (depends on film and exposure) |
| Can be uniform | Varies naturally |
| Might look fake at extreme settings | Always authentic |
| Add or remove anytime | Permanent part of the image |
Faking Film in Lightroom
Want that film look? Try these:
- Go easy. Start with low grain settings.
- Match your "film". Different films = different grain.
- Exposure matters. Use masks to add more grain in darker areas.
- Keep it small. Large grain often looks fake.
- Rough it up. Adjust roughness to avoid the "alien disease" look.
Photographer Bill Lawson put Lightroom grain to the test:
"Grain in film is real. Film images are made of grain. Grain in the digital realm is a layer over the digital image."
His verdict? Lightroom can mimic slightly overexposed T-Max 100. But extreme overexposure? That's beyond Lightroom's reach.
Conclusion
Adding film grain in Lightroom can give your digital photos a timeless feel. Here's what we've covered:
- Lightroom's grain tool now offers more natural-looking results
- The new masking panel allows for selective grain application
- Experimenting with Amount, Size, and Roughness is crucial
Start with a grain amount around 20 and adjust from there. As Nathaniel Eames notes:
"If you really want that authentic look, you'll need to shoot with real film, then scan those photos."
While Lightroom can't fully replicate film, it's a powerful tool. Some tips:
- Use masking to add more grain in highlights and midtones
- Create custom presets for different lighting conditions
- Try underexposing in RAW and adjusting in post for realistic grain
The choice to add grain is yours. Experiment and find the style that fits your vision. Whether you're going for vintage or just adding texture, Lightroom's grain tool has plenty to offer.
FAQs
How to make photos grainy in Lightroom?
Want to add some grain to your photos in Lightroom? Here's how:
- Open Develop Module (D)
- Scroll to Effects tab
- Find Grain section
- Adjust Amount, Size, and Roughness sliders
Start low with Amount (1-20) and tweak from there. Remember: subtle grain often looks more natural.
How much grain should I add in Lightroom?
There's no perfect answer, but here's a good starting point:
| Setting | Recommended Value |
|---|---|
| Amount | 1-20 |
| Size | 25-50 |
| Roughness | 50-75 |
Pro photographer Alik Griffin says:
"Anytime you move the roughness slider to a value less than the Size slider, the grain can often look strange and it never looks good to my eyes."
For a film-like look:
- Add more grain to highlights and midtones
- Cut back on grain in shadows
- Play with Size and Roughness for the right texture