Want that classic film look in your digital photos? Here's how to get it:
- Use film look presets in editing software like Lightroom
- Adjust color temperature, saturation, contrast, and grain
- Tweak tone curves for softer contrast and faded blacks
- Add subtle grain effects for texture
- Experiment with light leaks and lens effects
Key things to focus on: • Warm, soft colors with slightly muted tones • Wide dynamic range (13 stops) • Subtle film grain (not digital noise) • Slight imperfections like light leaks
- Mastin Labs (Fuji, Portra emulations)
- VSCO Film Packs
- RNI All Films
Quick tips:
- Shoot RAW for more editing flexibility
- Calibrate your monitor for accurate colors
- Start with low preset intensity and fine-tune
- Adjust for different lighting conditions
- Maintain consistency across photo sets
Remember: The goal is to capture film's essence while leveraging digital tools. Experiment to develop your own unique style!
Related video from YouTube
Key features of film photos
Film photos have a look that digital photographers often try to copy. Here's what makes film special:
Color choices
Film photos usually have warm, soft colors. Skin looks creamy and glowing. Colors are vibrant but slightly muted. Different films give different results:
- Velvia 50: Super vibrant colors
- Provia 100: Less saturated, but great color
Light and dark balance
Film is great at capturing both light and dark in one shot. It has 13 stops of dynamic range, so it keeps more detail in bright and dark areas than most digital cameras.
To get this look digitally:
- Tweak the tone curve in Lightroom
- Take out detail from blacks for a matte look
- Soften bright areas to cut contrast
Grain effects
Film grain isn't like digital noise. People often like it because it adds character. When adding grain to digital photos:
- Use a subtle grain effect
- Don't go overboard - less is better
Flaws and light leaks
The little imperfections in film photos are part of their charm. These can be:
- Slight overexposure
- Light leaks
- Blotchy skin
Jay P. Morgan, a commercial photographer and instructor, says:
"Does film have a look? Yes! It does."
These "flaws" are why many people love film photography.
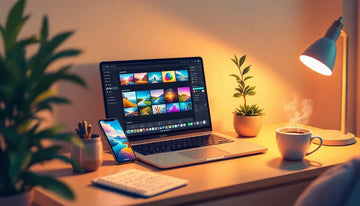
Setting up your digital workspace
Want that film look in your digital photos? Here's how to prep your workspace:
Software and tools
You'll need:
- Photo editing software (Lightroom, Capture One, or ON1 Photo RAW)
-
Film emulation software (optional):
- Alien Skin Exposure 6 ($149)
- DFT Film Stocks v1.5 ($95)
- DxO FilmPack 4 ($129)
RAW or JPEG?
Go for RAW. Why?
- Captures ALL sensor data
- Wider adjustments
- Non-destructive editing
- Most presets love RAW
Storage issues? Some cameras let you shoot RAW + JPEG at once.
Screen color setup
Accurate colors = key. Here's how:
1. Get a good screen (1440p, 27", IPS panel)
2. Grab a colorimeter (i1Display Studio or Spyder X Pro, both $150)
3. Warm up your screen (30 mins)
4. Kill dynamic picture settings
5. Use DisplayCal for calibration
6. Set white level: 90-120cd
7. Color temp: 6,500K
Don't forget: Re-calibrate often for consistent results.
Making a film look preset in Lightroom

Want to give your digital photos that classic film look? Here's how to create your own film-style preset in Lightroom:
Basic image adjustments
Start with these settings:
- Exposure: +0.12
- Contrast: -15
- Highlights: -15
- Shadows: +25
- Whites: -10
- Blacks: -25
These tweaks set the stage for that film-like appearance.
Adjusting colors
Head to the HSL/Color/B&W panel:
- Vibrance: -75
- Saturation: -5
Want to mimic Kodak Portra? Boost oranges and reds, but tone down blues and greens.
Changing the tone curve
The tone curve is your secret weapon:
- Click "Point Curve"
- Create an S-curve
- Lift the bottom-left point for a faded look
This softens contrast and adds that classic film fade.
Adding grain effects
No film look is complete without grain. Try these settings:
- Amount: 25-30
- Size: 25-35
- Roughness: 50
Lens and edge effects
Final touches:
- Vignette: -10
- Split toning: Warm up shadows (Hue: 50, Saturation: 20)
Happy with your settings? Save them as a preset. Remember, these are just starting points - play around and find your perfect film look!
Advanced film look techniques
Copying popular film types
Want to mimic specific film stocks digitally? Focus on their unique traits:
- Kodak Portra: Smooth skin tones, soft texture
- Fujifilm Superia: Vibrant colors, high contrast
- Ilford Delta: Rich blacks, fine grain
For Kodak Portra:
- Soften skin texture
- Enhance natural skin tones
- Avoid over-sharpening
Use HSL sliders to tweak colors, especially blues, greens, and skin tones.
Imitating film development methods
Digital tools can mimic film processing techniques:
| Technique | Digital Method |
|---|---|
| Push processing | Boost contrast and grain |
| Cross-processing | Tweak RGB curves for color shifts |
| Bleach bypass | Cut saturation, pump up contrast |
Adding light leak effects
Create realistic light leaks:
- Use gradient tools in Lightroom or Photoshop
- Apply warm colors for sunlight leaks
- Use cool colors for artificial light leaks
- Adjust opacity for subtlety
Copying film camera quirks
Replicate unique film camera features:
- Vignetting: Use post-processing vignette tools
- Lens distortion: Apply lens correction filters
- Chromatic aberration: Add subtle color fringing
"The goal is to replicate the unique quirks and textures of vintage cameras." - Moment Editor
For best results, shoot in RAW and use high-quality film emulation presets like those from Mastin Labs or VSCO Film.
sbb-itb-b27063b
Improving your film look preset
Adapting to different lighting
Film presets need tweaking for various light conditions. Here's how:
- Bump up exposure for dark scenes, dial it down for bright ones
- Boost contrast in flat light, cut it in high-contrast situations
- Fine-tune highlights and shadows to balance the image
Shooting in bright sun? Try this:
- Drop the exposure
- Pull back highlights
- Lift shadows
- Cool down the white balance
"I shoot raw+jpg and process the best shots in Lightroom using Fuji presets, some I've made and others from VSCO pack 1." - Ken, FujiX-Forum User
Adjusting for photo types
Different subjects need different tweaks:
| Photo Type | Preset Adjustments |
|---|---|
| Portraits | Soften skin, add warmth |
| Landscapes | Boost vibrance, tweak HSL for sky and foliage |
| Street | Pump up contrast, add grain for grit |
For landscapes, try these film-inspired presets:
- Kodak Ektar 100 for vibrant colors
- Kodak Gold 200 for warm tones
- Fujifilm Velvia 50 for rich saturation
Street photography? Consider:
- Black and white for a classic look
- Kodak Gold 200 for warmth
- Fujifilm Pro 400H for soft aesthetics
Using film look presets well
Editing multiple photos at once
Want to save time? Use batch editing. Here's how in Lightroom:
- Pick your photos in Library
- Find 'Saved Preset' in Quick Develop
- Apply to all selected shots
This works best for photos with similar lighting.
Fine-tuning individual photos
After batch editing, don't forget to tweak each photo:
- Check exposure and colors
- Adjust contrast and saturation
- Tweak grain for each shot
In Exposure software? Hit Previous to copy edits, then adjust as needed.
Keeping a consistent look
Want a cohesive style? Here's the trick:
- Use the same base preset
- Make small tweaks for each photo
- Copy and paste specific adjustments
Pro tip: Make your own Lightroom preset:
- Open a photo in Develop
- Edit it
- Copy settings (Command + C)
- Go to 'Presets', click '+'
- Name it and save
Now you've got a one-click preset for consistency, with room for tweaks.
"Editing for film look? It's all about tweaking light, adding grain, and adjusting colors."
Fixing common problems
Avoiding over-editing
It's easy to go overboard with film look presets. Here's how to keep things in check:
Start with a low preset intensity. In Lightroom, use the amount slider to dial it back. Check all editing panels to see what's changed. This helps you grasp the preset's impact.
Focus on contrast, grain, and color shifts. These can make or break your film look.
Digital noise vs. film grain
Don't mix up digital noise with classic film grain. Here's the difference:
| Digital Noise | Film Grain |
|---|---|
| Random, ugly | Uniform, organic |
| Varies in color | Consistent pattern |
| Detracts from image | Adds character |
To add real film grain:
1. Go to Lightroom's Effects panel
2. Tweak Amount, Size, and Roughness sliders
3. Aim for subtle, even grain across the image
Fixing color and tone issues
Color casts can ruin your film look. Try this quick fix:
Use Lightroom's Adjustment Brush. Pick the opposite color on the wheel. Paint over the problem area. Adjust saturation as needed.
Got a red sunburn? Here's what to do:
1. Pick a green tint in the Adjustment Brush
2. Paint over the red areas
3. Fine-tune until the skin looks natural
Remember: subtle tweaks often work best for a realistic film look.
Ready-made film look presets
Want that analog vibe without the hassle? Many photographers use pre-made film look presets. They're a quick way to get that film aesthetic in your digital shots.
Popular preset collections
Here's a quick look at some top-notch film emulation presets:
| Company | Preset Collection | What You Get |
|---|---|---|
| Mastin Labs | Fuji Original | Fuji 160NS, 400H, 800Z |
| Mastin Labs | Portra Original | Portra 160, 400, 800 |
| VSCO | Film Pack 01 | Kodak Gold, Portra, Tri-X |
| RNI | All Films 5 | 180+ film stocks |
These collections mimic specific film stocks. It's like having a film lab in your computer.
Tweaking ready-made presets
Presets are great, but they're not set in stone. Here's how to make them your own:
- Slap the preset on your image
- Dial down the intensity with the Amount slider
- Play with contrast, grain, and color balance
- Save your tweaks as a new custom preset
Now you've got a look that's uniquely yours.
Presets.io: A treasure trove
Presets.io is packed with film-inspired presets. Some standouts:
- Kodak Portra 160: Cool and calm
- All Gold Everything: Warm and retro, like Kodak Gold ISO200
- FujiColor 400 C: Desaturated with cool tones
These work with Lightroom Classic, CC, and Mobile. So you can get that film look wherever you edit.
Wrap-up
Blending Digital Precision with Film Charm
Creating film-like digital photos is about finding the sweet spot between precise editing and analog film's imperfect beauty. Here's how:
- Make subtle tweaks in Lightroom's Basic panel
- Use the "S" curve for contrast and color
- Add grain for film-like texture
- Include vignettes for a classic touch
The goal? Capture film's essence while using digital tools to your advantage.
Push Your Boundaries
Developing your style is crucial. Try these:
- Combine presets from different film stocks
- Experiment with VSCO's Grain and FX tools
- Tweak Strength, Character, and Warmth settings
Zach Hodges from VSCO says:
"Now all that remains is for you to get started! Try using a Film X preset, try using the Grain tool, and then maybe try some of the tips that we've talked about here and see what you can come up with."
So, what are you waiting for? Grab your camera and start experimenting!
FAQs
What are the settings for vintage film in Lightroom?
Want that classic film look? Here's how to get it in Lightroom:
- Clarity: +15
- Vibrance: -75
- Saturation: -5
These tweaks create that washed-out vintage vibe. The clarity bump sharpens things up a bit, while dropping vibrance and saturation gives you that old-school film feel.
How do I make my photos look like film in Lightroom?
Here's your game plan for film-like photos in Lightroom:
- Shoot RAW
- Pick Adobe Neutral color profile
- Tweak contrast
- Narrow the tonal range
- Dial back color saturation
- Sprinkle in some grain
Start with RAW files - they're your blank canvas. Adobe Neutral gives you a clean slate for your film-inspired edits.
Pro tip: Use the Tone Curve to fade your image. Lift that bottom left corner to kiss those true blacks goodbye. It's like your photo aged overnight!
Want to level up? Try this in Color Grading:
- Warm up those highlights
- Cool down the shadows
This split-toning trick adds a subtle color cast that screams vintage film stock.