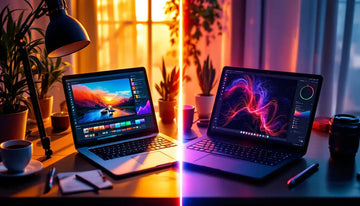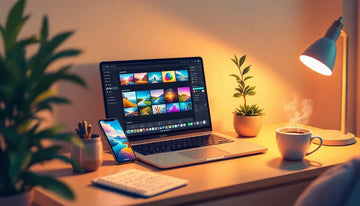
Want to edit photos faster and better? Lightroom presets are your secret weapon. Here's how to use them like a pro:
- Organize your presets
- Edit multiple photos at once
- Create custom presets
- Combine presets for unique looks
- Use keyboard shortcuts
Why use presets? They're huge time-savers:
| Editing Method | Time per Photo | 100 Photos |
|---|---|---|
| Manual Editing | 5-10 minutes | 8-16 hours |
| Using Presets | 1-2 minutes | 1.5-3 hours |
That's up to 14.5 hours saved on 100 photos!
Presets also help you:
- Apply complex edits instantly
- Keep your style consistent
- Fine-tune results quickly
Ready to supercharge your editing? Let's dive in.
Related video from YouTube
Keep Your Presets Organized
Organizing Lightroom presets is like tidying up your digital workspace. It saves time and speeds up editing.
Here's how to do it:
1. Create custom folders
Don't let presets pile up. Make new folders for different categories:
- Photo style ("Moody", "Bright and Airy")
- Shoot type ("Weddings", "Landscapes")
- Season ("Summer", "Winter")
Right-click in the Presets panel and select "New Folder". Name it something logical.
2. Use the Favorites feature
Mark go-to presets as favorites:
- Right-click on a preset
- Select "Add to Favorites"
- Access them quickly in the Favorites folder
3. Hide unused presets
Clean up your workspace without deleting anything:
- Go to Edit panel > Presets button > three-dot icon
- Choose "Manage Presets"
- Uncheck groups you want to hide
4. Back up your presets
Before reorganizing, make a backup:
- In Develop Module, right-click on a preset
- Choose "Show in Explorer" (PC) or "Show in Finder" (Mac)
- Copy the Develop Presets folder to a safe spot
Organizing your presets isn't just about tidiness - it's about working smarter, not harder.
2. Edit Multiple Photos at Once
Want to speed up your Lightroom workflow? Edit multiple photos at the same time. Here's how:
1. Apply Presets During Import
Save time by adding presets as you import:
- Click "File" > "Import Photos and Video"
- Pick your photos
- Find "Apply During Import"
- Choose your preset
- Hit "Import"
2. Use the Library Module
For more options:
- Go to Library mode
- Select your photos
- Open Quick Develop
- Pick a preset from "Saved Preset"
3. Sync in Develop Module
For precise control:
- Edit one photo
- Select others to edit similarly
- Click "Sync" (Command + Shift + S on Mac, Control + Shift + S on Windows)
- Choose settings to sync
- Click "Synchronize"
Pro Tip: Use Auto Sync to apply changes to all selected images as you edit. Just turn it off when you're done.
Master these techniques and you'll cut your editing time way down. Wedding photographers use this to keep hundreds of photos looking consistent.
3. Make Your Own Presets
Want to speed up your editing and keep your style consistent? Create custom Lightroom presets. Here's how:
1. Open a photo and reset
Pick a photo that matches your desired style. Reset any existing edits for a clean start.
2. Adjust settings
Tweak your image using Lightroom's panels:
- Basic: Exposure, contrast, highlights, shadows
- Tone Curve: Fine-tune contrast and brightness
- HSL: Adjust color hues, saturation, luminance
- Split Toning: Add color to highlights and shadows
- Detail: Sharpen and reduce noise
3. Save your preset
Happy with your edits? Save them:
- Click "+" next to Presets panel
- Choose "Create Preset"
- Name it (e.g., "Warm Landscape")
- Pick a folder
- Select settings to include
- Hit "Create"
4. Test and refine
Try your preset on different photos. Tweak as needed. You can update it anytime by right-clicking and selecting "Update with Current Settings."
Pro Tip: Make presets for different photo types (landscapes, portraits, etc.) to quickly apply your style across various shoots.
sbb-itb-b27063b
4. Combine Presets for Better Results
Want to level up your Lightroom game? Mix and match presets. It's like creating your own editing recipe.
Here's the secret sauce:
- Start with a base preset
- Layer on specific adjustments
- Fine-tune to perfection
Pretty Presets for Lightroom shows how it's done. They combined 7 presets for a killer portrait:
- White balance tweak
- Exposure boost
- Base color
- Soft matte effect
- Split tone for color
- Center light effect
- Noise reduction
This method gives you more control over your edits.
Pro Tip: When making your own presets, leave some boxes unchecked. This lets you stack presets without overwriting previous edits.
"Any unchecked field will be ignored when you apply the preset and it won't change." - Colin, Lightroom tutorial author
But heads up: Some presets clash. If that happens, try this:
- Apply first preset
- Export image
- Re-import and apply second preset
This trick stops presets from canceling each other out.
5. Use Keyboard Shortcuts
Keyboard shortcuts are your editing speed boost in Lightroom. They let you apply presets and make edits faster than clicking through menus.
Here are some key shortcuts to know:
- D: Develop Module
- \: Before/after toggle
- Y: Side-by-side comparison
- Ctrl+Z (Windows) or Cmd+Z (Mac): Undo
- Ctrl+U (Windows) or Cmd+U (Mac): Auto tone
But there's more. Check out these advanced shortcuts:
| Action | Windows | Mac |
|---|---|---|
| Toggle Panels | Shift+Tab | Shift+Tab |
| Crop Tool | R | R |
| Adjustment Brush | K | K |
| Linear Gradient | M | M |
| Radial Gradient | Shift+M | Shift+M |
These can slash your editing time. You can even set up custom shortcuts for your go-to presets.
"If you make a mistake, you can quickly correct it by readjusting the edit tool or going back as you normally do when working on a photo", says Cole, a Lightroom expert.
The undo feature (Ctrl+Z or Cmd+Z) is perfect for preset experiments.
Want to batch edit similar photos? Use Ctrl+Alt+V (Windows) or Cmd+Option+V (Mac) to paste settings from the previous image.
Master these shortcuts, and you'll edit like a pro in no time.
Conclusion
Lightroom presets can supercharge your photo editing. They save time and keep your images looking consistent.
Check out these time-saving perks:
| Benefit | Impact |
|---|---|
| Time saved per image | 90+ seconds |
| Users with big time savings | 75% |
| Workflow efficiency | Up |
| Image consistency | Better |
To squeeze the most out of Lightroom presets:
- Organize them for easy access
- Apply to multiple photos at once
- Make custom presets for your style
- Mix presets for better results
- Use keyboard shortcuts
Here's the thing: presets aren't just for pros. Newbies can use them to learn how different settings change their photos.
Use these tips, and you'll spend less time editing and more time shooting. As you get comfy with presets, you'll edit faster and smarter.
One last tip: don't be scared to tweak presets after applying them. Adjusting basics like highlights, shadows, and whites can really make your images pop.
With these tricks up your sleeve, you're set for a smoother, more effective editing process with Lightroom presets.
FAQs
How to speed up editing in Lightroom?

Want to edit faster in Lightroom? Presets are your secret weapon. Here's the scoop:
1. Make your own presets: Create presets for the types of photos you shoot most. Got a thing for landscapes? Whip up a "Punchy Landscape" preset.
2. Batch apply: Use "Sync" to slap a preset on multiple similar shots at once. Time saver!
3. Organize smartly: Group presets by photo type or style. You'll thank yourself later.
4. Tweak as needed: Don't just apply and walk away. Fine-tune after using a preset for that perfect look.
5. Shortcut savvy: Learn keyboard shortcuts for your go-to presets. Speed demon mode: activated.
Check out the time difference:
| Method | Time per photo |
|---|---|
| Manual editing | 3-5 minutes |
| Using presets | 30-60 seconds |
Presets can cut your editing time by up to 80%. Now that's what we call working smarter, not harder.