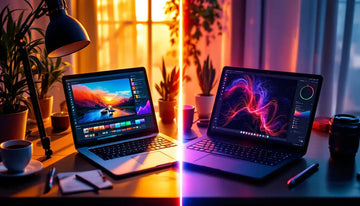
Want to give your photos that Hollywood movie magic? Here are 8 Lightroom presets to transform your images:
- Moody Blue: Neon-tinged dystopian vibes
- Golden Hour: Warm, nostalgic sunset glow
- Film Noir: High-contrast black and white drama
- Old Hollywood: Classic silver screen glamour
- Teal and Orange: Bold, modern blockbuster look
- Matte Finish: Soft, dreamy vintage feel
- High Contrast B&W: Punchy monochrome impact
- Anamorphic Look: Widescreen cinematic style
Quick Comparison:
| Preset | Mood | Best For | Key Edit |
|---|---|---|---|
| Moody Blue | Dark, futuristic | Night scenes, cities | Boost contrast, tweak blues |
| Golden Hour | Warm, nostalgic | Portraits, landscapes | Increase warmth, enhance oranges |
| Film Noir | Mysterious, dramatic | Street shots, moody portraits | Deepen shadows, add grain |
| Old Hollywood | Glamorous, classic | Vintage-style portraits | Soften contrast, increase glow |
| Teal and Orange | Bold, modern | Action scenes, beaches | Balance teal/orange split toning |
| Matte Finish | Soft, dreamy | Lifestyle, tech photos | Lift blacks, lower contrast |
| High Contrast B&W | Dramatic, timeless | Street photography, architecture | Boost contrast, deepen blacks |
| Anamorphic Look | Widescreen, cinematic | Landscapes, movie-style shots | Add lens flares, crop to 2.35:1 |
To use these presets:
- Apply the preset in Lightroom
- Adjust basic settings (exposure, contrast, etc.)
- Fine-tune colors with HSL panel
- Tweak tone curve for extra punch
- Add finishing touches (vignette, grain)
Remember: Presets are starting points. Customize to fit your style and subject.
Related video from YouTube
What Makes a Photo Look Cinematic
Cinematic photos grab attention. They use light, color, and mood to pull you in. Here's how to get that movie-like look:
Dramatic Lighting
Light is everything. Go for drama:
- High contrast between light and shadow
- Underexpose slightly (about -1 on the meter)
- Shoot in low light or at night
- Use harsh lighting for stark contrasts
Color Grading
Color sets the mood:
- Boost yellow tones
- Shift towards magenta
- Use HSL sliders for cohesion
- Cool tones = modern, warm = vintage
Composition and Framing
Think like a filmmaker:
- Use wide-angle lenses (35mm or 50mm)
- Blur backgrounds with narrow depth of field
- Try low angles and Dutch tilts
- Crop to 2.35:1 for widescreen look
Post-Processing Magic
In Lightroom, try these settings:
| Adjustment | Setting |
|---|---|
| Contrast | -15 |
| Highlights | -40 |
| Shadows | +30 |
| Whites | +12 |
| Blacks | +30 |
| Clarity | +60 |
| Vibrance | -5 |
| Saturation | -20 |
Don't forget:
- Add grain for texture
- Apply slight vignette (-15)
- Boost texture and clarity
Storytelling
Make viewers think. Give them clues to build a story:
- Choose angles that set a mood
- Use lighting for atmosphere
- Leave some mystery in the frame
Remember: Cinematic photos don't just show. They TELL.
Moody Blue
Moody Blue isn't just a preset - it's your ticket to cinematic cool. This look turns ordinary shots into attention-grabbing scenes.
It shines with:
- Night shots
- Portraits
- Landscapes
- Urban scenes
Here's the magic:
- Darker exposure
- Pumped-up contrast
- Blue-tinted shadows
- Matte finish
Want to nail the Moody Blue look? Here's how:
1. Tweak the Light panel:
| Adjustment | Setting |
|---|---|
| Exposure | -1.0 |
| Contrast | +40 |
| Highlights | -100 |
| Shadows | +30 |
| Whites | -100 |
| Blacks | +30 |
2. Use the Tone Curve to lift shadows and crush blacks
3. Add warm yellow to highlights and dark blue to shadows in Color Grading
4. Boost texture and clarity
5. Add a subtle vignette
For portraits, try this:
- Bump up orange saturation and luminance in Color Mixer
- Set green to magenta saturation to -100 for a semi-black and white effect
"The Moody Blue preset pack includes 15 mobile and 15 desktop presets, along with XMP, DNG, and LRTEMPLATE files", say the preset's creators.
This means you can get that moody, film-like vibe across different devices and editing software. Play around with the settings to make each photo pop.
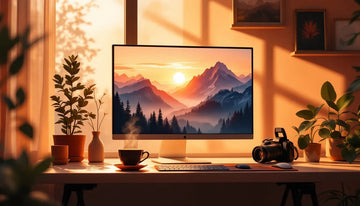
2. Golden Hour
The Golden Hour preset brings sunset and sunrise magic to your photos. It adds warm, glowing tones that make images pop with a sun-soaked look.
Here's what it does:
- Warms up color temperature
- Boosts oranges and yellows
- Softens highlights
- Enriches shadows
It's perfect for portraits, landscapes, and lifestyle shots.
Want the Golden Hour look? Here's how:
1. Adjust white balance:
Bump up temperature to 5350-6000K and give tint a little boost.
2. Tweak exposure:
Drop exposure by 0.5-1 stop, pull back highlights, and lift shadows.
3. Pump up colors:
Increase vibrance and boost orange and yellow saturation/luminance in the HSL panel.
4. Add final touches:
Apply a subtle vignette and use the dehaze slider for depth.
| Adjustment | Setting |
|---|---|
| Temperature | +15 to +30 |
| Exposure | -0.5 to -1.0 |
| Highlights | -30 to -50 |
| Shadows | +30 to +50 |
| Vibrance | +15 to +25 |
"The Golden Hour preset pack includes 20 color presets and 18 sun effect presets, allowing photographers to easily recreate that magical sunset glow", says the Luxe Lens team.
Pro tip: For best results, shoot during actual golden hour (1 hour after sunrise or before sunset) and use the preset to enhance the natural warm light.
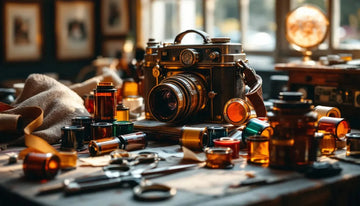
3. Film Noir
Film Noir preset? It's like stepping into a classic Hollywood thriller. Think high-contrast, moody shots that scream 1940s crime drama.
Here's what makes Film Noir pop:
- Deep blacks, bright whites
- Shadows that could hide a secret
- A touch of grain for that vintage feel
It's perfect for:
- Mysterious portraits
- Gritty street scenes
- City skylines after dark
Want to nail that Film Noir look? Here's how:
1. Go black and white
2. Crank up the contrast
3. Play with shadows and highlights
4. Add a sprinkle of grain
| Adjustment | Setting |
|---|---|
| Contrast | +50 to +70 |
| Blacks | -30 to -50 |
| Highlights | +30 to +50 |
| Clarity | +15 to +25 |
| Grain | +20 to +30 |
Pro tip: Light is key. Use a single, strong source to cast dramatic shadows. Think low-key, high-drama.
"The light in those movies is the key to the ambience of mystery and danger." - Ivo Guimaraes, Photographer
Want inspiration? Check out "Touch of Evil". It's a masterclass in Film Noir framing and lighting.
4. Old Hollywood
Want to give your photos that classic silver screen glamour? The Old Hollywood preset's got you covered.
This edit turns your shots into high-contrast black and white masterpieces with a soft, dreamy quality. Think dramatic lighting and strong shadows - perfect for vintage-style portraits, red carpet events, or recreating iconic movie scenes.
Here's how to nail the Old Hollywood look:
- Shoot in color, then go black and white
- Crank up the contrast
- Add a touch of softness
- Use dramatic lighting for those defined shadows
| Adjustment | Setting |
|---|---|
| Contrast | +40 to +60 |
| Highlights | +20 to +30 |
| Shadows | -30 to -50 |
| Clarity | -10 to -20 |
| Grain | +10 to +20 |
Pro tip: Ditch the big smiles. Old Hollywood is all about solemn, reflective expressions.
"Hurrell's portraits typically feature a dark or black background and hard light for defined shadows." - George Hurrell, Hollywood glamour photographer
For best results, use two light sources:
- Main light: 30-45 degree angle from the camera
- Rim light: Behind the subject
The Old Hollywood preset is part of the Vintage & Retro Lightroom Presets collection (€7,44). It works with Lightroom Classic CC, Lightroom CC, and syncs with Lightroom mobile.
5. Teal and Orange
Want to give your photos that Hollywood blockbuster look? Enter the Teal and Orange preset.
This color grading technique creates a striking contrast between warm and cool tones. It's the secret sauce behind the visual appeal of films like Iron Man and Transformers.
Here's the gist:
- Orange warms up skin tones and highlights
- Teal cools down shadows and backgrounds
- Result? A dramatic, cinematic feel
It's perfect for portraits, landscapes (especially with blue skies), urban scenes, and sunset/sunrise shots.
Want to try it in Lightroom? Here's how:
1. Temperature slider: Right for more orange, left for more teal
2. Color Mixer tool:
- Red: +50 to +100
- Yellow: -100
- Green: +100
- Blue: -100
| Adjustment | Setting |
|---|---|
| Shadows | Teal hue |
| Highlights | Orange tone |
| Red Primary Hue | +50 |
| Blue Primary Hue | -50 |
Pro tip: Keep the Red at +50 for more natural skin tones.
Fine-tuning? Use the Curves tool for an s-curve (more midtone contrast) and slightly raise blacks and lower whites for a film-like fade.
Remember: Less is often more. Many photographers prefer a light touch with this effect.
"The orange and teal color grade has been a popular choice in modern cinema for the past decade, providing a cinematic feel to images." - Color grading expert
sbb-itb-b27063b
6. Matte Finish
Want to give your photos a vintage vibe? The Matte Finish preset is your go-to. It's like adding a dreamy filter to your images, softening contrast and toning down colors for that film-like quality.
Here's the quick and dirty on creating a matte look in Lightroom:
- Do your basic edits
- Hit up the Tone Curve panel
- Add a point in the bottom left
- Nudge it up a bit
Boom. You've just muted the blacks and created that hazy effect.
| Blacks | Result |
|---|---|
| Lifted | Lighter matte |
| Lowered | Deeper matte |
Matte finish shines on:
- B&W shots
- Sunny day pics
- Portraits
- Landscapes
But watch out - it might wash out super colorful photos.
Pro move: Save your matte magic as a preset for quick future edits.
"At WPPI in Vegas, I noticed tons of prints rocking that matte look." - Trevor Dayley, Photographer
7. High Contrast Black and White
Want to make your photos pop? The High Contrast Black and White preset is your secret weapon.
This preset shines for:
- Portraits
- Street shots
- Landscapes
Here's how to create that high-impact B&W look in Lightroom:
- Go black and white (hit V)
- Pump up contrast (+85)
- Boost highlights (+10) and shadows (+15)
- Adjust whites (+10) and blacks (-12)
- Add clarity (+20)
For extra sharpness:
| Setting | Value |
|---|---|
| Amount | 50 |
| Radius | 1.0 |
| Detail | 25 |
Pro tip: Use the HSL/Color/B&W tab to tweak specific areas based on their original colors.
Fujifilm X-Photographer Kevin Mullins says:
"Use the Classic Chrome camera profile for denser, punchier monochrome images, even though it's a color film simulation."
Don't overdo it. Keep things natural.
Feeling bold? Add a touch of grain (Amount: 50, Size: 50, Roughness: 25) for that film look.
These tweaks will turn ordinary shots into eye-catching black and white stunners.
8. Anamorphic Look
The Anamorphic Look preset gives your photos a cinematic feel. It's great for landscapes, street shots, and portraits.
Here's how to create it in Lightroom:
- Use a 2.35:1 aspect ratio
- Bump up contrast (+30)
- Add a slight S-curve
- Lower highlights (-15) and raise shadows (+20)
- Add a subtle vignette
For lens flares:
| Setting | Value |
|---|---|
| Flare Center | Align with subject |
| Glow Radius | 1,000 |
| Glow Intensity | 5+ |
Want the real deal? The Moment 1.33x Anamorphic Lens Adapter costs $1300 but adds authentic flares and textures.
Photographer Steven Schultz says:
"The adapter flared beautifully with the tungsten bulb, leaving gorgeous warm streaks across the images, purely natural and free from post-processing."
Don't forget to "de-squeeze" your images. Crop to 16:9 and tweak the width in Photoshop.
For oval bokeh, use Camera Lens Blur in After Effects. Set aspect ratio to 0.5 and adjust blur to taste.
Finish with film grain (Amount: 20, Size: 25, Roughness: 50) for that classic cinema look.
How to Use Cinematic Presets
Want to give your photos that movie-like feel? Here's how to use cinematic presets in Lightroom:
1. Apply the Preset
Open your photo in Lightroom and click on your chosen preset. Keep in mind: the same preset can look different on various photos.
2. Tweak the Basics
After applying the preset, adjust these settings:
| Setting | Typical Range |
|---|---|
| Exposure | +/- 0.5 to 1.0 |
| Contrast | -15 to +30 |
| Highlights | -40 to +20 |
| Shadows | +20 to +30 |
| Whites | +12 to +20 |
| Blacks | +30 to +50 |
3. Play with Color
Use the HSL panel to:
- Shift hues slightly
- Lower saturation (-5 to -20)
- Adjust brightness of individual colors
4. Add Final Touches
- Bump up clarity (+60)
- Add some grain (Amount 20, Size 25, Roughness 50)
- Apply a subtle vignette (Amount -15)
5. Crop It
For that true cinematic look, try a 2.35:1 or 16:9 aspect ratio.
Remember: These are just starting points. Trust your eye and adjust as needed.
"Early morning or late evening light can make or break a cinematic edit. It provides that warm, directional light that's key to many film looks." - Thomas Heaton, landscape photographer
Pro Tip: Shoot during golden hour for the best results.
Preset Effects Side by Side
Let's compare the 8 cinematic presets:
| Preset Name | Mood | Colors | Best Uses |
|---|---|---|---|
| Moody Blue | Cinematic, moody | Neon carrot to steel grey | Dystopian landscapes |
| Golden Hour | Warm, nostalgic | Warm oranges and yellows | Outdoor portraits, landscapes |
| Film Noir | Dark, mysterious | High contrast black and white | Urban scenes, dramatic portraits |
| Old Hollywood | Glamorous, classic | Soft, muted tones | Vintage-style portraits |
| Teal and Orange | Bold, modern | Teal and orange contrast | Action scenes, urban landscapes |
| Matte Finish | Soft, dreamy | Desaturated, pastel hues | Lifestyle, tech-related photos |
| High Contrast B&W | Dramatic, timeless | Deep blacks, bright whites | Street photography, architecture |
| Anamorphic Look | Widescreen, cinematic | Varied, often cool-toned | Landscapes, movie-style shots |
Each preset adds a unique flavor to your photos. Moody Blue can turn a cityscape into a Blade Runner-like scene, while Golden Hour makes portraits feel like summer film stills.
Choose your preset based on your subject and story. Shooting street scenes? Try Film Noir or High Contrast B&W for added drama.
These presets are just starting points. You'll likely need to tweak settings like exposure and color balance for the perfect look.
"Early morning or late evening light can make or break a cinematic edit. It provides that warm, directional light that's key to many film looks." - Thomas Heaton, landscape photographer
Some preset packs offer more specific movie styles. Hong Kong Retro Movie Style mimics Wong Kar-wai's warm, retro look, while Stranger Things Cinematic Preset gives that cool 80s vibe.
Remember: presets modify existing photo info. The effect will vary based on your original shot's lighting and colors. Try different presets on the same photo to find the best fit for your vision.
Mixing Presets and Custom Edits
Presets are just the start. To make your photos pop, mix them with custom tweaks.
Here's how:
1. Apply the preset
Pick a preset that fits your photo's mood. "Moody Blue" for a futuristic cityscape? "Golden Hour" for a warm portrait? Go for it.
2. Tweak the basics
Adjust exposure, contrast, highlights, and shadows. Every photo's different, so these need fine-tuning.
3. Fine-tune colors
Use Lightroom's HSL tool. This is key for that cinematic look.
4. Play with the tone curve
Mess around with contrast levels. It can really boost that cinematic feel.
5. Add finishing touches
Maybe a slight vignette? Or adjust clarity? These small changes can make a big impact.
"Presets are the icing, not the cake batter. Learn to take good images first, then enhance them through editing." - Jessica Vickers, Photographer and Editor
Quick guide for popular cinematic presets:
| Preset | Custom Edit Tips |
|---|---|
| Moody Blue | Bump up contrast, tweak blue hue |
| Golden Hour | Fine-tune warmth, boost oranges |
| Film Noir | Enhance shadows, add grain |
| Teal and Orange | Balance teal/orange split toning |
Want your presets to shine? Shoot in early morning or late evening. Great lighting makes all the difference.
Don't be scared to make your own presets. Start with a look you like, adjust it, save it. You'll develop a unique style that makes your photos stand out.
Wrap-up
We've covered 8 presets to give your photos a cinematic look:
- Moody Blue
- Golden Hour
- Film Noir
- Old Hollywood
- Teal and Orange
- Matte Finish
- High Contrast Black and White
- Anamorphic Look
These presets are just the beginning. Here's how to make the most of them:
Mix it up: Try different presets on the same photo. That street scene? It might pop with Moody Blue OR Teal and Orange.
Make them yours: Adjust contrast, play with colors, or add a vignette. Don't be afraid to tweak.
Play with ratios: Want more drama? Crop to 2.35:1 or 16:9.
| Preset | Good For | Key Tweaks |
|---|---|---|
| Moody Blue | Night scenes, cities | Up the contrast, play with blues |
| Golden Hour | Portraits, landscapes | Adjust warmth, boost oranges |
| Film Noir | Dramatic portraits, street shots | Deepen shadows, add grain |
| Teal and Orange | Action, beach scenes | Balance teal/orange tones |
The Brixton Film pack has 23 presets for Lightroom, Lightroom Classic, and Photoshop. Plenty to work with!
Pro tip: Good lighting is key. Early morning or late evening often work best.
And hey, why not create your own presets? Start with a look you like, adjust, and save. You'll develop your own style over time.
Now go make some cinematic magic!
FAQs
How to make cinematic edits in Lightroom?

Want to give your photos that movie-like feel? Here's how:
1. Tweak the light
Start in the Light section. Play with contrast, highlights, shadows, whites, and blacks. This sets the mood.
2. Balance the colors
Fine-tune your color balance. This is key for that cinematic vibe.
3. Create the mood
Use color grading tools. They're your secret weapon for that cinematic atmosphere.
4. Add some flair
Try vignetting or grain. These effects can take your photo from "meh" to "wow".
5. Sprinkle in some grain
A touch of grain? It's like time-traveling your photo back to the film era.
How to get a cinematic look in Lightroom?
Here's a starting point for that movie-magic look:
| Setting | Value |
|---|---|
| Contrast | -15 |
| Highlights | -40 |
| Shadows | +30 |
| Whites | +12 |
| Blacks | +30 |
But don't stop there. Play with clarity, vibrance, and saturation. Remember, these are just guidelines. Your photo, your rules. Adjust until it feels right to you.