


Table of Contents
- Common Preset Import Errors and Fixes
- How to Import Presets to Luminar Neo: A Step-by-Step Guide
- Preset Importing in Luminar NEO: The Basics
- Common Import Errors and How to Fix Them
- System and Compatibility Issues
- How to Avoid Import Errors Going Forward
- Conclusion: Getting Preset Imports Right in Luminar NEO
- FAQs
Common Preset Import Errors and Fixes
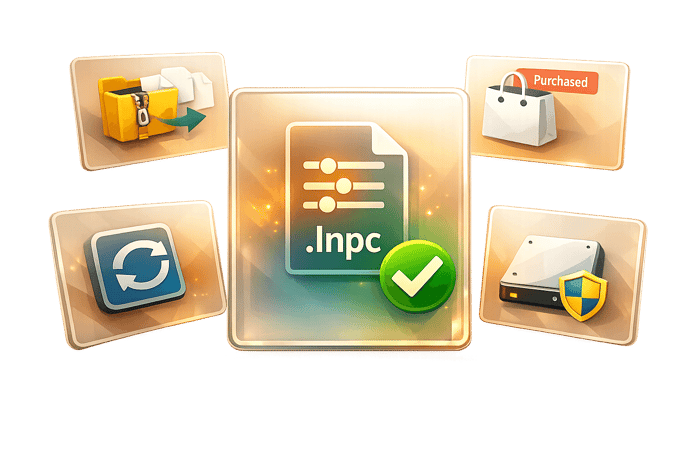
Importing presets into Luminar NEO(LNeo) can feel simple, but common mistakes often lead to errors. These include using the wrong file format, failing to unzip files, outdated presets, or confusion about where presets appear after import. To avoid issues:
- Use
.lnpcfiles only: Luminar NEO supports.lnpcfor presets. Other formats like.zipor.cubewon't work. - Unzip files before importing: Always extract downloaded preset files before importing.
- Check the correct location: Imported presets appear under Presets Tab > Purchased, not in My Presets.
- Keep LNEO updated: Outdated software can cause compatibility issues.
If problems persist, verify file integrity, re-download presets, and ensure your system has enough disk space and proper permissions. Restarting the app often resolves missing presets.
How to Import Presets to Luminar Neo: A Step-by-Step Guide
sbb-itb-b27063b
Preset Importing in Luminar NEO: The Basics
Getting familiar with how presets work in LNEO can make solving issues much easier.
What Are Presets in Luminar NEO?
Presets in LNEO are essentially one-click tools that apply a combination of adjustments, such as exposure, color, tone, and texture. As Skylum's Knowledge Hub explains:
"Presets combine efficiency with creativity. By using AI to understand the strengths and weaknesses of every image, Presets automatically correct common capture problems and apply enhancements that inspire new ideas." - Skylum's Knowledge Hub
Think of them as a creative launchpad rather than the final touch. You can adjust their effect using an intensity slider to suit your vision. If you’ve worked with earlier Luminar versions, you might remember Looks and Templates, which were the predecessors to today’s Presets.
Supported Preset Formats and Sources
LNEO uses a specific format for preset collections: .lnpc (Luminar NEO Preset Collection). This is the only format the software recognizes for complete preset packs. Other file types, like .cube LUT files or image overlays, serve different roles and don’t function as presets.
Because of this, it’s important to download presets designed specifically for LNEO. For example, collections from Presets.io are already in the .lnpc format, so there’s no need for conversions or guesswork.
Now, let’s dive into how to import these presets into LNEO.
How to Import Presets Step by Step
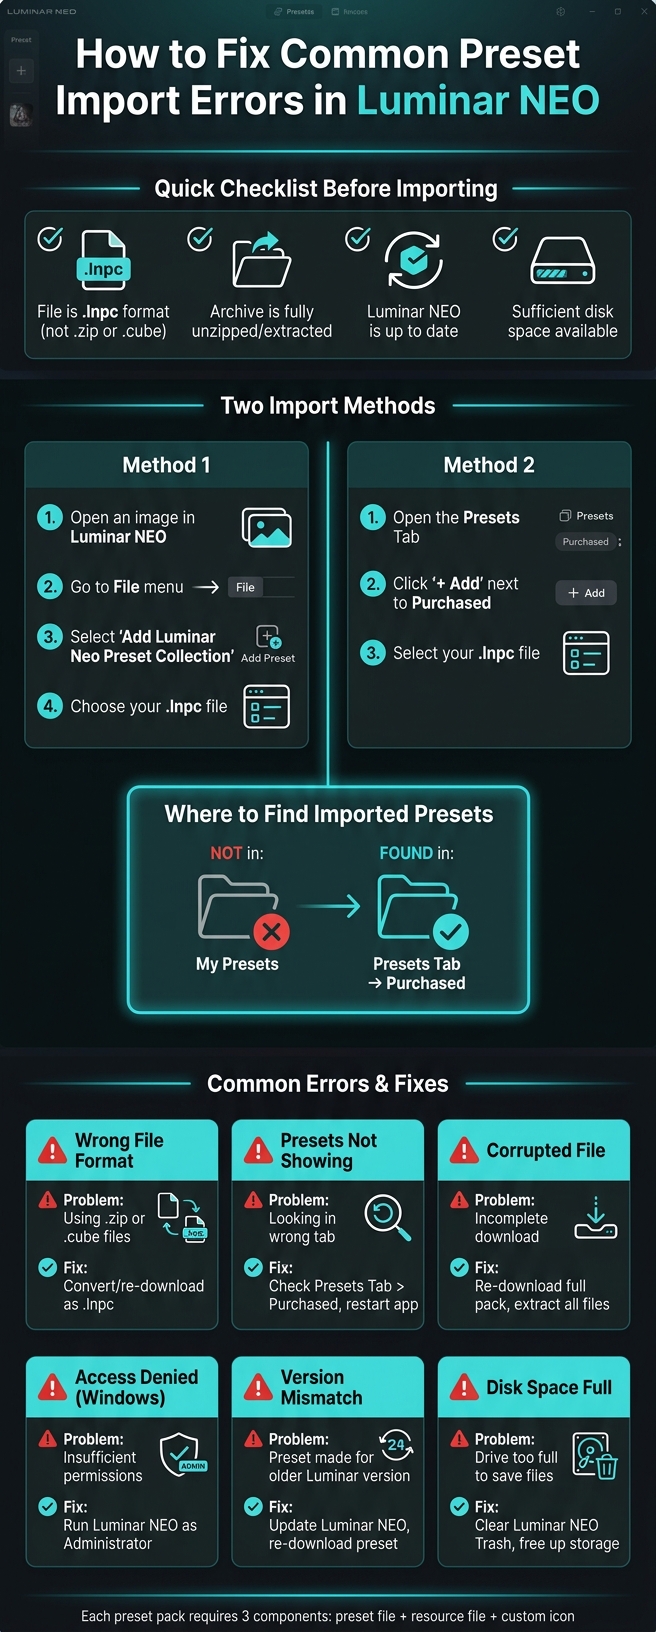
Here are two simple ways to import a .lnpc file into Luminar NEO:
- Method 1: Open an image and go to the top menu. Select File > Add Luminar Neo Preset Collection, then locate and choose your
.lnpcfile. The collection will appear under Presets Tab > Purchased. - Method 2: Head to the Presets Tab and click the + Add button next to Purchased. Then, select your
.lnpcfile.
Before importing, make sure to unzip downloaded files. On Windows, right-click and choose "Extract All." On a Mac, just double-click the .zip file. Always ensure the files are unzipped before importing them into the app.
Common Import Errors and How to Fix Them
How to Import Presets into Luminar NEO (Step-by-Step)
Even when you carefully follow the steps, import errors can still sneak in. Let’s go over some common problems and how to resolve them.
File Type or Format Mismatch
One of the most frequent issues is trying to import an unsupported file type. LNEO only accepts .lnpc files for presets. If you attempt to use a .zip archive or an image overlay, you’ll either see an error or the process will fail silently.
Keep in mind that LUT files (commonly .cube) are not presets. To use these, navigate to Edit > Creative > Mood > Choose LUT > Load Custom LUT file. Similarly, custom sky textures (like JPEG, PNG, or TIFF files) are meant for Sky AI > Sky Selection > + button, not the preset import menu.
If you encounter an "unsupported format" message, double-check the file extension by right-clicking the file and confirming it’s .lnpc. Files with other extensions won’t work with the preset import tool. If the file type is correct but the issue persists, the file might be corrupted.
Corrupted or Incomplete Preset Files
Even with the correct .lnpc extension, a preset may fail to import if the file is corrupted or wasn’t fully downloaded. In this case, re-download your preset pack from its original source, extract the .zip completely, and ensure all necessary files (preset, resource, and custom icon) are included.
When transferring presets manually, make sure to move the entire parent folder containing all related files. Leaving out even one element can cause the preset to fail or display incorrectly. Once everything is in place, check if the collection appears as it should.
Presets.io Luminar Neo Essentials Bundle

$139.50
$269.00
Presets.io Luminar Neo Essentials Bundle Take your photo editing to the next level with the Presets.io Luminar Neo Essentials Bundle—our complete editing solution built exclusively for Luminar Neo users. This exclusive bundle combines Luminar Neo Perpetual Desktop Software with 10… continue reading
Presets Imported But Not Showing Up
Sometimes, the import process completes without error, but the presets seem to vanish. This is often due to navigation confusion rather than a failed import.
Imported preset collections are located under the Purchased category in the Presets tab, not in My Presets, which is reserved for your own creations. Ensure you’re in the Presets tab at the top of the LNEO window - not the Edit tab. Once in the correct section, click the collection name to expand it and view the individual presets.
If the collection still doesn’t appear, try restarting LNEO. A fresh launch often helps the app scan and index newly added files. For manually placed presets, you can right-click any existing preset and choose Show in Finder (macOS) or Show in Explorer (Windows) to confirm the files are in the correct location. Properly importing presets ensures a smooth editing experience in LNEO.
System and Compatibility Issues
Sometimes, import problems can arise from how your system is set up.
Disk Space and Permissions Problems
Running out of disk space or facing restricted folder permissions are two frequent reasons for failed imports. As your LNEO catalog expands with more photos and presets, it demands additional storage. If your drive is nearly full, the app might fail to save new preset files, often without providing a clear error message. Regularly clearing the LNEO Trash can help free up space.
On Windows, restricted folder permissions can also block imports. If LNEO isn’t running with the proper access level, Windows User Account Control (UAC) might prevent the app from writing files to protected directories, leading to an "Access Denied" error. A quick solution is to right-click the LNEO shortcut and choose "Run as administrator." For macOS users, ensure your account has Read & Write access to the preset folder by selecting "Show in Finder" from the preset menu and adjusting permissions if needed.
Additionally, antivirus software like Windows Defender might flag LNEO’s file-writing behavior as suspicious. To avoid this, add LuminarNeo.exe and its associated data folders (usually found in C:\Program Files\Skylum\Luminar NEO) to your antivirus exclusion list. If the issue persists, try performing a Windows Clean Boot.
Version Incompatibilities
LNEO uses the .lnpc format for preset collections, but not all presets are compatible. Presets designed for older versions of Luminar or other Skylum products might not work with the "Add Luminar Neo Preset Collection" command. If an import fails immediately after selecting a file, it could be due to a version mismatch.
Older presets may also struggle to function properly if they rely on outdated AI engine versions. Keeping LNEO updated ensures better compatibility with the Luminar Neo collections. Addressing these compatibility and system issues can make your workflow smoother and help you avoid future import headaches.
How to Avoid Import Errors Going Forward
Preventing preset import issues in Luminar.NEO is easier than you might think. With some planning and regular upkeep, you can keep your editing process running smoothly.
Organizing Your Preset Files
Start by organizing your preset files before opening Luminar.NEO. Always unzip downloaded archives and ensure the files have the .lnpc extension before importing them.
Within Luminar.NEO, presets are automatically sorted into categories: X Membership, Favorites, My Presets, and Purchased. To avoid confusion, keep your custom presets in My Presets and marketplace downloads in Purchased. If you need to locate a preset file on your computer, click the three dots (...) next to a collection and select Show in Finder (macOS) or Show in Explorer (Windows). For better organization, delete unused collections by right-clicking and selecting Delete Collection. Maintaining an organized folder structure is key to a hassle-free import process.
Keeping Luminar NEO Up to Date
Using an outdated version of Luminar.NEO can lead to import problems or display issues with new presets. Skylum frequently releases updates to improve the AI engine, fix bugs, and ensure compatibility with the latest .lnpc formats. If you're on macOS, enable auto-updates to stay current effortlessly. Windows users should regularly check for updates through the app or the Skylum website.
It’s also a good idea to log into your Skylum account occasionally to re-download purchased preset packs. Skylum sometimes updates older collections, like legacy "Luminar Looks" and "Templates", to improve compatibility with newer versions. The preset files in your downloads folder might already be outdated, so downloading the latest versions ensures everything works as intended.
Backing Up Your Preset Packs
Your preset packs are valuable, so back them up to avoid losing them. To do this, go to My Presets or Purchased in the Presets panel, click the three dots (...) next to a collection, and choose Show in Finder or Show in Explorer. From there, copy the entire parent folder - not just the .lnpc file. Each preset relies on three components stored in that folder: the preset file, a resource file, and a custom icon. Missing any of these files can cause import issues.
Save these folders to an external hard drive or a cloud service like Google Drive or Dropbox. If you ever reinstall Luminar.NEO or switch to a new computer, simply drag the backed-up folders into the Luminar.NEO User Presets directory and restart the application to restore them.
Conclusion: Getting Preset Imports Right in Luminar NEO
Understanding common mistakes can make your editing process smoother. Most issues with importing presets into Luminar.NEO boil down to a few fixable problems: incorrect file formats, missing key components, or using an outdated version of the software.
Stick with high-quality preset packs. For example, collections like the Luminar NEO presets from Presets.io are correctly packaged in the .lnpc format. They include everything you need - preset files, resource files, and custom icons - helping you avoid the frustration of presets not appearing after import. Always handle files properly: unzip the packs before importing and back up the entire folder to avoid losing any components.
FAQs
Why does my .lnpc preset import fail with no error?
If your .lnpc preset doesn’t import and there’s no error message, the problem is likely an incompatible file type. Make sure the file has the .lnpc extension, as other formats won’t work.
If the file type is correct but the issue persists, check if Luminar NEO is up-to-date. Compatibility issues are often resolved with software updates.
For a range of compatible and high-quality presets, you can explore options on Presets.io.
Where can I find presets after importing them into Luminar Neo?
After importing presets into Luminar Neo, head over to the Presets tab. You'll find any purchased collections neatly organized under the Purchased category. For custom or manually installed presets, look under My Presets. Simply expand the collection name to view all the presets it contains. Platforms like Presets.io provide a variety of collections designed to streamline and improve your editing process.
What should I back up to avoid losing my preset packs?
To make sure you don't lose your preset packs, it's a good idea to back up the original .lnpc files. For any custom presets you've created, head to the User section in the Presets panel. From there, click the three dots menu and choose either Show in Finder (macOS) or Show in Explorer (Windows). Once located, copy the entire parent folder. This folder should include the preset file, resource file, and any custom icon you've used. Backing up all these elements ensures your presets are fully saved.