

Table of Contents
- Top 7 Lightroom Presets for Wildlife Photography
- Complete Wildlife Editing Workflow in Lightroom Classic (Start to Finish)
- Quick Comparison
- What Makes a Wildlife Preset Worth Using
- 1. Presets.io Wildlife Detail Preset Pack
- 2. Adaptive Fur & Feather Detail Preset
- 3. High-Impact Action Sharpening Preset
- 4. Natural Color Wildlife Preset
- 5. Low-Light High-ISO Recovery Preset
- 6. Outdoor Mood Texture Preset
- 7. Fine Feather Detail Brush Preset
- Wildlife Preset Comparison
- Tips for Better Results with Wildlife Presets
- Conclusion
- FAQs
Top 7 Lightroom Presets for Wildlife Photography
If your wildlife RAW files look flat, soft, or noisy, the fix is simple: use presets that sharpen the animal, control high-ISO grain, and keep color close to the scene. In this list, I’d focus on 7 preset types: a general wildlife detail pack, an AI-masked fur-and-feather preset, an action sharpening preset, a natural color preset, a low-light recovery preset, a mood-and-texture preset, and a local feather brush.
Here’s the short version:
- For mammals: use a general wildlife detail preset
- For birds: use AI-masked feather presets or a feather brush
- For motion: use an action sharpening preset
- For ISO 6,400–12,800 files: use a low-light recovery preset
- For color-first edits: use a natural color preset
- For daylight mood: use a texture-first preset
- For fine local detail: finish with a brush on eyes, whiskers, or feathers
The main thing I’d look for is simple: subject masking, controlled sharpening, and noise reduction in the right order. If sharpening hits the whole frame, backgrounds get rough fast. If noise reduction goes too far, fur and feathers lose shape. In many wildlife files, that balance matters more than any single slider.
Complete Wildlife Editing Workflow in Lightroom Classic (Start to Finish)

sbb-itb-b27063b
Quick Comparison
| Preset | Best For | Detail Style | Noise Handling | Color Look |
|---|---|---|---|---|
| Wildlife Detail Pack | Mammals, general use | Moderate, local tools | Good for low light | Natural |
| Adaptive Fur & Feather | Birds and mammals | High on subject only | Strong masked cleanup | Realistic |
| Action Sharpening | Fast motion | Strong edge/detail punch | Medium | Higher contrast |
| Natural Color | Forest, grassland, portraits | Controlled and soft | Good | Rich but restrained |
| Low-Light Recovery | Night, dawn, dusk | Recovery-first | Strong for ISO 6,400–12,800 | Cleaner night tones |
| Outdoor Mood Texture | Daylight shots | Texture-first | Moderate | Cinematic |
| Fine Feather Brush | Bird close-ups | Local-only fine detail | Local cleanup only | Subject-led |
My takeaway: the best choice depends on the file in front of you. Start with a base preset, importing them to your iPhone if you're editing on the go, check the mask at 100% zoom, then fine-tune sharpening, texture, and color by hand.
What Makes a Wildlife Preset Worth Using
Use three checks to judge any wildlife preset: subject masking, detail control, and noise handling. Start with a simple test: does the sharpening stay on the animal, or does it hit the whole frame?
Selective sharpening vs. global sharpening
Whole-frame sharpening increases edge contrast across the image. That can make a photo look crisper at first glance, but it also sharpens the background and steals attention from the animal.
Subject-only sharpening keeps the focus where it should be. Modern Adaptive presets use built-in smart masks that Lightroom can detect on its own, so sharpening lands on fur, feathers, and eyes while the background stays untouched.
Put simply, Adaptive presets sharpen the subject and leave the background alone.
Balancing texture, clarity, and masking
Texture brings out fine detail. Clarity changes broader contrast, and if you push it too far, it can create halos. The better wildlife presets lean more on Texture for fur and feathers. Then they use brush-based local adjustments to add detail only where it helps.
"These brush presets are fast easy ways for you to brush on changes like brightening, darkening, adding texture to fur and even bring out some depth and dimension." - Matt Kloskowski
This is where masking does the heavy lifting. If the mask doesn't cleanly separate the subject, adding Texture or Clarity can spill into the blurred background. When that happens, noise tends to stand out more. That tradeoff gets even more important when the photo also needs noise cleanup.
Noise reduction for high-ISO wildlife files
High-ISO wildlife shots need noise reduction before sharpening. If you sharpen first, you boost the grain. If you go too hard on noise reduction, you wipe out texture. Good presets handle noise first, then bring detail back in. The sequence matters more than the exact slider numbers.
Use these three controls as the baseline for the presets that follow.
1. Presets.io Wildlife Detail Preset Pack

The Presets.io Wildlife Detail Preset Pack uses AI-enabled masking to target fur, feathers, and eyes while protecting the background from harsh edges or halos. That makes it a good fit for the subject-only sharpening and noise balance covered above.
Subject Detail
Instead of applying one sharpening pass to the whole image, the pack gives you localized modifier tools like Boost Fur and custom brushes for eyes and whiskers. So you can add detail where it counts, without roughing up the rest of the frame.
This works well for dense fur, fine plumage, and whisker detail. And it becomes even more useful when low light forces you to push ISO higher.
Noise Control
For high-ISO wildlife files, the pack also includes noise-reduction and detail-recovery tools built for low-light images. That includes stronger noise reduction for ISO 6,400–12,800 files.
The goal is simple: cut noise without wiping out fine texture. That makes these tools a solid match for low-light wildlife shots, including night drives and nocturnal subjects.
2. Adaptive Fur & Feather Detail Preset
For photographers who want automatic subject masking with very little setup, this preset keeps things simple. The Adaptive Fur & Feather Detail Preset uses Lightroom's AI masking to target the animal first, then applies sharpening and texture changes to that area.
Subject Detail
This preset works at the subject level, so sharpening stays on fur, feathers, and scales instead of spilling into the background. It’s tuned to bring out fine detail like a leopard’s rosettes or the iridescent sheen of bird plumage.
That means more detail where it matters and less edge noise behind the subject. After you apply it, check the mask in Lightroom's masking panel before pushing Clarity or Texture any further.
Noise Control
Once Lightroom isolates the subject, the preset manages grain without wiping away key texture. On high-ISO files, it applies stronger noise reduction to the background while keeping subject detail in place.
Go easy with the intensity control. Push it only until the subject still looks natural.
Color Naturalness
This preset also keeps the edit believable by avoiding overly saturated habitat tones. It balances earth tones, greens, and sky blues to better match what you saw in the field.
Eye detail and coat color stay realistic, which matters a lot when you’re photographing animals in forests or savannas.
Best Shooting Scenario
It works best when the subject sits against a busy background, like forest, savanna, or grassland scenes. Start by finishing Exposure and White Balance, then rebalance Contrast, Highlights, and Shadows.
Use this preset when you want clean subject separation, controlled detail, and natural color in one pass.
3. High-Impact Action Sharpening Preset
Built for fast-moving wildlife and changing light, this preset sharpens the details that matter most without making edges look harsh. It works best when you need a fast edit with a master preset bundle and don't have time for careful local brushing.
Detail Rendering
This preset adds micro-contrast to fur, feathers, and eyes while keeping the look natural.
"Improve contrast and clarity without over-sharpening... preserves realistic fur, feather, and eye detail." - AAA Presets
Noise Control
Use moderate sharpening on the subject, then bring back depth in shadows and blacks without pulling up grain. From there, keep color restrained so the animal still looks like itself, not pushed too far in post.
Color Naturalness
It keeps earth tones, greens, and sky blues looking natural instead of oversaturated.
Best Shooting Scenario
Use it for safaris, birding, and other fast-moving scenes where light can shift in a hurry. After you apply it, adjust Exposure and White Balance so the final image fits the scene.
4. Natural Color Wildlife Preset
When detail matters but you don't want the edit to feel heavy-handed, this preset does the job well. It keeps the animal crisp and clear while holding onto natural color, so the file doesn't get pushed too far.
Detail Rendering
It brings out midtone detail and keeps contrast in check, using selective texture adjustments and modifier brushes to separate the subject more cleanly without adding artifacts.
Noise Control
Because it avoids aggressive global sharpening, background grain is less likely to jump out in high-ISO files. That's a big help in busy habitats, where noisy backgrounds can pull attention away from the animal.
Color Naturalness
This is the preset's strong point. It balances greens, browns, and sky tones to pull RAW files out of that flat, gray look. And if a habitat color like grass still feels too vivid after you apply the preset, you can use a color-specific modifier tool to tone down that hue without changing the rest of the image.
Best Shooting Scenario
Use it for wildlife images that need natural color and restrained sharpening in forest, savanna, and park settings. It's also a smart starting point when you want a polished base before adding more targeted local detail.
"Create striking wildlife images with a clean, professional finish... deepening impact without losing natural texture." - The Presets Room
5. Low-Light High-ISO Recovery Preset
When a wildlife shot is too dark for a standard detail preset, switch to a recovery-first edit. This preset has one job: pull detail back from high-ISO files where noise, crushed shadows, and muddy color are already dragging the image down. It works best on hard low-light frames, not clean daytime photos.
Detail Rendering
Start by masking the subject so the recovery work stays where it matters most. Then dial in fur, feathers, and eyes.
The key here is balance. You want enough sharpening to bring detail back, but not so much that noise gets harsher. At the same time, noise reduction needs to clean up the file without wiping away the fine texture that still makes the image feel alive.
Noise Control
At ISO 6,400 to 12,800, this preset smooths background luminance grain while holding onto the fine texture that keeps nocturnal portraits readable. That narrow focus matters. This is for very dark files with visible grain, where sharpening on its own just can't bring back usable detail.
Color Naturalness
Once noise is under control, fix color shifts before pushing detail any further. High-ISO shadows often drift in odd directions, so this preset cools the image a bit and pulls saturation back for a cleaner night look.
Best Shooting Scenario
Use it on very dark wildlife files made at night, at dawn, or under artificial light. Think of it as a recovery pass first. After that, refine detail only in the parts of the subject that still hold texture.

The Ultimate Presets.IO Bundle

$89.00
$1,662.00
The Ultimate Presets.io Bundle combines The Master Preset Bundle Volume I and The Master Preset Bundle Volume II into one complete collection, giving you every editing style you need in a single download. Save $37 vs. Volume I and II… continue reading
6. Outdoor Mood Texture Preset
For cleaner daylight files, this next preset adds mood without giving up detail. It works best for well-exposed wildlife shots taken in daylight or during golden hour. If your file already looks good and just needs more depth, this is a strong fit.
Detail Rendering
This preset leans on Texture instead of heavy global sharpening. That helps fur and feathers stay crisp without turning edges harsh. The subject gets enough sharpening to stand out, while the habitat still looks natural. Backgrounds stay soft and secondary, which is a big help when the scene feels busy.
Noise Control
For shaded or overcast files, it uses moderate noise reduction first. Then it brings back fur and feather detail with light sharpening and clarity, so the texture doesn’t get washed out.
Color Naturalness
It keeps greens, browns, and sky tones believable while avoiding that flat gray look you often see in unedited wildlife files. A small White Balance tweak at the end can help match the scene more closely.
Best Shooting Scenario
Use it for well-exposed wildlife in daylight, golden hour, and direct sun when you want a cinematic look that still feels natural.
7. Fine Feather Detail Brush Preset
When a full-image preset still leaves feather detail looking a little flat, this brush helps you clean up just the bird. It sharpens feather detail without touching the background, so you get tighter control where it matters most.
Detail Rendering
Use Texture and Clarity with a light hand. The goal is to bring out fine feather detail without creating halos around the edges.
Noise Control
Start by reducing noise in the background. Then add just enough sharpening to keep feather barbs clear, while sharpening the bird only where needed. If the bird was shot in shaded light, a shadow-lifting brush layer can help bring out hidden patterns in dark plumage.
Color Naturalness
Use HSL adjustments to keep plumage colors looking natural, especially on iridescent feathers. That helps hold onto the bird’s natural sheen instead of pushing colors too far.
Best Shooting Scenario
This brush works well for birds with clear feather structure in shade, backlight, high ISO, or patchy forest light. It tends to work best after a global preset has already handled exposure and color.
Wildlife Preset Comparison
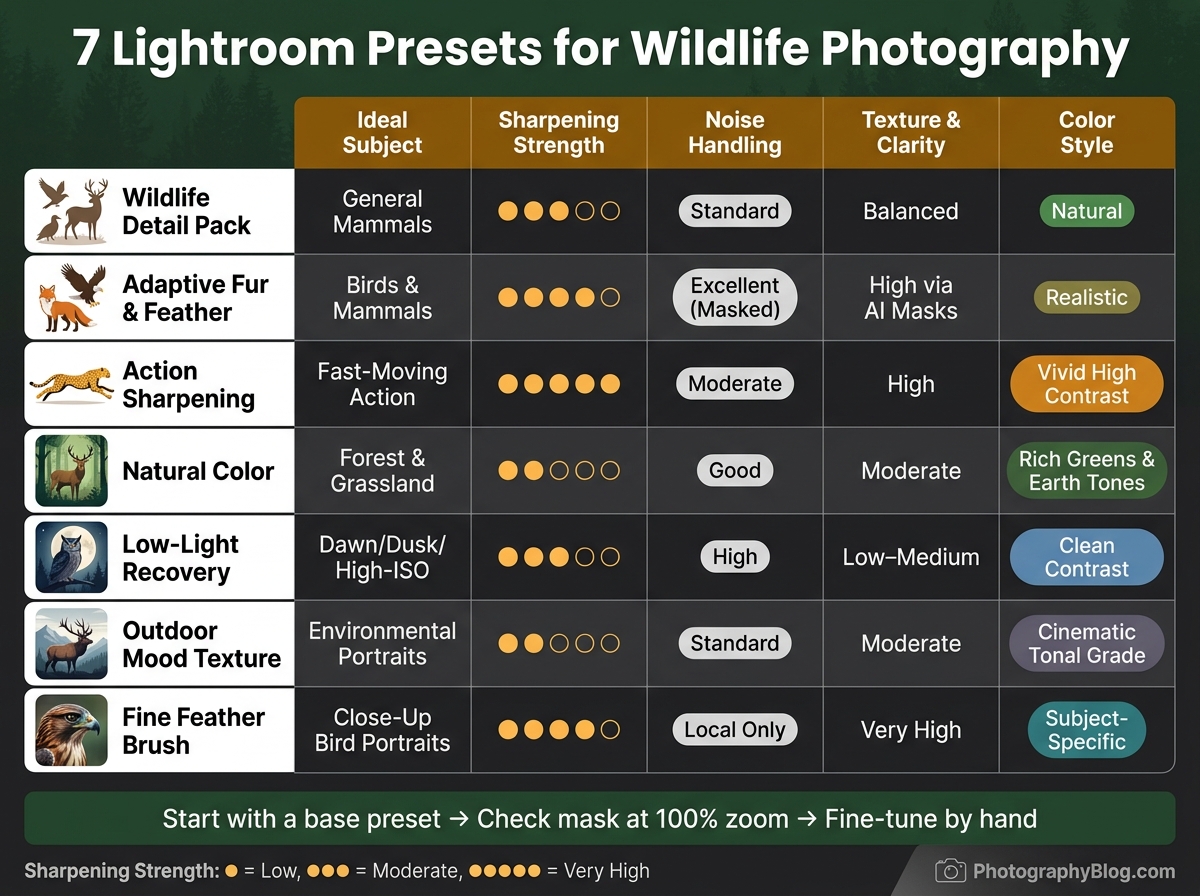
7 Lightroom Presets for Wildlife Photography: Quick Comparison Guide
Use this comparison to match each preset to the subject, lighting, and amount of detail you want to pull out.
| Preset | Ideal Subject | Sharpening Strength | Texture & Clarity | Noise Handling | Color Style |
|---|---|---|---|---|---|
| Wildlife Detail Pack | General mammals | Moderate | Balanced | Standard | Natural |
| Adaptive Fur & Feather | Birds & mammals | High (targeted) | High via AI masks | Excellent (masked) | Realistic |
| Action Sharpening | Fast-moving action | Very high | High | Moderate | Vivid, high contrast |
| Natural Color | Forest & grassland | Low | Moderate | Good | Rich greens, earth tones |
| Low-Light Recovery | Dawn, dusk, high-ISO | Moderate | Low to medium | High (noise reduction) | Clean contrast |
| Outdoor Mood | Environmental portraits | Low | Moderate | Standard | Cinematic tonal grade |
| Fine Feather Brush | Close-up bird portraits | High (local only) | Very high | Local only | Subject-specific |
Here’s the fastest way to match each preset to the right wildlife scene.
Presets grouped by subject type
For birds, Adaptive Fur & Feather and Fine Feather Brush usually give the best result. They help pull out small feather detail without making the whole frame look harsh.
For mammals, Wildlife Detail Pack is the best starting point. It adds clean detail and keeps the overall look natural.
If you're working with motion, go with Action Sharpening. It’s built for fast-moving subjects and adds much stronger sharpening and contrast.
For dawn, dusk, or high-ISO files, Low-Light Recovery is the better fit. It keeps noise under control while cleaning up the image.
Close-up shots are where Fine Feather Brush stands out. Use it on eyes, whiskers, and fine facial detail when you want extra precision.
When to pair a global preset with a brush preset
After you choose your base preset, finish the image with a brush preset for tighter control. Start with the global preset first, then brush in detail on areas like the eyes, whiskers, or darker shadow zones.
That gives you a sharp subject without making the background look overworked. It’s a simple combo, but it does a lot of the heavy lifting.
Tips for Better Results with Wildlife Presets
Start with RAW files and zoom to 100%
After you choose a preset, do a few basic checks to keep wildlife detail sharp and natural-looking. Start with RAW files. Then dial in Exposure, White Balance, and Contrast first. After that, use the preset as a starting point instead of letting it do all the work for you.
Once the preset is on, zoom to 100% before you touch sharpening. A photo can look fine when it fits the screen, then fall apart at full resolution. That’s where crunchy texture, halos, and noise tend to show up, especially in high-ISO shots.
Watch for halos and background noise
If the image starts to look too crisp, check the edges next. Fur and feathers are usually the first place problems show up. If you see halos, pull back Clarity or Sharpening until those edge artifacts disappear.
The background matters just as much as the animal. If a preset makes the background look grainy or rough, don’t lower sharpening across the entire photo right away. Use masking instead, so you can soften the parts that need it without losing detail on the subject.
Adjust masking before raising detail
Set the mask first, then add Texture or Sharpening. Lightroom’s subject selection can separate the animal from the background in seconds, which makes it much easier to add detail only where it helps.
That simple step keeps soft, out-of-focus areas smooth while the subject stays crisp.
Keep habitat colors believable
Greens, browns, and blues can get pushed too far fast in wildlife edits. The HSL panel gives you a clean way to pull those tones back. Move greens a bit toward yellow or olive, and keep blues cooler instead of making them too intense.
That way, the habitat still looks like a real place, not a color effect built around the animal.
Conclusion
Match your preset to your shooting conditions
Start by matching the preset to the file in front of you. Stronger clarity often works better for action shots. Gentler noise reduction tends to fit low-light files. Natural color is usually the safer pick for portraits, while mood grading can suit wider habitat scenes.
The best preset is the one that fits the subject, the light, and the file quality. After that, make your own adjustments by hand so the preset supports the image instead of taking over.
Use presets as a starting point, not a final edit
Use presets as a base, not the finished edit. Dial in exposure, contrast, highlights, shadows, texture, clarity, and sharpening by hand. Start with the Basic panel first, then add only the detail the image needs.
That approach helps you keep attention on sharp subject detail without rough-looking artifacts. It also helps you balance detail, masking, and noise reduction across the full edit. Presets.io offers Lightroom preset collections and installation guides for a faster starting point. Used this way, wildlife presets save time without sacrificing texture, color, or realism.
FAQs
How do I choose the right preset for my wildlife shot?
Pick based on the light and the subject in the frame. A Natural Warmth preset works well for golden-hour photos because it can bring out the look of fur and grass. A Moody Forest preset can be a good fit for high-contrast scenes with patchy, filtered light.
For nocturnal animals or low-light shots, choose presets that put more focus on noise reduction and shadow recovery. After that, adjust exposure, contrast, and white balance so the edit matches the photo.
Should I apply noise reduction before sharpening?
Yes. Apply noise reduction first so sharpening doesn’t make digital artifacts or sensor noise stand out even more. If you sharpen too early, wildlife photos can start to look grainy or a bit unnatural.
Clean up the image first, and you give yourself a smoother base to work from. Then sharpening can zero in on the details you actually want people to notice, like fur, feathers, and eyes. Presets.io offers tools that help balance these adjustments.
When should I use a brush preset instead of a global preset?
Use a brush preset when you want to edit just one part of the animal or scene. That could mean brightening or darkening a small area, adding texture to fur, or sharpening specific details.
Brush and gradient presets are made for local edits. Global presets work best when you want to set the overall look in one click, then tweak it from there.