

Table of Contents
- Automate Lightroom to Instagram Workflow
- How To Post To Instagram From INSIDE LIGHTROOM! Lightroom to Instagram
- Quick comparison
- 1. What automating Lightroom to Instagram looks like
- 2. Prepare Lightroom for Instagram-ready exports
- 3. Set up the automation trigger from Lightroom
- 4. Connect exports to Instagram posting and scheduling
- 5. Test the workflow, fix weak points, and keep it running
- FAQs
Automate Lightroom to Instagram Workflow
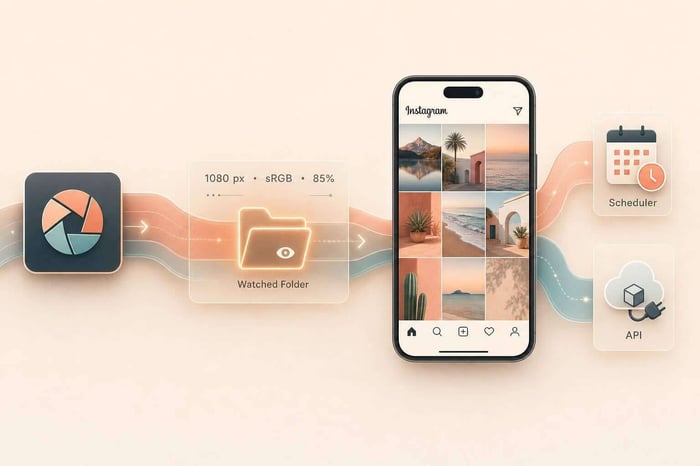
If I want less friction between editing and posting, I need one fixed path. The simplest setup is this: export every photo at 1,080 px, sRGB, and about 85% JPEG quality, send it to one folder or synced collection, then publish through Lightroom (LR) Mobile, Meta Business Suite, or the Instagram Graph API.
Here’s the short version:
- I keep one Instagram Queue in Lightroom.
- I save export presets for 1,080 x 1,350 and 1,080 x 1,080.
- I use a watched local folder or cloud-synced folder as the handoff point.
- I choose one posting path and stick with it:
- LR Mobile for low-volume manual posting
- Meta Business Suite for desktop scheduling
- API automation for near hands-off publishing
- I test with one image first before sending a full batch.
A few settings matter more than most. Instagram compresses uploads, so exporting at 80% to 90% quality often works better than 100%. And since Instagram added support for 3:4 posts in 2025 with 1,080 x 1,440 px, I need to check crop presets now and then so posts don’t get cut off in the feed.
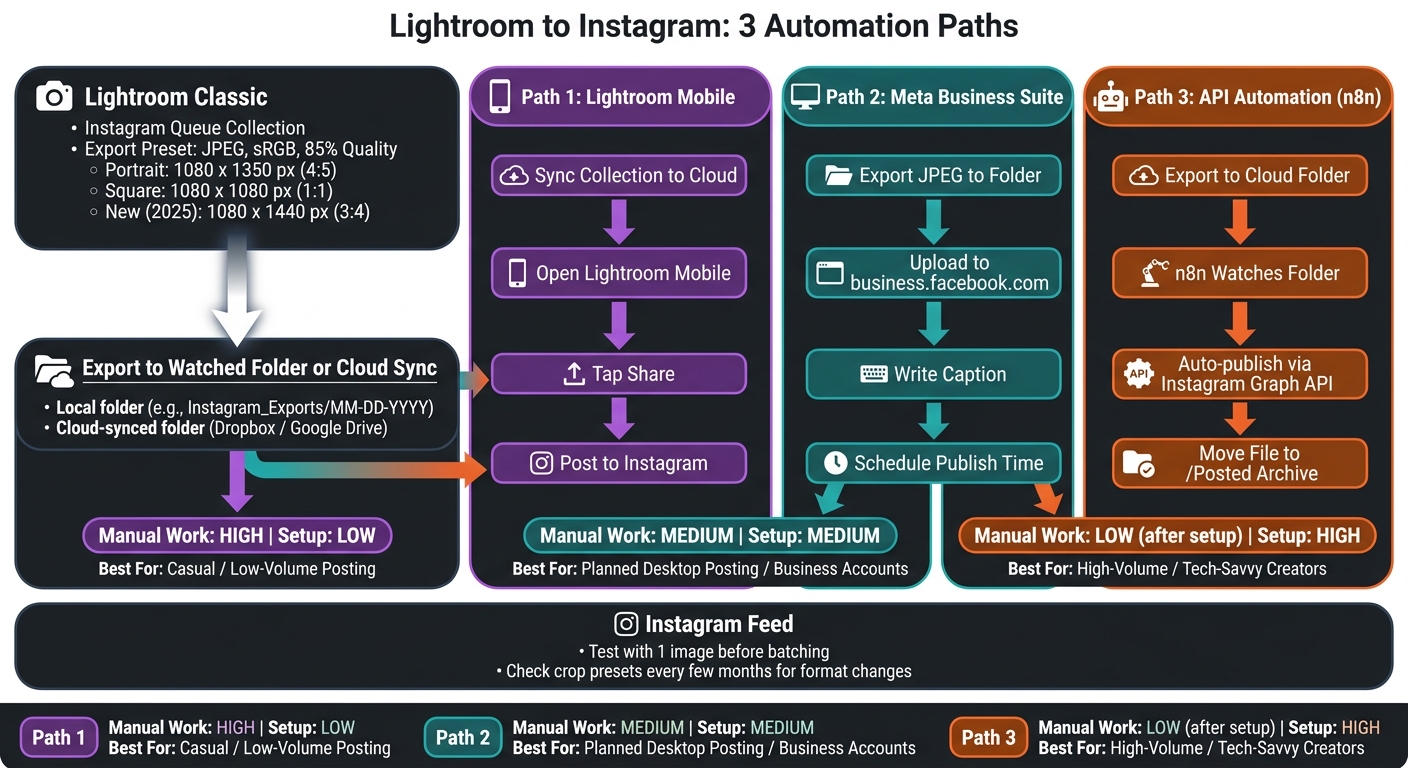
Lightroom to Instagram Automation Workflow: 3 Paths Explained
How To Post To Instagram From INSIDE LIGHTROOM! Lightroom to Instagram
sbb-itb-b27063b
Quick comparison
| Path | Best for | Manual work | Setup |
|---|---|---|---|
| Lightroom Mobile | Casual posting | High | Low |
| Meta Business Suite | Planned desktop posting | Medium | Medium |
| API workflow | High-volume publishing | Low after setup | High |
My takeaway: the best workflow does not remove judgment. It removes repeat work. Once the export settings, folder, and posting path are locked in, posting gets a lot less messy.
1. What automating Lightroom to Instagram looks like
At its core, this workflow is about removing the repetitive steps between finishing an edit and getting that photo published. The goal is to automate the repetitive steps, not the creative decisions.
A typical setup has three parts: a trigger, a processing stage, and a publishing stage. The trigger might be something simple, like adding a photo to a specific LR collection. The processing stage handles export settings. Then the publishing stage sends the image to a scheduling tool or pushes it through the Instagram Graph API. Once that flow makes sense, the next move is setting up Lightroom exports so they feed the system cleanly.
1.1 Choose the right workflow path
The best path depends on how often you post and how much control you want.
LR Mobile sync is the simplest route. You sync a collection from Lightroom Classic to the cloud, open LR Mobile on your phone, and publish each post from there. It’s free and doesn’t need any third-party tools.
Desktop scheduling tools like Meta Business Suite are a better fit for higher-volume accounts. You export images from Lightroom, upload them to the scheduler, write captions, and set publish times from your desktop. Meta Business Suite is free for Instagram Business and Creator accounts.
If you want a fully automated setup, API-based tools like n8n can watch a LR cloud folder and publish on their own through the Instagram Graph API. Setup takes more work up front, but once it’s in place, adding a photo to the queue can be the only thing left to do.
1.2 Decide how much automation you need
This choice usually comes down to three things:
- how much you post
- whether you want captions planned ahead
- how comfortable you are with technical setup
Legacy LR-to-Instagram plugins aren’t dependable, so don’t build your process around them.
Pick one path and stick with it. If you keep switching midway, the workflow gets slower instead of smoother.
| Workflow Path | Best For | Effort Level |
|---|---|---|
| Mobile Handoff | Low-volume users | Low (manual share) |
| Scheduled Posting | Business accounts, batch creators | Medium (semi-auto) |
| API Automation | High-volume, tech-savvy creators | High (initial setup) |
Use one of the three paths above. They’re the options that hold up today. After that, the next step is getting LR ready for steady Instagram-friendly exports.
2. Prepare Lightroom for Instagram-ready exports
Set Lightroom up so each export goes to the right place, uses the right size, and keeps the same overall look.
2.1 Build an Instagram collection and status system
Create an "Instagram Queue" collection in LR. Then use color labels to track where each image stands. Mark published images red so you don't post the same shot twice.
You can also draft captions in the Title and Caption metadata fields. That way, posting tools can pull from those fields later instead of making you retype everything. It gives you one staging area to manage, and it gives your automation one place to watch.
2.2 Use presets for a consistent feed look
A recognizable feed style usually starts with the same editing base across every post. Use one preset family so your grid feels consistent instead of all over the map.
Film-style presets can look great, but they also need clean export settings. Instagram's compression can flatten subtle tones, which is why those export choices matter so much. Clean export settings help preserve those edits after upload.
Presets.io offers LR presets in aesthetic, cinematic, vintage, and film-inspired styles, plus installation guides that make setup simple.
2.3 Save an Instagram export preset
Here's what those settings should look like:
| Setting | Recommended Value |
|---|---|
| File Format | JPEG |
| Quality | 85% |
| Color Space | sRGB |
| Portrait Dimensions | 1080 x 1350 px (4:5) |
| Square Dimensions | 1080 x 1080 px (1:1) |
| Output Sharpening | Off |
Export at 85% quality, not 100%. That helps you avoid triggering more aggressive Instagram compression.
Keep the color space set to sRGB. If you export in Adobe RGB or ProPhoto RGB, Instagram's conversion can shift colors.
Turn off output sharpening. Instagram already applies its own sharpening during upload, and stacking both can leave images looking harsh.
Save two presets:
- "Instagram Portrait – 1080x1350"
- "Instagram Square – 1080x1080"
If you want one default, go with portrait. It takes up more screen space in the feed, which gives each post a bit more visual weight.
With those export presets saved, the next move is sending the files to a watched folder or cloud sync path.
The Ultimate Presets.IO Bundle

$89.00
$1,662.00
The Ultimate Presets.io Bundle combines The Master Preset Bundle Volume I and The Master Preset Bundle Volume II into one complete collection, giving you every editing style you need in a single download. Save $37 vs. Volume I and II… continue reading
3. Set up the automation trigger from Lightroom
Once your export presets are saved, the next move is simple: pick the folder that will receive every export.
3.1 Export to a watched local or cloud folder
In LR Classic, open the Export dialog with Ctrl+Shift+E. Then set Export Location to a dedicated folder or to a subfolder inside a cloud-synced directory. A setup like Instagram_Exports with date-based subfolders such as MM-DD-YYYY works well.
If you export to a folder synced with Dropbox or Google Drive, those files can sync to your phone automatically. That synced file then becomes the starting point for your next posting step. In plain English: no more dragging files around by hand.
To avoid duplicate posts, move files into an Archive or Posted subfolder after a successful upload. That keeps the watched folder clean and gives your automation a clear signal about what has already been processed.
This folder is your handoff point between editing and posting or scheduling.
3.2 Compare trigger methods before you commit
Not every trigger method fits the same workflow. Some give you more control. Others save more time. The smart move is to pick one path first, then build the rest of the workflow around it.
| Trigger Method | Level of Automation | Setup Complexity | Best Use Case |
|---|---|---|---|
| Local Export Folder | Medium (Manual Handoff) | Low | Desktop users who prefer manual control and batch organization |
| Cloud-Synced Folder | Medium–High | Medium | Handoff from desktop editing to mobile posting or third-party schedulers |
| API/Webhook (n8n) | High (Fully Automated) | High | Professional creators needing scheduled posts with AI-generated captions |
For most photographers, a cloud-synced folder gives the best balance. It cuts out extra file-transfer steps, skips the hassle of API credentials or webhooks, and still lets you post manually when you want to.
Direct-publish plugins are unreliable, so stick with folder-based or API-based workflows instead.
Once exports start landing in the right folder, you can connect that folder to the posting or scheduling step.
4. Connect exports to Instagram posting and scheduling
Once Lightroom exports land in your watched folder or synced library, you can send them out through LR Mobile, Meta Business Suite, or a cloud automation tool.
4.1 Publish from Lightroom Mobile for a simple workflow
If your LR Classic collection is synced to the cloud, those images are already sitting inside the LR Mobile app on your iPhone or Android device. This only works if the photo has already synced to LR Mobile. Open the image, tap Share, and send it straight to Instagram. You’ll still write the caption and publish by hand, but you skip the file transfer step entirely.
This is the fastest manual handoff from Lightroom to Instagram. If you want scheduled publishing instead of manual sharing, switch to Meta Business Suite.
4.2 Schedule Instagram posts with Meta Business Suite
For planned publishing, Meta Business Suite at business.facebook.com gives you a simple desktop scheduler, and it’s free. Use the same export folder you set up earlier so the process stays consistent. Upload your images, write captions, and choose exact publish times for audiences across multiple U.S. time zones.
Export JPEGs in sRGB and crop to 4:5 before upload so your composition stays intact. If you want a more hands-off setup, the next path is cloud automation.
4.3 Compare posting paths by effort and control
Each option comes with its own trade-off. Some are faster to set up. Others cut down the manual steps after LR export.
| Path | Best For | Effort |
|---|---|---|
| Lightroom Mobile | Travelers and casual daily posters | Low - manual share per image |
| Meta Business Suite | Portfolio and small business accounts | Medium - manual export and upload |
| Cloud automation | High-volume and tech-savvy photographers | High - API tokens and technical setup |
After you choose a path, test one post first before batching the rest.
5. Test the workflow, fix weak points, and keep it running
Before you run a full batch, send one image through the whole workflow first. It’s a small step, but it can save you from a messy batch of bad crops, wrong folders, or failed posts.
5.1 Run a small end-to-end test before full use
Start with a single photo. Export it from LR with your saved Instagram preset, then make sure it lands in the right folder or queue. After that, check the image on your phone for color, sharpness, and crop. Desktop and mobile screens don’t always show the same thing, so this extra check is worth doing.
If you’re using an automation tool like n8n, set a limit so the first run processes only one image instead of the full queue. When that post looks right and reaches the right destination, check your log and make sure the posted timestamp and post ID update as expected.
Once the first post passes, leave those settings alone. Only revisit them when Instagram changes its format rules.
5.2 Keep presets, export settings, and posting rules up to date
After the test run is working, maintenance is the main repeat task.
Instagram’s format rules shift over time. In mid-2025, Instagram added support for the 3:4 aspect ratio (1,080 x 1,440 px), and profile grids started showing 4:5 thumbnails instead of squares. If your Lightroom crop presets still use older settings, your images may get cropped in ways you didn’t expect.
Take a look at your export settings and crop presets every few months so they stay in line with any new format changes Instagram rolls out.
FAQs
Which Lightroom-to-Instagram workflow is best for me?
The right workflow comes down to two things: how comfortable you are with the tech and how often you post.
If you want a mostly hands-off setup, an n8n workflow is a solid pick. It can pull queued photos, generate captions from metadata, and publish them through the Instagram Graph API.
If you'd rather stay in control and post things yourself, Lightroom Mobile is the simplest route. For desktop users, custom export presets make it easier to keep image sizing consistent, like 1,080 pixels on the short edge.
Why export at 85% JPEG quality instead of 100%?
Because 85% JPEG quality tends to be the sweet spot for Instagram. It gives you a solid balance between image detail and file size.
At 100% quality, the file is often bigger than it needs to be. That can push Instagram to compress it harder after upload. Exporting at 85% helps keep the file lighter, which can cut down on extra compression and do a better job of preserving sharpness and clarity.
How do I prevent bad crops or duplicate Instagram posts?
Set your images to a 4:5 aspect ratio in Lightroom before exporting. That lines up with Instagram’s format and helps you avoid awkward auto-cropping.
To avoid duplicate posts, use an automated workflow that marks each item as posted by saving a timestamp and media ID in your data source. Then your system only processes rows that haven’t been posted yet.