

Table of Contents
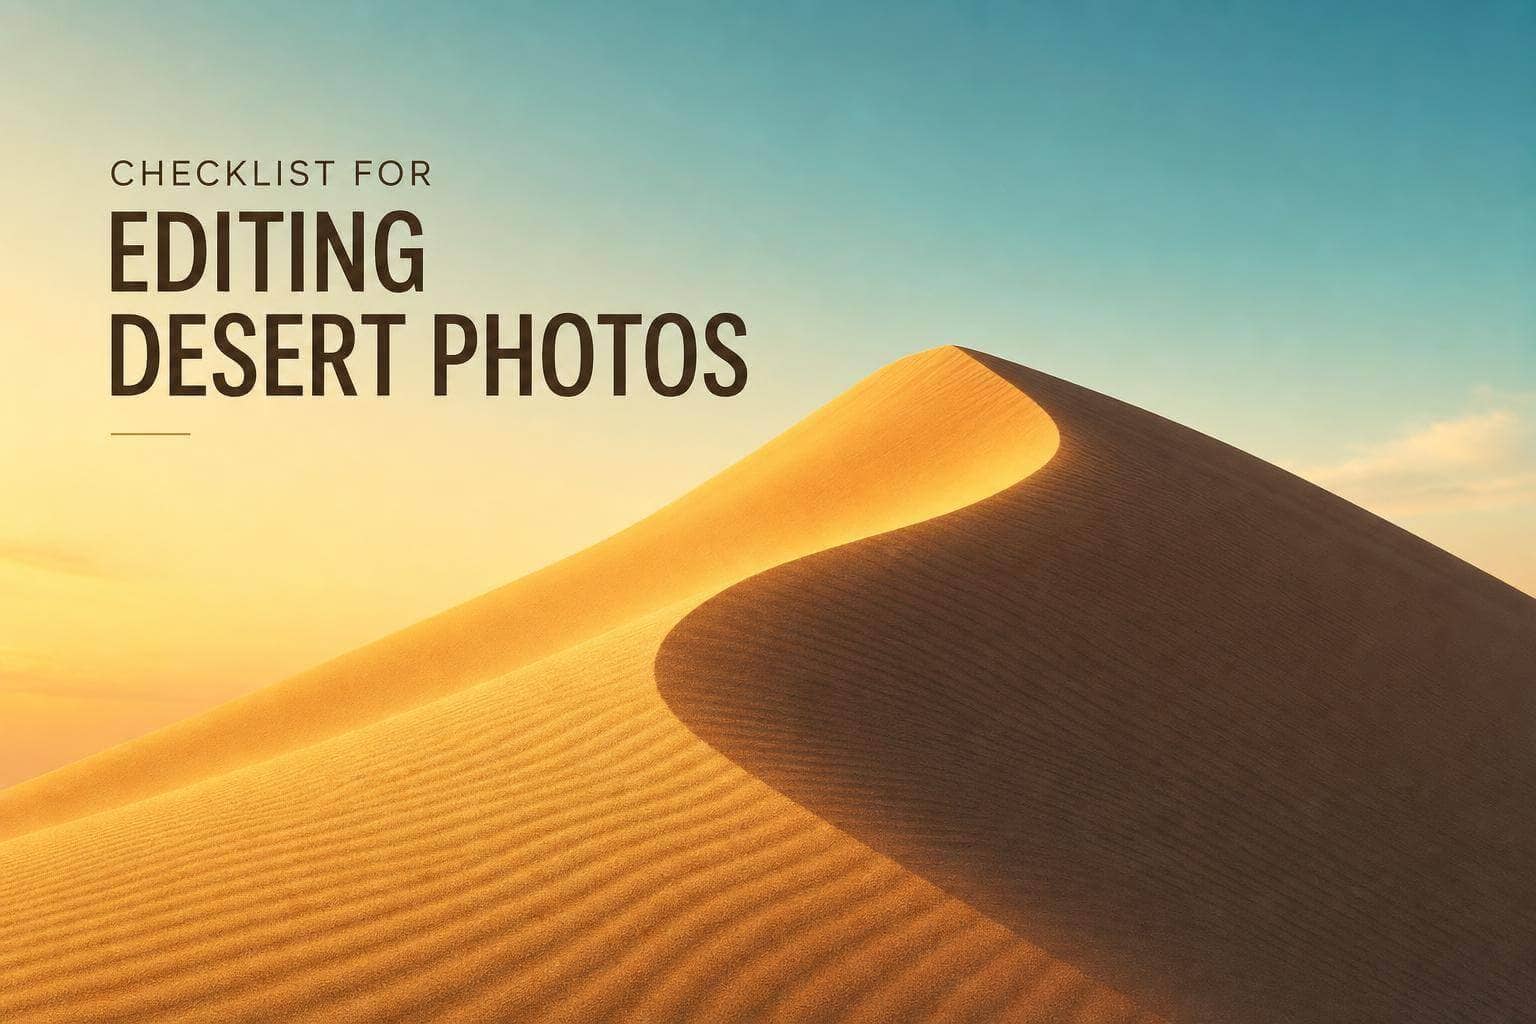
- Checklist for Editing Desert Photos
- Check 1: Base Preset, Profile, and Histogram
- Check 2: Exposure and Tonal Balance
- Landscape Photography Editing | Sand Dune Lightroom Tutorial
- Check 3: White Balance and Desert Color Control
- Check 4: Texture, Clarity, Dehaze, and Detail
- Final Desert Photo Editing Checklist
- FAQs
Checklist for Editing Desert Photos
Desert photos usually fail in the same 4 places: clipped sand, blocked shadows, bad white balance, and too much texture work.
If I want a clean desert edit in Lightroom, I check the file in this order:
- Base setup: profile, preset, and histogram
- Tone: exposure, highlights, whites, shadows, and blacks
- Color: white balance, oranges, yellows, and shadow color
- Detail: texture, clarity, dehaze, sharpening, horizon, and dust spots
That order matters. If I skip ahead, I can end up fixing the same photo twice.
A few numbers help set the edit:
- Start white balance around 5,200K to 5,500K in bright desert light
- Keep an eye on both ends of the histogram
- Use light sharpening masks so skies stay smooth
- Save local masks until after global tone fixes
Here’s the short version: set the base first, protect highlights and shadows, keep sand color believable, and use detail tools with restraint. Then I do a last pass for lens corrections, cleanup, crop, and gallery match before export.
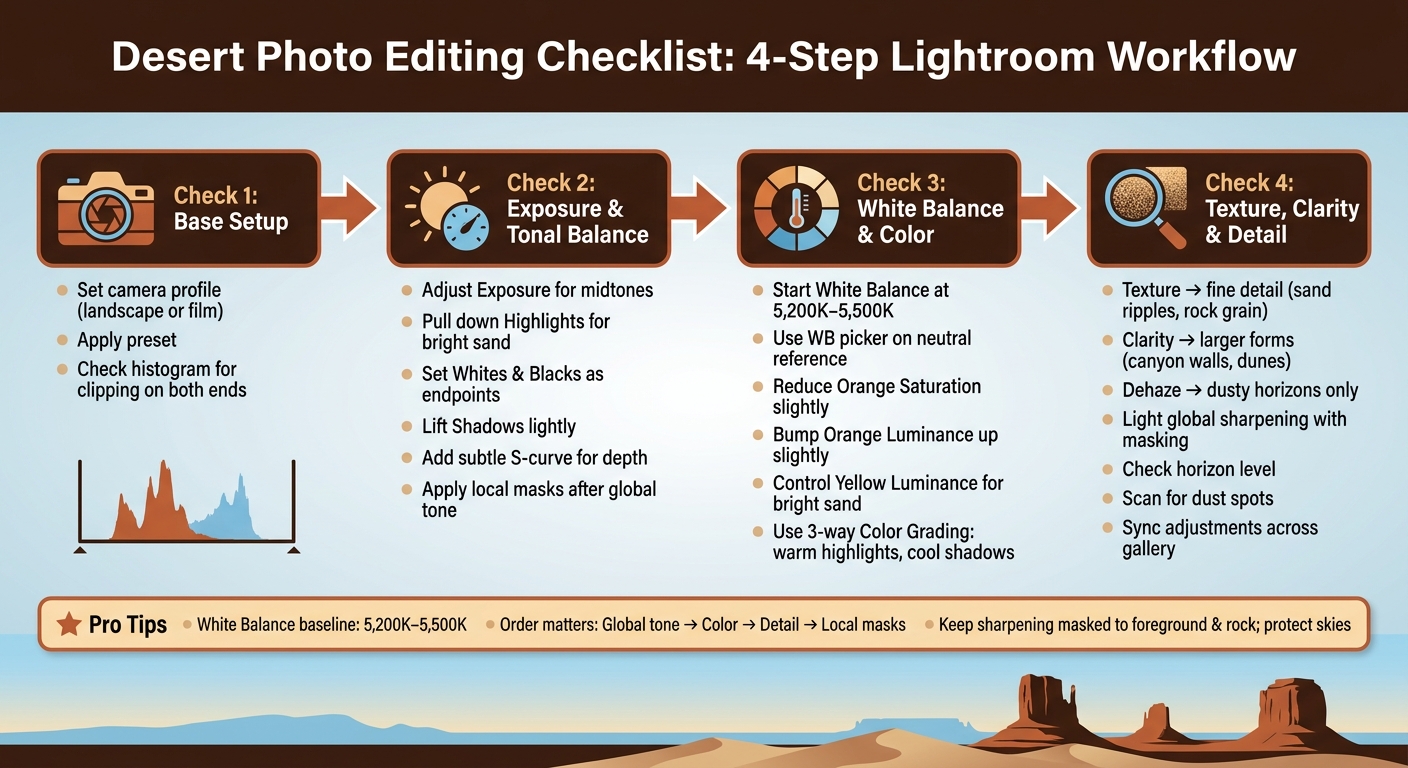
Desert Photo Editing Checklist: 4-Step Lightroom Workflow
Check 1: Base Preset, Profile, and Histogram
Set the Profile and Apply the Preset
Start with the profile before touching the sliders. The profile sets the base color and contrast for the desert scene, so it shapes everything that comes after. For desert landscapes, a landscape or film profile usually gives you a balanced starting point before you apply a preset.
Then apply your preset and fix White Balance and Exposure by hand. A desert preset should support warm sand and rock tones without pushing them too far. If the sand starts looking unnaturally orange, the preset is doing too much.
With the preset in place, check the histogram for clipped sand and lost shadow detail.
Check for Highlight and Shadow Clipping
Look at the histogram first. Bright sand and shaded rock are usually the first trouble spots. Trust the histogram, not the camera meter.
Check the right edge for highlight clipping. Bright sand, sunlit rocks, and sky detail can clip to white, which wipes out sand texture. Then check the left edge for crushed shadows. Shaded rock formations are a common problem area, and crushed shadows can make the photo feel too heavy while hiding detail.
A contrast-heavy preset can push both ends too far. If either side is clipping, fix exposure now before moving into the tonal work in Check 2. That keeps the rest of the edit clean.
If the histogram shows detail on both ends, move on to exposure and tonal balance.
sbb-itb-b27063b
Check 2: Exposure and Tonal Balance
Adjust Exposure, Highlights, Whites, Shadows, and Blacks
Start with Exposure to set the midtones in the scene. Then pull down Highlights to bring back bright sand and harsh skies. Use Whites and Blacks as your endpoints so the image keeps clean boundaries without stripping texture from the dunes. Lift Shadows with a light touch to bring out detail in rocks. Push Shadows too far, though, and the whole scene starts to look flat and unnatural.
Refine Contrast with the Tone Curve and Local Masks
Once the Basic panel is in place, use a subtle S-curve to add depth and separation across dunes and rock faces.
Save local masks for after the global tones are done. That order matters. Then use masks to fix problem spots, like a Linear Gradient for a bright sky or a Radial Mask or Brush to isolate a dune or rock face.
With tone balanced, move to white balance and desert color control.
Landscape Photography Editing | Sand Dune Lightroom Tutorial
Check 3: White Balance and Desert Color Control
After tonal balance, dial in color before you touch texture and detail.
Set White Balance for Realistic Sand and Rock
The biggest desert editing mistake is pushing color too far. Sand and rock already run warm, so even a small move on the Temperature slider can turn the whole frame into an orange mess.
Start with a white balance temperature between 5,200K and 5,500K as a baseline for bright desert light. That gives you a solid place to start before any creative grading. If you have a neutral reference in the frame - white clothing, a gray rock, or a cloud - use the white balance picker first to set believable whites.
Handle white balance before creative grading so the preset doesn't push the warmth too hard.
Fine-Tune HSL and Color Grading
Once white balance is set, head to the HSL panel and start with Orange. Pull Orange Saturation down a bit and bump Orange Luminance up slightly to keep the sand warm while still showing surface detail.
Then use Yellow Luminance to control bright sand and stop highlights from looking harsh.
If you want more depth without cranking saturation, use three-way Color Grading to warm the highlights and cool the shadows. That gives the scene more dimension through temperature contrast, not heavier color.
Pick a realistic WB first. Then use HSL and color grading to fine-tune warmth, contrast, and mood.
Once color is in place, move on to texture, clarity, dehaze, and sharpening.
Check 4: Texture, Clarity, Dehaze, and Detail
Once color is in place, move on to detail control. This is where you shape sand ripples, rock grain, and far-off ridges without making the file look overcooked.
Sharpen Sand Ripples, Rock Detail, and Distant Haze Without Overdoing It
Texture, Clarity, and Dehaze each work at a different scale. Texture affects fine patterns like sand ripples, rock grain, and mud cracks without changing large contrast areas. Clarity works more through the midtones, adding structure to bigger shapes like canyon walls or the curved edge of a dune. Dehaze helps with atmospheric scatter, so it's best for dusty horizons or distant ridges that look washed out in midday heat.
A simple way to think about it:
- Use Texture for fine detail
- Use Clarity for larger forms
- Use Dehaze only when you need to cut haze
Finish with Sharpening, Crop, and Set Consistency
After detail work, take a minute to check horizon level and dust spots. Keep global sharpening on the light side. In Lightroom, use masking so sharpening hits only high-detail parts like foreground sand and rock faces, while clear skies and soft gradients stay smooth. If you push sharpening into a clean blue sky, noise shows up fast.
Before export, check the horizon again. Tripods can sink into soft sand, and even a small tilt stands out in a wide desert scene. Then scan for sensor spots. Desert wind drives dust into camera bodies, and those spots become easy to see against bright sand and open sky.
If you're editing a full set from the same shoot, sync your core adjustments across the images so the set keeps the same look.

The Ultimate Presets.IO Bundle
$89.00
$1,662.00
The Ultimate Presets.io Bundle combines The Master Preset Bundle Volume I and The Master Preset Bundle Volume II into one complete collection, giving you every editing style you need in a single download. Save $37 vs. Volume I and II… continue reading

Final Desert Photo Editing Checklist
Use this last pass before export.
| Step | What to Check |
|---|---|
| Base preset and profile | Make sure the right camera profile is applied. Your preset should improve the photo, not fix a bad starting point. |
| Highlight and shadow protection | Check that highlights and shadows aren’t clipping. The histogram should look balanced. |
| White balance | Keep white balance in a believable daylight range. Sand and rock should look natural. |
| Color balance | Oranges and yellows should feel natural. Shadows should stay neutral, not blue or muddy. |
| Texture and detail | Apply selective sharpening to the foreground and rock. Keep skies and smooth surfaces clean. |
| Lens corrections | Fix distortion and vignetting before you make stylized adjustments. |
| Cleanup | Remove dust spots. Clean up footprints and other distractions. |
| Gallery consistency | Make sure color temperature, contrast, and exposure line up across the full gallery. |
If every line checks out, export the set.
FAQs
What if my desert photo still looks too orange?
If your desert photo looks too orange, head to Lightroom’s HSL panel. It lets you tweak a single color range without changing the entire image. A small move usually does the trick: lower orange saturation by 10% to 15% to tone down the color cast.
You can also nudge the Temperature slider in the Color panel to fix white balance and keep the tones looking natural.
When should I use Texture, Clarity, or Dehaze?
Use Texture, Clarity, and Dehaze to bring out the detailed, rugged look of desert landscapes. These tools are great for making sand dune ripples, rock formations, and other small surface details stand out.
That said, a light touch usually works best. For example, increasing Clarity by +5% to +20% can add depth and a more lifelike feel without making the photo look harsh or overprocessed.
Should I edit one photo first before syncing a full set?
Yes. Editing one representative photo first is a smart way to work.
Start by applying your preset to a single image. Then tweak the exposure, white balance, and contrast until the photo looks the way you want.
Once that image feels right, sync those settings to similar photos to keep the look consistent. After that, go back and fine-tune individual shots where needed.