Table of Contents
- Checklist for Cinematic Wedding Photo Editing
- How to Edit Cinematic Wedding Photos in Lightroom: A Pro Tutorial
- Preparation Steps
- Color Grading for a Cinematic Wedding Look
- Contrast, Exposure, and Dynamic Range Adjustments
- Maintaining Consistency Across the Album
- Final Touches and Export Settings
- Summary
- FAQs
Checklist for Cinematic Wedding Photo Editing
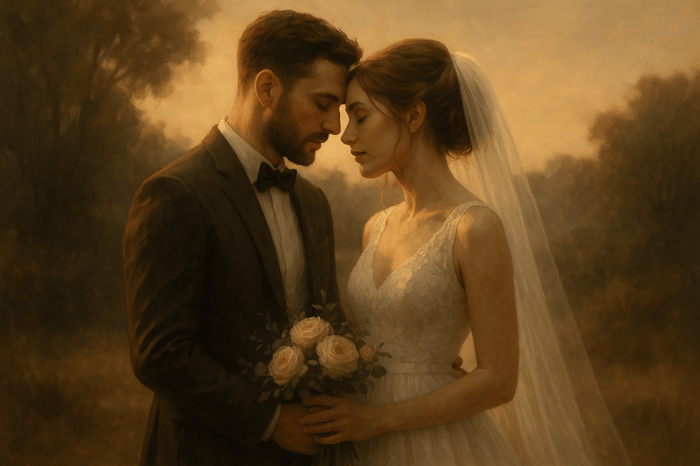
Cinematic wedding photo editing transforms ordinary wedding photos into film-like masterpieces. The process emphasizes dramatic color grading, rich contrasts, and moody tones to create a storytelling experience that feels straight out of a movie. Here's a quick breakdown of the process:
- Organize Files: Use clear folder structures (e.g., “MM/DD/YYYY_EventPhase”) and back up files using the 3-2-1 rule (3 copies, 2 media types, 1 offsite).
- Calibrate Your Monitor: Use tools like X-Rite i1Display to ensure accurate colors, saving time and improving precision.
- Cinematic Presets: Choose presets that fit the wedding's mood (e.g., warm tones for outdoor settings, cooler tones for urban scenes). Presets.io offers collections priced between $19 and $49.
- Color Grading: Adjust white balance, refine individual color channels, and apply split toning to highlights and shadows for a cinematic look.
- Dynamic Range: Fine-tune contrast, exposure, and tone curves to add depth while preserving details in highlights and shadows.
- Consistency: Use batch editing to maintain a unified style across the album, then refine individual images for key moments.
- Final Touches: Remove distractions, add subtle grain and vignettes, and prepare files for print (300 dpi, sRGB) or web (72 dpi, 2048px width).
This step-by-step approach ensures polished results while keeping the editing process efficient. Tools like Presets.io’s Cinematic Bundle ($37.00) can streamline workflows and help achieve a professional finish.
How to Edit Cinematic Wedding Photos in Lightroom: A Pro Tutorial
Preparation Steps
Getting your workspace ready is key to saving time and ensuring polished, professional edits. Here’s how to set yourself up for success with your cinematic wedding edits.
Organize and Back Up Files
Start by sorting your RAW images into folders labeled by event phases, such as "11/03/2025_Smith-Jones_Wedding/Getting Ready", "Ceremony", or "Reception." Using the MM/DD/YYYY format in your folder names keeps everything tidy and easy to navigate. A consistent naming convention - like "11/03/2025_Smith-Jones_Ceremony" - is a lifesaver when handling thousands of images or collaborating with a second shooter. This system eliminates confusion and keeps your workflow smooth.
Don’t forget to back up your files right away. The 3-2-1 backup rule is a trusted standard: keep three copies of your files, store them on two different types of media, and ensure one copy is offsite (like in the cloud). External hard drives paired with a cloud storage service provide the reliability needed to safeguard wedding memories. In fact, over 80% of professional wedding photographers rely on digital backup systems to prevent data loss and streamline their process.
Calibrate Your Monitor
To ensure accurate colors, calibrating your monitor is a must. Use tools like the X-Rite i1Display or Datacolor Spyder to set your monitor to sRGB. Regular calibration - once a month or before major projects - keeps your colors consistent across devices and prints.
A 2023 study revealed that using calibrated monitors can reduce color correction time by up to 30%, making your editing process faster and more precise. This step is crucial for achieving the cinematic wedding tones that define your work.
Select Cinematic Wedding Presets
Once your files are organized and your monitor is calibrated, it’s time to choose your cinematic wedding presets. These presets act as a professional starting point, giving you a cohesive look while leaving room for creative tweaks. Presets.io offers a variety of collections tailored for cinematic wedding, film-inspired, and artistic styles. Their presets work seamlessly with tools like Lightroom, Capture One, and Luminar NEO, helping you maintain consistency throughout the album.
Think about the wedding’s mood and setting when selecting presets. For instance, a rustic outdoor wedding might call for warm, earthy tones, while a sleek city ceremony might look better with cooler, moodier presets. Test a few options on sample images to find the best fit before diving into the full edit.
Presets from Presets.io, typically priced between $19 and $49, provide a solid foundation for your edits. With frequent updates and easy installation guides, they keep your workflow efficient without compromising your creative vision.
Color Grading for a Cinematic Wedding Look
Once you've got your monitor calibrated and your presets selected, the next step is color grading. This process transforms wedding photos into cinematic wedding stories by tweaking colors, contrast, and tones to create a mood while keeping the natural beauty intact. Start by perfecting the white balance - it sets the stage for all the color adjustments to come.
Adjust White Balance
White balance is the cornerstone of cinematic color grading. Begin by using the eyedropper tool to establish a neutral base. From there, adjust the temperature (around 6,500K works beautifully for golden hour) and tint to shape the mood while ensuring skin tones stay natural.
For those stunning golden hour shots, nudging the temperature slider up adds warm, romantic tones that make sunset portraits glow. On the other hand, for cloudy or indoor settings, lowering the temperature can bring in cooler, bluish hues that feel natural yet add depth. If you spot any green or magenta tints, the tint slider can help you correct them quickly.
Many photographers use a gray card during the ceremony to nail custom white balance settings. This move not only saves time during editing but also ensures consistent and accurate colors throughout the album. Once your white balance is on point, you can move on to refining individual color channels for a cohesive look.
Fine-Tune Color Channels
The HSL (Hue, Saturation, Luminance) panel is where the magic happens. Start by focusing on reds and oranges to maintain realistic skin tones. If you notice any distracting green casts, reduce their saturation. For a more cinematic wedding feel, shift blue tones toward teal to add depth and sophistication.
Always compare before-and-after versions to ensure consistency across the entire album. Use the HSL panel to subtly tweak background colors while keeping the focus on your subjects. Often, the smallest adjustments can make the biggest impact.
Add Split Toning to Highlights and Shadows
Split toning is the finishing touch that gives your photos that polished, cinematic wedding feel. By applying different tones to highlights and shadows, you can create depth and reinforce the scene's mood.
A classic approach is to pair warm tones in the highlights with cooler tones in the shadows. In Lightroom's Color Grading panel, try setting highlights to a hue of 45 with 20% saturation and shadows to a hue of 200 with 15% saturation. This creates the popular teal-orange look seen in many films.
The key is balance - neither highlights nor shadows should overpower the other. For outdoor ceremonies, warm highlights can enhance the romantic feel, while cooler tones might suit indoor receptions for a more elegant vibe.
Split toning also serves as a storytelling tool. Combining warm highlights with cool shadows can evoke nostalgia or lend a dreamy, timeless quality to your photos. Start with subtle adjustments and tweak the intensity until it feels just right.
If you're looking for a shortcut, check out Presets.io for cinematic preset collections that include split toning adjustments to give your edits a head start.
Contrast, Exposure, and Dynamic Range Adjustments
Fine-tuning contrast and exposure is essential for bringing depth and clarity to your wedding photos. These adjustments can transform your images, giving them that cinematic wedding feel that draws viewers in, much like a movie scene. Here’s how to optimize exposure, use the tone curve, and set precise black and white points for a polished, professional look.
Optimize Contrast and Exposure
Before diving into adjustments, take a moment to study your histogram. This tool is your roadmap, showing the tonal distribution in your image and helping you avoid losing details in shadows or highlights. For cinematic wedding photography, aim for a balanced histogram with soft transitions at both ends - harsh clipping can make your edits feel less refined.
Start with the Exposure slider to adjust the overall brightness and bring out subtle details. Then, move to the Contrast slider, but tread lightly - cinematic wedding styles typically favor a softer contrast compared to commercial edits. This creates smoother tonal transitions that mimic the look of film.
Next, refine the Highlights and Shadows sliders. Lowering the Highlights helps recover bright details, while raising the Shadows reveals textures in darker areas, like the groom’s suit or dimly lit reception corners. Keep toggling the before/after view to ensure your changes enhance the image without going overboard.
Finally, use the Whites and Blacks sliders to define the tonal extremes. As you drag these sliders, watch for clipping indicators to maintain detail in both the brightest and darkest areas. This step ensures your image has depth and avoids losing critical information.
Use the Tone Curve for Cinematic Effects
Once you’ve adjusted contrast and exposure, the tone curve becomes your secret weapon for adding cinematic flair. This tool allows for precise control over tonal regions, giving your edits depth and character that basic sliders can’t achieve.
For a vintage, faded look, slightly lift the black point by dragging the bottom-left corner of the curve upward. Then, create a soft S-curve with gentle anchor points to add subtle contrast. If you’re going for a punchier, more dramatic style, deepen the shadows in the lower curve and brighten the highlights in the upper section to form a more pronounced S-curve. This approach works beautifully for reception shots or images with dramatic lighting.
The key is to keep it subtle. Cinematic editing isn’t about drastic changes - it’s about crafting a mood with tonal shifts that feel deliberate and natural. Start with small adjustments and build gradually until you achieve the effect you’re after.
Set Black and White Points
Defining your black and white points is crucial for maximizing dynamic range and ensuring your photos don’t look flat. These points establish the darkest and brightest values in your image, adding depth and contrast.
When setting the black point, ensure that dark areas retain detail. This is especially important in wedding photography, where textures in dark suits, evening gowns, or shadowy venues need to be preserved. Avoid turning these areas into pure black voids.
For the white point, pay close attention to bright elements like the bride’s dress or scenes with strong lighting. The goal is to maintain the brilliance of these whites without losing detail to overexposure. Proper adjustment ensures the dress remains luminous and textured, rather than blending into a featureless white patch.
Zoom in on key areas - like the bride’s dress, the groom’s suit, or backlit scenes - to verify that textures and details are intact. Your histogram should show a full tonal range without significant clipping at either end.
To maintain consistency across your wedding album, consider using batch editing tools to apply baseline adjustments to similar images. Many photographers rely on custom presets for this - Presets.io offers collections inspired by cinematic and film styles, complete with pre-configured contrast and exposure settings. These presets can serve as a strong foundation, which you can then fine-tune to match each scene’s unique mood.
The Master Preset Bundle

$57.00
$672.00
Get All High-Quality Preset Collections For Just $57. Best Value! Every Style. Every Platform. One Download Get 56 high-quality Presets.io collections in one complete bundle — designed to help you edit faster, stay consistent, and get professional-looking results in seconds.… continue reading
sbb-itb-b27063b
Maintaining Consistency Across the Album
Crafting a cinematic wedding album that feels cohesive requires careful planning and attention to detail. Consistency in editing plays a vital role in creating a polished and unified visual story. From the ceremony to the reception, seamless editing transforms individual moments into a flowing narrative, giving the album a cinematic quality.
Think of your wedding album as a movie - each photo is a scene, and together they tell a complete story. To achieve this, every image should complement the others while maintaining the mood you've established. This approach not only elevates the quality of your work but also strengthens your reputation as a photographer who delivers a premium experience for couples.
By focusing on tonal adjustments and contrast, you can ensure that individual edits blend into a unified cinematic experience.
Use Batch Editing for Uniformity
Batch editing is a powerful tool for maintaining consistency across similar images. It allows you to apply settings like color grading, contrast, and exposure adjustments to groups of photos with similar lighting and scenes, saving time while ensuring a cohesive style throughout the album.
Start by selecting cinematic presets that work well across a variety of lighting conditions and scenes. Apply these presets to all images during import, then fine-tune individual photos as needed. Tools like Presets.io offer collections designed for cinematic and film-inspired styles, providing a reliable foundation for your edits. Their presets can be tailored to different wedding scenarios, helping you maintain a consistent look.
For the best results, apply your chosen preset to batches of similar images and use editing software's sync function to replicate adjustments across the group. In Lightroom, for example, you can sync settings like exposure, color grading, and tone curves with ease. This ensures your cinematic style - whether it’s lifted blacks, warm highlights, or film-inspired tones - remains consistent across hundreds of images.
When dealing with challenges like varying lighting conditions or mixed camera settings, group images with similar characteristics for batch editing. Use masks to fine-tune specific areas and develop a signature color grading style that can be customized as needed. For outdoor ceremonies transitioning between bright sunlight and shaded areas, create separate batches and adjust your base settings while keeping the overall aesthetic intact.
Review and Refine Individual Images
Batch editing sets the stage, but it’s the individual refinements that truly bring an album to life. After applying batch edits, review each image to fine-tune details like exposure, color balance, and distractions that batch processing might miss. This step ensures every photo aligns with the cinematic story you’re telling.
Pay special attention to key moments - like the first kiss or the ring exchange - that deserve extra care. Subtle adjustments, such as targeted exposure tweaks or selective color grading, can amplify the emotional impact of these moments. This refinement process distinguishes professional work from automated edits.
Use side-by-side comparison tools in your editing software to check for consistency across the album. Toggle between consecutive images to spot differences in color temperature, contrast, or mood. If an image feels out of place, make targeted adjustments to bring it in line with the overall aesthetic.
Transitions between different parts of the day - like moving from outdoor portraits to dimly lit reception shots - should feel smooth and intentional. Adjust the intensity of your cinematic preset or modify specific color channels to ensure these shifts enhance the album’s flow rather than disrupt it.
Experts recommend starting with batch edits to establish consistency, followed by individual refinements to highlight unique moments. This balanced approach ensures that while the album maintains a cohesive cinematic look, each significant moment still gets the attention it deserves, enhancing its emotional resonance.
Final Touches and Export Settings
The finishing touches are what transform your edits into a polished, professional product, ready for both print and digital formats. These final steps ensure your wedding photos retain their cinematic quality, no matter how or where they’re viewed. Paying close attention to this stage can make all the difference in client satisfaction - and even lead to valuable referrals.
Here’s how to refine your images and prepare them for export.
Retouch and Remove Distractions
Retouching is all about keeping the focus on the story while removing anything that might pull attention away. Start by zooming in to 100% in your editing software to spot small imperfections. These could include blemishes, stray hairs, or sensor spots - anything that subtly detracts from the cinematic feel.
Use tools like the spot removal feature in Lightroom or the healing brush in Photoshop to clean up minor distractions. For more significant issues, such as unwanted background elements or temporary objects in the frame, the clone stamp tool can work wonders while maintaining the natural flow of the scene.
For close-up portraits, advanced techniques like frequency separation can help refine skin tones without losing texture. This method separates color from detail, making it easier to smooth out imperfections while keeping the image realistic. To avoid over-editing, use adjustment layers for targeted corrections rather than permanent, destructive edits. Always compare the before-and-after views to ensure your changes look natural and maintain the cinematic aesthetic.
Don’t forget the details - ring shots, for instance, should be free of distractions. Correct small imperfections like makeup smudges or wrinkles in the dress to ensure every element looks flawless.
Add Final Touches
Enhancements like grain and vignettes can elevate the cinematic mood of your photos. Film grain, for instance, adds a subtle texture reminiscent of analog photography, giving your images a timeless warmth. Apply it sparingly to avoid overwhelming the photo - just enough to add character.
Vignettes are another powerful tool. A soft vignette subtly draws the viewer’s eye to the center of the frame, naturally focusing attention on your subjects. When done right, it enhances the romantic atmosphere without looking artificial.
If you’re looking for tools to streamline this process, Presets.io offers specialized cinematic and vintage film collections. Their Cinematic Bundle, currently priced at $37.00 (discounted from $432.00), includes presets with professionally calibrated grain and vignette settings. These can help you fine-tune the effects to match your creative vision.
Keep the venue and lighting in mind when applying these effects. Outdoor ceremonies bathed in natural light might call for lighter grain and minimal vignetting, while indoor reception shots could benefit from more dramatic enhancements to emphasize a moody ambiance.
Once these final touches are complete, it’s time to configure your export settings.
Export for Print and Web
Export settings are crucial for preserving image quality, whether your photos are destined for large prints or social media. The right specifications ensure your clients see the best version of your work, no matter the format.
For print delivery in the U.S., export your images as JPEG files using the sRGB color profile at 300 dpi. For an 8x10-inch print, set the dimensions to 2400x3000 pixels. The sRGB color profile ensures consistent color reproduction across different printers and screens.
For web delivery, optimize your images by exporting at 72 dpi with a maximum width of 2048 pixels. Adjust compression settings to balance file size and image quality, so your photos load quickly without sacrificing visual appeal.
| Delivery Format | Resolution | Color Profile | File Format | Dimensions |
|---|---|---|---|---|
| 300 dpi | sRGB | JPEG | 2400x3000 px (8x10") | |
| Web/Social | 72 dpi | sRGB | JPEG | 2048px max width |
Before finalizing, preview your exported images on various devices to ensure your cinematic edits look consistent across screens. According to industry surveys, over 80% of wedding photographers use batch processing to save time and maintain consistency. Lastly, double-check file naming conventions to keep your work organized and SEO-friendly.
Summary
Editing cinematic wedding photos demands a thoughtful, step-by-step approach that includes preparation, color grading, managing dynamic range, and applying finishing touches. This process not only ensures a polished, film-inspired aesthetic but also keeps your workflow efficient - something every client appreciates.
The journey starts with preparation. This includes organizing your files, calibrating your monitor for accurate colors, and selecting cinematic presets that align with your vision. The heart of the cinematic look lies in color grading, which involves adjusting white balance, refining color channels, and using split toning to enhance highlights and shadows. To achieve the depth and richness often associated with film photography, dynamic range optimization is key. This step focuses on tweaking contrast, fine-tuning tone curves, and setting proper black and white points.
Maintaining consistency across an entire wedding album is crucial, and batch editing can save both time and effort. Tools like Presets.io's Cinematic Bundle make this easier. Priced at $37.00, this collection offers expertly calibrated presets for color grading, contrast, and film effects. These presets allow you to apply a cohesive look to multiple photos in just a few clicks.
The final steps bring everything together. Removing distractions, adding subtle grain and vignettes, and carefully setting export parameters ensure your images are polished and ready for delivery. Whether the photos are destined for print or online sharing, these finishing touches are what elevate your work to a professional standard.
FAQs
What are the essential steps for editing wedding photos with a cinematic style?
To achieve a cinematic feel in wedding photo editing, begin with color grading to establish the mood and tone of the image. Fine-tune the contrast to create depth and make the details pop. Enhancing highlights and shadows can add a refined touch, giving the photo a polished appearance. Incorporating a gentle vignette helps direct focus to the couple, subtly framing the subject. For an effortless way to elevate your edits, explore film-inspired presets from collections like Cinematic or Wedding Presets, which can help you achieve a professional, movie-like aesthetic with ease.
How can I keep wedding photo colors consistent across screens and prints?
To ensure your colors stay consistent across devices and in print, begin by calibrating your monitor. This step helps guarantee accurate color representation right from the start. Stick to standard color profiles like sRGB or Adobe RGB for reliability, and use soft proofing to preview how your edits will appear in print. High-quality presets, such as those available from Presets.io, can streamline your workflow and maintain uniform color grading. Lastly, check your edits on different screens and review printed proofs to fine-tune any discrepancies.
What tools or presets can make cinematic wedding photo editing easier?
For those looking to streamline their cinematic editing workflow, Presets.io provides a range of top-tier Lightroom presets. Their collections, including cinematic, vintage film, and aesthetic styles, are crafted to make tasks like color grading, tweaking contrast, and perfecting wedding photos much easier. These presets are designed to deliver a refined, cinematic finish with little effort, making them a fantastic tool for wedding photographers seeking professional-quality results.


.png)
