
Table of Contents
- Ultimate Guide to Ethereal Color Blending in Lightroom
- Key Principles of Ethereal Color Blending
- How to get an ethereal look for your photos using Lightroom
- Lightroom Tools for Ethereal Effects
- Step-by-Step Workflow for Ethereal Color Blending
- Advanced Techniques for Better Ethereal Effects
- Using Presets.io for Easy Ethereal Blending
- Conclusion
- FAQs
Ultimate Guide to Ethereal Color Blending in Lightroom
Ethereal color blending transforms ordinary photos into soft, dreamy visuals with muted highlights, pastel tones, and a glowing atmosphere. This style is popular for portraits, weddings, and landscapes, creating a romantic and nostalgic feel. Lightroom offers powerful tools like Texture, Clarity, Dehaze, and HSL/Color Grading to achieve this effect while maintaining precision and control.
Key Takeaways:
- Defining the Look: Focus on soft highlights, pastel colors, and smooth transitions.
- Best Subjects: Works well for portraits, weddings, landscapes, and fantasy photography.
- Lightroom Tools: Use Texture, Clarity, Dehaze, and Curves for subtle adjustments.
- Workflow: Start with raw image prep, adjust exposure, refine with local edits, and finalize with selective masking.
- Presets: Platforms like Presets.io offer pre-designed options to save time and ensure consistency.
This style requires subtle edits that enhance softness and light while highlighting the subject. Whether you're working manually or using presets, mastering these techniques can elevate your photo editing process.
Key Principles of Ethereal Color Blending
What Defines the Ethereal Look?
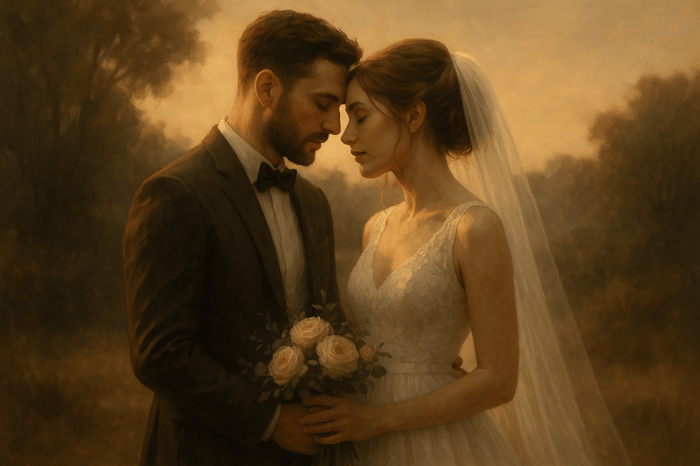
The ethereal aesthetic is all about creating a dreamy, almost magical atmosphere. It’s characterized by soft, muted highlights that gently glow instead of appearing harsh or overexposed. These highlights often seem wrapped in a delicate haze, giving the image an otherworldly feel.
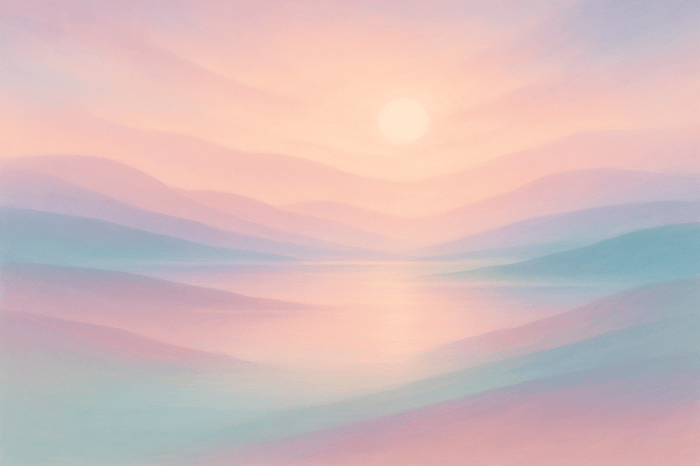
Pastel tones play a big part in this style - think soft pinks, creamy whites, pale blues, and warm beiges that appear to float effortlessly across the frame. Texture and clarity are often reduced, adding to the surreal vibe. Techniques like a shallow depth of field and beautiful bokeh help the subject stand out against a luminous, blurred background.
Experts suggest that soft, diffused lighting - like what you’d find during golden hour or on cloudy days - is perfect for creating this ethereal effect. They also highlight the importance of color harmony, recommending analogous or pastel palettes to craft a soothing and cohesive look.
This style works especially well for certain types of photography.
Best Subjects for Ethereal Editing
Some subjects are naturally suited to ethereal color blending. Portrait and wedding photography, for instance, thrive with this soft, romantic touch. The dreamy quality adds warmth and elegance, making moments feel timeless.
Landscape and nature photography also benefit from this approach. Misty mornings, golden hour views, and atmospheric conditions like fog or haze provide the perfect canvas. These natural elements amplify the softness of the scene, transforming it into something almost magical.
Fantasy and fine art photography are equally ideal for this style. These genres aim to transport viewers to another world, and ethereal edits - with their dreamy tones and soft focus - enhance that storytelling. Flowing elements like fabric, hair, or water work especially well here, adding a sense of movement and grace. Photographers often note that these edits are particularly popular for portraits, weddings, and fine art landscapes.
Balancing Exposure and Color
Once you’ve defined the look and chosen your subject, the next step is getting the exposure and color balance just right. The key to ethereal color blending lies in subtlety - going overboard with edits can strip away the natural charm. The goal is to enhance the dreamy quality while staying true to the essence of the scene.
Smooth color transitions are essential. Harsh boundaries or abrupt tone shifts can break the illusion, so blending warm and cool tones seamlessly is crucial. Gentle adjustments to exposure, contrast, color temperature, and saturation can create that soft, inviting background.
Selective tools like the Adjustment Brush can help fine-tune specific areas without losing the overall ethereal mood. Adding a subtle vignette can also draw attention to the subject, enhancing the dreamy atmosphere without overpowering the image. Mastering these techniques ensures your photos maintain their delicate, magical quality.
How to get an ethereal look for your photos using Lightroom
Lightroom Tools for Ethereal Effects
Now that the basics of ethereal color blending are clear, let’s dive into the specific Lightroom tools that help bring that soft, dreamy atmosphere to life. These tools are your go-to for creating the signature ethereal look.
Using Presence Controls
The Presence Controls - Texture, Clarity, and Dehaze - are key to achieving a diffused, otherworldly effect. Each slider plays a unique role in softening details and adjusting contrast to evoke a dreamlike feel.
- Texture: This slider refines the fine details in your image. To create a smoother, softer look, move it slightly into the negative range. This works wonders for skin, fabrics, and subtle surface details, maintaining clarity without feeling over-processed.
- Clarity: By reducing midtone contrast, this adjustment adds a gentle haze to your image. Be careful not to overdo it - softness is the goal, but too much can make the photo lose definition.
- Dehaze: Push this slider into the negative range to mimic the natural softness of mist or fog. A light touch here can add a subtle blur that enhances the ethereal vibe. For example, a 2023 tutorial from Light Stalking demonstrated how using the Adjustment Brush with a negative Dehaze setting, combined with a warmer color temperature, transformed a simple flower photo into a dreamy masterpiece. This technique also included selective masking and tweaks to exposure and contrast to make the subject pop against a soft, glowing background.
Once these adjustments are in place, refine the overall tone and warmth using White Balance and Temperature settings.
White Balance and Temperature Settings
White Balance and Temperature are essential for setting the emotional tone in your ethereal edits. These controls go beyond simple color correction - they let you infuse your image with warmth and atmosphere.
- Temperature: Sliding toward warmer tones introduces soft, golden hues, creating a romantic and inviting feel.
- Tint: Subtle shifts toward magenta or green can enhance skin tones or complement natural elements like foliage or skies.
The trick is to balance these adjustments with the rest of your edits so everything feels cohesive. Once you’ve set the mood, the next step is fine-tuning tonal transitions using Curves and HSL panels.
Curves and HSL/Color Grading Panels
For smooth, harmonious color transitions, the Curves and HSL/Color Grading panels are your best friends. These tools provide precise control over tonal ranges and color blending, which are essential for the ethereal aesthetic.
- Curves Panel: Apply a gentle S-curve to lift the shadows slightly and soften the highlights. This creates a low-contrast, dreamy effect that reinforces the soft atmosphere.
- HSL Panel: Adjust specific colors with precision. For instance, you can desaturate certain hues while enhancing the luminance of others to create separation between the subject and the background.
- Color Grading: Formerly known as Split Toning, this tool allows you to introduce warm tones to the highlights and cooler shades to the shadows. This controlled blending adds depth and enhances the ethereal palette.
Here’s a quick reference table to summarize these tools and their typical adjustments:
| Tool | Ethereal Effect Use | Typical Adjustment | Notes |
|---|---|---|---|
| Texture | Softens fine details | Slight negative adjustment | Maintain subtlety for a realistic look |
| Clarity | Reduces midtone contrast | Light reduction | Adds a gentle haze |
| Dehaze | Adds atmospheric softness | Mild negative adjustment | Adjust exposure if necessary |
| Temperature | Creates a warm, inviting mood | Shift toward warmer tones | Ensure overall color harmony |
| HSL | Fine-tunes specific color ranges | Targeted, subtle tweaks | Enhances subject-background separation |
For even more control, use selective masking tools like the Adjustment Brush or Radial Filter. These allow you to apply edits to specific areas, such as softening the background while keeping the subject sharp. This technique adds depth and ensures the viewer’s attention stays where it matters most.
Finally, consider adding a subtle Post-Crop Vignette to gently darken the edges of your image. This effect draws the eye toward the center, emphasizing your subject and enhancing the overall ethereal mood.
Step-by-Step Workflow for Ethereal Color Blending
Follow this workflow to create consistently dreamy edits, starting from a solid base and refining your image with thoughtful adjustments.
Preparing the Raw Image
Every great ethereal edit begins with a well-prepared image. Look for photos with soft lighting and atmospheric conditions like mist or the golden hour glow - these naturally lend themselves to the ethereal style.
Start by importing your raw file into Lightroom and enabling lens corrections in the Lens Corrections panel. This step eliminates distortions or vignetting that could detract from the ethereal look. Next, evaluate your image’s composition and crop if needed to improve the visual flow and remove distractions.
Check the histogram to ensure there’s a good balance of detail in both highlights and shadows. If the image is severely overexposed or underexposed, it can be more challenging to achieve the soft, balanced feel of ethereal photography. Aim for a solid tonal range, even if the colors or mood need further tweaking.
Set a neutral white balance to establish a clean starting point. This will make exposure adjustments more precise and set the stage for the next steps.
Adjusting Exposure and Applying Presets
Once your image is prepped, it’s time to shape the ethereal mood through exposure and contrast adjustments. For this style, slightly increasing exposure - typically around +0.4 to +0.5 - helps create that bright, airy feel without losing important details in the highlights. Reduce contrast and raise highlights by about +10 to +15 to further enhance the soft, glowing effect.
Using Lightroom presets can save time and ensure consistency. Platforms like Presets.io offer collections specifically designed for ethereal aesthetics. For example, their "Matte Dream Preset Collection", available for $12.00 as of November 2025, can instantly create a dreamy look with just one click. Apply a preset as your base, then fine-tune it to suit your image’s unique lighting and subject.
Adjust the white balance to complement these changes. Shift the temperature slider toward warmer tones to evoke a golden, inviting atmosphere. A subtle adjustment of the tint slider toward magenta can enhance skin tones or natural elements, adding to the overall mood.
Local Adjustments and Final Touches
After setting the overall tone, refine your image with local adjustments. This is where the ethereal magic truly happens, as you can selectively enhance specific areas to add depth and focus. Use masking tools to separate your subject from the background, ensuring the subject remains sharp while the background takes on a soft, dreamy quality.
The Adjustment Brush is a powerful tool for warming and softening background areas while keeping your subject crisp. This selective approach draws attention to the most important parts of the image while maintaining the overall ethereal vibe.
For a glowing effect, use radial filters around light sources or areas you want to emphasize. Increase exposure and highlights in these areas while slightly reducing clarity to mimic natural light diffusion.
Wrap up your edit by ensuring everything feels balanced. Add subtle sharpening to your subject if necessary, and for portraits, consider applying skin smoothing to enhance the softness. The Post-Crop Vignette tool can be used to gently darken the edges of the image, guiding the viewer’s eye toward the center and reinforcing the dreamy, focused atmosphere. Review the image for color harmony to ensure the tones remain cohesive and light throughout.
Finally, prepare your image for its intended use. Whether it’s for print or web display, your export settings should preserve the quality you’ve worked hard to achieve. Double-check that the edits look as polished on your chosen medium as they do on your calibrated monitor. By taking these steps, you’ll create an ethereal image that feels soft, balanced, and effortlessly captivating.

The Master Preset Bundle

$57.00
$672.00
The Master Preset Bundle Every Style. Every Platform. One Download Get 56 high-quality Presets.io collections in one complete bundle — designed to help you edit faster, stay consistent, and get professional-looking results in seconds. Get All High-Quality Preset Collections For… continue reading
sbb-itb-b27063b
Advanced Techniques for Better Ethereal Effects
Once you've mastered the basics, these advanced techniques can take your ethereal photography edits to a whole new level. By fine-tuning your approach, you can create images that are both visually striking and deeply atmospheric.
Creating the Orton Effect in Lightroom
The Orton Effect is known for its dreamy, glowing blur that's perfect for creating an ethereal vibe. Originally developed by photographer Michael Orton using film, this effect can now be achieved entirely in Lightroom - no Photoshop required.
Start by adjusting the exposure and contrast to balance brightness and depth. Increase the exposure slightly and lower the contrast to create a soft, diffused glow. For an extra touch, use the Dehaze tool in reverse. Instead of sharpening details, slide it into the negatives (around -20 to -40) to create a soft, foggy atmosphere.
To fine-tune the effect, adjust the Highlights and Shadows to ensure the glow enhances your subject without overpowering the image. Adding carefully blended color gradients can further enhance the depth and dreamy quality.
Combining Multiple Color Gradients
Layering color gradients can add depth and richness to your photos, creating a sense of atmosphere that draws viewers in. Using Lightroom's Linear Gradient and Radial Gradient tools, you can apply custom color adjustments to different parts of the image.
For instance, try applying a warm gradient with a touch of magenta to the sky and a cooler gradient with teal or blue tones to the foreground. This contrast mimics natural atmospheric perspective, making your scene feel more immersive.
To ensure seamless blending, feather the gradients and adjust their opacity. Use the HSL/Color Grading panels to tweak hue, saturation, and luminance for each gradient, but keep an eye on saturation levels to avoid harsh transitions or color banding. Always preview your image at different zoom levels to ensure smooth results.
Selective Masking for Custom Color Overlays
Selective masking allows you to enhance specific areas of your photo with precise color overlays, making certain elements pop while maintaining balance. Lightroom's Adjustment Brush with Auto Mask is perfect for this.
Enable the "Show Selected Mask Overlay" option to ensure your adjustments stay within the intended areas. For instance, in portraits, you might warm up skin tones while keeping the background cooler. In landscapes, warming up the foreground while leaving distant elements cooler can create a clear sense of depth and guide the viewer's eye through the image.
This technique is especially effective for creating a visual hierarchy, ensuring your subject remains the focal point.
Summary of Techniques
| Technique | Tools Needed | Effect Achieved |
|---|---|---|
| Orton Effect | Lightroom | Dreamy, glowing blur |
| Multiple Color Gradients | Lightroom HSL/Grading | Depth and atmosphere |
| Selective Masking | Lightroom Brush/Mask | Targeted color overlays |
Keep in mind that subtlety is key when working with ethereal effects. Overusing tools like Dehaze or Clarity can lead to flat or unnatural results. To complete your edits, consider adding a light vignette to subtly frame your subject and enhance the dreamy aesthetic. By layering these techniques thoughtfully, you can achieve stunning, professional-quality images that embody the ethereal style.
Using Presets.io for Easy Ethereal Blending

Presets.io offers a quick and professional way to create stunning ethereal effects. Their extensive library of high-quality Lightroom presets allows you to achieve breathtaking results with just one click. While manual adjustments can provide more control, these presets save time and deliver consistent, polished outcomes. Let’s dive into the collections designed to help you bring your ethereal vision to life.
A Variety of Preset Collections
Presets.io has curated several collections tailored to achieve ethereal aesthetics:
- Matte Dream Preset Collection: Perfect for soft, muted, and dreamy tones, this collection promises to "Give Your Photos a Soft, Dreamy Makeover – Instantly!" It’s ideal for portraits and lifestyle photography.
- Light & Airy Preset Collection: Designed for bright, natural lighting, these presets work wonderfully for outdoor scenes and portraits, adding a gentle glow to your photos.
- Moody Blue Preset Collection: Tailored for landscapes and travel photography, this collection introduces cool, atmospheric tones. The "chilly blues" create a melancholic yet captivating look, perfect for ethereal landscapes.
- Aesthetic Presets Collection: A versatile set that covers a range of soft and pleasing styles, suitable for portraits, still life, and more. This collection aligns with contemporary ethereal trends and adapts to various photography genres.
Simple Installation and Regular Updates
Installing Presets.io presets is a breeze. Whether you’re using Lightroom on your desktop or mobile device, the platform provides detailed guides to walk you through the process. Desktop users receive XMP and LRTemplate files, while mobile users get DNG files optimized for Lightroom Mobile.
Each purchase includes a step-by-step "User Installation & Tutorial Guide", ensuring you can start editing right away. The process involves downloading the files, importing them into Lightroom, and applying them to your images with ease.
Presets.io also stands out for its commitment to keeping your editing tools fresh. New presets are added weekly, so you’ll always have access to the latest styles and techniques without needing to make additional purchases. This ensures your toolkit evolves with current trends, giving you endless creative possibilities.
Why Use Presets for Ethereal Editing?
Presets.io isn’t just about convenience - it’s about elevating your workflow. Here’s why photographers love using these presets:
- Time-Saving: Applying complex effects instantly is a huge advantage, especially when editing large batches of photos for clients or social media.
- Consistency: Whether you’re building a cohesive portfolio or maintaining a specific aesthetic for branding, presets ensure every image shares the same ethereal mood and color palette.
- Customizable Starting Point: Instead of starting from scratch, you begin with professionally designed effects. From there, you can tweak exposure, color intensity, and other elements to align with your creative vision while retaining the preset’s ethereal foundation.
The platform’s 4.8 out of 5-star rating from over 1,400 reviews speaks to its quality and ease of use. Users appreciate the consistent results across different lighting conditions and photography styles.
| Collection Type | Best For | Key Ethereal Features |
|---|---|---|
| Matte Dream | Portraits, lifestyle | Soft, dreamy makeover effects |
| Light & Airy | Outdoor scenes, portraits | Bright, soft, natural glow |
| Moody Blue | Landscapes, travel | Cool atmospheric tones |
| Aesthetic | All-purpose editing | Versatile ethereal styles |
With comprehensive bundles and regular updates, Presets.io makes professional-grade ethereal editing accessible to photographers of all skill levels. Whether you’re refining a portfolio or crafting a consistent social media presence, these presets provide the tools to achieve stunning, cohesive results in Lightroom.
Conclusion
Mastering ethereal color blending in Lightroom is all about understanding its core tools, sticking to a structured workflow, and using high-quality presets to streamline your editing process.
To create those soft, dreamy effects, you need to get comfortable with Lightroom's key features - like Presence controls, White Balance, Curves, and HSL/Color Grading. By making precise adjustments to exposure, contrast, highlights, and clarity, you can take an ordinary photo and turn it into something truly eye-catching.
A structured workflow plays a huge role in maintaining consistency across your work. Start with proper raw image preparation, move through exposure and tonal adjustments, apply your chosen aesthetic, and wrap up with localized edits. This step-by-step approach not only avoids the frustration of inconsistent results but also helps you develop a signature ethereal style over time.
Presets can be a game-changer when it comes to speeding up your editing. Platforms like Presets.io offer collections tailored specifically for ethereal aesthetics, giving you a professional starting point that can save hours of work. With just a few clicks, you can achieve stunning effects, leaving more time for creative fine-tuning.
The real magic happens when you combine manual techniques with presets. This approach gives you the best of both worlds: a professional foundation to build on and the flexibility to tailor the final look to your unique vision - whether you're editing for social media or delivering standout client work.
FAQs
What’s the best way for beginners to create an ethereal color blending effect in Lightroom?
If you're new to photo editing, achieving an ethereal color blending effect in Lightroom might be simpler than it seems. Start by experimenting with basic tools like the Tone Curve, HSL sliders, and Graduated Filters. These features allow you to tweak colors and light, creating soft, dreamy tones with smooth transitions.
For an even faster and more refined outcome, consider using pre-made Lightroom presets. These presets apply expertly crafted adjustments with a single click, making it easy to give your photos that enchanting, ethereal look without much effort.
What should I avoid when creating an ethereal color blend in Lightroom?
When crafting an ethereal look in Lightroom, there are a few common missteps to steer clear of. One of the biggest culprits is over-editing. It's tempting to crank up sliders like clarity, saturation, or dehaze, but pushing them too far can make your image feel artificial. Instead, focus on subtle tweaks that amplify the dreamy vibe without overpowering the photo.
Another area to watch is the balance of light and color. Ethereal edits thrive on soft contrasts and harmonious tones, so harsh shadows or overly bright, clashing colors can disrupt the mood you're aiming for. Tools like the tone curve and color grading are your best friends here - use them to create a cohesive, gentle aesthetic that flows naturally.
Lastly, don’t forget to preserve the details in your image. Going overboard with blur or noise reduction might erase important textures, leaving the photo looking flat or overly processed. Keeping those fine details intact is key to achieving a polished, professional result.
How can Lightroom presets create consistent ethereal effects across multiple photos?
Lightroom presets are an excellent way to create a consistent, dreamy vibe across multiple photos. Instead of tweaking each image individually, you can use these pre-made adjustments to give your entire collection a cohesive look in just a few clicks.
Take, for example, the presets available from Presets.io. They offer a range of styles, from artistic to cinematic effects, designed to simplify your editing process while adding a polished touch. Whether you're working on personal projects or building a professional portfolio, presets are a great way to maintain a unified visual style while saving valuable time.