
Table of Contents
Lightroom Opacity Slider vs Manual Adjustments
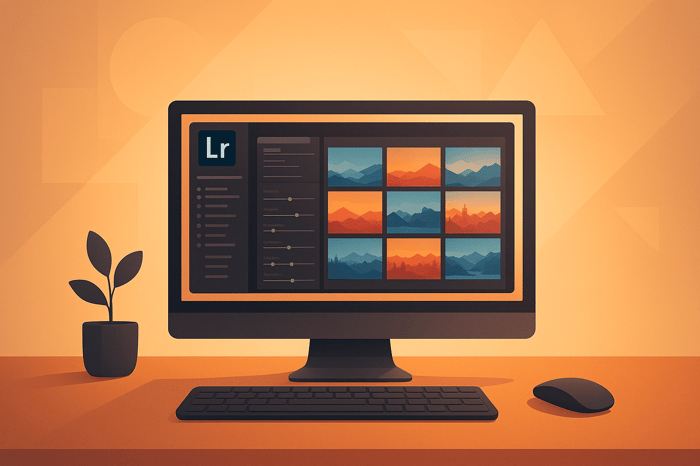
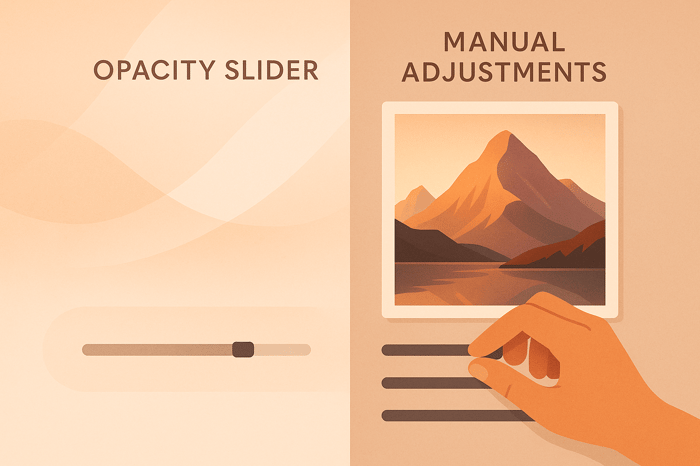
When editing photos in Lightroom, you have two main options for fine-tuning your images after applying a preset: the opacity slider (introduced in 2022) and manual adjustments. Each method serves a different purpose, and understanding their strengths can help you create polished edits efficiently.
- Opacity Slider: Adjusts the strength of a preset globally. It’s fast, easy to use, and great for batch editing or maintaining consistency across many photos. Available in Lightroom Mobile, but requires plugins (like Opal, $15) for Lightroom Classic.
- Manual Adjustments: Gives you precise control over individual settings like exposure, contrast, highlights, and shadows. Ideal for detailed edits but takes more time and skill to master.
Quick Comparison
| Feature | Opacity Slider | Manual Adjustments |
|---|---|---|
| Speed | Fast, global adjustments | Slower, detailed edits |
| Control | Limited to preset scaling | Full control over settings |
| Ease of Use | Beginner-friendly | Requires learning sliders |
| Compatibility | Works with presets only | Works on all images |
| Best For | Batch edits, consistency | Precision, specific tweaks |
For efficiency, start with a preset and adjust its intensity using the opacity slider. Then, use manual adjustments to fine-tune specific elements like shadows or highlights. Combining both methods lets you balance speed and precision for professional-quality results.
Have You Seen The OPACITY Slider for LIGHTROOM Classic CC!

What is the Lightroom Opacity Slider
The Lightroom opacity slider is a tool that adjusts the overall intensity of a preset with a single, simple movement. It fine-tunes the strength of preset effects, blending the original image with the applied preset to achieve the perfect balance.
Its functionality varies depending on the version of Lightroom you’re using. Lightroom Mobile includes the opacity slider directly within the app, making it easily accessible. However, Lightroom Classic doesn’t have this feature built-in, so users need third-party plugins like Opal (priced at $15) to enable it.
Let’s dive into how this slider works and why it can be a valuable part of your editing workflow.
How the Opacity Slider Works
The opacity slider adjusts all preset settings proportionally. For instance, if a preset increases exposure by +0.8 stops, setting the slider to 50% reduces the adjustment to +0.4 stops. Sliding it to the left mixes more of the original image back in, while sliding it to the right amplifies the preset’s effects.
Here’s how to use it in Lightroom Mobile:
- Open the photo you want to edit.
- Apply your chosen preset.
- Tap the preset icon again to reveal the opacity slider.
- Move the slider left to reduce the effect or right to increase it.
This straightforward process makes fine-tuning presets quick and intuitive.
Now that you know how it works, let’s look at its advantages.
Benefits of Using the Opacity Slider
The opacity slider is a time-saver, especially for photographers working with large image collections. For example, wedding or event photographers can apply the same preset across hundreds of photos and then quickly tweak the intensity for each one. This ensures a consistent style throughout the gallery without spending hours on individual edits.
It also simplifies batch editing. Adjusting the opacity across multiple images makes it easier to maintain a cohesive look, which is essential for high-volume workflows.
For beginners, the opacity slider is a welcome feature. Instead of wrestling with complex tools like tone curves or color grading, new users can achieve polished edits by simply adjusting one slider. This makes it less intimidating for those just starting with photo editing.
Another advantage is that it allows for subtle adjustments while keeping the preset's original aesthetic intact. For instance, reducing a preset to 60% opacity softens its effect but still reflects the creator’s vision - ideal if you’re using presets from sources like Presets.io.
These benefits make the opacity slider a valuable addition for anyone balancing speed and precision in their work.
Drawbacks of the Opacity Slider
Despite its usefulness, the opacity slider has some limitations. One of the biggest is its lack of selective control. Since it adjusts all settings equally, you can’t, for example, tone down the color grading while leaving the exposure untouched. This one-size-fits-all approach might not suit every photo.
Another downside is the reliance on third-party plugins for some Lightroom versions. Lightroom Classic users must purchase tools like the Opal plugin to access the slider, which adds an extra step and cost compared to the seamless experience in Lightroom Mobile.
Lastly, uniform scaling can sometimes create unnatural results. For example, if a preset includes strong exposure adjustments and heavy color grading, reducing the opacity might leave the colors too muted or the exposure too bright. In such cases, manual adjustments offer more precise control over individual elements.
These drawbacks highlight the trade-offs between simplicity and precision when using the opacity slider in your editing process.
Manual Adjustments in Lightroom
Manual adjustments in Lightroom let you fine-tune individual sliders after applying a preset. Unlike the opacity slider, which scales all settings proportionally, manual adjustments give you precise control over specific elements like exposure, contrast, highlights, and shadows.
This method allows you to tailor edits to the unique needs of each photo. Think of presets as a starting point - manual tweaks are what bring your vision to life.
How to Make Manual Adjustments
Making manual adjustments in Lightroom is simple once you understand the key sliders and their roles. Begin by applying a preset, then head to the Basic panel to refine your image.
- Exposure slider: Adjusts the overall brightness, focusing on the lightest areas. Use this for broad brightness corrections.
- Contrast slider: Controls the difference between light and dark areas. Move it right for a bold, dramatic look or left for a softer feel.
- Highlights slider: Helps recover details in bright, blown-out areas, bringing back texture and nuance.
- Shadows slider: Lifts or deepens the darkest parts of your photo, revealing hidden details or adding depth.
- Whites and Blacks sliders: Fine-tune the brightest whites and darkest blacks for precise tonal balance.
To guide your adjustments, use the Histogram. It shows you where details might be lost in highlights or shadows, helping you avoid clipping.
Benefits of Manual Adjustments
The biggest advantage of manual adjustments is the level of control they offer. You can refine specific aspects of your image without affecting others, whether it’s recovering details in highlights or adjusting the color temperature in select areas.
Presets can take you most of the way, but manual adjustments are what truly elevate your edits. They let you achieve that extra polish that transforms a good photo into a great one.
Another bonus? Manual adjustments are a fantastic learning tool. Experimenting with sliders teaches you how light, color, and composition work together, sharpening both your technical skills and artistic eye.
For professional projects - like portrait retouching or commercial photography - manual edits are often essential. They deliver the tailored results needed to meet client expectations or achieve a specific creative vision.
Challenges of Manual Adjustments
The primary downside? Time. While presets are quick, manual adjustments can take several minutes per image, which adds up fast when editing large batches, like for weddings or events.
There’s also a learning curve. Understanding how each slider works - and how they interact - takes practice. Beginners may feel overwhelmed by the sheer number of options and struggle to produce consistent results.
Another common issue is overprocessing. Without the built-in restraint of presets, it’s easy to overdo it - pushing sliders too far can lead to unnatural colors, harsh contrast, or lost detail. Striking a balance requires a careful eye.
Finally, consistency can be tricky. Presets ensure a uniform look across a series of images, but with manual adjustments, maintaining that cohesion takes discipline and skill. This can be especially challenging when editing hundreds of photos from the same shoot.
Up next, we’ll compare manual adjustments with the opacity slider to help you decide which approach suits your workflow best.

The Master Preset Bundle

$57.00
$672.00
The Master Preset Bundle Every Style. Every Platform. One Download Get 56 high-quality Presets.io collections in one complete bundle — designed to help you edit faster, stay consistent, and get professional-looking results in seconds. Get All High-Quality Preset Collections For… continue reading
sbb-itb-b27063b
Opacity Slider vs Manual Adjustments Comparison
Let’s dive deeper into how the opacity slider and manual adjustments compare. While both serve distinct purposes in editing, understanding their differences helps you decide which method fits your workflow and creative goals.
The opacity slider is all about speed and simplicity. It adjusts all settings simultaneously, making it perfect for batch edits. In contrast, manual adjustments take more time but allow for precise, targeted changes.
Here’s how they function: the opacity slider scales all adjustments globally - reducing every setting to a percentage of its original value (e.g., 70% reduces all settings to 70%). This approach maintains balance but lacks the fine control manual adjustments provide. With manual tweaks, you can focus on specific areas, like enhancing shadows or refining highlights, without affecting the rest of the image.
Another difference lies in ease of use. The opacity slider is straightforward and beginner-friendly, while manual adjustments require a deeper understanding of individual settings.
Compatibility also sets them apart. The opacity slider only works with presets, making it a great tool for adjusting high-quality presets like those from Presets.io. On the other hand, manual adjustments are versatile - they can be applied to any image, whether or not a preset is involved.
Key Differences Table
| Attribute | Opacity Slider | Manual Adjustments |
|---|---|---|
| Speed | Fast; adjusts all settings at once | Slower; involves individual tweaks |
| Precision | Global control; less detailed | Highly precise; setting-specific |
| Learning Curve | Easy to use; beginner-friendly | Requires understanding each setting |
| Compatibility | Works only with presets | Works on all images, with or without presets |
| Cost | Free in Lightroom; plugins like Opal cost $15 | Free; included in Lightroom |
| Workflow | Best for batch edits and preset consistency | Ideal for detailed corrections and fine-tuning |
Each method shines in different scenarios. For instance, if you’re editing hundreds of wedding photos, the opacity slider ensures a consistent look by quickly adjusting preset intensity across all images. On the other hand, manual adjustments are better suited for portraits or detailed work, where you might need to perfect skin tones, enhance specific features, or refine backgrounds.
As photographers lean toward faster workflows, the opacity slider has gained popularity for its ability to deliver quick, non-destructive edits without compromising quality. Still, neither method is inherently superior - they complement each other. The real trick is knowing when to use each one to match your creative vision and workflow needs.
Which Method to Choose for Your Workflow
After understanding the strengths and limitations of different editing techniques, it's time to decide which approach aligns best with your editing goals and workflow.
When to Use the Opacity Slider
The opacity slider shines when speed and uniformity are your priorities. For instance, wedding photographers can save hours by applying a preset from Presets.io at around 80% opacity across hundreds of photos. This approach ensures a consistent, polished look in a fraction of the time it would take to edit each image individually. It’s particularly useful for high-volume projects like school portraits or real estate photography, where maintaining a cohesive style is more critical than fine-tuning each shot.
Presets.io presets are designed to maintain their quality even when adjusted, letting you experiment with different intensities effortlessly. This makes the opacity slider an excellent choice for beginners aiming to achieve professional results without diving into complex manual edits.
When to Use Manual Adjustments
Manual adjustments are the go-to option when precision is key. They allow you to focus on specific elements, such as enhancing skin tones, sharpening eye details, or adjusting background elements - tasks that a simple opacity adjustment can’t handle.
For advanced editing projects, manual adjustments are indispensable. Whether you're working on a fashion shoot or an editorial spread, you may need to tweak individual color channels, adjust tone curves, or apply localized corrections. These edits are crucial for addressing challenges like recovering detail in overexposed skies or brightening shadows in specific areas. Manual adjustments provide the level of control required for highly customized and polished results.
Using Both Methods Together
Combining both techniques can offer the best of both worlds: efficiency and precision. Start by applying a preset to establish the overall tone - such as a cinematic preset from Presets.io at around 70% opacity - to create a consistent foundation quickly.
Then, refine specific details with manual adjustments. For example, after applying the preset, you could fine-tune exposure, clarity, or color balance in targeted areas. This hybrid approach not only speeds up your workflow but also ensures that your edits are both cohesive and meticulously crafted.
Conclusion: Finding the Right Balance
Deciding between the opacity slider for speed or manual adjustments for precision ultimately depends on what you're aiming to achieve with your edits. The opacity slider is perfect for quick, uniform results across a large number of photos, making it a go-to tool for busy workflows like wedding photography or commercial projects. On the other hand, manual adjustments are ideal for images that require detailed, fine-tuned corrections.
Combining these two approaches can create a more flexible and effective editing process. Start with a high-quality preset to establish your base look. From there, use the opacity slider to fine-tune the overall intensity, and then make manual adjustments for those areas that need special attention - whether it’s lifting shadows in a portrait or bringing out the colors in a dramatic sky. This hybrid method is a great way to achieve both efficiency and precision in your edits.
Presets.io makes this approach even smoother with presets designed to complement both techniques. With a solid reputation backed by a 4.8 out of 5-star rating from 1,400 reviews, their presets are a trusted choice. The Master Preset Bundle, priced at $49, includes 56 collections and 721 presets, giving you plenty of options to experiment with different styles while maintaining consistency in your work.
FAQs
What’s the difference between using the opacity slider and manual adjustments in Lightroom Mobile for keeping a consistent editing style across multiple photos?
The opacity slider in Lightroom Mobile is a handy tool for adjusting the strength of a preset across your photos. It simplifies the process of creating a consistent look by letting you tweak the effect without having to manually change individual settings. This is especially helpful when you're working on a batch of images with similar lighting or stylistic requirements.
On the flip side, manual adjustments give you full control over elements like exposure, contrast, and color grading. While this approach offers greater flexibility, it can take more time and may result in slight inconsistencies if you're not meticulous. A good strategy is to use the opacity slider to quickly set a baseline and then fine-tune specific details manually if needed.
What are the limitations of Lightroom Classic's opacity slider, and how can third-party tools help improve your editing workflow?
The opacity slider in Lightroom Classic is a handy feature for dialing back the intensity of presets, but it does come with certain drawbacks. One major limitation is that it doesn’t let you tweak specific adjustments within a preset. This can make it tricky to fine-tune details or achieve the exact look you’re going for, especially during more intricate edits. It can also feel a bit restrictive when you're dealing with complex edits that involve multiple layers of adjustments.
If you’re looking to expand your editing possibilities, third-party tools and plugins can be game-changers. Some plugins offer precise control over individual adjustments or even allow you to blend effects dynamically. These advanced features can give you the flexibility and control needed to refine your edits and create more polished, professional-looking results. Exploring these tools could be a valuable addition to your editing workflow.
When is it better to use manual adjustments instead of the opacity slider in Lightroom for achieving personalized edits?
When you want complete control over your edits, manual adjustments are the way to go. Unlike the opacity slider, which changes the overall intensity of a preset or adjustment, manual edits let you tweak specific settings like exposure, contrast, or color tones to suit your creative vision.
This method is particularly helpful for photographers aiming for a distinct, personalized style that presets alone can’t always deliver. By fine-tuning individual elements, you can make sure every detail reflects exactly what you’re going for.