
Table of Contents
Lightroom Cache Settings: Ultimate Guide
Optimizing Lightroom's cache settings can drastically improve editing speed and workflow efficiency. Here's what you need to know:
- What Cache Does: Cache stores temporary image data, enabling faster access and smoother editing, especially with large catalogs or high-resolution files.
- Key Cache Types:
- Camera Raw Cache: Stores partially processed raw files to speed up the Develop module. Increase its size to 20-50GB for better performance.
- Preview Cache: Handles thumbnails and previews for quicker navigation in the Library module. Use "Standard" or "1:1" previews based on your needs.
- Temporary Cache: Preloads adjacent images for seamless transitions during editing.
- Best Practices:
- Use an internal SSD for cache storage to maximize speed.
- Increase cache size to handle large catalogs and avoid frequent rebuilding.
- Enable Smart Previews for faster editing on less powerful systems.
- Maintenance Tips:
- Clear and rebuild caches periodically to avoid corruption or slowdowns.
- Regularly optimize your catalog for smoother performance.
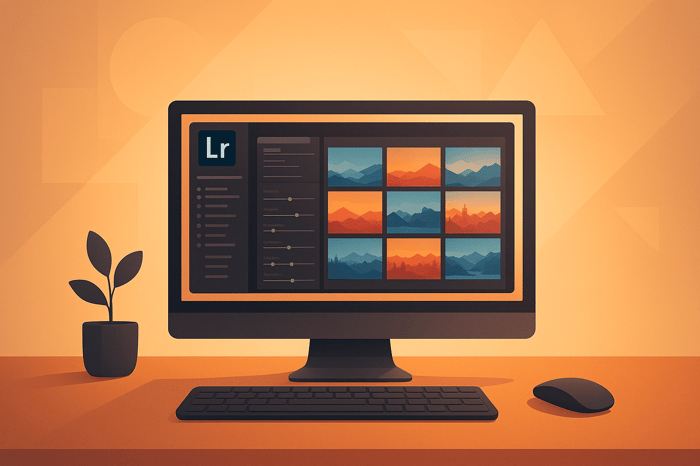
Setting up Lightroom for speed and performance
Setting Up Camera Raw Cache for Better Performance
Configuring your Camera Raw Cache correctly can make a noticeable difference in Lightroom's responsiveness. Default settings often fall short for demanding workflows, so let’s break down how to optimize your cache for a smoother editing experience.
Setting Camera Raw Cache Size
The Camera Raw Cache plays a vital role in speeding up Lightroom. To tweak these settings, open Lightroom Classic and go to Edit > Preferences (Windows) or Lightroom Classic > Preferences (Mac). Then, switch to the Performance tab. Here, you can adjust the cache location and size to better suit your needs.
By default, the cache size is often too small, which forces Lightroom to rebuild cache data frequently. This can slow down performance, especially when switching between images.
Here’s a quick guide to optimal cache sizes based on your workflow:
| Cache Size | Workflow Type | Performance Impact |
|---|---|---|
| 20GB | Medium | Works for most users |
| 40-50GB | Heavy/Professional | Ideal for large catalogs and high-res files |
If your storage allows, starting with a 10GB cache is fine, but allocating more - up to 40-50GB - can significantly improve performance, particularly for professional photographers handling large catalogs or high-resolution images. A larger cache lets Lightroom store more partially processed raw data, reducing delays when navigating between photos in the Develop module.
Picking the Right Cache Location
The location of your cache is just as important as its size. Avoid using external or portable drives for your cache - they’re slower and prone to disconnections, which can force Lightroom to rebuild the cache unnecessarily.
| Cache Location | Performance Impact | Recommended For |
|---|---|---|
| SSD (internal) | Fastest | Best for all users |
| HDD (internal) | Moderate | Suitable if SSDs aren’t available |
| External/Portable Drive | Slowest | Not recommended |
For the best performance, use an internal SSD. If your system has multiple drives, dedicating a separate SSD for the cache can prevent it from competing with your operating system for disk access. If you’re working with traditional hard drives, choose the fastest internal drive available and avoid placing the cache on the same drive as your OS to reduce bottlenecks.
How Cache Settings Affect Your Workflow
Once your cache size and location are optimized, you’ll notice a smoother workflow. Lightroom’s caching system preloads adjacent images in the filmstrip while you edit in the Develop module. This preloading ensures transitions between images feel seamless - provided the cache is set up correctly.
A well-configured cache minimizes delays, especially during sequential editing. Using an internal SSD further reduces performance hiccups, making your editing process far more efficient.
Keep an eye on storage as your cache grows. Modern cameras produce large files, often between 50–100MB each, so a generously sized cache prevents constant turnover. For photographers managing large catalogs or high-res files, these settings are essential. A small cache on a slower drive can lead to frustrating delays, while a larger cache on an internal SSD transforms the editing experience.
Setting Up Preview and Temporary Caches
Fine-tuning your Preview and Temporary caches is an essential step to keep Lightroom running smoothly. These caches speed up navigation and editing, making your workflow more efficient. Once you've optimized your Camera Raw Cache, it's time to adjust your preview and smart preview settings for even better performance.
Setting Up Preview Cache
The Preview Cache stores image previews, which makes browsing and culling in the Library module much quicker. Instead of generating previews every time you scroll through your catalog, Lightroom uses these cached versions, significantly improving navigation speed - especially with large catalogs or high-resolution images.
You can manage your preview settings during import or tweak them later in the Library module. Lightroom offers several preview types:
- Standard Previews: Perfect for general navigation, these are smaller and faster to generate.
- 1:1 Previews: Ideal for inspecting details at 100% magnification. They take up more storage but save time when zooming in to check focus or fine details.
For the best performance, store your previews on an internal SSD. To manage preview storage, go to Library > Previews and choose options like "Build Standard-Sized Previews" or "Build 1:1 Previews" for specific images.
| Preview Type | Storage Impact | Best For | Performance Benefit |
|---|---|---|---|
| Standard Previews | Moderate space | General browsing and culling | Faster Library navigation |
| 1:1 Previews | High space usage | Detailed inspection workflows | Instant 100% zoom |
| Smart Previews | Lower space usage | Offline editing and speed | Faster Develop module |
How to Use Smart Previews
Smart Previews are scaled-down versions of your raw images, measuring 2,560 pixels on their longest side. They allow you to edit your photos even without access to the original files and can improve performance in the Develop module.
To create Smart Previews, check the "Build Smart Previews" box during import. You can also create them later by selecting images and going to Library > Previews > Build Smart Previews. For an extra performance boost, enable "Use Smart Previews instead of Originals for image editing" in Preferences > Performance.
Smart Previews are especially useful for large catalogs or when working on a less powerful computer. They reduce the processing load by using smaller file sizes while still offering full editing flexibility. Once you're done with a project, you can free up disk space by discarding them through Library > Previews > Discard Smart Previews.
This feature is also handy when experimenting with presets, such as those from collections like Presets.io. Since Smart Previews require less processing power, you can quickly test out various aesthetic, cinematic, or vintage presets without the lag of working with full-resolution files.
Temporary Caches in Develop Module
The Temporary Cache in the Develop module operates automatically, preloading the current image, as well as the previous and next images in the filmstrip. This ensures that images load instantly when you move between them, making the editing process much smoother.
To get the most out of this cache, work on images sequentially. LR preloads adjacent files into memory, which speeds up transitions and enhances responsiveness. Before entering the Develop module, organize your images into groups or apply filters to keep Lightroom's temporary cache working efficiently.
Having enough RAM is crucial for this process. LR uses system memory to load adjacent images, so sufficient RAM ensures the cache runs smoothly without competing with other tasks. By optimizing this feature, you'll notice faster image loading and a more seamless editing experience - especially when applying consistent adjustments or experimenting with different presets.
These cache settings form the backbone of Lightroom's performance, setting the stage for additional improvements in the next steps.

The Master Preset Bundle

$57.00
$672.00
The Master Preset Bundle Every Style. Every Platform. One Download Get 56 high-quality Presets.io collections in one complete bundle — designed to help you edit faster, stay consistent, and get professional-looking results in seconds. Get All High-Quality Preset Collections For… continue reading
sbb-itb-b27063b
Fixing and Maintaining Lightroom Caches
Over time, LR caches can become corrupted or sluggish, leading to slower performance or even workflow disruptions. Regular maintenance is key to keeping things running smoothly while avoiding unnecessary storage issues.
Clearing and Resetting Caches
Cache corruption can cause problems like slow image loading, glitches, or errors. The good news? Clearing and rebuilding caches can fix these issues without affecting your original photos or edits.
To clear the Camera Raw Cache, follow these steps:
- Windows: Go to Edit > Preferences > File Handling
- Mac: Go to Lightroom > Preferences > File Handling
Once there, click on "Purge Cache" to free up disk space and remove any corrupted data.
If you're dealing with problems in the Preview Cache, close Lightroom, locate your catalog folder, and delete the "Lightroom Catalog Previews.lrdata" folder. When you reopen Lightroom, it will automatically generate fresh previews, fixing display glitches or corrupted thumbnails.
Keep an eye on your video cache, as large files can drag down performance. You can clear or relocate the video cache through LR's preferences if it starts taking up too much space on your startup drive.
| Cache Type | Clearing Method | When to Clear | Expected Outcome |
|---|---|---|---|
| Camera Raw Cache | Preferences > Purge Cache | When the Develop module is slow or errors appear | Faster processing after cache rebuild |
| Preview Cache | Delete "Lightroom Catalog Previews.lrdata" folder | If thumbnails or previews look corrupted or outdated | Clean, refreshed previews |
| Video Cache | Manual deletion or relocation via preferences | When file sizes grow too large or video playback lags | Improved video performance |
These simple steps can help prepare your system for smoother catalog operations.
Improving Lightroom Catalog Performance
A well-optimized catalog goes hand-in-hand with efficient cache performance. Over time, catalogs can become bloated or fragmented, slowing down Lightroom. To fix this, use the built-in "Optimize Catalog" feature, located under File > Optimize Catalog. Running this tool periodically - especially after major import sessions - can tidy up the database and improve responsiveness. While it may take a few minutes for larger catalogs, the payoff in speed is worth it.
Another way to keep things running efficiently is by maintaining a lean catalog. Regularly back up your catalog on a separate drive - ideally weekly - to protect against corruption that could affect caching. A clean, organized catalog ensures better performance and reduces the risk of cache-related issues.
Fixing Common Cache Problems
If you're experiencing delays in the Develop module, your Camera Raw Cache might be too small or corrupted. Increasing the cache size beyond the default 5GB - especially for high-resolution workflows - can make a big difference. For larger catalogs, consider bumping it up to 20GB or more to minimize interruptions.
Slow navigation in the Library module usually points to preview cache issues. To speed things up, enable the "Build Standard-Sized Previews" option during import. If problems persist, manually clear and rebuild your preview cache to ensure thumbnails are up-to-date and error-free.
Lagging while switching between images in the Develop module could be due to temporary cache preloading issues. Make sure your system has enough RAM to handle your workflow. Processing images in sequence can also help LR's preloading work more efficiently. For even smoother performance, enable Smart Previews by selecting "Use Smart Previews instead of Originals for image editing" in the Performance preferences.
If you see disk space warnings, it might be time to clean up your cache folders. Regular monitoring and disk cleanups can prevent cache bloat and keep Lightroom running smoothly.
Persistent errors during export or editing may signal deeper cache corruption. If clearing caches and restarting Lightroom doesn’t solve the issue, try testing your workflow on a smaller batch of images. If problems continue, consider creating a new catalog and importing your images along with their edit history.
For users who rely on presets - like those from Presets.io, offering styles such as aesthetic, cinematic, and vintage looks - healthy caches are essential. Smooth preview generation and efficient comparisons depend on up-to-date, error-free cache data, ensuring a faster, more reliable editing experience.
Advanced Lightroom Performance Tips
Fine-tuning cache settings and leveraging performance features can significantly enhance your editing experience, especially when working with large catalogs or high-resolution images.
Using Cache Settings with GPU Acceleration
Combining optimized cache settings with GPU acceleration can make a noticeable difference in Lightroom's Develop module. By enabling GPU acceleration through Preferences > Performance, you can speed up adjustments like exposure, highlights, and shadows. For the best results, set your Camera Raw Cache size to 20–50GB on a fast SSD and ensure your system uses a graphics card with at least 4GB of VRAM. This setup minimizes lag when processing high-resolution images.
It’s crucial to store the cache on a fast internal SSD to avoid bottlenecks. However, don’t overload your system drive by using it for both the operating system and Lightroom cache, as this can lead to resource conflicts. This approach, paired with other Lightroom performance tools, ensures a smoother and more efficient workflow.
Using Lightroom Presets for Faster Workflow
Presets can be a game-changer for speeding up your editing process while reducing the strain on your system. Tools like those from Presets.io allow you to apply complex looks instantly, cutting down on manual adjustments and reducing cache load. For example, the Master Preset Bundle from Presets.io offers 721 presets across 56 collections for $49, covering styles like cinematic and vintage film looks.
Presets streamline your workflow by providing consistent starting points, minimizing the need for multiple cache-intensive adjustments. Instead of experimenting with various settings - which can generate excessive cache entries - you can apply a preset and make minor tweaks as needed. This not only saves time but also reduces system resource usage, especially when editing large batches of images.
Presets.io describes its collections as "incredibly easy to use, even for beginners, so you can quickly edit your photos like a pro". The time saved compounds when handling event or shoot collections, making presets an essential tool for efficiency.
Cache Configuration Comparison
Choosing the right cache configuration is key to balancing performance and storage needs. Here’s a breakdown of common setups:
| Cache Size | Location | Storage Type | Performance Impact | Best Use Case |
|---|---|---|---|---|
| 1GB | System drive | HDD | Slow, frequent cache swaps | Light editing, small catalogs |
| 20GB | System SSD | SSD | Moderate improvement | General photography workflows |
| 40–50GB | Dedicated SSD | SSD | Fastest performance | Professional workflows, large files |
| 20GB | Portable HDD | HDD | Slow, not recommended | Budget setups |
For advanced users, the ideal setup is a 40–50GB cache stored on a dedicated SSD separate from the system drive. This configuration ensures the fastest image loading and smooth editing, especially when paired with 32GB or more of RAM and a GPU with at least 4GB of VRAM.
Additionally, enabling Smart Previews at 2560px on the long edge can significantly improve performance on machines with less powerful hardware. By selecting "Use Smart Previews instead of Originals for image editing" in Performance preferences, LR works with smaller files, reducing cache demands without sacrificing editing quality.
For culling and editing speed, setting the Standard Preview Size to 1440px or 1680px on the long edge is a smart choice. This allows LR to preload adjacent images when working sequentially in the Develop module.
Keep in mind that the benefits of optimized cache settings scale with your hardware. Systems equipped with NVMe SSDs, 32GB+ RAM, and dedicated GPUs will experience the most noticeable improvements. Investing in the right hardware and configurations can dramatically reduce waiting times and provide a smoother editing experience.
Summary and Key Points
Fine-tuning LR's cache settings can significantly speed up your editing process. By understanding and optimizing the three main cache types, you can reduce delays and create a smoother editing experience.
Cache Setup Tips Recap
Camera Raw Cache is a top priority. Increase it to around 50GB, especially if you work with large catalogs. Make sure to store it on a fast internal SSD rather than an external or portable drive, as slower drives can hinder performance .
Preview Cache requires a balance between storage and speed. Setting the Standard Preview Size to 1440px or 1680px (long edge) provides a good compromise between image quality and performance. This approach ensures faster browsing while saving space without sacrificing visual clarity on most screens.
Smart Previews set to 2560px on the long edge work efficiently by mimicking raw files during editing but using far fewer system resources. Activating the "Use Smart Previews instead of Originals for image editing" option in the Performance preferences is especially useful for systems with limited hardware power.
Temporary Caches shine when editing sequentially in the Develop module, as LR preloads nearby images for quicker access. However, jumping between non-adjacent images can negate this benefit .
One user with over 5,000 images reported a noticeable performance boost after increasing their Camera Raw Cache to 50GB, switching to an internal SSD, and setting preview sizes to 1440px.
Once your cache settings are optimized, you can enhance your workflow further by incorporating additional performance-boosting techniques.
Next Steps for Lightroom Performance
After refining your cache settings, focus on GPU acceleration and efficient presets to push performance even further. If your system has a dedicated graphics card, enable GPU acceleration through Preferences > Performance for smoother operation.
Consider using preset collections, like those from Presets.io, to streamline editing and reduce manual adjustments that can strain the cache. Presets provide consistent starting points, especially when working on large batches of photos.
Routine maintenance is essential to keep LR running efficiently. Clear caches regularly to prevent slowdowns, and split large catalogs into smaller ones for easier management. Also, keep an eye on the available storage where your cache is located - a full drive can drastically affect performance.
Finally, ensure your hardware matches your performance goals. Systems with NVMe SSDs, 32GB+ of RAM, and dedicated GPUs see the most noticeable improvements when paired with optimized cache settings. Start with these recommendations and fine-tune based on your specific workflow and hardware setup.
FAQs
Why does storing my Lightroom cache on an internal SSD improve performance?
Storing your Lightroom cache on an internal Solid State Drive (SSD) can make a noticeable difference in performance. Why? SSDs are much faster at reading and writing data compared to traditional Hard Disk Drives (HDDs). This speed allows Lightroom to access cached data quickly, leading to smoother editing sessions and faster loading times.
Another advantage of using an internal SSD is reduced latency. Since the data stays within your computer, it avoids the slower transfer speeds of external connections. To get the most out of this setup, make sure your internal SSD is high-speed and has plenty of free space to meet Lightroom's storage needs.
What are Smart Previews in Lightroom, and how can they boost performance on slower computers?
Smart Previews in Lightroom are scaled-down versions of your original photos, designed to let you edit without needing constant access to the full-resolution files. They’re compact yet detailed enough to handle precise adjustments.
By working with Smart Previews, you can boost Lightroom’s performance, especially on computers with limited processing power. Since the software uses these smaller previews instead of the larger original files, tasks like editing, zooming, and navigating become noticeably quicker and more responsive. When it’s time to export or finalize your work, Lightroom seamlessly applies your edits to the original files, ensuring the highest quality is preserved.
How often should I clear and rebuild my Lightroom cache to keep it running smoothly, and what are the signs that it’s time to do so?
If you want to keep Lightroom running smoothly, clearing and rebuilding your cache every few months is a smart move - especially if you start noticing sluggish loading times, delays during photo edits, or even frequent crashes.
By clearing the cache, you can free up storage space and prevent Lightroom from being slowed down by old or corrupted data. Just be sure to back up your settings and preferences beforehand to protect any custom configurations you’ve set up.