Table of Contents
- How to Edit Golden Hour Photos for Cinematic Looks
- Quick & Easy Golden Hour COLOR GRADING in Lightroom
- Tools and Presets You Need for Cinematic Edits
- How to Edit Golden Hour Photos Step by Step
- Editing Different Types of Golden Hour Photos
- Presets vs Manual Editing: Which Is Better?
- Final Tips for Cinematic Golden Hour Photos
- FAQs
How to Edit Golden Hour Photos for Cinematic Looks
Golden hour photos already have a magical glow, but with the right editing, you can make them look cinematic. The process focuses on balancing warm tones, fixing lighting challenges, and enhancing colors to create a film-like aesthetic. Here's how:
- Start with a preset: Use Lightroom presets to save time and establish a cinematic base. Options like the Cinematic Light Collection ($12.00) are perfect for golden hour tones.
- Tweak exposure and contrast: Adjust brightness and use the Tone Curve for soft, balanced contrast.
- Use AI masking: Target specific areas like the sky or subject to enhance warmth and fix uneven lighting.
- Refine colors: Use the HSL panel to desaturate overpowering hues and maintain natural skin tones.
- Add texture: Apply subtle film grain for a polished, cinematic feel.
Golden hour editing can be tricky due to haze, blown-out highlights, and overly vibrant colors. Tools like Lightroom’s masking and color grading features help address these issues. Whether you’re editing portraits or landscapes, presets combined with manual tweaks ensure professional results. For consistent edits, consider investing in high-quality presets like those from Presets.io.
Quick & Easy Golden Hour COLOR GRADING in Lightroom
Tools and Presets You Need for Cinematic Edits
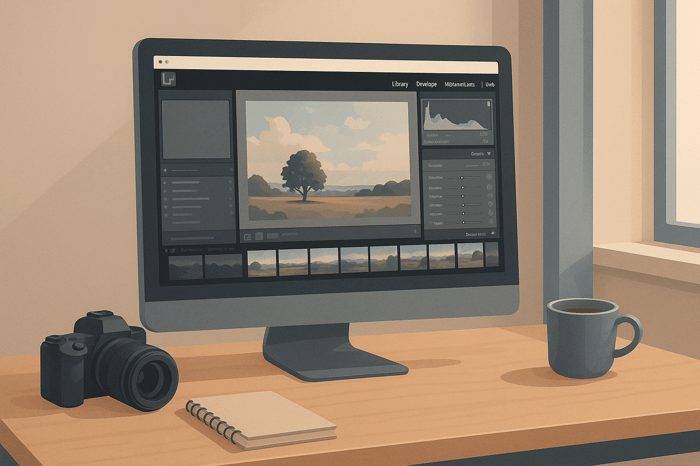
When it comes to cinematic photo edits, Adobe Lightroom is your go-to tool. Pair it with high-quality presets, and you’ll not only speed up your workflow but also maintain a cohesive look across your images. Let’s dive into the Lightroom features and masking techniques that make cinematic edits possible.
Key Lightroom Tools for Cinematic Editing
Lightroom is packed with tools to help you turn ordinary photos into cinematic works of art. Start with white balance adjustments to control the overall warmth of your image. By reducing excessive orange and yellow tones, you can keep the photo’s glow without it feeling overdone.
Next, use masking and AI tools to target specific areas of your image. For example, you can brighten your subject, darken the background, or add warmth to the sky. These tools are perfect for correcting uneven lighting and color casts, which are common challenges in photography.
The Tone Curve panel is another essential feature. It allows you to create that soft, film-like contrast by muting blacks and carefully controlling highlights - steering clear of a harsh, overly digital look. Meanwhile, the Color Grading panel is where you can achieve iconic cinematic color schemes, like the ever-popular teal-and-orange combo.
For fine-tuning colors, the HSL panel comes into play. You can shift greens toward yellow for a warmer feel or desaturate distracting hues to keep the focus on your subject. Lastly, the Effects panel lets you add subtle film grain, giving your photo a tactile, authentic texture. Now, let’s see how presets can simplify all of this.
How Presets Speed Up Cinematic Editing
Presets are a game-changer for Lightroom users. With just one click, they apply a full set of adjustments, instantly giving your photos a cinematic vibe. This not only saves time but also ensures a consistent look across your images, especially if they’re from the same shoot.
Think of presets as a starting point. Once applied, you can tweak settings like exposure, contrast, and color balance to fit your creative vision. No need to reinvent the wheel every time you edit a photo.
If you’re looking for presets, Presets.io offers some great options. Their cinematic collections start at just $12.00, with bundles like The Cinematic Bundle for $37.00 or the Master Preset Bundle (721 presets) for $49.00. These collections are highly rated and designed to tackle common golden hour challenges while delivering that sought-after filmic aesthetic.
Installing and Using Lightroom Presets
Using Lightroom presets is easier than you might think. Once you’ve downloaded your chosen presets - available for both desktop and mobile - follow the installation guides provided by platforms like Presets.io to get set up quickly.
To install, open Lightroom and head to the Develop module. From there, use the Presets panel to import your new files. Once installed, pick a golden hour photo, browse your presets, and click on the one that matches your desired look. The preset will automatically apply a series of adjustments, giving your photo an instant cinematic transformation. Afterward, you can fine-tune settings like exposure, contrast, or white balance to make the image truly your own.
How to Edit Golden Hour Photos Step by Step
Transform your golden hour shots into cinematic masterpieces by combining the efficiency of presets with thoughtful manual adjustments. Here's a step-by-step guide to help you achieve that warm, dreamy glow using Lightroom.
Step 1: Start with a Cinematic Preset
Begin by importing your photo and applying a preset designed to enhance golden hour tones. Look for presets that emphasize warm hues, muted blacks, and a subtle teal-orange contrast for a film-inspired vibe. For instance, presets from Presets.io's Movie or Cinematic Light Collections ($12.00) are a great starting point to establish the mood and tone of your image.
Step 2: Fine-Tune Exposure and Contrast
Once the preset is applied, adjust the exposure to ensure the brightness complements the mood of your shot. Use the Tone Curve panel to create a gentle S-curve - this deepens shadows and lifts highlights without losing important details. Strive for a balance that keeps both the shadows and highlights detailed while adding depth and dimension to your image.
Step 3: Use AI Masking for Warmth and Sky Enhancements
Leverage AI masking to make selective adjustments, focusing on the sky and other key areas. Add soft orange and yellow tones to the sky for a rich, warm glow without altering other parts of the photo. For portraits, apply a mask to the subject's face to introduce a touch of warmth while maintaining an even overall tone. This step ensures the golden hour effect is evenly distributed yet subtle, keeping the cinematic aesthetic intact.
Step 4: Reduce Haze and Refine Highlights
Use the Dehaze slider (around +10 to +25) to bring clarity and detail to your image, but avoid overdoing it to prevent unnatural artifacts. Adjust local highlights and shadows as needed, paying close attention to maintaining natural skin tones. Revisit the white balance for any final tweaks to the temperature, ensuring everything looks cohesive. For a finishing touch, add a hint of grain in the Effects panel to give your photo a textured, professional feel.

The Master Preset Bundle

$57.00
$672.00
The Master Preset Bundle Every Style. Every Platform. One Download Get 56 high-quality Presets.io collections in one complete bundle — designed to help you edit faster, stay consistent, and get professional-looking results in seconds. Get All High-Quality Preset Collections For… continue reading
sbb-itb-b27063b
Editing Different Types of Golden Hour Photos
Once you’ve mastered the basics, it’s time to refine your editing approach based on the type of photo you’re working with - whether it’s portraits, landscapes, or travel shots. Each style has its own demands, and tailoring your edits to suit them can make all the difference. While the foundational techniques stay consistent, portraits need careful attention to maintain natural skin tones, whereas landscapes allow for more dramatic, bold adjustments to bring the scene to life.
Editing Golden Hour Portraits
Golden hour portraits thrive on subtlety. The goal is to enhance the natural warmth of the light while keeping skin tones soft and realistic. You want to amplify the cinematic feel without overpowering the subject's natural beauty.
Start by using portrait presets, like the Wedding or Kodak Portra Collection from Presets.io (priced at $12.00). These presets are perfect for maintaining the delicate balance of skin tones while introducing the nostalgic warmth of classic film photography.
One common challenge with golden hour portraits is backlighting, which can cast shadows on the subject's face. To address this, lift the shadows gently on facial features while ensuring the highlights retain their natural glow. The HSL panel is your best friend here, especially for fine-tuning orange and red hues to avoid oversaturation or unnatural tones. Be mindful of the white balance - too much warmth can make skin look overly yellow or orange.
For a cinematic touch, apply subtle split toning with orange highlights and teal shadows. Use tools like radial gradients or local adjustments to draw attention to the subject, simulating rim lighting for added depth. When applying global color grading, use masking tools to protect the subject’s face from harsh color shifts. Keep contrast adjustments light, as too much can flatten facial features.
To finish, add a touch of grain in the Effects panel for texture - it lends a soft, film-like quality without distracting from the portrait’s natural charm. Once you’ve perfected your portraits, you can move on to the bolder, atmospheric edits that landscapes and travel photos demand.
Editing Landscapes and Travel Photos
Golden hour landscapes and travel shots are all about capturing the magic of the moment. Here, you can go bold with your edits to emphasize the scene’s atmosphere and scale, creating rich, cinematic colors that draw viewers in.
Start by using AI masking to enhance the skies, adding warmth and contrast to bring out the drama of the golden hour. This selective editing ensures the skies pop without overwhelming the foreground elements.
For presets, try Presets.io's Moody Blue Collection to introduce cool, contrasting blues that complement the golden hues of the hour. If you’re leaning into the warmth, the Pumpkin Spice Collection is a great choice for deepening those golden tones and adding a cinematic richness.
Use the tone curve to boost contrast, deepening shadows and enhancing highlights for that signature cinematic feel. Roll off the highlights slightly to maintain a polished, professional look. Increase vibrancy selectively - cityscapes benefit from warm highlights and detailed clarity adjustments, while nature scenes shine with rich greens and golds. Pay close attention to the balance between the sky and the foreground to ensure harmony in the composition.
Add a subtle vignette to heighten the drama and direct the viewer’s focus into the scene. This final touch, combined with enhanced skies, balanced contrast, and thoughtful color grading, turns ordinary landscapes and travel photos into stunning visual stories that capture the essence of golden hour.
| Photo Type | Primary Focus | Key Adjustments | Recommended Presets |
|---|---|---|---|
| Portraits | Natural skin tones, shadow lifting | HSL fine-tuning, split toning, protected masking | Wedding Collection, Kodak Portra |
| Landscapes | Dramatic skies, rich colors | AI sky masking, contrast adjustments, vibrancy | Moody Blue, Pumpkin Spice |
| Travel/City | Warm highlights, architectural details | Clarity adjustments, enhanced warmth, detail preservation | Cinematic Light Collection |
Presets vs Manual Editing: Which Is Better?
When transforming a raw golden hour shot into a stunning cinematic image, the way you edit can make all the difference. Choosing between presets and manual editing isn’t about declaring a winner - it’s about finding what works best for your needs, skill level, and creative goals. Both approaches have their strengths, and many photographers use a hybrid method to get the best of both worlds.
Presets are all about speed. If you’re dealing with hundreds of golden hour photos, presets can save you hours by applying transformations in seconds. This efficiency is a game-changer when you’re up against tight deadlines or need to process a large batch of similar images. On the other hand, manual editing is far more time-intensive, as it involves tweaking each image individually.
For those just starting out, presets provide an easy way to achieve professional-looking results without needing extensive technical know-how. Mastering manual editing, however, requires a deeper understanding of tools like the tone curve, HSL panel, and masking. While this learning curve can be steep, it becomes essential as you develop your artistic vision.
Manual editing shines when creative control is your priority. Whether you’re tackling challenging lighting or aiming for a highly specific look, manual adjustments give you the freedom to fine-tune every detail. This level of control allows you to craft unique styles that reflect your personal vision, rather than relying solely on pre-designed aesthetics.
Another factor to consider is consistency. Presets are ideal for creating a cohesive look across multiple photos, which is especially important for portfolios or projects. Manual editing, while more flexible, can lead to variations as your decisions and preferences evolve during the editing process.
Presets vs Manual Editing Comparison
| Aspect | Presets | Manual Adjustments |
|---|---|---|
| Speed | Quick transformations in seconds | Slower, detailed adjustments for each photo |
| Consistency | Uniform results across edits | Variability based on individual decisions |
| Creative Control | Limited to preset parameters | Full control over every detail |
| Skill Requirement | Beginner-friendly | Requires advanced editing knowledge |
| Cost Efficiency | One-time purchase for multiple looks | Time investment for each image |
| Customization | Good starting point, needs refining | Unlimited customization potential |
Combining both methods often delivers the best results. Many professionals start with a preset to establish a base and then make manual adjustments to fine-tune exposure, color balance, and other creative elements. Tools like those from Presets.io are popular for this approach, allowing photographers to quickly apply a look and then refine it with manual edits.
When deciding which method to use, think about your workflow. Wedding photographers managing hundreds of golden hour portraits often rely on presets for their speed and consistency. Meanwhile, fine art photographers pursuing a distinctive cinematic style lean on manual editing for the precision it offers. Your choice should ultimately reflect your time constraints, expertise, and creative ambitions.
Final Tips for Cinematic Golden Hour Photos
Start your editing process with a cinematic preset to establish a strong foundation, then fine-tune it with manual adjustments. Pay close attention to exposure and contrast to maintain that warm, soft glow of golden hour. Use tools like AI masking to selectively enhance warmth, reduce haze, and refine highlights. This streamlined method helps transform raw golden hour shots into cinematic masterpieces.
Once your initial edits are in place, the quality of your presets becomes a game-changer. Platforms like Presets.io provide professionally crafted cinematic collections that simplify the editing process. For example, their Cinematic Light Preset Collection and Movie Preset Collection are available for $12.00 each (regularly $27.00) and are specifically designed for cinematic color grading and tonal adjustments. For a more complete editing toolkit, you can opt for The Cinematic Bundle at $37.00 (regularly $432.00). High-quality presets not only save time but also ensure a consistent look across your edits.
To refine your cinematic style, reference images can be incredibly helpful. Choose a film still or a cinematic photo that matches the mood you're aiming for. Analyze the key elements - dominant colors, contrast, and the overall emotional tone. Using this as a guide, you can make deliberate adjustments instead of random changes, resulting in a polished and cohesive final image.
Take your edits further with advanced techniques. Incorporate split toning to add complementary colors to highlights and shadows, or add subtle grain for texture and depth. You can also experiment with the HSL (Hue, Saturation, and Luminance) and Calibration panels to create unique color grades that make your work stand out.
Consistency is key, especially when working on a series of photos. Stick to presets from the same collection or bundle to create a unified aesthetic. This is particularly important for portfolios or client projects, as it ensures a professional and cohesive presentation. Presets.io's 4.8-star rating from over 1,400 reviews highlights its reliability in helping photographers achieve consistent results.
Because golden hour is so fleeting, efficient workflows are essential. Organizing your presets and practicing your manual adjustments ahead of time allows you to edit quickly while the creative vision is still fresh in your mind. Whether you're working on wedding portraits or landscape shots, being prepared ensures you can focus on the artistic aspects without getting bogged down by technical hurdles.
Lastly, always test your edits on multiple devices before finalizing them. Colors and contrast can vary significantly across screens, so this step ensures your cinematic vision looks as intended - whether it's shared on social media or printed for display.
FAQs
How can I keep skin tones natural while giving my golden hour photos a cinematic look?
To keep natural skin tones intact in your golden hour photos while adding a cinematic flair, consider starting with Lightroom presets crafted specifically for cinematic color grading. Presets.io provides a range of options that are ideal for achieving this aesthetic, simplifying the process of creating polished, professional-looking images.
Once you've applied a preset, fine-tune the details by manually adjusting the white balance and tone curves. These tweaks ensure that skin tones stay warm and authentic. Pay close attention to contrast and saturation - small adjustments can amplify the golden hour glow without overwhelming the photo. By blending presets with these subtle refinements, you can achieve a stunning, balanced result.
What’s the difference between using presets and manual editing for cinematic golden hour photos, and when should you choose each?
When it comes to achieving that cinematic golden hour vibe in your photos, you’ve got two main options: presets and manual editing.
Presets are like ready-made recipes for your images. They apply a specific look instantly, making them a go-to for saving time and keeping your edits consistent. If you're new to editing or need professional-looking results fast, presets are a great choice.
Manual editing, on the other hand, puts you in the driver’s seat. You can tweak colors, contrast, and every little detail to match your creative vision. This approach is perfect for photographers who love experimenting or want a highly tailored result.
Sometimes, the best approach is to combine the two. Start with a preset to get the base look, then fine-tune it manually to make the final image truly yours. Whether you're working through a large batch of photos or crafting a single masterpiece, you can mix and match these methods to suit your needs.
How can I use AI masking in Lightroom to enhance specific parts of my golden hour photos without affecting the entire image?
AI masking in Lightroom offers a fantastic way to fine-tune specific parts of your golden hour shots. Begin by navigating to the Masking tool in the Develop module. Lightroom can intelligently identify elements like subjects or skies in your photo, enabling you to adjust those areas without affecting the rest of the image.
Once your mask is in place, you can tweak settings such as exposure, contrast, or color temperature to amplify that warm, golden glow. For added precision, the Brush Tool within the mask lets you manually refine the selection, giving you complete control. This method allows you to craft a cinematic, polished finish while keeping every detail just the way you want it.