
Table of Contents
Checklist for Perfect Whimsical Blur Photos
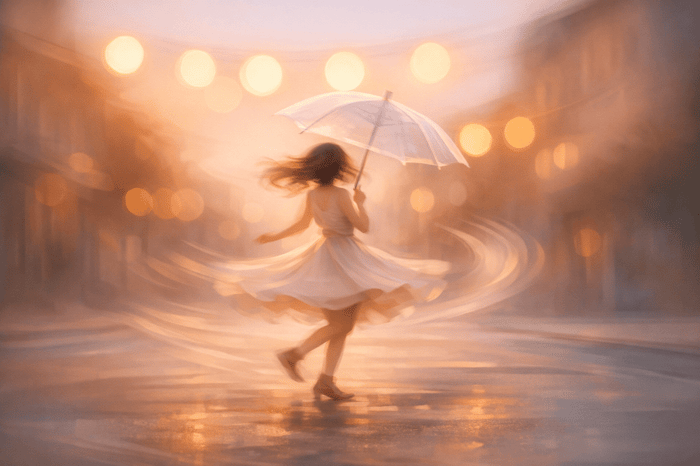
Whimsical blur photography transforms ordinary moments into soft, dreamy visuals by embracing motion, light, and intentional blur. This style prioritizes emotion over sharpness, making it a favorite for weddings and artistic projects in 2025 and 2026. Here's a quick guide:
- Gear: Use prime lenses with wide apertures (f/1.8–f/2.8) and longer focal lengths for smooth backgrounds. A tripod is crucial for stability during long exposures, but handheld techniques work for motion effects.
- Settings: Slow shutter speeds (1/10s to 5s), low ISO (100–400), and ND filters for bright conditions. Experiment with modes like Shutter Priority or Manual.
- Techniques: Try panning to create motion streaks, zoom blur for a tunnel effect, or intentional camera movement (ICM) for abstract patterns.
- Lighting: Shoot during golden hour for warm, diffused light. Mist or fog adds depth and softness.
- Post-Processing: Use tools like Lightroom or Photoshop for selective blur, bokeh adjustments, and presets for consistency.
Master these techniques to create images that feel soft, emotional, and timeless.
Preparation: Equipment and Settings
Select the Right Lenses
The lens you choose can make or break your whimsical blur effect. Prime lenses with wide apertures (like f/1.8 or f/2.8) paired with telephoto focal lengths are your best bet for achieving smooth bokeh and a beautifully blurred background. Simon Ringsmuth, an Educational Technology Specialist, explains:
"Wide apertures also mean your photos will have a shallower depth of field, and anything out of focus behind your subject will begin to take on a smoother, more visually pleasing blur".
Longer focal lengths amplify the blur effect. For instance, zooming in to 300mm will create a far more dramatic background blur than shooting at 24mm. If you’re aiming for a zoom blur effect, a zoom lens like a 24-70mm is essential. Professional photographer David Shaw describes this technique:
"A zoom blur, as is obvious from the name, requires a zoom lens to execute. The result is an image that appears to blur outward, from a comparatively sharp center point".
To capture this effect, set your shutter speed to around 1/10th of a second and continuously adjust the zoom during the exposure.
Stabilize Your Camera
Once you’ve chosen the right lens, stability becomes crucial for achieving a clean blur effect. A tripod is your best friend for long exposures, ensuring the stationary parts of your image stay sharp while the moving elements blur. For example, when photographing waterfalls or busy crowds with exposures lasting 3 to 5 seconds, a tripod eliminates unwanted camera shake. Tech journalist Tata Rossi notes:
"The longer your lens, the more prone it is to camera shake".
That said, handheld shooting can work well for intentional camera movement (ICM) techniques. Modern cameras with in-body image stabilization (IBIS) allow for exposures of 1 second or longer without significant shake. For panning shots - like tracking a moving car or cyclist at shutter speeds between 1/30 and 1/60 seconds - you can shoot handheld or use a tripod equipped with a panning head for smoother results. If you don’t have a tripod handy, improvising works too: lean against a sturdy object like a streetlight or rest your camera on a wall for added stability.
Set Up Your Environment
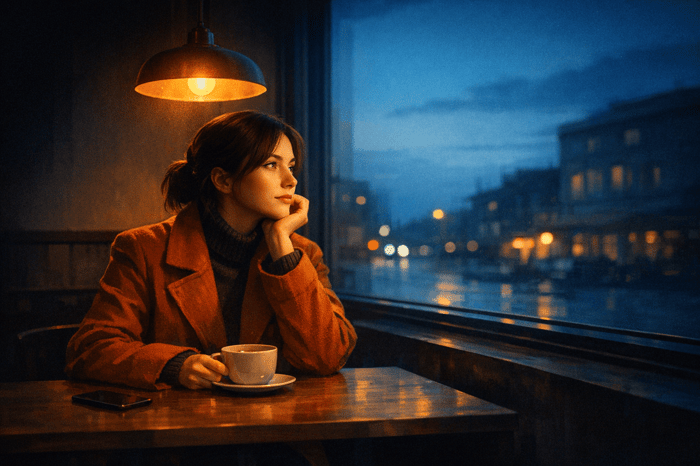
With your gear ready, it’s time to optimize your environment to enhance the dreamy, blurred effect. Lighting plays a massive role in whimsical blur photography. The golden hour - shortly after sunrise or just before sunset - offers warm, diffused light that softens shadows and boosts the dreamlike quality of your shots. Incorporating atmospheric elements like mist, haze, or fog can further enhance the ethereal vibe by adding depth and softening distant details.
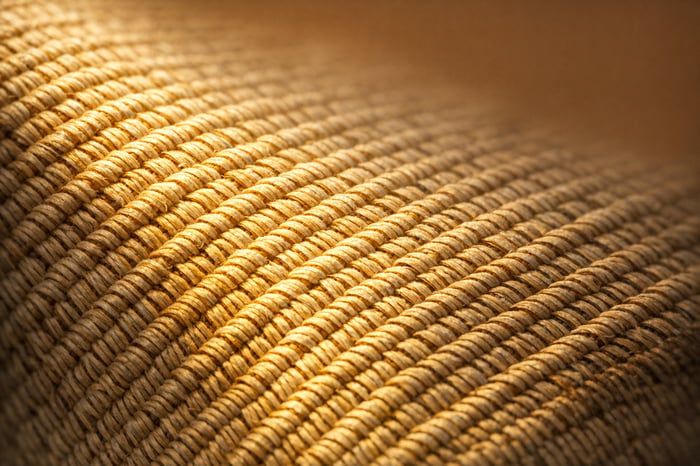
Background selection is equally important. Choose simple, uncluttered backgrounds that don’t compete with your subject. Look for textures or patterns, such as rows of tree trunks or tall grass, which work well for vertical panning blurs. Avoid chaotic compositions, as they can distract from the serene, otherworldly aesthetic you’re aiming to create.
sbb-itb-b27063b
Create Magical Images with Intentional Blur | Impressionist Style Tutorial
In-Camera Techniques
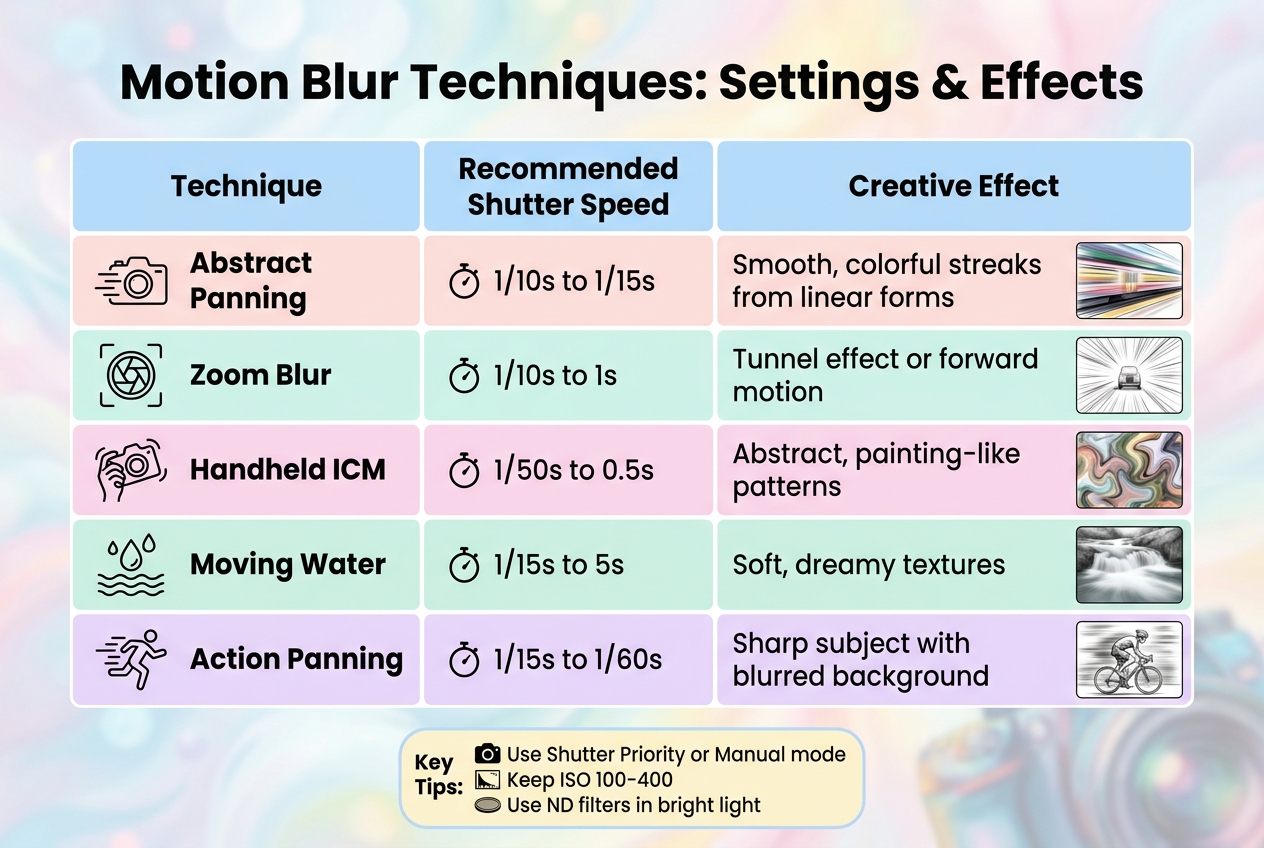
Whimsical Blur Photography Techniques: Shutter Speeds and Creative Effects Guide
Once you've chosen your equipment and set up your environment, you can dive into these in-camera methods to craft that dreamy blur effect.
Adjust Camera Settings
The right camera settings lay the groundwork for creating whimsical blur. Use Shutter Priority or Manual mode, set your shutter speed to 1/100s or slower, and choose an aperture between f/8 and f/16. Keep your ISO low - between 100 and 400 - and if you're shooting in bright light, an ND filter can help keep your exposure balanced.
For zoom blur effects, pre-focus at your desired focal length and then switch to manual focus. This ensures your subject stays somewhat recognizable throughout the shot. As creative photography expert Simon Bond points out, "you won't see any worthwhile results from shutter speeds over 1/100th".
Once your settings are ready, you can experiment with motion techniques to enhance the blur effect.
Experiment with Motion Blur
Motion blur adds energy and movement to your shots.
- Panning: This technique involves moving your camera parallel to a moving subject, creating streaks of color. Use shutter speeds between 1/15s and 1/60s for subjects like cyclists or cars. Consistent movement is key - any hesitation can cause parts of the image to retain unwanted detail, disrupting the smooth color streaks.
- Zoom Blur: Create a striking "tunnel" effect by adjusting your zoom ring while the shutter is open. A 1-second shutter speed works well - zooming out tends to be more effective at night to avoid light trails overwhelming your subject.
- Intentional Camera Movement (ICM): Move your camera in deliberate patterns - circles, straight lines, or even heart shapes - during a handheld exposure of around 0.5 seconds. As photographer Marie Gardiner explains, "ICM is the deliberate physical movement of the camera during a shot, to create a pleasant 'motion blur' effect".
| Technique | Recommended Shutter Speed | Creative Effect |
|---|---|---|
| Abstract Panning | 1/10s to 1/15s | Smooth, colorful streaks from linear forms |
| Zoom Blur | 1/10s to 1s | Tunnel effect or forward motion |
| Handheld ICM | 1/50s to 0.5s | Abstract, painting-like patterns |
| Moving Water | 1/15s to 5s | Soft, dreamy textures |
| Action Panning | 1/15s to 1/60s | Sharp subject with blurred background |
Use Foreground Elements
Incorporating foreground elements into your shots adds depth and complexity to your blur photography. Shooting through objects in the foreground can create compelling layers. For example, tree trunks, plant stems, and tall grass work beautifully for panning blur effects. For zoom blur, tree canopies provide the perfect amount of detail to emphasize outward motion - clear skies, on the other hand, won't deliver the same impact.
Point light sources, like Christmas lights or city lights, can create stunning streaks of color when you move your camera during exposure. These lights act as "kinetic light paint", creating vibrant trails across your frame. To achieve the best results, look for scenes with repeating patterns or strong color blocks, such as autumn leaves. These elements add structure to abstract images that might otherwise feel chaotic.
When working with intentional movement, remember to turn off image stabilization and switch to manual focus. This prevents your camera from trying to refocus during movement, ensuring your blur effect stays intentional and controlled.
The Wedding Bundle

$44.00
$165.00
The Wedding Bundle is a thoughtfully curated collection of Lightroom presets crafted to elevate every moment of your wedding photography — from intimate preparations to the final celebration. Featuring presets from Love, Matte Film, Stylish, The Bouquet, Vintage Dress, Elegant… continue reading

Post-Processing: Refining the Blur Effect
Post-processing is where you can take your blur effect to the next level. With the help of editing software, you can fine-tune blur, tweak bokeh, and create that dreamy, artistic vibe. Let’s dive into some tools and techniques that can help you refine your images.
Enhance Blur with Editing Tools
Editing programs like Lightroom and Photoshop offer powerful tools to enhance and control blur. For instance, Lightroom's Lens Blur tool, powered by Adobe Sensei AI, allows you to create depth maps and apply selective blur. Features like "Focus on Subject" and "Visualize Depth" help you pinpoint and refine areas of blur with precision.
Photoshop's Blur Gallery provides even more specialized options. Here’s a quick breakdown of some key tools:
- Field Blur: Add multiple pins across your image, each with different blur levels, making it perfect for complex scenes.
- Iris Blur: Create an elliptical focus area to highlight a subject while softly blurring the rest.
- Tilt-Shift: Mimic a miniature world by blurring the top and bottom sections of your image.
Photographer Maria Semelevich encourages creativity with these tools:
"Everything is about the creative approach, so do not hesitate and experiment!"
For added control, convert layers to Smart Objects before applying filters. This allows you to use tools like Gaussian Blur on layer masks to create smooth, natural transitions.
Improve Bokeh Quality
Bokeh - the aesthetic quality of out-of-focus highlights - can add a magical touch to your images. Post-processing tools give you the freedom to customize bokeh shapes and styles beyond what your lens naturally produces. Options include:
- Circle
- Bubble
- Vintage 5-blade
- Ring (doughnut)
- Anamorphic (oval)
In Lightroom, the Cat Eye slider can create crescent-shaped, swirling bokeh reminiscent of vintage lenses. Adjust settings like Threshold and Brightness within blur filters to control how light transforms into bokeh highlights. Tools like Lightroom's Boost slider or Photoshop's Light Bokeh and Color Bokeh sliders can make these highlights more vibrant and eye-catching.
Maria Semelevich emphasizes the importance of balancing contrast and exposure:
"The more contrast that is applied with a clear, not overexposed bokeh, the better it looks."
Keep in mind that underexposed bokeh can appear dull, while overexposed highlights may lose detail and merge into a white blur. For added texture, try overlaying bokeh using Screen or Linear Dodge blending modes in Photoshop. But remember Semelevich’s advice:
"More is not always better! Sometimes too many effects... can give the opposite effect and hide the beauty of the original image or idea."
Streamline Edits with Presets.io

Manually adjusting each photo can be time-consuming, especially when working with multiple images. That’s where presets come in. Platforms like Presets.io offer ready-made options to create a soft-focus, whimsical aesthetic with just a few clicks. These presets often reduce clarity and sharpness to achieve an ethereal look while maintaining consistency across your edits.
For example, a Tilt-Shift preset might automatically apply settings like Contrast -40, Clarity -15, and Sharpness -100. You can then fine-tune the effect by adjusting gradients or using brushes to better align with your subject. Presets are non-destructive, meaning you can always tweak them further to suit your vision. Plus, Presets.io provides simple installation guides to get you started quickly.
Advanced Techniques for Better Results
Once you've mastered basic in-camera and post-processing methods, these advanced techniques can take your whimsical blur photography to the next level.
Capture Moving Elements
When photographing moving water, the right shutter speed is key. For fast-moving waterfalls, try a shutter speed around 1/15 second. Slower waves, on the other hand, may need multi-second exposures to create that dreamy, misty effect. Similarly, wind-blown foliage can be transformed into soft, colorful streaks with exposures of about 1/4 second.
Using a tripod is essential here. It keeps static elements in your frame sharp while allowing motion to blur, creating a striking contrast that enhances the whimsical quality. If you're shooting in bright daylight, Neutral Density (ND) filters are a lifesaver. They reduce the amount of light entering your lens, letting you use longer shutter speeds without overexposing your image.
Create Abstract Results
For images that look almost like paintings, experiment with camera jiggling during short exposures. Photographer David Shaw explains the unique effect:
"The results [of jiggling] can be very painting-like, and are quite unlike any other type of image I know how to create".
This technique works especially well with linear patterns, such as tree trunks or tall flower stems.
Another fun option is zoom blurring, which involves changing your lens's focal length during the exposure. This creates a "tunnel" effect, with blur radiating outward from a central point. To nail this technique, use a shutter speed between 1/10 and 1/15 second and keep the camera moving smoothly throughout the entire exposure. Stopping or pausing mid-motion can lead to jumbled details that lack the desired artistic flow.
Apply Presets for Final Touches
After experimenting with these techniques, you can refine your results using presets. Tools like Presets.io collections are perfect for adding the finishing touches, helping you maintain a cohesive style, color palette, and mood across your photo series. They're particularly useful for enhancing long-exposure shots of flowing water, wind-blown foliage, or intentional camera movements.
Presets simplify adjustments like color grading, turning raw motion into polished, eye-catching images. Since they're non-destructive, you can tweak them to match your vision without worrying about losing your original work. Presets.io also provides easy installation guides, so you can start applying these enhancements right away and achieve consistent results throughout your whimsical blur photography projects.
Conclusion
Creating whimsical blur photos involves three key stages: preparation, in-camera techniques, and post-processing. Each step builds on the last, resulting in soft, dream-like images that feel almost magical.
Start with the right equipment and location. Shooting during the golden hour and using wide apertures (like f/1.4–f/2.8) helps isolate your subject and lay the groundwork for that artistic blur. These early choices set the stage for turning technical precision into creative expression.
Next, focus on in-camera techniques. Experiment with slow shutter speeds to capture natural motion blur. As photographer Skylum explains:
"A dreamy photoshoot requires only great attention to the camera settings and light treatment. Once mastered, this will enable you to shoot soft, otherworldly images that evoke wonder and beauty".
Finally, bring your vision to life through editing. Adjustments like reducing clarity and contrast (around –20 to –40) and adding a soft glow can refine your photos. Using tools like presets from Presets.io can help simplify your workflow while maintaining flexibility. Their presets allow you to apply professional effects quickly, with options to tweak opacity and masking for a personal touch.
FAQs
What shutter speed should I start with for whimsical blur?
To create a dreamy blur effect, start by using a slower shutter speed to capture motion intentionally. A good starting point is 1/15 to 1/30 seconds, which allows you to blend motion blur with some retained detail. You can tweak this setting depending on how fast your subject is moving and the overall scene you're capturing.
Do I need a tripod, or can I shoot whimsical blur handheld?
You can create whimsical blur photos without needing a tripod. This effect typically involves tweaking the shutter speed and moving the camera during the exposure. If you're confident in your technique, you can achieve this handheld. While a tripod might offer extra stability, it's not a must-have for this style of photography.
How do I keep my subject recognizable while adding blur?
To create a striking image with a whimsical blur effect, take control of your camera's manual settings. Start by focusing directly on your subject to keep it sharp and clear. Then, adjust the shutter speed to intentionally blur the background or surrounding elements. The trick lies in finding the right balance between sharpness and blur, ensuring your subject remains the focal point while the blurred areas add a touch of creativity.