
Table of Contents
Ultimate Guide to Vignettes in Lightroom
Vignettes in Lightroom are a simple yet powerful way to enhance your photos. They adjust the brightness or color at the edges of an image, helping draw attention to the subject or create a specific mood. Lightroom offers three main tools for vignettes:
- Lens Corrections/Optics Panel: Fixes natural lens vignetting caused by the camera lens.
- Effects Panel (Post-Crop Vignetting): Adds vignettes that adjust dynamically with cropping.
- Masking Tools (Radial Gradient, Brush): Provides precise control for custom vignettes, especially for off-center subjects.
Key Tips:
- Use Lens Corrections first to fix or retain natural vignetting.
- Apply Post-Crop Vignetting for centered subjects or batch edits.
- Use Radial Gradients for off-center compositions or to emphasize specific areas.
- Combine vignettes with tone curves, color grading, and grain for vintage or cinematic effects.
- Avoid over-darkening key details or creating harsh transitions by adjusting feathering.
For a polished look, experiment with layering vignettes and save your favorite settings as presets for consistent results. Platforms like Presets.io offer ready-made presets that include vignettes, tone curves, and other adjustments to streamline your workflow.
Core Lightroom Vignette Tools and Adjustments

Post-Crop Vignetting in the Effects Panel
The Effects panel in Lightroom is your go-to for adding creative vignettes. The Post-Crop Vignetting tool adjusts automatically when you crop your image, ensuring the vignette always aligns with your final composition. This means you can experiment with cropping without worrying about the vignette looking uneven or out of place.
Start with the Amount slider. Negative values darken the edges, while positive values lighten them. For a subtle and natural dark vignette, try setting it between -5 and -20. This range usually draws attention to the subject without being overpowering. If you're after a bold, dramatic effect, you can push the slider further, but be cautious not to lose important details in the corners.
The Midpoint slider controls how far the vignette spreads inward. A lower value pulls the effect closer to the center, covering more of the frame, while a higher value keeps it near the edges. Adjust this setting so the vignette starts just outside your subject, avoiding overlap with your focal point.
With the Roundness slider, you can shape the vignette. A value of 0 creates an oval that matches your crop's aspect ratio. Negative values make the vignette more rectangular, great for wide landscapes. Positive values create a rounder shape, ideal for portraits or centered compositions. Choose a shape that complements your image - slightly rectangular for landscapes, slightly rounder for portraits.
The Feather slider determines how smoothly the vignette blends into the image. High Feather values (60-100) create a soft transition, while lower values result in a harder edge. Use lower settings only for stylized effects, as they can look artificial in most cases.
The Highlights slider is especially useful when darkening edges with bright areas, like sunsets or windows. Increasing the Highlights value preserves some brightness in those areas, preventing them from looking overly dim.
Finally, the Style dropdown offers three options: Highlight Priority, Color Priority, and Paint Overlay. Highlight Priority and Color Priority retain color and highlight details, making them ideal for natural-looking edits. Paint Overlay simply darkens or lightens without considering color, which can work for bold, stylized effects but may look unnatural in subtle edits.
For best results, apply vignettes later in your editing process - after cropping and adjusting tones and colors. This way, you can assess the vignette's impact in context and avoid redoing it if you crop again.
Next, let’s tackle natural lens vignetting using the Lens Corrections panel.
Lens Corrections and Optics Panel
The Lens Corrections panel (or Optics in newer Lightroom versions) addresses natural vignetting caused by lens design, wide apertures, or other physical factors. This type of vignetting often darkens the corners of your image unintentionally.
To fix this, enable Lens Profile Corrections in the Optics panel. Lightroom will detect your lens model from the image metadata and apply a correction profile to brighten the corners and even out exposure automatically.
If the automatic correction doesn’t fully resolve the issue, switch to the Manual tab for finer adjustments. Use the Vignetting Amount slider to brighten edges further, but avoid overdoing it, as this can create halos or unnaturally bright corners. The Midpoint slider here adjusts how far the correction extends toward the center - higher values keep the adjustment confined to the edges, maintaining a balanced look.
For a more natural feel, you don’t always have to fully correct lens vignetting. Slightly under-correcting can retain some of the natural falloff, which works well for wide-angle landscapes or environmental portraits. You can even move the Amount slider slightly left to add a touch of vintage or film-like charm.
A good rule of thumb: address lens vignetting before applying creative vignettes in the Effects panel. Overlapping corrections can amplify the effect unintentionally. For commercial or product photography, fully correct the lens vignetting first, then add a controlled vignette if needed. For artistic or vintage-style edits, you might keep some natural vignetting and layer it with a subtle creative vignette for added depth.
Using Radial Gradients and Masks
For off-center subjects, symmetrical vignettes from the Effects panel may not work as well. This is where Radial Gradients and masking tools shine, allowing you to create custom vignettes that match your subject’s placement.
To use a Radial Gradient, activate the tool in the Masking panel and draw an ellipse around your subject. Adjust its position so the subject is comfortably inside. Increase the Feather setting to create a soft transition between the inside and outside areas. Then, enable the Invert option so your adjustments affect the area outside the ellipse. Lower the Exposure slider to darken the surroundings, or tweak settings like Highlights and Shadows for a more tailored effect. You can also adjust Clarity, Dehaze, or Saturation to further guide attention to your subject. This technique creates a vignette that naturally follows your composition, no matter where the subject is located.
Radial Gradient vignettes are particularly effective in genres like street or travel photography, where backgrounds can be busy. You can even use multiple radial vignettes to dim distracting areas while keeping your subject fully exposed - something a single global vignette can’t achieve as effectively.
For a more advanced touch, try a two-step vignette. First, create a Radial Gradient, invert it, and darken the outer area. Then, duplicate the mask, disable the Invert option, and slightly brighten the inner section with an Exposure boost of +0.2 to +0.5. This creates a subtle spotlight effect, adding depth and dimension to your image.
With Lightroom’s newer Masking system, you can take this further by intersecting a Radial Gradient with Subject or Luminance masks. This allows you to create smart vignettes that adapt to your subject’s edges and brightness levels, ensuring a seamless and polished result.
The BEST Way to Use Vignettes in Lightroom | Tutorial Tuesday
Creating Vintage Looks with Vignettes
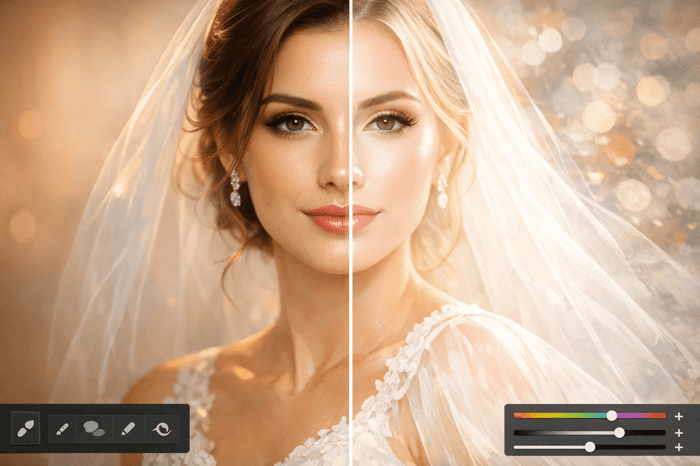
Lightroom's vignette tools are a great starting point for creating vintage effects, but the magic happens when you combine them with tonal and textural tweaks. Vintage photography often pairs darkened edges with carefully adjusted tones, colors, and textures to recreate that classic film vibe. Once you've added a vignette, refining tones and colors helps it blend seamlessly into your vintage aesthetic.
Combining Vignettes with Tone Curve and Color Grading
The Tone Curve is your go-to tool for crafting a matte, low-contrast base that makes vignettes look more film-like and less like a digital overlay. Start by lifting the bottom-left point of the curve to soften shadows and create that signature matte effect. Then, pull down the top-right point to prevent highlights from becoming too harsh or clipped.
To maintain depth, add a subtle S-curve in the midtones. This keeps important details - like faces - clear while preserving the overall soft, low-contrast feel.
For added authenticity, tweak the Blue channel in the Tone Curve. Gently lift the shadows to introduce a cool cyan tint and lower the highlights slightly to bring in a warm yellow tone. This mirrors the subtle color shifts you’d see in scanned film, where shadows often lean cool and highlights feel warm.
Next, use Color Grading to add depth and character. For a warm vintage look, add orange or yellow tones to the highlights and midtones with low saturation (about 10–20%). Keep the shadows neutral or slightly cool for balance. This contrast between warm, glowing centers and cooler, darker edges enhances the vignette's effect.
If you're aiming for a faded film or cross-processed vibe, push cool blues or teals into the shadows, warm up the highlights, and reduce overall saturation in the Basic panel by 10–15%. This creates a muted, understated color palette that pairs beautifully with a vignette, making the edges feel darker and subtly tinted while keeping the central subject clean and neutral.
To get the best results, follow this sequence: start with the Tone Curve to set the contrast, move on to Color Grading for your color palette, and finish by fine-tuning the vignette. This ensures all adjustments work together seamlessly.
Adding Grain and Texture for Vintage Effects
Once your tones are balanced, it's time to add grain and texture to complete the film-inspired look. Grain is key to making your vignette feel like part of a physical film process rather than a digital effect. The Effects panel offers dedicated grain controls that pair perfectly with vignette settings.
Set the Grain Amount between 15–35 and the Size between 20–40, depending on the film texture you're aiming for. For a fine-grain look (like Kodak Portra), stick to lower values (15–20). For a grittier, high-ISO effect, go higher (30–35). Larger grain sizes (35–40) work well for dramatic night scenes, while smaller sizes (20–30) feel more polished and controlled.
The Roughness slider determines how uniform the grain appears. Values between 40–60 usually strike the right balance, giving the grain a natural feel.
Always check your grain adjustments at 100% zoom. Overdoing it can make the image look overly processed. The grain should feel subtle - noticeable on closer inspection but not overwhelming at normal viewing distances.
To mimic aged prints, reduce Clarity or Texture globally by 5–10 points. This softens details, giving the image a scanned, vintage photo feel. To keep your subject sharp, use a Radial Gradient to restore Clarity locally (+10 to +15) around key areas like eyes or faces.
For a high-ISO, gritty film aesthetic, increase both Grain Amount and Size while using a darker, tighter vignette (Midpoint around 35–45). Lowering contrast in the Tone Curve helps the grain stand out while avoiding harsh shadow clipping. This approach channels the raw, documentary feel of street photography from the '70s and '80s.
Examples of Vintage Styles
Here are three distinct vintage styles you can try right away. Each combines vignette settings, tone curves, and color adjustments to create a unique look:
- Subtle Dark Film Look
Perfect for portraits and lifestyle shots. Use a Post-Crop Vignette with Amount set to -15 to -25, Midpoint at 50, Feather at 70–80, and Roundness at 0 to +10. Add a matte effect by lifting the blacks in the Tone Curve and apply warm Color Grading to the highlights (orange tint at 10–15% saturation). Set Grain Amount to 20–25 with Size at 25–30 for a soft, film-inspired finish. - Faded Print with Lightened Corners
For a dreamy, nostalgic look, set Vignette Amount to +10 to +20, Midpoint at 45–60, and Feather at 80–100 for soft, glowing edges. Raise the blacks and lower the whites in the Tone Curve for a pronounced matte effect. Add soft yellow tones to the highlights with Color Grading, desaturate greens and blues, and reduce Texture by -5 to -10. Use Grain Amount at 15–20 and Size at 20–25 for a delicate finish. - Strong Black-and-White with Heavy Vignette
Ideal for dramatic, high-contrast images. Convert to black and white, then increase contrast while lifting the blacks in the Tone Curve. Use a Radial Gradient to brighten the subject (Exposure +0.3 to +0.5). Apply a strong vignette (Amount -30 to -50, Midpoint 40–50, Feather 60–70) and add Grain Amount at 25–30 with Size at 30–35. This style works well for portraits and architectural shots with a classic, timeless feel.
If you're editing multiple images or want consistent results, presets can save you time. Platforms like Presets.io offer collections tailored for vintage styles, including Retro Film and Kodak Portra presets. These presets combine vignettes, tone curves, color grading, and grain into one-click solutions, which you can then tweak to suit your specific images.

The Master Preset Bundle

$57.00
$672.00
The Master Preset Bundle Every Style. Every Platform. One Download Get 56 high-quality Presets.io collections in one complete bundle — designed to help you edit faster, stay consistent, and get professional-looking results in seconds. Get All High-Quality Preset Collections For… continue reading
sbb-itb-b27063b
Advanced Vignette Techniques and Tips
Once you've nailed the basics of Post-Crop Vignetting and vintage effects, it’s time to step up your game. Advanced vignetting is more than just darkening the edges of your frame - it’s about shaping light to guide the viewer’s eye, adding depth to your composition, and improving your editing workflow.
Layering Multiple Vignettes
Layering vignettes in Lightroom allows you to create more refined and professional results. Instead of sticking to a single Post-Crop Vignette, you can use a mix of global and local adjustments to sculpt light and shadow around your subject.
Start with a Post-Crop Vignette as your foundation. Adjust the settings to subtle levels: set the Amount to -10 to -20, the Midpoint to 50, and the Feather to 70–80. This creates a soft, general darkening around the edges.
Next, use a Radial Gradient mask for more targeted adjustments. Select the Radial Gradient tool, draw an oval around your subject, and feather it generously. Invert the mask so your adjustments apply outside the oval. Lower the Exposure by -0.3 to -0.5 stops and reduce Shadows by -10 to -20. This creates a vignette tailored to your subject’s position, perfect for off-center portraits or environmental shots.
For added impact, duplicate the radial mask and uncheck the Invert option. This second mask brightens the subject itself. Increase the Exposure by +0.2 to +0.5 stops and enhance Clarity or Whites by +10 to +15. This subtle spotlight effect makes your subject stand out while keeping the background understated. The result? A layered vignette: a global base layer, a custom background darkening, and a subject-specific brightening.
Fine-tune these layers with the Brush tool. If the vignette unintentionally darkens important details like faces or bright clothing, use the Brush tool to subtract from the mask and restore those areas. This gives you precise control over the effect.
For portraits or lifestyle photography, this layered method adds depth and separation without the harsh "ring" effect of a single global vignette. You can also combine Radial Gradients with Linear Gradients or Color Range masks to ensure bright skies or foreground elements aren’t overly darkened.
Before wrapping up, zoom in at 100% to check your work. Look for any unintentional darkening of skin tones, hair highlights, or other key details. Keeping the effect subtle ensures it enhances the image without drawing attention to itself.
Using Presets to Simplify Vintage Editing
While manual layering gives you ultimate control, presets simplify the process and save time. A good preset bundles vignette settings with other adjustments like matte tone curves, warm color grading, and film grain, letting you achieve a polished look in one click. You can then tweak individual elements like vignette intensity or grain amount as needed.
Platforms like Presets.io offer collections tailored for vintage and film-inspired looks. Popular options include the Retro Film Preset Collection, Kodak Portra Preset Collection, Fuji Film Preset Collection, and The Vintage Film Bundle. These presets feature advanced vignette structures alongside tone curves, color grading, and grain effects to replicate analog styles. With an average rating of 4.8 out of 5 stars from 1,413 reviews, they’re a trusted resource for both Lightroom desktop and mobile users.
Individual presets start at $12.00, but for maximum variety, the Master Preset Bundle offers 721 presets for $49.00 (regularly $672.00). New presets are released weekly, giving you fresh creative tools to experiment with.
Presets are more than just a time-saver - they ensure consistency. Whether you’re editing a wedding, a portrait session, or a product shoot, using the same base preset across all images creates a cohesive look. From there, you can tweak settings like vignette Amount, Midpoint, or mask intensity to suit different crops, lighting conditions, or print formats (like 8×10 or 16×20 inches). Adjustments to grain and color grading can also be tailored depending on whether the images are for social media or large wall prints.
Some advanced presets even include built-in mask structures, such as smart vignettes that preserve important subject details. This eliminates the need for manual masking while still allowing precise adjustments.
For even greater efficiency, save your favorite layered vignette setups - like combinations of Post-Crop Vignettes, Radial masks, and grain - as custom presets. This creates a personal library of go-to looks you can reuse for future projects.
Comparison of Vignette Approaches
Lightroom offers three main methods for creating vignettes, each with unique strengths. Knowing when to use each one helps you choose the best approach for your specific image.
| Vignette Type | Pros | Cons | Best Use Cases |
|---|---|---|---|
| Post-Crop Vignette (Effects Panel) | Quick and consistent; auto-adjusts to cropping; ideal for batch processing; simple controls | Always centered on the frame | Centered compositions, batch edits, simple vintage effects, landscapes |
| Radial Masks / Radial Gradient | Fully customizable; allows layering; combines exposure, contrast, and color adjustments | Requires more manual setup; slower for high-volume workflows | Off-center subjects, portraits, lifestyle shots, subject-aware effects |
| Lens-Based Vignetting (Optics/Lens Corrections) | Reflects natural lens characteristics; optically realistic | Limited creative control; tied to raw image frame | Recreating vintage lens effects, preserving analog feel, correcting lens falloff |
Post-Crop Vignettes are best for quick, consistent results, especially for centered subjects or batch edits. Highlight Priority mode offers subtle, natural effects, while Paint Overlay mode delivers bolder vintage looks.
Radial Masks are ideal for off-center subjects or when you need precise control over the vignette’s shape and intensity. They’re perfect for portraits, lifestyle images, and any scenario where the vignette should follow the subject rather than the frame.
Lens-Based Vignetting captures the natural optical qualities of your lens. Enabling Profile Corrections in the Lens Corrections panel removes unwanted darkening for a clean look. Alternatively, you can dial back the correction to retain some natural edge darkening, enhancing vintage aesthetics. Pair this with Post-Crop Vignettes or Radial Masks for more refined effects.
For the most dynamic vintage edits, combine all three methods. Start with lens-based corrections to preserve natural optical characteristics, add a global Post-Crop Vignette for mood, and use Radial Masks for precise subject emphasis. This layered approach results in balanced, visually striking images.
Practical Workflow and Common Mistakes
Incorporating vignettes into your editing process doesn’t have to feel overwhelming. A streamlined, repeatable workflow can save you time and ensure consistent results, especially when tackling large batches of photos. The trick lies in knowing when to add vignettes and how to identify and fix potential issues before they detract from your final image.
Step-by-Step Workflow for Vintage Edits
A solid vintage editing workflow in Lightroom follows a logical progression. By addressing foundational adjustments first and saving creative effects for later, you avoid unnecessary rework and keep your edits efficient.
Step 1: Import and Apply Lens Corrections
Start by importing your images and applying Profile Corrections in the Lens Corrections panel. For a vintage aesthetic, slightly reduce the correction to preserve some natural edge darkening. This provides a clean baseline before layering on creative effects.
Step 2: Adjust Exposure and White Balance
Fine-tune the overall Exposure, Highlights, Shadows, and White Balance in the Basic panel. Nailing these adjustments early ensures your image is well-balanced, reducing the need for heavy-handed vignettes later.
Step 3: Add Your Vignette
- For centered subjects like landscapes or symmetrical portraits, use the Post-Crop Vignetting tool in the Effects panel. Set the Amount between -10 and -20 for a subtle effect. Adjust the Midpoint (around 50 for general use or 60–70 for a more concentrated effect) and the Feather (70–80) for smooth transitions. Modify the Roundness based on your composition - lower values (30–40) for rectangular landscapes and higher values (60–70) for portraits.
- For off-center subjects, opt for a Radial Gradient instead. Draw an oval around your subject, invert the mask, and feather it generously. Lower the Exposure by -0.3 to -0.5 stops and reduce the Shadows by -10 to -20 to create a subtle, natural vignette that wraps around your subject.
Step 4: Apply Tone Curve and Color Grading
To achieve a faded, film-inspired look, lift the blacks slightly in the Tone Curve panel by dragging the bottom-left point up by 5–10%. In the Color Grading panel, add warm tones (orange or yellow) to the highlights and cooler tones (teal or blue) to the shadows. Keep these adjustments minimal to maintain a natural feel.
Step 5: Add Grain and Texture
In the Effects panel, introduce Grain for a film-like texture. Set the Amount between 15 and 30, the Size around 25–35, and Roughness to 50. For added grit, increase Texture in the Basic panel by +5 to +10. This step ties together the vignette, color grading, and tone curve, creating a cohesive vintage vibe.
Step 6: Fine-Tune and Export
Review your image at 100% zoom to check for any harsh transitions or banding. Make final tweaks to vignette strength, grain, or color grading as needed. Once satisfied, export your image in the appropriate resolution and color space: sRGB for web and Adobe RGB or ProPhoto RGB for print. To save time on future edits, create a custom preset or explore platforms like Presets.io for ready-made vintage presets.
Troubleshooting Common Vignette Issues
Even with a solid workflow, problems can arise. Knowing how to address these common vignette issues will help you maintain a polished look.
Over-Darkened Corners
If your corners appear too dark or muddy, reduce the vignette Amount in small increments (around 5 points) until the effect looks natural. Check the Midpoint setting - values below 40 can push the vignette too far into the frame. Increasing the Midpoint to 50 or higher keeps the darkening confined to the edges.
For Radial Gradients, soften the transition by increasing the Feather or reducing the Exposure adjustment. If corners clip to black, adjust the Shadows slider or reduce the vignette’s Shadows adjustment.
Harsh Edges or Visible Rings
Hard edges or visible rings often indicate insufficient feathering. Increase the Feather slider to 80 or higher for a smoother transition.
Subject Getting Darkened
If important details like faces or key elements near the edges are unintentionally darkened, switch to a Radial Gradient. Place the mask around the subject, invert it, and adjust the vignette to darken only the background. Alternatively, use the Brush tool to subtract the vignette effect from specific areas.
Banding and Posterization
Banding can occur in smooth areas like skies or studio backgrounds. To fix this, slightly reduce the vignette Amount or add Grain (15–25) to break up the gradient. If banding persists, check your export settings - 8-bit color depth can introduce banding, so consider exporting as a 16-bit TIFF for print or a high-quality JPEG (90 or above) for web.
Vignette Changes After Cropping
Post-Crop Vignetting recalculates based on the new frame dimensions. If your vignette feels too strong after cropping, revisit the Midpoint and Roundness settings to refine the effect. For Radial Gradients, reposition and resize the mask to better suit the new composition.
Adapting Vignettes to Different Subjects
Not all subjects benefit from the same vignette treatment. Tailoring the vignette to the subject, crop, and intended output ensures it complements the composition.
Portraits
Portraits often work well with moderate to strong vignettes that emphasize the subject’s face. Use a Radial Gradient around the head and shoulders, invert the mask, and darken the background slightly (Exposure: -0.4 to -0.6 stops; Shadows: -15 to -25). A high Feather (80+) ensures smooth transitions, while a circular vignette (Roundness: 60–70) enhances tight headshots.
Landscapes
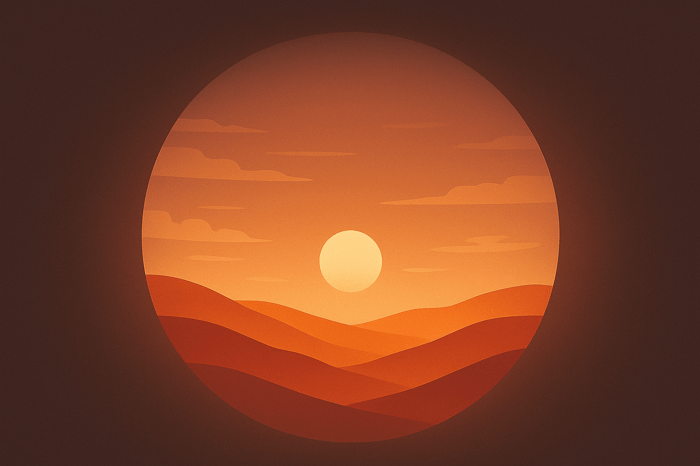
For landscapes, opt for subtle, wide vignettes that guide the viewer’s eye without overpowering the scene’s natural beauty. Use a global Post-Crop Vignette with a mild Amount (-10 to -15) and a high Feather (around 80). Adjust the Midpoint and Roundness to keep the darkening confined to the edges, enhancing the mood while preserving the scene’s details.
Conclusion and Key Takeaways
Why Vignettes Matter
Vignettes are an incredibly versatile tool in Lightroom, used by photographers across the U.S., from casual hobbyists to seasoned professionals. They address a common challenge: guiding the viewer’s attention. By subtly darkening or brightening the edges of a photo, vignettes help direct focus toward the most important part of the image - whether that’s a face, a product, or the central action.
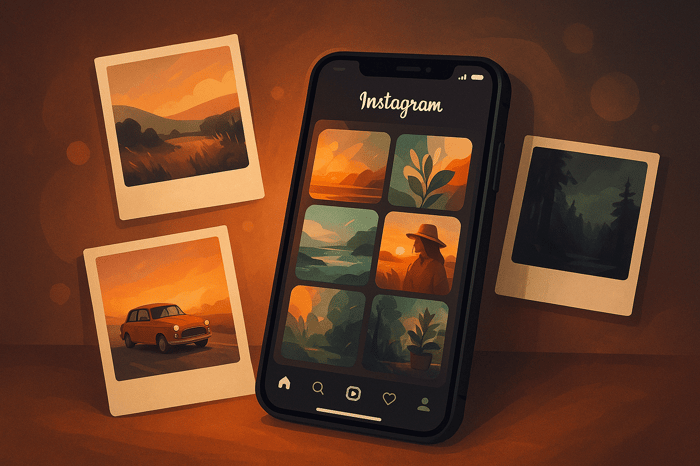
But vignettes do more than just focus attention. They can add mood and atmosphere to your photos, transforming an ordinary shot into something unforgettable. A darker vignette can create a sense of intimacy or drama, while a lighter one can evoke feelings of openness and lightness. When used consistently - whether in wedding albums, Instagram feeds, or commercial projects - vignettes can also help establish a cohesive visual style that makes your work instantly recognizable.
Lightroom’s vignette tools stand out for their flexibility. For quick adjustments, the Post-Crop Vignetting tool in the Effects panel offers control over settings like Amount, Midpoint, Roundness, and Feather, making it perfect for centered subjects and batch edits. If you’re looking to correct natural lens falloff, the Lens Corrections and Optics panel provides lens-specific vignetting. And for more creative freedom, Radial Gradients and masking tools allow you to shape and position vignettes with precision, ideal for off-center subjects or intricate compositions.
Vignettes are also a key ingredient in creating vintage or film-inspired looks. Pairing them with techniques like Tone Curve adjustments, split-toned color grading, and carefully applied grain can give your photos a nostalgic, timeless feel that works beautifully both online and in print.
With these applications in mind, here are some practical tips to refine your vignette technique.
Final Tips for Using Vignettes
To get the most out of vignettes, start with subtle adjustments. It’s always easier to build up the effect gradually than to dial it back after going too far. Match the vignette’s shape to your subject: circular Post-Crop Vignettes work well for centered portraits, while Radial Gradients are better suited for off-center compositions.
Avoid harsh, unfeathered edges that can distract from your subject. And don’t fall into the trap of applying the same strong vignette to every photo - adapt the intensity, shape, and placement based on the image’s subject, aspect ratio, and intended use, whether it’s for a large print or a social media post.
To streamline your workflow, save your favorite vignette settings as custom presets. If you’re looking for inspiration or want to explore new styles, professionally designed presets can be a great resource. For example, Presets.io offers collections like the Vintage Look Collection, Retro Film Preset Collection, and Cinematic Collections. Starting at $12.00, with bundles like The Vintage Film Bundle priced at $39.00, these presets - rated 4.8 stars from over 1,400 reviews - combine advanced vignette effects with complementary color grading and tonal adjustments. They’re a practical starting point for developing your own signature style.
To deepen your understanding, try experimenting. For instance, create a vignette using only the Post-Crop Vignetting tool, then replicate the effect using Radial Gradients to see how each method offers different levels of control. Test the same vignette settings across various aspect ratios - like square, 4×5, and 16×9 - to notice how the crop influences the overall effect and composition.
FAQs
How can I create vignettes in Lightroom without darkening key details in my photos?
When adding vignettes in Lightroom, it’s important to keep the effect subtle to avoid overshadowing key details in your image. Make good use of the Feather and Midpoint sliders to create a smooth and natural transition. Start with a gentle vignette and fine-tune it gradually, ensuring it enhances the photo without drawing attention away from important elements.
For greater precision, consider using the Radial Gradient tool instead of the Vignette panel. This tool lets you manually position and shape the vignette, making it easier to complement your composition while protecting essential areas. Always zoom in and carefully review your edits to ensure the vignette blends seamlessly and adds to the overall aesthetic of your photo.
How can I combine vignettes with tools like Tone Curve and Color Grading in Lightroom to create a vintage look?
To craft a captivating vintage look in Lightroom, blending vignettes with tools like the Tone Curve and Color Grading can make a noticeable difference. Begin by adding a soft vignette to naturally guide the viewer's eye toward the center of your photo. Fine-tune the midpoint and feathering to ensure the transition feels smooth and complements your image's composition.
Next, dive into the Tone Curve to create those classic faded shadows and gentle highlights that define vintage aesthetics. Slightly raising the blacks and pulling back the highlights can deliver a nostalgic, film-inspired vibe. Then, use Color Grading to set the mood - try warm tones for the highlights and cooler, muted shades for the shadows. Adjust the balance and saturation until everything feels just right.
If you're short on time, high-quality Lightroom presets tailored for vintage effects can be a game-changer. They offer a quick way to achieve consistent results while leaving room for personal tweaks to match your vision.
When should I use Post-Crop Vignetting, Radial Masks, or Lens Vignetting in Lightroom?
Choosing between Post-Crop Vignetting, Radial Masks, or Lens Vignetting comes down to the style you’re aiming for and the composition of your photo.
- Post-Crop Vignetting works best when you want an even vignette around the edges of a cropped image. It’s perfect for adding a subtle, refined touch to your photo.
- Radial Masks offer more flexibility, letting you create custom-shaped vignettes or draw attention to specific parts of your image with precision.
- Lens Vignetting replicates the natural vignette effect produced by certain lenses, giving your photo a genuine, vintage-like appearance.
Play around with these tools to see which aligns with your creative goals. If you’re short on time, presets with built-in vignettes can be a great way to achieve polished results quickly and effortlessly.