
Table of Contents
Ultimate Guide to Macro Composition Basics
Macro photography isn’t just about getting close - it’s about arranging elements to create visually striking images. At extreme magnifications, even minor adjustments can drastically change your composition. This guide focuses on key techniques to help you master macro photography composition:
- Rule of Thirds: Position subjects along a 3x3 grid to balance your frame and add visual interest.
- Symmetry and Centering: Use symmetry for bold, focused shots, especially with radial patterns.
- Leading Lines: Guide the viewer’s eye using natural lines like flower stems or leaf veins.
- Background Blur (Bokeh): Create soft, pleasing backgrounds by adjusting aperture, distance, and lighting.
- Selective Focus: Highlight specific details with shallow depth of field and manual focus techniques.
- Lighting: Leverage natural light during golden hours or use diffused artificial light for control.
My 9 Best Composition Tips for Macro Photography
sbb-itb-b27063b
Core Principles of Macro Composition
Mastering macro photography requires an understanding of certain key principles that can elevate your shots from ordinary to extraordinary. Let’s break down some of these essential techniques.
The Rule of Thirds is a cornerstone of macro photography. Imagine dividing your frame into a 3x3 grid using two horizontal and two vertical lines, creating nine equal sections. Instead of centering your subject, place key elements - like a flower head or an insect’s eye - along these gridlines or at the four intersections, often called "power points". This approach distributes visual interest across the frame, making the composition feel more balanced while using the surrounding space to complement the subject. Many cameras feature a Rule of Thirds overlay in their viewfinder, making it easier to align your subject during the shoot. For taller subjects, align them with a vertical gridline and leave extra space in the direction they’re facing to create a sense of harmony.
"The best photos place their subject a third of the way into the frame."
– Jaymes Dempsey, Nature Photographer
Rule of Thirds in Macro Photography
Research shows that viewers’ eyes are naturally drawn to the intersection points of the Rule of Thirds grid rather than the center. This explains why positioning elements along these points can add movement and energy to your shot, steering clear of a static or overly centered look. For instance, aligning a flower stem with a vertical gridline and placing the bloom at a power point creates a dynamic composition. And if you didn’t get it quite right while shooting, many editing tools let you apply a Rule of Thirds overlay to fine-tune the framing.
Centered and Symmetrical Compositions
While the Rule of Thirds promotes balance, centered compositions offer a striking, immediate impact by emphasizing symmetry. This technique works especially well in macro photography, where intricate details - like the radial patterns of a flower - can take center stage. Centering simplifies the frame, drawing the viewer’s attention directly to the subject and amplifying its visual power. Look for symmetry in various forms: vertical (mirrored sides), horizontal (like reflections), or radial (circular patterns). A tripod and bubble level can help achieve perfect alignment, and placing the point of symmetry directly in the center of the frame enhances the effect even further.
"Symmetry can be very powerful, and it's usually best emphasized by putting the point of symmetry (the place around which the image is symmetrical) in the dead center of the image."
– Jaymes Dempsey, Managing Editor, Digital Photography School
Diagonal and Leading Lines
Leading lines are like visual pathways, guiding the viewer’s eye toward your focal point. They add depth and dimension to otherwise flat macro surfaces. In macro photography, these lines can be literal - like flower stems, leaf veins, or branches - or implied, such as a trail of ants or the repetitive patterns in ferns. Diagonal lines, in particular, introduce a sense of movement and energy, while horizontal lines evoke calm and stability. To maximize their effect, position your camera so that a leading line begins in a corner (especially the lower-left) and directs the viewer’s gaze toward your subject. Combining these lines with the Rule of Thirds by aligning them with the gridlines can further enhance the overall balance.
"They're lines within the frame of your image that 'lead' the viewer's eye to a specific portion of the frame... much like a lit runway does for an airplane in the dark of night."
– Lea Hartman, Portrait Photographer
Managing Background and Focus
In macro photography, the interplay between sharp focus and blurred elements is crucial. A well-managed background complements the subject, naturally directing the viewer's attention. By controlling depth of field and carefully considering background elements, you can create striking compositions that feel clean and intentional.
Creating Background Blur (Bokeh)
Achieving beautiful background blur, or bokeh, starts with creating distance - both between your subject and its background, and between your camera and the subject itself. For instance, lowering your camera and framing your subject against faraway trees or an open sky can help avoid cluttered backgrounds like nearby grass or leaves [17, 18]. On overcast days, shooting upward can provide a neutral white backdrop, while a sunset can bathe your image in warm orange or pink tones.
To enhance this effect, use a wide aperture, such as f/2.8 or f/4, to soften the background [17, 19]. Longer focal lengths also compress the scene, amplifying the blur [12, 19]. The closer your camera is to the subject, the more pronounced the effect becomes.
"The shallower your depth of field... the closer your subject can be to the background, while still allowing for a nice uniform wash."
– Jaymes Dempsey, Managing Editor, Digital Photography School
Pay attention to the edges of your frame, watching for distracting elements like bright spots or stray stems that might steal focus from your subject. Sometimes, just a small adjustment in your shooting position can completely transform the background. For a dramatic effect, consider using a flash or LED light close to your subject. This technique can darken the background significantly, creating a studio-like look even outdoors.
Once you've mastered background blur, refining your focus can elevate your images even further.
Selective Focus Techniques
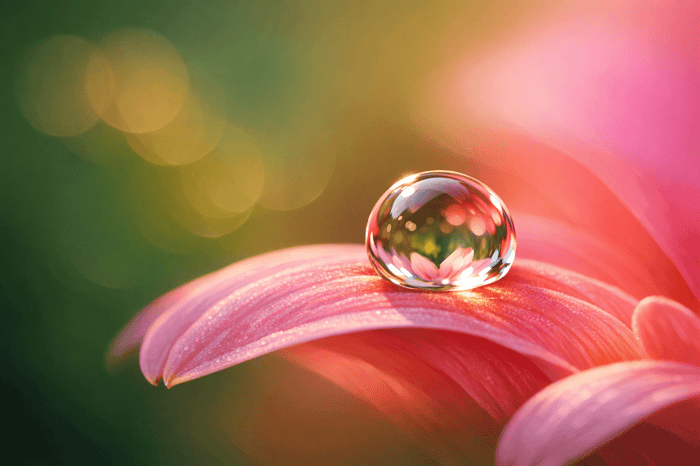
Selective focus is about sharpening specific details while letting other parts fade into a soft blur. This approach draws attention to textures and intricate features, like the edge of a flower petal, an insect's eye, or a single water droplet [18, 19].
Apertures between f/2.8 and f/5.6 are ideal for this technique, as they create a very shallow depth of field. To achieve precision, manual focus is key, since autofocus systems can struggle with the high magnifications used in macro photography. If you're finding it tricky to nail the focus, try the "rocking technique": set the focus ring to a fixed distance, then gently move your camera back and forth until the critical detail comes into sharp view.
"Selective focusing... is when you employ a wide aperture, like f/2.8, to create a shallow depth of field – then you deliberately position the focus on a particular part of your subject."
– Jaymes Dempsey, Managing Editor, Digital Photography School
For subjects with multiple points of interest, adjust your camera angle so that these details align on the same plane, ensuring more of the subject stays in focus. For more complex subjects with significant depth, consider focus stacking. This involves capturing multiple shots, each focused on a different part of the subject, and blending them in post-processing software like Adobe Photoshop or Helicon Focus [12, 18].
Using Negative Space
Negative space refers to the area surrounding your main subject, giving it room to "breathe." In macro photography, this space doesn't have to be empty - it can include out-of-focus elements like grass, water, or sky, as long as they don't compete with the subject for attention [20, 22].
"The best images tend to include plenty of negative space because it helps the viewer breathe."
– Elizabeth Halford, Photographer
Position your subject so it faces or moves into the negative space, adding a sense of motion or narrative to the image [16, 21]. For a minimalist feel, place a single subject in the center, surrounded by ample negative space to evoke tranquility and focus. Using a wide aperture can help blur distracting elements into soft bokeh, while shooting from low angles can incorporate a clean sky as your negative space [2, 10].
Lighting for Macro Composition

Macro Photography Lighting Types Comparison Guide
Lighting plays a critical role in macro photography - it sets the mood, highlights texture, and helps your subject stand out. In fact, lighting accounts for a staggering 80% of a macro composition’s success. Whether you’re working with natural sunlight or using artificial setups, mastering how to shape and control light can turn an ordinary shot into something extraordinary.
The quality of light matters even more than its source. Soft light, like the kind you get on cloudy days or during the golden hours, creates gentle transitions between highlights and shadows, giving your subject a natural and pleasing look. Hard light, such as the harsh midday sun, produces sharp contrasts and intense shadows, which can overpower smaller, delicate subjects. The direction of light is another key factor: side lighting brings out texture with defined shadows, while backlighting can create striking outlines. Let’s dive into how to make the most of natural light before exploring artificial options.
Working with Natural Light
Natural light offers vibrant, true-to-life colors and, when timed well, can be stunning. The golden hours - the first and last two hours of sunlight - are particularly magical. During these times, sunlight is softer and warmer, casting a flattering glow on your subject. The light passes through more of the atmosphere, reducing harsh blue tones and adding a subtle yellowish tint.
Overcast skies are another gift to macro photographers. They naturally diffuse sunlight, creating even, shadow-free lighting that enhances color richness. On the other hand, direct midday sun can be problematic, as it often results in blown-out highlights and deep shadows that challenge even the best cameras.
To make the most of natural light, consider your position. For front lighting, align your shadow with the subject so the sun is behind you. For more depth and texture, use side lighting by placing the sun at a 90-degree angle to your subject. Indoors, you can mimic this setup by positioning your subject near a window for soft, directional light. If the light feels too harsh, a white curtain can act as a diffuser, softening the illumination.
When natural light isn’t enough, artificial lighting becomes a powerful tool.
Using Artificial Lighting
Artificial lighting gives you full control when natural light is unavailable or inconsistent. The two main types for macro photography are continuous LED lights and flash units. Continuous LEDs are beginner-friendly since they let you see exactly how light interacts with your subject in real time. Flash units, on the other hand, deliver powerful bursts of light, perfect for freezing motion - ideal for capturing fast-moving insects.
Diffusers are a must for both flashes and LEDs. They soften the light, eliminating harsh spots and unnatural shadows. Photographer Matthew Cicanese, for example, uses a Canon Speedlite 600EX II-RT with off-camera triggers for precise and uniform lighting. He also recommends the Litra Pro, a compact, waterproof LED unit with 1,200 lumens of consistent, color-balanced light. Affordable softbox modifiers or homemade diffusers can also work wonders in softening your light source.
Ring lights and ring flashes are another popular option. These attach to the front of your lens, providing even, shadow-free illumination - perfect for avoiding lens shadows on close-up subjects. However, they can sometimes produce flat, uninspiring lighting. For more creative control, try moving your light source off-camera. This approach allows you to introduce dramatic shadows or highlights. Adding a honeycomb grid to your light source can further narrow the beam, spotlighting specific details while keeping the background dark.
| Lighting Type | Best Use Case | Key Advantage |
|---|---|---|
| Ring Flash | General macro, shadowless fill | Even illumination directly in front of the lens |
| Continuous LED | Beginners, still life, video | Real-time visualization of light and shadows |
| Off-Camera Flash | Capturing motion and textures | Freezes motion and adds dramatic lighting |
| Desk Lamp | Indoor macro | Adjustable and easy to use for indoor setups |
For indoor macro work, desk lamps with "daylight" bulbs are a budget-friendly option, mimicking the sun’s natural color temperature. Keep in mind the inverse square law: doubling the distance between your subject and light source reduces the light’s intensity to one-fourth. This principle can help you create dramatic effects, like blacking out the background by placing a flash close to your subject while leaving the background underexposed.
"A macro photograph's composition is 80% determined by the lighting, therefore it is the single most important element a macro photographer should have complete control over."
– Samuel Granger, Creator and Product Designer, Adaptalux
Samuel Granger, the mind behind Adaptalux, has developed a modular lighting system tailored for macro photography. Featuring interchangeable LED and Xenon Flash arms, this system provides precise directional control, allowing photographers to shape light, highlight textures, and add depth. With tools like these, lighting becomes more than just a technical aspect - it becomes a creative force that transforms your macro shots from simple documentation into captivating art.

The Master Preset Bundle

$57.00
$672.00
The Master Preset Bundle Every Style. Every Platform. One Download Get 56 high-quality Presets.io collections in one complete bundle — designed to help you edit faster, stay consistent, and get professional-looking results in seconds. Get All High-Quality Preset Collections For… continue reading
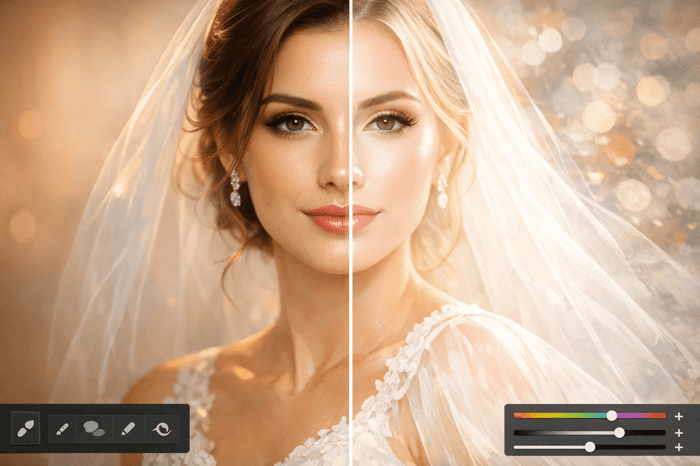
Post-Processing Macro Compositions
After nailing your shooting and lighting techniques, the final touch to elevate your macro photography lies in post-processing. This step is where your image can truly shine, bringing out the intricate details and enhancing the overall composition. Always shoot in RAW format to preserve as much detail as possible and give yourself the flexibility needed for precise editing.
When refining details, tools like Lightroom's Texture slider can add sharpness to elements like insect wings or flower petals while maintaining their natural appearance. Pair this with the Sharpening tool to make your subject look crisp and defined. Adjust sliders like Amount, Radius, Detail, and Masking to strike the perfect balance between enhancing texture and keeping the background smooth. For color adjustments, the HSL sliders (Hue, Saturation, Luminance) allow you to fine-tune specific colors, ensuring your subject stands out vividly. Photographer Natalia Robert highlights the importance of vibrancy:
"Vibrancy retains detail while giving the colors a stronger pop."
Using the Vibrance slider instead of Saturation helps maintain a natural look while enhancing colors.
Post-processing also allows you to perfect your composition. Tight cropping can help align your subject with the rule of thirds, and tools like vignettes or adjustment brushes can draw attention to your subject by subtly softening the background. For more advanced effects, Photoshop's Gradient Maps can add artistic tones to highlights and shadows, creating a polished, fine art feel. Just be cautious with noise reduction - apply it carefully to avoid losing essential details.
Adjusting Details and Colors
Fine-tuning exposure is critical, and the histogram is your best friend here. It helps you ensure details in both shadows and highlights are preserved. Instead of relying heavily on the basic contrast slider, try using the Tone Curve for a more nuanced approach - gently lifting highlights and deepening shadows for a professional finish.
When sharpening, Lightroom offers four key sliders to master. Start with the Amount slider, which controls the overall strength (a value of 40 is a good baseline). The Radius slider determines how far the sharpening extends along edges - keeping it around 1.0 works well for macro shots. The Detail slider brings out small textures, which is great for high-frequency subjects like leaves but should be used sparingly for softer elements. Finally, the Masking slider ensures sharpening is applied only to high-contrast edges, leaving smooth areas like background bokeh untouched.
The HSL panel is perfect for targeting specific hues. For example, you could boost the saturation of a butterfly's vibrant wings while keeping the surrounding greenery muted. Temperature adjustments can also set the mood of your image - cooler tones for icy scenes or warm hues for golden-hour shots. Noise reduction should always be the last step, as earlier adjustments like sharpening or exposure tweaks can sometimes introduce unwanted noise.
Editing with Presets.io

If you're looking to speed up your editing workflow, Lightroom presets can be a game-changer. Platforms like Presets.io offer a variety of high-quality presets that simplify the editing process. With just one click, you can transform your image without manually adjusting multiple sliders for exposure, contrast, and color.
Photographer Andrew Childress explains:
"It only takes one click to completely overhaul your imagery."
Presets provide consistent and precise adjustments, ensuring a cohesive look across your images. Presets.io offers collections in styles like aesthetic, cinematic, vintage, and film looks, with new options added regularly. Since all edits are reversible, you can experiment freely without risking your original RAW file.
For macro photography, presets can be tailored to enhance specific aspects - like sharpening fine details, boosting vibrancy, or adding subtle vignettes to draw focus to your subject. Toolkit presets can also handle repetitive tasks, such as correcting lens distortion or chromatic aberration, which are common in close-up shots. As Andrew Childress notes:
"A preset is more measured, consistent, and repeatable than endlessly twiddling sliders."
Look for presets that make use of the Texture slider to bring out intricate details or apply vignettes to naturally guide the viewer's eye to your subject. Whether you're new to macro photography or a seasoned pro looking to streamline your workflow, Presets.io offers tools that can take your images to the next level.
Conclusion
Mastering macro composition is a blend of technical know-how and artistic flair. Techniques like the rule of thirds, leading lines, and negative space lay a solid groundwork, but the real artistry emerges when you make these principles second nature through practice. Photographer Ronny Oakes captures this idea perfectly:
"Every picture you take teaches you for the next one."
Practice sharpens your instincts, but don’t be afraid to break the rules. Experimentation is where creativity thrives. Grace Rivera highlights this freedom:
"Once you have the basics down, you can experiment. There are no set rules for how you should shoot anything. That's the beauty of being an artist."
Play with angles, move around your subject, and observe how others approach composition - even when your camera isn’t in hand. This exploration fuels creativity and sets the stage for the next phase: post-processing.
Once you’ve captured those compelling shots, editing helps bring them to life. Thoughtful post-processing enhances your images, refining details and amplifying colors. Tools like Presets.io Lightroom presets make this process seamless. From cinematic tones to vintage vibes, these presets deliver polished results quickly, freeing you to focus more on shooting and less on tweaking.
FAQs
How do I use the Rule of Thirds to improve my macro photography?
The Rule of Thirds is a straightforward technique that can make your macro photos feel more balanced and visually appealing. To put it into action, start by enabling the 3×3 grid on your camera or viewfinder. This grid divides your frame into nine equal sections with four key intersections. Instead of centering your subject, position its most compelling feature - like the eye of an insect or the tip of a flower petal - on one of these intersection points or along a grid line. This off-center placement naturally draws the viewer's attention and adds depth to your composition.
While framing your shot, think about the subject's movement or line of sight. For instance, if a butterfly’s wing extends toward the upper-right, place the tip in that area and leave space for the viewer’s eye to follow. To keep the overall composition balanced, align secondary elements - like a water droplet or the edge of a leaf - along the remaining grid lines. With macro photography’s typically shallow depth of field, it’s essential to align your focal point with the grid to ensure your main subject remains sharp and clear.
After capturing your photo, you can fine-tune it using Lightroom presets from Presets.io. These presets are tailored to enhance the intricate textures and vibrant colors often found in macro photography. They’ll help your shot pop while preserving its natural feel.
What are the best lighting tips for creating stunning macro photos?
Great lighting plays a crucial role in creating standout macro photos. Soft, diffused light - like the gentle glow of early-morning sunlight or light softened with a diffuser - helps reduce harsh shadows and brings out intricate textures. For a more dramatic vibe, experiment with side or backlighting to emphasize shapes and create striking contrast. Tools like a softbox, ring light, or translucent reflector can help you achieve more even, polished lighting.
If you're relying on natural light, mornings are your best friend. The low angle of the sun provides soft, flattering illumination. Overcast days are another excellent choice, offering consistent, shadow-free light. When natural light falls short, consider using continuous LED lights or off-camera flash units for added control. Continuous lights are particularly beginner-friendly since you can see the lighting effects in real time. On the other hand, flash units deliver powerful, focused bursts of light that can highlight fine details. Reflectors are also handy for filling in shadows and balancing your composition.
Once you've captured your shot, take it to the next level with Lightroom presets from Presets.io. These presets are tailored to enhance contrast, color, and texture, giving your macro photos that extra edge to truly shine.
How does selective focus bring out details in macro photography?
Selective focus, achieved by using a wide aperture to create a shallow depth of field, is a great way to make a small subject stand out. This technique works wonders in macro photography, where the magnification brings out textures and intricate details - like the fine hairs on an insect or the delicate patterns of a flower. By keeping the focus on a single point, the image avoids unnecessary distractions and highlights the subject’s distinctive features.
For example, using a moderate aperture like f/8 on a 100mm macro lens strikes a balance. It delivers sharp detail where it’s needed while keeping the background pleasantly blurred. On the flip side, using very small apertures, such as f/32, can lead to diffraction, which softens the details across the image. Picking the right aperture is key to ensuring the subject’s details remain crisp and visually captivating, giving your macro shots that extra punch.