
Table of Contents
Ultimate Guide to Skin Tone Editing in Lightroom
Skin tone editing in Lightroom is all about creating natural, flattering results that enhance portraits. This guide breaks down everything you need to know for precise and consistent edits. Key takeaways include:
- White Balance: Correct color casts using the Temperature and Tint sliders.
- HSL/Color Mixer: Adjust Hue, Saturation, and Luminance for reds, oranges, and yellows to refine skin tones.
- Local Adjustments: Use tools like the Adjustment Brush and Radial Filter for targeted edits.
- RGB Values: Balance Red > Green > Blue for natural tones (e.g., a 15–20 point gap between Red and Blue).
- Presets: Save time with Lightroom presets but fine-tune manually for the best results.
Whether you're fine-tuning a single image or batch-editing a project, this guide equips you with the tools and techniques to achieve polished skin tones.
The Ultimate Lightroom Skin Tone Workshop + FREE Raw Files
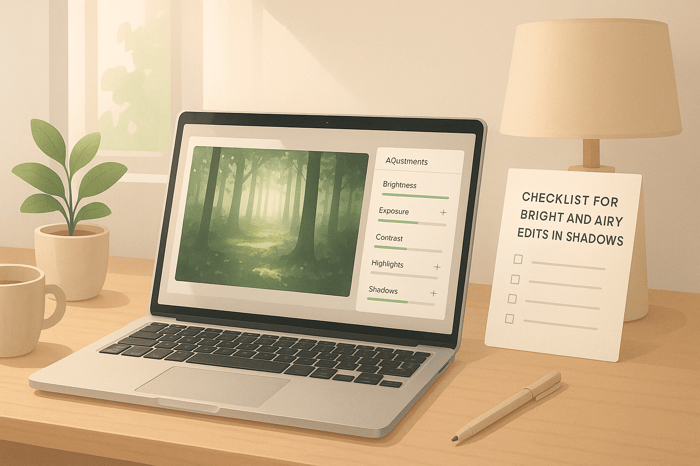
Main Tools in Lightroom for Skin Tone Editing
Lightroom provides a variety of tools to help you achieve natural-looking skin tones. When used thoughtfully, these tools can streamline your portrait editing process and deliver consistent, polished results.
Basic Adjustments: White Balance, Exposure, and Contrast
The first step in creating great skin tones is mastering the basic adjustments. These controls determine the overall color, brightness, and tonal balance of your image.
- White Balance: This corrects unwanted color casts caused by different types of lighting. For instance, tungsten lighting often adds an orange-yellow cast, while fluorescent bulbs can create greenish tones. Use the Temperature slider to adjust between warmer (yellow) and cooler (blue) tones, and the Tint slider to balance green and magenta. For daylight portraits, aim for a range of 5,200K to 5,800K.
- Exposure: Adjusting exposure directly affects the brightness of the image, which plays a big role in how skin tones appear. Set the exposure so that skin tones fall in the mid to high range of the histogram, ensuring details in both highlights and shadows remain intact.
- Contrast: Adding contrast enhances the depth and dimension of skin tones by balancing light and dark areas. A moderate increase (+10 to +30) works well to maintain natural transitions without creating harsh edges.
These adjustments lay the groundwork for more precise edits later on.
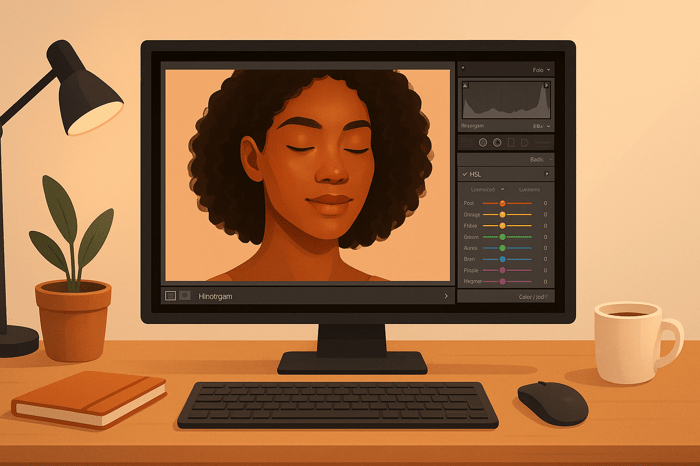
HSL/Color Mixer for Skin Tone Adjustments
Once the basic settings are in place, the HSL (Hue, Saturation, Luminance) panel allows you to refine skin tones with precision, without affecting the rest of the image.
Skin tones generally fall within the orange color range, though tweaks to the red and yellow sliders may also be needed. The HSL panel organizes colors into eight groups, each with sliders for Hue, Saturation, and Luminance:
- Hue: Shift the orange slider slightly toward red or yellow to fine-tune skin tone color.
- Saturation: Lower the saturation for a softer, creamier look or increase it for more vibrancy.
- Luminance: Adjust this to make skin tones lighter or darker, depending on the effect you want.
For additional refinement, adjust the red and yellow sliders to address specific features like rosy cheeks or overly warm tones. You can also use the targeted adjustment tool (the small circle in the top left of the HSL panel). Click on the area of the skin you want to adjust, then drag up or down to fine-tune the related color values.
Targeted Adjustments: Brushes, Masks, and Spot Removal
When basic and selective adjustments aren't enough, Lightroom's local tools let you make highly specific edits.
- Adjustment Brush: This tool allows you to paint adjustments onto specific areas. It includes all the global adjustment controls, plus options like Clarity for managing skin texture and Color for subtle tints. Use a high feather (75–100) and low flow (25–50) for smooth, natural-looking edits.
- Radial Filters: These are great for adding localized light to faces. Create a radial mask and adjust warmth and brightness to simulate soft, flattering lighting, especially in backlit portraits.
- Linear Gradients: Use these to balance uneven lighting across the face. For example, if overhead lighting brightens the forehead more than the chin, a subtle gradient adjustment can even out the exposure and color temperature.
- Spot Removal: This tool helps you eliminate blemishes or minor discolorations. Sample a nearby area with a similar tone and apply it to the problem spot for a seamless correction.
For advanced edits, Lightroom’s Masking tools - like color range, luminance range, or AI-powered "Select Subject" - offer even greater precision. These options let you target specific areas without affecting the rest of the image.
Zoom in to check the details, but also step back to assess the overall impact of your edits. The goal is to enhance skin tones subtly while keeping the result natural and true to the subject.
Step-by-Step Methods for Perfect Skin Tones
Getting professional-quality skin tones takes a careful, methodical approach. By following this workflow, you can achieve consistent results while keeping the natural essence of your subject intact.
Setting Up the Base Image
Start with a sharp, well-exposed image. In Lightroom, head to the Develop module and make some basic adjustments before diving into color corrections.
Check the histogram to ensure the skin tones fall in the mid-to-high range. Avoid clipping highlights or losing shadow detail. If the image feels too dark, use the Exposure slider to brighten it slightly. For overexposed images, pull down the highlights and lift the shadows to recover details in the skin.
Once you’ve set a solid foundation, you’re ready to fine-tune the skin tones using precise RGB adjustments.
Finding and Fixing Skin Tones
The secret to accurate skin tone correction lies in measuring RGB values, rather than relying solely on what looks right to the eye. Press W to activate the eyedropper tool and get precise color readings.
Place the eyedropper on a neutral midtone area of the skin, steering clear of highlights, shadows, or areas with strong color casts like rosy cheeks. Look for a spot that represents the natural skin color. The RGB values will appear as percentages.
To achieve balanced skin tones, the Red channel should lead, followed by Green, and then Blue, with a typical Red-to-Blue gap of about 18–20 points.
In July 2009, the Pixelation Blog shared a tutorial that broke down the process of correcting skin tones in Lightroom. The example featured a male subject whose initial RGB values were R: 74.7%, G: 69.1%, B: 65.6%. By adjusting the tint slider from +6 to 0, increasing the temperature from 4250 to 4619, and boosting orange saturation by +40, the final RGB values were corrected to R: 72.3%, G: 63.2%, B: 53.2%. This created a Red-to-Blue difference of 19.1 points, resulting in a more natural and balanced look.
For even finer control, use local masking to tweak specific areas of the skin.
Adjusting Warmth and Removing Color Casts
Use the Tint slider to balance the Green value between Red and Blue, and then adjust the Temperature slider to create a 15–20 point lead of Red over Blue. Keep an eye on your RGB values while making these changes.
Once the temperature is adjusted, revisit the overall exposure to ensure the brightness is correct. Then, double-check the Tint slider to confirm that the Green value remains balanced.
To enhance warmth and minimize cyan tints, aim for an 18–20 point gap between Red and Blue. You can do this in several ways: increase the overall Saturation slider for a broader effect, use the Vibrance slider for a subtler touch, or adjust the Orange Saturation slider in the HSL panel for precise control over skin tones.
When working with different skin tones, adjust your approach as needed. For example, Asian or Hispanic skin tones may look more natural with reduced blue values to emphasize a yellow undertone, while still maintaining the key R > G > B relationship.

The Master Preset Bundle

$57.00
$672.00
The Master Preset Bundle Every Style. Every Platform. One Download Get 56 high-quality Presets.io collections in one complete bundle — designed to help you edit faster, stay consistent, and get professional-looking results in seconds. Get All High-Quality Preset Collections For… continue reading
sbb-itb-b27063b
Improving Skin Tones Using Lightroom Presets
Presets can be a game-changer when it comes to achieving consistent and natural-looking skin tones. They work hand-in-hand with manual editing techniques, offering a faster and more efficient way to refine skin tones while maintaining precision.
Why Use Presets for Skin Tones?
Presets provide a reliable starting point, saving you from having to make repetitive adjustments - especially useful for large projects like wedding albums or portrait sessions. They also act as a learning tool, showcasing how experienced editors use features like HSL adjustments, color grading, and tone curves to achieve professional results.
Beyond convenience, presets help establish consistency across your portfolio. By using the same base presets and tweaking them as needed, you can create a cohesive style while ensuring skin tones remain natural and flattering.
Where to Find High-Quality Presets
The quality of presets can vary, so it’s essential to choose ones that handle skin tones effectively across different lighting conditions and complexions. Poorly designed presets can result in unnatural color shifts or washed-out features, which can undermine your work.
Presets.io is a great resource for finding carefully crafted presets. Their collections focus on enhancing the subject's natural features without over-editing. For example, their aesthetic and cinematic presets are designed to highlight the authentic character of skin tones. Plus, they add new presets weekly, giving you plenty of options to experiment with. To make things easier, they also provide step-by-step installation guides for both desktop and mobile Lightroom, ensuring a smooth workflow.
Combining Presets with Manual Adjustments
While presets are a fantastic starting point, combining them with manual adjustments allows you to achieve the perfect balance. Here’s how to make the most of them:
- Start with a preset: Choose one that aligns with your desired look and apply it to your photo.
- Fine-tune with manual tools: Use Lightroom's eyedropper to check and adjust RGB values. You might need to tweak settings like temperature, tint, or HSL sliders to achieve the exact skin tone you’re aiming for.
- Focus on Orange and Red sliders: These are crucial for maintaining natural warmth in skin tones. Adjust their saturation levels as needed to avoid overly vibrant or dull results.
- Use local adjustments: After applying a preset globally, use Lightroom’s masking tools for targeted edits. For example, you can soften harsh highlights or enhance details in specific areas like the subject’s face. If the lighting conditions vary, you might also reduce the opacity of the preset for better control.
Conclusion: Key Points for Perfect Skin Tones
Summary of Important Tools and Techniques
When it comes to editing skin tones in Lightroom, having a clear, step-by-step approach is key. Start by ensuring proper exposure - slightly overexpose darker skin tones while keeping lighter complexions neutrally exposed. Always shoot in RAW format for the most flexibility during editing.
Next, focus on white balance. Use a gray card or the eyedropper tool to set an accurate baseline, then fine-tune the temperature and tint. Aim for a balanced red > green > blue ratio with the correct tonal gaps.
The HSL/Color Mixer is your ally for refining skin tones. Adjust the Red and Orange channels to create natural hues, enhance glow, and control saturation. For more detailed adjustments, the Tone Curve allows for precise tweaks to red and blue tones.
Local adjustments are essential for perfecting details. Use the Adjustment Brush to refine lightness and smooth out imperfections. The Radial Filter can add targeted lighting effects, while the Clone/Heal tool is perfect for removing blemishes.
Next Steps with Presets.io
Once you’ve mastered manual adjustments, presets can help streamline your workflow without compromising quality. The trick is to use presets as a starting point, not the final step.
Presets.io offers tools tailored for enhancing natural skin tones across various lighting conditions and complexions. Their aesthetic and cinematic presets are especially suited for portraits, providing a solid base that you can customize further. With new presets added weekly, you’ll always have fresh options to explore.
To get the best results, combine preset efficiency with manual precision. Start by applying a preset, and then use Lightroom’s masking tools for targeted adjustments. If the preset alters skin tones in an unwanted way, select the subject, invert the mask, and apply the preset only to the background. This approach keeps the preset’s overall atmosphere intact while giving you full control over skin tones.
Test presets on a variety of skin tones to ensure they work well across your projects. While global edits can be synced for similar images, remember that brush adjustments should always be image-specific. This balance between speed and precision helps you maintain consistency while ensuring every subject looks their best.
Mastering skin tone editing takes practice. Work with real images featuring different lighting conditions and skin tones. By combining these techniques with high-quality presets from Presets.io, you’ll develop the skills and style needed to achieve professional results every time.
FAQs
How can I make skin tone adjustments in Lightroom look natural under different lighting conditions?
To get natural-looking skin tones in Lightroom, start by checking that your photo's white balance is accurate. If you used a gray card during the shoot, you're already ahead. Otherwise, you can adjust the Temperature and Tint sliders in Lightroom to set a solid starting point.
Next, head to the HSL (Hue, Saturation, Luminance) panel. This is where you can fine-tune skin tones by correcting any unwanted color casts. Be careful not to oversaturate - subtle adjustments go a long way in keeping the tones realistic.
For smooth and consistent results, pay attention to the balance between highlights and shadows. Harsh contrasts can exaggerate or distort skin tones, so aim for a softer, even look. If you want to speed up your workflow, professional presets designed for skin tone correction can be a game-changer. They’re especially helpful for achieving natural results across different lighting conditions.
How can I use Lightroom presets to ensure consistent skin tones across multiple photos?
To keep skin tones consistent across a batch of photos in Lightroom, start by selecting or creating presets tailored for skin tone adjustments. Applying these presets to all images in the batch sets a unified foundation. Lightroom's sync feature makes it easy to copy and apply settings like white balance and HSL adjustments across multiple photos, ensuring a cohesive appearance.
Once the preset is applied, you can refine individual images as needed. Use tools like the HSL sliders or adjustment brushes to correct any differences in lighting or skin tone. This mix of presets and precise tweaks helps you achieve polished, professional results without a lot of extra work.
How can I adjust skin tones using RGB values in Lightroom, and what should I do if the results don't look right?
When adjusting skin tones with RGB values in Lightroom, start by selecting the white balance dropper and sampling the skin area to check the RGB values. For a natural appearance, the red value should generally be the highest, followed by green, and then blue. A helpful guideline is to maintain about a 20-point difference between red and blue, with green falling somewhere in the middle.
If the results seem off, try refining the adjustments using tools like the HSL sliders or color curves to tweak hue, saturation, and luminance. You can also reference standard skin tone RGB ranges to guide your adjustments. Make small, incremental changes until the skin tones look balanced and realistic.