
Table of Contents
- How to Create Minimalist Edits in Lightroom
- Lightroom Tutorial / How I edit Minimalist Photos
- What Is Minimalism in Photography
- Preparing Photos for Minimalist Editing
- Main Lightroom Tools for Minimalist Edits
- Advanced Methods for Minimalist Effects
- Maintaining Consistency and Exporting Your Photos
- Conclusion
- FAQs
How to Create Minimalist Edits in Lightroom
Want to make your photos stand out with simplicity? Minimalist editing in Lightroom is the way to go. This guide shows you how to refine your images by focusing on clean compositions, subtle adjustments, and intentional edits. Here's what you'll learn:
- What minimalism means in photography: It's all about removing distractions to highlight your subject.
- Key techniques in Lightroom: Adjust exposure, simplify colors, use masking tools, and clean up distractions.
- Best subjects for minimalist edits: Architecture, landscapes, portraits, and more.
- Finishing touches: Consistent edits, export settings, and using presets for efficiency.
Lightroom Tutorial / How I edit Minimalist Photos

What Is Minimalism in Photography
Minimalism in photography is all about stripping an image down to its bare essentials. The goal? To create powerful visuals using as few elements as possible. Clean lines, uncluttered compositions, and generous negative space work together to draw attention to the subject, making every detail count.
At its heart, minimalist photography revolves around the idea that less is more. Every element in the frame should serve a purpose, guiding the viewer’s eye to the main subject without unnecessary distractions. This approach encourages simplicity while ensuring the story behind the image remains clear and impactful.
Minimalist photographs often rely on high contrast, neutral color schemes, clean geometric shapes, and ample negative space. This negative space isn’t just empty - it’s a deliberate design choice that enhances the subject and brings balance to the composition.
Key Elements of Minimalist Photography
Negative space is a cornerstone of minimalist photography. This empty area around the subject creates breathing room, allowing the main element to stand out. By using negative space effectively, even small subjects can feel significant and commanding within the frame. In minimalist photography, every detail is intentional, and nothing is wasted.
Simple color schemes are another hallmark of this style. Many minimalist photographers stick to monochromatic tones or limit themselves to just two or three complementary colors. This restrained palette keeps the focus on the subject while creating a calm and cohesive visual experience. Neutral shades like white, gray, and beige often dominate, ensuring the subject remains the star.
Clean lines and geometric shapes bring structure and order to minimalist compositions. Whether it’s the sharp edge of a building, the curve of a staircase, or the symmetry of a circular object, these shapes add interest without overwhelming the image. The trick is to choose forms that support, rather than compete with, the subject.
Intentional isolation of the subject is key to removing distractions. This might involve waiting for a crowd to clear in an urban setting, finding angles that eliminate clutter, or using a shallow depth of field to blur out unnecessary background elements. The focus remains on what truly matters in the frame.
Subtle textures and patterns can add depth without complicating the image. A weathered wall, gentle ripples in water, or the grain of wood can enhance a photo’s tactile quality while maintaining its simplicity. These understated details provide visual interest without detracting from the minimalist aesthetic.
Best Subjects for Minimalist Photos
Architecture is a natural fit for minimalist photography. Modern buildings with clean lines, repetitive patterns, and expansive surfaces of glass or concrete offer endless opportunities. Look for features like grid-like windows, overhangs, or cutouts that create striking negative spaces. Urban settings also provide geometric gems like bridges, tunnels, and staircases that lend themselves beautifully to minimalist compositions.
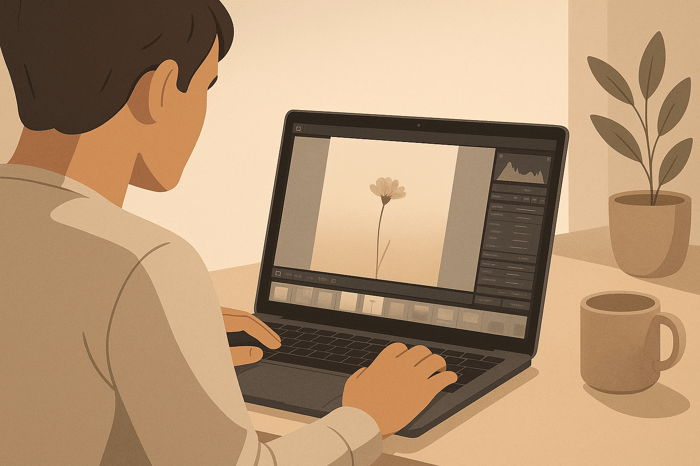
Still life photography embraces minimalism effortlessly. A single flower in a vase, a piece of fruit on a plain surface, or everyday objects arranged with plenty of space around them can produce stunning results. The key is to focus on objects with interesting shapes or textures, paired with simple, uncluttered backgrounds.
Landscapes lend themselves to minimalism through thoughtful composition and timing. Think of a lone tree in an open field, a solitary rock formation against the sky, or the serene meeting of sea and horizon. Weather conditions like fog or snow can simplify the scene further, removing distractions and creating clean, minimalist backdrops.
Portrait photography benefits greatly from minimalist techniques when the goal is to highlight the subject’s expression or personality. Plain backgrounds, simple lighting, and avoiding busy props or clothing patterns allow the focus to remain entirely on the person. This approach is particularly effective for headshots or artistic portraits where emotion and connection take center stage.
Abstract subjects thrive in minimalist photography. Shadows from everyday objects, reflections in water or glass, or close-ups of textures can transform into striking images when isolated from their context. By reducing these subjects to basic shapes, lines, and tonal contrasts, you can create compelling visuals that captivate through simplicity.
With these subjects in mind, you’re ready to take your minimalist photos to the next level. Up next, we’ll dive into how to fine-tune your images using Lightroom for that polished, minimalist finish.
Preparing Photos for Minimalist Editing
Creating a minimalist masterpiece starts with selecting the right photo. Even the most advanced editing tools can’t turn a cluttered image into a clean, simple composition. The preparation phase is all about finding and refining an image that naturally leans toward simplicity, removing distractions, and setting the stage for a polished, minimalist aesthetic.
Choosing the Right Image
Not every photo in your collection will work for minimalist editing. The best candidates already have qualities that align with minimalist principles, even before you touch any editing tools.
Look for images with isolated subjects that naturally stand out. Think of a single bird soaring across a clear sky, a lone figure in an empty plaza, or an architectural detail with plenty of breathing room. These types of photos already emphasize simplicity - you’re just enhancing their existing strengths.
Key elements to prioritize include:
- Clean backgrounds: Uncluttered spaces like plain walls or open skies help reduce visual noise.
- Ample negative space: This enhances the prominence of your subject and gives the image a sense of balance.
- Simple color palettes: Neutral tones or monochromatic schemes work best, as they avoid competing colors that can distract from your subject.
- Good exposure and contrast: Starting with a well-exposed image gives you more flexibility in post-processing, ensuring details in both highlights and shadows remain intact.
Cropping and Straightening Your Photos
Once you’ve chosen the right image, the next step is cropping and straightening. These adjustments help eliminate distractions and ensure your subject takes center stage.
Strategic cropping is key to removing unnecessary elements. Even a strong photo can benefit from trimming away stray details - like a branch poking into the frame or an object lingering near the edges. The goal is to leave only what contributes to the story you’re telling.
"The final purpose of cropping is typically to make sure that the subject becomes the viewer's point of focus without the presence of competing details, which are less significant." - Darius
Use compositional rules to guide your cropping. The Rule of Thirds is a great starting point, helping you position your subject for balance and visual interest. Don’t shy away from experimenting with asymmetry - it can highlight negative space and add a dynamic element to your composition.
Straightening lines and angles is essential for achieving the clean, structured look minimalist photography demands. Crooked horizons or tilted buildings can disrupt the overall harmony of your image. Use Lightroom’s straightening tools to align horizontal lines with the frame’s edges and ensure vertical elements stand upright.
For architectural shots, correct perspective distortions to maintain symmetry and clean lines. Lightroom’s perspective correction tools can help restore balance, ensuring parallel lines look as they should.
Plan ahead when shooting to make editing easier. Capturing your photos with a bit of extra space around the subject gives you room to crop, straighten, or adjust the perspective without cutting out important parts of the composition.
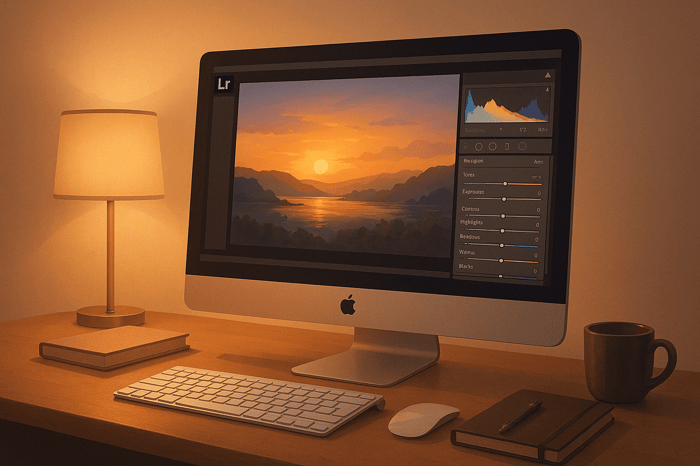
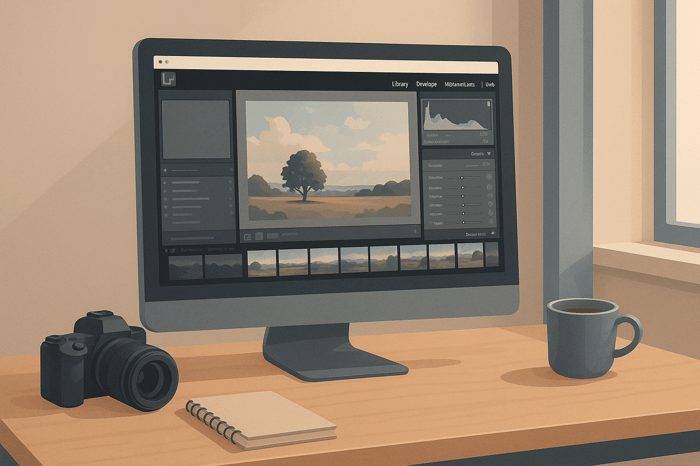
Main Lightroom Tools for Minimalist Edits
Once you've cropped and straightened your image, it's time to refine your minimalist edit using Lightroom's tools. Every adjustment should work toward enhancing clarity and simplicity. Here's a closer look at the tools that can help you achieve a clean, minimalist aesthetic.
Adjusting Basic Settings
The Basic panel is your go-to starting point for creating the understated look that defines minimalist photography. Focus on these key adjustments:
- Exposure: Lower it slightly to create a calm, subdued atmosphere.
- White Balance: Shift the Temperature to the left for cooler tones, and nudge the Tint to the right to introduce subtle green hues.
- Highlights and Whites: Reduce Highlights to retain details in bright areas while boosting Whites to maintain brightness without harsh contrasts.
- Shadows and Blacks: Lower Shadows to separate your subject from the background. Decreasing Blacks adds depth and enhances darker tones.
- Contrast: Use it sparingly to maintain depth while preserving a soft, minimalist feel.
These tweaks help emphasize negative space and keep the focus on your subject.
Color Adjustments for a Minimalist Look
After fine-tuning exposure, simplify your color palette to achieve a cohesive, minimalist vibe:
- Desaturation: Use the HSL panel to reduce the saturation of individual colors by sliding them to the left, creating a muted and harmonious palette.
- Black and White Conversion: Eliminate color distractions by applying Lightroom's black-and-white profiles for a timeless, clean look.
- HSL Adjustments: Adjust Hue, Saturation, and Luminance to refine specific colors. For instance, lowering the luminance of blues can darken skies, simplifying the background.
- Color Grading: Add subtle, cool tints to shadows for a unified and serene color scheme.
These adjustments ensure your composition feels balanced and uncluttered.
Tone Curve for Soft Contrast
The Tone Curve is a powerful tool for achieving smooth, minimalist contrast:
- Reverse S-Curve: Lift the shadow curve and lower the highlight curve to create a soft, matte effect.
- Matte Effect: Use the Point Curve to gently raise the bottom-left point, softening blacks and adding a moody, artistic touch.
These subtle changes help maintain a clean and polished look without overpowering the image.
Masking for Targeted Edits
Lightroom's masking tools allow you to make precise adjustments to specific areas, ensuring the overall composition remains balanced:
- Radial Filters: Use these to create soft vignettes or to brighten your subject while subtly darkening the edges, drawing attention where it matters most.
- Graduated Filters: Smoothly transition edits across large areas, such as skies, to reduce distractions.
- Brush Adjustments: Manually brighten your subject, tone down distractions, or tweak saturation for added refinement.
- Automated Masks: Leverage AI-powered masks (like Subject, Sky, or Object) to isolate elements for quick and precise edits.
These tools make it easier to guide the viewer's eye and maintain focus on the essential parts of your image.
Removing Unwanted Objects
Distractions, no matter how small, can disrupt the minimalist aesthetic. Lightroom's removal tools can help you clean up your image:
- Spot Removal: Use Heal mode to seamlessly remove dust spots or other minor distractions by blending them into the surrounding area.
- Clone Mode: Duplicate textures or extend clean lines, particularly useful for architectural shots.
- Precision Techniques: Tackle larger distractions in smaller sections to ensure a natural and polished result.

The Master Preset Bundle

$57.00
$672.00
The Master Preset Bundle Every Style. Every Platform. One Download Get 56 high-quality Presets.io collections in one complete bundle — designed to help you edit faster, stay consistent, and get professional-looking results in seconds. Get All High-Quality Preset Collections For… continue reading
sbb-itb-b27063b
Advanced Methods for Minimalist Effects
Once you've mastered the basics, these advanced techniques can help you fine-tune your minimalist photography. They emphasize precision and efficiency, resulting in a polished and sophisticated aesthetic.
Selective Adjustments for Cleaner Compositions
Radial gradients are an excellent way to draw attention to your subject. They allow you to target specific areas with precision. To use this tool effectively, place a radial gradient over the main subject and increase the exposure by +0.5 to +1.0 stops while slightly enhancing clarity. This adjustment subtly highlights your subject, naturally guiding the viewer's eye.
For added depth, invert the gradient. Then, reduce the exposure by -0.3 to -0.7 stops and apply feathering to create a soft vignette that minimizes distractions around the edges.
Linear gradients, on the other hand, work particularly well for architectural and landscape photography. Apply a linear gradient to the background, then reduce saturation by 20–30% and slightly soften the sharpness. This technique shifts attention away from busy elements, ensuring the main subject remains the focal point.
For even greater control, combine gradients with the adjustment brush. After applying a radial gradient, refine the edges with the brush to match the contours of your subject. This hybrid approach is especially useful for isolating subjects with intricate outlines while maintaining a clean, intentional look.
Once your gradients are in place, take advantage of advanced removal tools to eliminate any lingering distractions.
Removing Small Distractions
Lightroom's AI-powered tools make cleaning up your images faster and more effective. The Generative Remove tool, powered by Adobe Firefly, can handle complex distractions like power lines, signs, or cluttered elements - even in detailed backgrounds. Simply brush over the unwanted areas, and the tool does the rest.
For portraits or street photography, Lightroom Classic's Distraction Removal tool offers a "People" feature that automatically detects and masks background individuals. This ensures your composition stays focused on the main subject without manual effort.
Adopt a systematic approach when cleaning up distractions. Start with the most noticeable elements, then zoom in to 100% magnification to address finer details like dust spots, sensor marks, or minor blemishes. These small refinements can make a big difference in achieving a clean, minimalist aesthetic.
Using Minimalist Presets for Efficiency
After perfecting your adjustments and removing distractions, presets can help streamline your workflow while maintaining consistency. Minimalist presets are designed to simplify the editing process, offering muted color palettes, soft contrast curves, and gentle desaturation for that clean, understated look.
Websites like Presets.io offer a wide selection of minimalist presets tailored to various lighting conditions. Whether you're aiming for bright and airy tones or a moody, low-key vibe, these presets provide a solid starting point you can customize to suit your vision.
The secret to using presets effectively is to treat them as a foundation rather than a finished product. Apply your chosen preset first, then make targeted adjustments - such as tweaking exposure, fine-tuning white balance, or refining masks - to align the edit with your composition and lighting.
Batch processing becomes incredibly efficient once you've identified presets that complement your shooting style. Apply a preset to a series of images, then make individual adjustments as needed. This approach not only saves time but also ensures visual consistency across your portfolio.
For the best results, select presets that align with your camera's color profile and typical shooting conditions. Experiment with different options to find the ones that best match your minimalist style, whether you lean toward cooler tones, warm neutrals, or timeless black-and-white edits.
Maintaining Consistency and Exporting Your Photos
Wrap up your minimalist edits by ensuring consistency across your images and preparing them for various platforms. These finishing steps can transform individual photos into a polished and cohesive collection.
Keeping Your Edits Consistent
Consistency is key when turning a set of photos into a unified series. Whether you're crafting an Instagram feed, delivering a client gallery, or building a portfolio, your minimalist edits should reflect a cohesive style.
Start with exposure. Similar lighting conditions should have consistent adjustments - like applying +0.3 stops to outdoor portraits - to create a harmonious visual flow.
Next, focus on color temperature. Minimalist photography often benefits from a uniform color palette. For instance, you might stick to cool tones around 5,800K or warm neutrals at 4,200K. Setting a custom white balance for your typical shooting conditions can help maintain this consistency.
Your tone curve should also follow a similar pattern. If you prefer soft contrasts with subtle highlights and lifted shadows, apply this approach consistently across your images. Minor variations are fine, but the overall tonal relationship should stay steady.
Pay close attention to saturation levels. If your style leans toward muted tones - say, reducing vibrance by 15-25% - keep this range consistent throughout your collection. Sudden shifts in color intensity can break the calm, balanced aesthetic that defines minimalist photography.
To streamline your process, consider creating a custom preset based on your favorite minimalist edit. This preset can serve as a starting point for future edits, ensuring that foundational adjustments like contrast, clarity, and color grading stay aligned. From there, fine-tune each image as needed while preserving the overall look.
For similar photos, batch editing can save time. Sync basic settings like tone curves and color adjustments, then tweak exposure and cropping individually to perfect each shot.
Once your edits are consistent, optimize your export settings to ensure your photos look their best across different platforms.
Export Settings for Different Uses
Your minimalist edits deserve export settings that enhance their impact, whether they're viewed online, in print, or shared with clients. Tailoring these settings to specific uses ensures your photos retain their quality and simplicity.
For web and portfolio use, export images at 1920 pixels on the long edge with a resolution of 72 DPI. Use the sRGB color space to ensure accurate colors across screens, and set JPEG quality to 85-90% to balance file size and image clarity.
When preparing for social media, consider each platform's preferred dimensions:
- Instagram Posts: 1080×1080 pixels
- Instagram Stories: 1080×1920 pixels
- Facebook: 1200 pixels on the long edge
Stick with sRGB color space and 72 DPI for social media exports, as platforms compress uploads regardless of your settings.
For print, use a resolution of 300 DPI for sharp detail (e.g., 2400×3000 pixels for 8"×10" prints). Export in Adobe RGB for a broader color range and choose either TIFF or high-quality JPEG (95-100%) based on file size requirements.
Client delivery often calls for multiple formats. Provide high-resolution JPEG files at 300 DPI for printing and a separate web gallery with 72 DPI images for online use. Offering both Adobe RGB and sRGB versions ensures flexibility for digital and print purposes.
For quick sharing via email, export at 1200 pixels on the long edge with 72 DPI and a JPEG quality of 70-80% to keep file sizes under 1MB.
Use a clear and descriptive file naming system, like "2025_09_MinimalistPortrait_Sarah_01.jpg." This makes it easier to organize and locate files later.
Sharpening settings should match the intended output. For screen viewing, select "Screen sharpening" with a Standard amount. For print, choose sharpening for either Matte or Glossy paper, depending on your printer. Lightroom's output sharpening options are designed to preserve the clean, minimalist look of your edits.
Finally, consider metadata inclusion based on the context. For client work, include copyright details and contact information. For social media, you might strip metadata to reduce file size and protect privacy.
Conclusion
Editing in Lightroom with a minimalist approach allows your subject to take center stage by eliminating unnecessary distractions. But minimalism isn't just about taking things away - it's about making deliberate choices that elevate the story your photo tells.
Start with a clean, well-composed image and use Lightroom's core tools to refine it. Focus on the basics: adjust exposure, apply subtle color grading, and fine-tune the tone curve. Minimalist editing thrives on restraint - small, thoughtful adjustments often make the biggest difference. Once you've nailed the essentials, Lightroom's advanced tools can help you polish your minimalist vision even further.
Lightroom's masking and removal tools are particularly useful for creating targeted edits that guide the viewer's eye. These precise adjustments help maintain the natural, uncluttered feel that's essential to minimalist photography.
Consistency is another cornerstone of minimalist editing. To transform individual photos into a cohesive collection, aim for uniform adjustments across your images. Whether you're curating a portfolio or crafting content for social media, keeping exposure, color temperature, and tonal balance consistent will give your work a polished, recognizable style.
The timelessness of minimalist editing is one of its greatest strengths. While trends in photography come and go, clean, simple images with strong compositions never lose their appeal. Edits grounded in minimalism will continue to resonate with viewers long after the latest fad fades.
With the technical aspects in place, let your creative instincts take over. Practice these techniques on different subjects to refine your skills and push your edits to new levels of simplicity and impact.
Above all, trust your artistic judgment. Minimalist photography is personal - what feels clean and balanced to you might look different to someone else. Use these tools and techniques as a starting point, then shape a style that reflects your unique vision.
FAQs
How can I use negative space to make my subject stand out in minimalist photography?
Negative space can be a game-changer in minimalist photography, helping your subject truly stand out. By surrounding your subject with a large, uncluttered area, you naturally guide the viewer's eye right where you want it. This not only makes your composition cleaner but also brings a sense of calm and balance to the image.
To make the most of negative space, ensure the empty areas work with your subject rather than competing for attention. Experiment with different angles, lighting, and positioning to create a striking yet simple composition. This technique allows your subject to take the spotlight while delivering a clean, minimalist vibe.
What mistakes should I avoid when creating minimalist edits in Lightroom?
When working on minimalist edits in Lightroom, it's important to use the contrast and clarity sliders sparingly. Pushing these too far can leave your photos looking overdone and artificial. Minimalist editing is all about simplicity, so small, deliberate tweaks are usually the way to go.
Another pitfall to avoid is overly relying on presets. While presets can provide a helpful foundation, they aren't one-size-fits-all. Every photo has its own lighting and composition, so taking the time to fine-tune those presets ensures your edits remain balanced and maintain that clean, minimalist aesthetic.
Lastly, go easy on localized adjustments like brushes and gradients. Using these tools excessively can lead to uneven or inconsistent results, which runs counter to the minimalist principle of creating images that feel simple and harmonious.
How can I keep a consistent minimalist style across multiple photos in Lightroom?
To keep a consistent minimalist style across a photo series in Lightroom, start by selecting or creating a preset that matches the aesthetic you're aiming for. Applying this preset to all the images ensures uniformity in tone, exposure, and color adjustments.
Lightroom’s batch editing feature can save time by applying the same settings to multiple photos simultaneously. For fine-tuning, use the reference view tool to compare edits side by side and make adjustments as needed. Periodically review your edits to ensure they maintain the minimalist feel and cohesion throughout the entire series.