
Table of Contents
Complete Guide to Lightroom: 7 Photo-Editing Concepts
Photo editing is both an art and a science, requiring a combination of creative vision and technical know-how. For photography enthusiasts and professionals alike, software like Lightroom has become an indispensable tool for transforming raw images into stunning visuals. But where do you begin? And how can you make your edits both efficient and impactful?
This article breaks down seven essential photo editing concepts, as outlined in a recent video tutorial, to help you enhance your workflow, achieve professional results, and unlock your creative potential in Lightroom (or any similar editing software). Whether you’re a budding photographer or an experienced editor looking for new insights, this guide offers actionable techniques to elevate your craft.
Understanding the Foundations of Photo Editing
Before diving into specific tools and techniques, it’s crucial to understand one simple truth: photo editing is all about balance. The goal isn’t to crank up sliders like saturation or contrast indiscriminately but rather to create harmony between the elements of your image. Below, we explore seven transformative concepts that will help you refine your editing process.
1. Clean Up Your Image: Removing Distractions
Every great edit begins with a clean foundation. Remove unwanted objects, people, or blemishes that detract from your image’s focus. Lightroom’s Generative AI and Remove tools make this process faster than ever.
- How to Use the Remove Tool:
Zoom into your image and use the brush tool to target distractions. Lightroom’s AI will intelligently fill in the gaps for a seamless look.- For crowded scenes, use the distraction removal tool to select and remove groups of subjects automatically.
- Manually refine areas if needed to ensure precision.
Pro Tip: If a generative AI tool struggles with complex edits, consider toggling it off and using simpler manual adjustments for cleaner results.
2. Sharpening and Noise Reduction
Sharpness and detail are critical in creating professional-looking images. However, too much noise (grain) can ruin an otherwise beautiful photo. Here's how to balance sharpness and noise reduction effectively:
- Noise Reduction Techniques:
Use the Denoise function to reduce grain. Adjust the noise slider to remove imperfections while preserving texture. - Sharpening Without Overdoing It:
Increase sharpness strategically by using masking tools to target edges and details. Press the Alt/Option key while dragging the masking slider to ensure you’re sharpening only the necessary areas.
Pro Tip: Always view your image at 100% magnification to check if the noise or sharpness adjustments work well for high-resolution prints.
3. Mastering White Balance for Mood and Accuracy
White balance refers to adjusting the "color temperature" of your image to ensure whites appear natural. But beyond accuracy, white balance also sets the mood of your photo.
- Temperature and Tint Sliders:
- Cool tones (blues) create a refreshing, calming atmosphere.
- Warm tones (yellows/oranges) evoke coziness or drama.
- Using the White Balance Picker:
Select a neutral gray, white, or black area of your image to automatically correct white balance.
Pro Tip: You don’t always need to "correct" white balance. Sometimes, leaning into warm or cool tones enhances the story you want your image to tell.

The Master Preset Bundle

$57.00
$672.00
The Master Preset Bundle Every Style. Every Platform. One Download Get 56 high-quality Presets.io collections in one complete bundle — designed to help you edit faster, stay consistent, and get professional-looking results in seconds. Get All High-Quality Preset Collections For… continue reading
4. Perfecting Exposure and Contrast
Even the best cameras can’t match the dynamic range of the human eye. Lightroom’s exposure sliders help bridge this gap by improving the brightness and depth of your image.
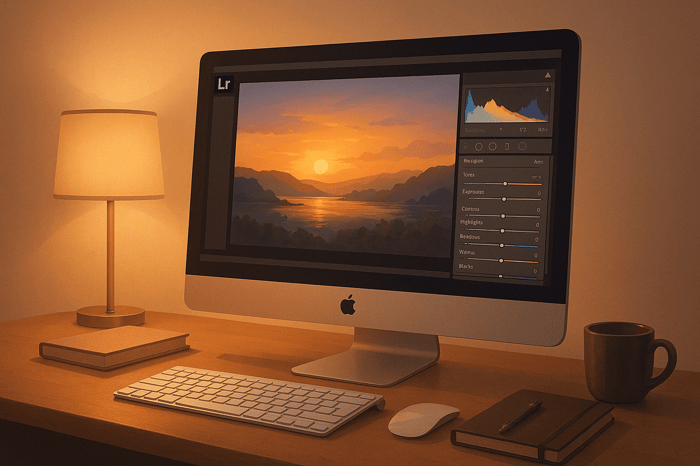
- Understand the Histogram:
- The left side represents shadows.
- The middle represents midtones.
- The right side represents highlights.
Adjust exposure sliders (whites, shadows, blacks) individually for greater control rather than using the general exposure slider.
- Add Contrast: Increase the difference between light and dark areas to make your image more dynamic.
Pro Tip: A balanced histogram is often desirable, but don’t be afraid to deviate for creative purposes. High contrast or moody lighting can add drama.
5. Adding Vibrancy Without Overdoing It
Color enhances emotion in photography, but oversaturation can make images feel unnatural. Lightroom offers two sliders for fine-tuning color:
- Vibrance: Boosts muted colors without oversaturating already vibrant tones.
- Saturation: Adjusts the intensity of all colors equally. Use this sparingly.
For targeted adjustments, use the Color Mixer to control the hue, saturation, or luminance of specific colors (e.g., blues, reds).
Pro Tip: Experiment with black-and-white edits to explore tonal contrast. Monochrome images often highlight details that color can obscure.
6. The Power of Masking: Local Adjustments
Masking allows you to apply edits to specific areas of your photo without affecting the rest. This is especially useful for highlighting subjects or enhancing certain regions of your image.
- How to Mask in Lightroom:
- Use a brush to paint over the area you want to edit.
- Adjust parameters like exposure, contrast, or saturation to make the subject pop.
- Explore AI options like Select Subject or Select Sky for quick, automated masks.
Pro Tip: Combine multiple masks for advanced effects. For example, brighten your subject with one mask while darkening the background with another to create depth.
7. Cropping for Composition
Cropping isn’t just about resizing - it’s about guiding your viewer’s eye. Use composition rules like the Rule of Thirds to place your subject along the gridlines for a balanced, aesthetically pleasing image.
- Cropping Strategies:
- For portraits, leave negative space in the direction your subject is facing.
- For landscapes, align the horizon with either the top or bottom third of the frame.
Pro Tip: Always keep your image’s final use in mind (e.g., Instagram posts may require specific aspect ratios).
Key Takeaways
- Start with a clean base: Use tools to remove distractions and set the stage for your edits.
- Balance sharpness and noise: Use masking to target areas for sharpening and minimize grain.
- Leverage white balance: Adjust temperature and tint sliders to create the desired mood.
- Master exposure and contrast: Use the histogram and targeted sliders for precise adjustments.
- Control saturation: Use vibrance for subtle pops of color or explore monochrome options.
- Use masking for focus: Highlight your subject while refining other areas with local adjustments.
- Compose with intentional cropping: Apply theories like the Rule of Thirds to create captivating compositions.
Final Thoughts
Photo editing is a journey of constant discovery. By mastering these seven foundational concepts in Lightroom, you’ll not only improve the technical quality of your images but also develop an eye for storytelling through editing. Remember, the key to impactful edits lies in subtlety - small, thoughtful changes often yield the most striking results.
With practice and experimentation, you’ll find your unique editing style, turning ordinary photos into extraordinary works of art. Now, it’s time to take what you’ve learned and bring your vision to life!
Source: "Photo Editing Tutorial: 7 Concepts Beginner's Must Master" - Aperlust, YouTube, Aug 19, 2025 - https://www.youtube.com/watch?v=8Qfr5s9H9Cs
FAQs
What’s the difference between Lightroom and Photoshop for photo editing?
Lightroom is ideal for organizing, color-correcting, and enhancing photos efficiently, especially when working with large batches. It focuses on global and local adjustments like exposure, white balance, and color grading. Photoshop, on the other hand, is best for detailed retouching, compositing, and pixel-level edits. Many photographers use both together—starting in Lightroom for overall editing, then refining specific images in Photoshop.
How can I make my Lightroom edits look more natural?
The key to natural-looking edits is balance and subtlety. Avoid overusing sliders like saturation, clarity, or contrast. Instead, focus on small, targeted changes using masking and vibrance adjustments. Always zoom in at 100% to ensure details remain sharp without introducing noise or over-processing artifacts. Remember: great edits enhance the image, not overpower it.
Do I need professional equipment to apply these Lightroom concepts effectively?
Not at all. The seven photo-editing concepts—like white balance, exposure control, and cropping—apply to photos from any camera, even smartphones. The power of Lightroom lies in its flexibility to elevate images regardless of gear. What matters most is understanding how to use its tools to enhance lighting, color, and composition according to your creative vision.