
Table of Contents
Ultimate Guide to Moody Wildlife Presets
Moody wildlife presets are pre-designed settings for Adobe Lightroom that instantly add a dark, atmospheric tone to your wildlife photos. These presets adjust contrast, shadows, color balance, and more to create dramatic, story-like effects. They’re perfect for adding depth, mood, and consistency to your images, especially in challenging lighting conditions.
Key Takeaways:
- What They Do: Enhance photos with cinematic tones, rich contrasts, and emotional depth.
- Why Use Them: Save time, ensure consistency, and make your wildlife shots stand out in a sea of visuals.
- Choosing the Right Preset: Consider your subject (e.g., birds vs. mammals), lighting, habitat, and the story you want to tell.
- How to Apply: Easily install and tweak presets in Lightroom for polished results.
- Customization Tips: Adjust exposure, white balance, and sharpening for natural-looking edits.
Moody presets are versatile and work beyond wildlife photography, including portraits and landscapes. Platforms like Presets.io offer a wide range of options to help you achieve your desired look.
SECRETS To MOODY Wildlife Photos In Lightroom
How to Choose the Right Moody Wildlife Presets
Picking the right moody preset is all about aligning your creative vision with the unique qualities of your subject and its environment. The wrong choice can overwhelm a stunning wildlife moment, while the right one transforms your photo into something unforgettable. Here’s how to make the best choice.
What to Consider When Selecting Presets
Different wildlife subjects call for different approaches. Birds, for example, demand a distinct touch compared to mammals because feathers and fur interact with light in unique ways. Feathers can either shimmer beautifully or look unnatural, depending on how shadows and highlights are handled. Mammals, on the other hand, often benefit from presets that bring out the texture of their coat without overloading the colors.
Lighting conditions and the time of day also play a big role. Golden hour naturally adds warmth and depth, requiring minimal adjustments, while harsh midday light might need stronger tweaks to manage contrast and exposure. Instead of battling the light, work with it to enhance details in your subject’s fur or feathers.
The habitat is another key factor. Forests, with their dappled light and deep shadows, need presets that can balance high contrast without losing detail. Savannas, with their open spaces and intense sunlight, require adjustments to soften harsh light while preserving the scene’s warmth. Wetlands, with their reflective surfaces, call for careful color balancing to keep tones looking natural.
Finally, think about the story you want your photo to tell. Are you aiming for a dark, mysterious vibe or a warm, inviting feel? Your choice of preset can make all the difference in how your image communicates its mood.
Exploring Wildlife Preset Styles
Once you’ve considered these elements, take a look at the variety of preset styles available:
- Cinematic presets: These create a dramatic, film-like effect with deep shadows, bold contrast, and refined color grading. They’re great for intense subjects like birds of prey or big cats in striking light.
- Vintage-inspired presets: With subtle desaturation, film grain, and warm tones, these are ideal for nostalgic scenes, like deer appearing through morning mist.
- AI-adaptive presets: These use intelligent adjustments tailored to your photo’s content. They’re a great starting point for further fine-tuning.
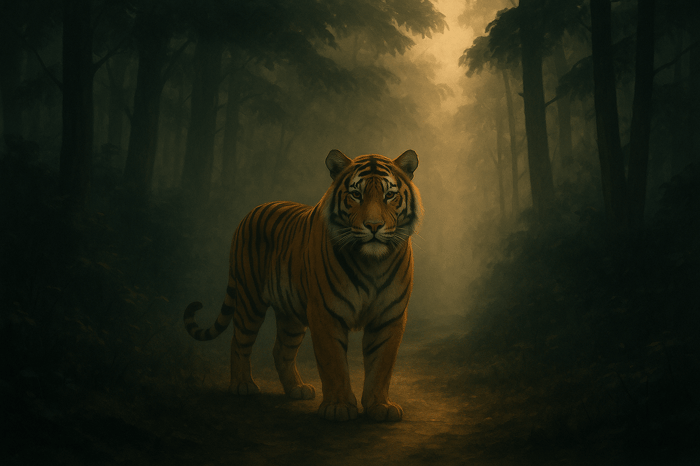
- Dark and moody presets: Designed to amplify shadows and muted colors, these work beautifully for forest shots or nocturnal scenes with a mysterious atmosphere.
- Warm-toned presets: Perfect for enhancing golden hour hues, these presets bring out the warmth in subjects with golden or reddish fur or feathers.
No single preset works for every scenario. The best wildlife photographers keep a variety of presets at their fingertips, choosing the right one based on the subject, environment, lighting, and their artistic intent. A well-curated collection of presets can elevate the mood and drama of any wildlife shot.
How to Apply and Customize Moody Presets
Now that you've chosen the ideal moody preset for your wildlife photo, it's time to make it shine. Applying the preset correctly and tweaking it to suit your image ensures your edits look polished and natural.
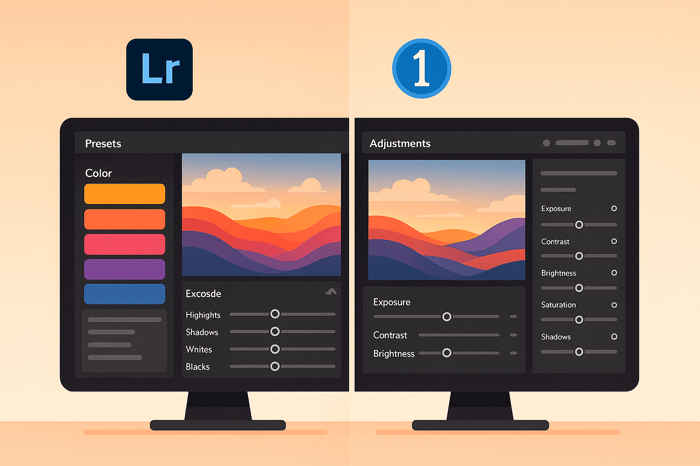
How to Apply Presets in Lightroom and Mobile Apps
Getting your presets up and running in Lightroom Mobile is a breeze. If you're using an Android device, start by downloading the preset files. Open Lightroom Mobile, choose an image, and tap "Presets" at the bottom. Then, head to the three-dot menu in the top-right corner, select "Import Presets", and upload your ZIP file. Once imported, you'll find your presets under Presets > Yours > User Presets.
For DNG presets, there's an extra step. After unzipping the preset folder, open Lightroom and tap "Add Photos." Navigate to the DNG file saved on your device and import it. Once the DNG file opens, tap the three-dot icon in the top-right corner and select "Create Preset." Name your preset, assign it to a group, and save it.
If you're using AI-powered presets, you'll need a Premium subscription to Lightroom or Photoshop. The latest updates bring full AI functionality to Android devices via the Lightroom mobile app, matching what’s already available on iOS and desktop.
To apply any preset, open your wildlife photo, tap the "Presets" panel, and navigate to "Yours." Select the preset group where your new preset is saved, tap it, and hit the checkmark to apply.
Once the preset is applied, it’s time to refine the image with subtle adjustments to make it truly shine.
How to Customize Presets for Natural Results
Applying a preset is just step one. The real artistry lies in fine-tuning it to fit your specific image while keeping the results natural. Start by calibrating your screen for accurate color representation.
Pay attention to the subject's eyes - they often serve as the focal point. Wildlife photographer Piet van den Bemd showcases this approach in his Arctic work. Using Lightroom’s AI-powered "select subject" tool, he isolated a bearded seal, then refined the mask with the brush tool for precision. He slightly lifted the exposure, added clarity and texture to enhance the seal’s fur, and warmed the tones to bring back its natural color.
Begin your adjustments with the basics: correct white balance, tweak exposure, and remove distractions. Use the eyedropper tool to set the white balance, but trust your instincts - if something feels off, it probably is.
For pinpoint accuracy, use local adjustment masks. Van den Bemd used a luminance range mask to adjust the brightness and contrast of floating ice, adding depth without harshness. He also applied a color range mask to tone down blue hues in the snow, leaving it looking clean and crisp.
When sharpening, start by pushing the "Detail" slider to its max to see the effect, then dial it back to a natural level. Use the "Masking" slider to focus sharpening on textured areas while avoiding smooth surfaces like water. Wildlife photographer Kathleen Reeder advises:
"All changes should be intentional, not arbitrary, and the adjustments you make should always be as subtle as you can afford to make them."
Noise reduction is another balancing act. Adjust the color noise slider to remove specks, then use the luminance noise slider to soften grain without losing texture. Van den Bemd used AI noise reduction to smooth areas like the sky and water while preserving the details in the seal's fur.
For AI presets, let the software finish detecting sections like the background, sky, or subject before making adjustments. After applying a preset, you can use the Amount Slider to control its intensity. You can even stack multiple AI presets - just click the checkmark after each one to layer them effectively.
Batch Editing for Consistent Results
Once you’ve perfected one image, batch editing can save you time while keeping a cohesive look across a series of photos. If your shots were taken under similar conditions, this method is a game-changer.
In Lightroom desktop, edit your first image to create a "master edit." Then, copy the develop settings (Ctrl+Shift+C on Windows or Cmd+Shift+C on Mac), excluding local adjustments specific to that image. Select all the other images in your series and paste the settings (Ctrl+Shift+V or Cmd+Shift+V).
On Lightroom Mobile, syncing through the cloud makes batch editing easy. After editing your master image, ensure it syncs, then apply the same preset to the rest of your series. You can still tweak individual images as needed to maintain the overall mood and style.
Even with batch editing, remember that each image is unique. A preset that works perfectly for one shot might need slight exposure or shadow tweaks for another. The goal is to create a consistent mood and style, not identical edits for every photo. As professional wildlife photographer Carol puts it:
"My goal is to create a photo that makes me say... 'Yes, that's how it felt to be there!'"

The Master Preset Bundle

$57.00
$672.00
The Master Preset Bundle Every Style. Every Platform. One Download Get 56 high-quality Presets.io collections in one complete bundle — designed to help you edit faster, stay consistent, and get professional-looking results in seconds. Get All High-Quality Preset Collections For… continue reading
How to Create Mood in Wildlife Photography
Capturing mood in wildlife photography is about more than just editing presets - it’s about connecting with the emotion of the moment. By mastering lighting, composition, and keeping your edits subtle, you can turn an ordinary wildlife shot into something that deeply resonates with viewers. Let’s dive into how lighting can help you convey emotion in your wildlife images.
Working with Lighting and Shadows
Lighting is the foundation of mood in wildlife photography.
Backlighting creates a dramatic, glowing effect by placing the sun directly behind your subject. This technique produces a rim of light that separates the animal from its background, adding a magical touch. Use spot metering to expose your subject correctly while maintaining that radiant glow.
Sidelighting adds depth and texture by emphasizing the interplay of light and shadow. Position the light source at a 90-degree angle to your subject to highlight details like the stripes on a tiger or the rough texture of an animal’s fur. Wildlife photographer Tin Man Lee sums it up perfectly:
"There is no good or bad light, but you need to master the light to enhance your photos for the mood you want to convey."
Overcast days provide soft, diffused light, which reduces harsh shadows and ensures even illumination. On such days, setting your white balance to 'Cloudy' and using a tripod for slower shutter speeds can help you capture the scene effectively.
For more dramatic results, look for dappled or spot lighting. This type of light selectively illuminates parts of your subject or the landscape, naturally guiding the viewer’s eye while leaving other areas in shadow.
Low-key photography is another powerful technique. By focusing on your subject’s key features and letting the rest of the frame fall into shadow, you can create an air of mystery. This style works especially well for animals in darker environments, drawing attention to the details that matter most.
Once you’ve used lighting to set the mood, the next step is to refine your composition by making your background work for your subject.
How to Use Backgrounds to Support Your Subject
A well-thought-out background can enhance the mood of your wildlife shot without stealing attention from the subject. A clean, intentional backdrop complements the main focus while setting the tone of the scene.
Changing your angle is often the easiest way to improve your background. By moving slightly to the side, crouching lower, or adjusting your height, you can dramatically alter what appears behind your subject.
Aperture control is another effective technique. Using a wide aperture (f/2.8 to f/5.6) blurs distracting backgrounds, keeping your subject sharp and prominent. For example, a puffin framed against soft, blurred ocean hues creates a gentler mood compared to one with a busy, detailed background.
Light direction can also shape your background. Backlighting helps separate your subject, while sidelighting can add texture and dimension to the surrounding environment you want to include.
Environmental storytelling uses the background to add context to your image. A snow leopard framed by the rugged Himalayan slopes tells a deeper story than one isolated against a blank sky. However, make sure the background is free of distractions like stray branches, other animals, or man-made objects that could detract from the mood.
How to Avoid Over-Editing
To preserve the authenticity of your wildlife photos, keep your edits subtle. Over-editing can strip away the natural beauty of the moment, leaving the image feeling artificial.
Rely on your memory of the scene when editing. If an adjustment doesn’t feel true to how you remember the moment, it’s probably not the right choice.
Always start with RAW files. These give you the flexibility to make significant adjustments to exposure, shadows, and highlights while maintaining the natural textures of your subject.
Be especially careful with white balance. While correcting color casts is important, avoid removing the natural hues that define the mood - like the golden tones of sunset or the cool blues of early morning fog.
Apply sharpening selectively, focusing on textured areas like fur or feathers. Over-sharpening can make smoother areas look unnatural. Similarly, use noise reduction sparingly - too much can create a waxy effect that detracts from the organic feel of your photo.
Before making heavy edits, ask yourself if the image truly needs them. Sometimes, the best approach is to let the photograph speak for itself with minimal intervention.
"Understanding how different lighting conditions affect mood allows you to intentionally shape the emotional impact of your photos."
Summary and Next Steps
Now that you’ve honed your skills in lighting, composition, and subtle editing, it’s time to bring everything together. With the right tools and techniques, you can elevate ordinary wildlife photos into captivating images that resonate emotionally with your audience.
Key Takeaways
Streamlining your editing process is essential, especially when dealing with large batches of wildlife photos from a single shoot or trip. Using presets not only saves time but also helps you refine and maintain a consistent personal style.
The foundation of moody wildlife photography lies in understanding how different elements complement each other. Focus on mastering lighting techniques like backlighting and sidelighting, use backgrounds strategically to highlight your subject, and keep your edits understated to preserve the natural authenticity of your shots.
When choosing presets, look for those that amplify the inherent drama in your wildlife photos. Moody presets, in particular, excel in low-light conditions, simplifying the landscape and adding a touch of mystery to your compositions. To make them truly yours, adjust elements like exposure, contrast, and color grading to align with your creative vision. Subtle color grading can also help maintain a cohesive look across your entire portfolio.
Many presets are crafted by seasoned photographers, offering a professional edge to your work. Use these as a starting point to develop your own distinctive style, ensuring your wildlife photography conveys the emotional depth that moody presets can bring.
Discover Quality Presets at Presets.io
Ready to take your editing to the next level? Presets.io offers a wide selection of high-quality Lightroom presets designed to enhance your workflow and bring out the best in your wildlife photographs. Their collections include aesthetic, cinematic, vintage, and film-inspired presets - perfect for creating striking moods in your images.
The Master Preset Bundle at Presets.io features 721 presets for both desktop and mobile use, giving you a versatile toolkit for crafting different looks. Whether you’re editing on your computer or phone, these professional-grade presets can transform your photos with ease.
What makes Presets.io stand out is the variety it offers. With new presets added weekly, you’ll always have fresh options to experiment with, keeping your edits aligned with current photography trends. Plus, the platform provides simple installation guides, so even beginners can get started without a hitch.
If you use software beyond Lightroom, Presets.io has you covered with styles for Capture One and Luminar NEO, allowing you to maintain your creative flow no matter which platform you prefer.
Experiment with different presets to explore various editing styles and discover the perfect mood for your wildlife shots. High-quality presets not only save time but also deliver polished, professional-looking results.
Start with a few collections that align with your vision, practice customizing them, and watch as your wildlife photography evolves into a powerful, moody aesthetic that captures the raw beauty and emotion of nature’s most unforgettable moments.
FAQs
How can I use moody wildlife presets to enhance my photos while keeping them natural?
To give your wildlife photos a moody yet natural feel, focus on making subtle adjustments that enhance the scene without overpowering it. Start by choosing presets that emphasize natural tones, then tweak them to fit the unique qualities of each image. Leverage tools like masking and selective editing to refine specific areas, such as drawing attention to your subject or enhancing key parts of the background.
Keep the look balanced by fine-tuning settings like contrast, vibrancy, and opacity. This helps you avoid an overly dramatic or fake appearance. With small, intentional edits, you can retain the original atmosphere and details of your photo while adding a touch of creative style.
What mistakes should I avoid when using moody presets in tricky lighting situations?
When working with moody presets in tricky lighting situations, steer clear of these common missteps:
- Pushing saturation or vibrance too far: Overdoing it can make colors appear unnatural and clash with the mood you're aiming for.
- Skipping adjustments for unique lighting: Lighting conditions vary, and presets aren’t one-size-fits-all. Without fine-tuning, edits can end up looking off or inconsistent.
- Neglecting exposure settings: Incorrect exposure can flatten your photo, stripping away depth and atmosphere, which are essential for moody edits.
To achieve the best results, pay attention to the natural lighting and make subtle tweaks. These small changes can elevate your work while keeping the mood intact.
What are the best lighting techniques to enhance the mood when using moody presets for wildlife photography?
To get the most out of moody presets in wildlife photography, make the most of natural light during the golden hours - right after sunrise or just before sunset. This soft, warm light naturally enhances depth and brings a dramatic touch to your photos.
If you're aiming for a more cinematic vibe, try incorporating tools like spotlights, haze, or black reflectors. These can help you highlight shadows and boost contrast, perfectly matching the moody aesthetic. Together, these techniques create a rich, atmospheric effect that pairs seamlessly with your presets.