
Table of Contents
Ultimate Guide to Cubism Photo Editing
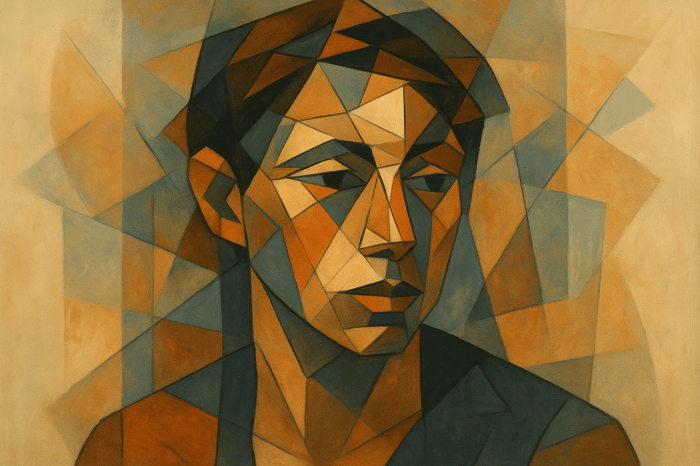
Cubism photo editing transforms ordinary images into striking, multi-perspective artworks inspired by early 20th-century Cubist artists like Picasso and Braque. This style deconstructs and reassembles subjects into angular, fragmented compositions, offering a fresh way to reinterpret visuals.
Here’s what you’ll learn:
- What is Cubism? An art movement that presents subjects from multiple viewpoints.
- Why use it in photo editing? To experiment with form, geometry, and layered perspectives.
- Tools to get started: Software like Adobe Photoshop, Lightroom, and GIMP, plus presets from platforms like Presets.io.
- Step-by-step techniques: Fragmenting images, manipulating shapes, and adjusting tones for Analytical or Synthetic Cubism styles.
- Stylistic approaches: Analytical Cubism focuses on neutral tones and geometric deconstruction, while Synthetic Cubism uses bold colors and collage effects.
This guide equips you with tools and techniques to transform your photos into Cubist-inspired digital art, blending geometry, perspective, and creativity.
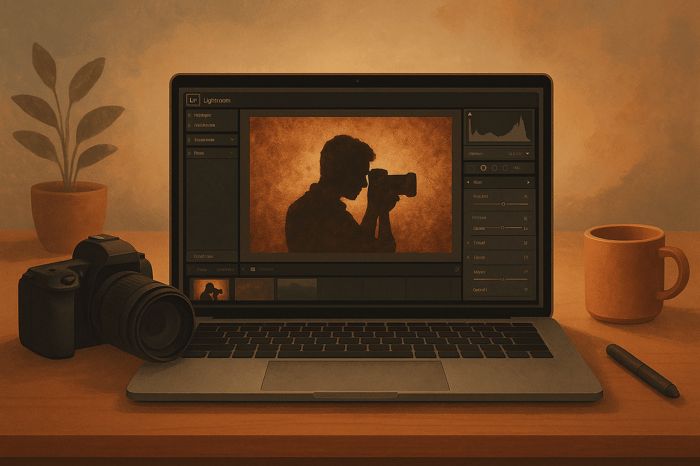
Cubism Photoshop Tutorial
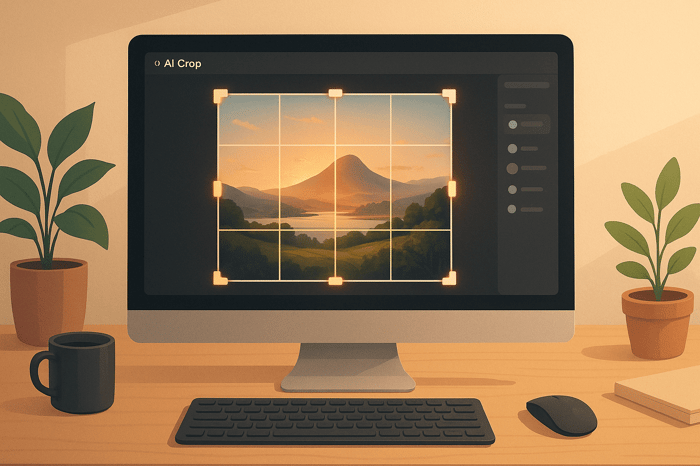
Tools and Resources for Cubism Photo Editing
Bring your Cubist-inspired edits to life with tools designed for precision and creativity. Transforming images through fragmentation, perspective shifts, and reconstruction requires software and resources that can handle these intricate processes. Below, we’ll dive into some of the top software options and tools to help you refine your Cubist editing workflow.
Popular Software Options
Choosing the right software is key to achieving the fragmented and reassembled look that defines Cubism.
- Adobe Photoshop: Known for its advanced features, Photoshop lets you isolate and fragment image elements with tools like selection, masking, and layering. Its cloning and healing tools are perfect for blending fragmented pieces seamlessly, and its support for raw files ensures maximum flexibility.
- Adobe Lightroom: With its intuitive sliders for color grading and tonal adjustments, Lightroom provides a strong foundation for Cubist edits, helping you set the tone and mood before diving into detailed work.
- GIMP (GNU Image Manipulation Program): This free, open-source software offers professional-level editing capabilities. Its customization options, paired with support for multiple programming languages, make it a great choice for artists looking to automate effects or create custom tools.
- Corel PaintShop Pro: Packed with an extensive library of colors, gradients, and textures, this software is ideal for enhancing Cubist compositions.
- Pixlr Editor: An online editing tool with over 2 million effects, Pixlr is perfect for quick, creative experiments. While it’s not as robust as other options, it’s a handy tool for simpler Cubist projects.
- Skylum Luminar: This software uses AI-powered enhancements, making it a great pick for beginners. Its user-friendly interface and multiple viewing formats help artists ease into digital Cubist art.
- Copista: A mobile app powered by AI, Copista lets you transform photos into Cubist-inspired artworks right from your phone, making it a convenient option for on-the-go creativity.
Using Presets.io for Artistic Presets
Beyond software, presets can speed up your editing process and help you achieve stunning results. Presets.io is a platform offering a wide range of Lightroom presets designed to elevate your photos into artistic masterpieces. With new presets added weekly, it’s a treasure trove for photographers of all experience levels.
These presets are particularly useful for Cubist-inspired edits, serving as a creative springboard for your projects. Whether you’re working with portraits, landscapes, or abstract compositions, Presets.io offers styles that align beautifully with Cubist aesthetics. Pricing starts at $12.00, and the Master Bundle, featuring 721 presets, is available for $49.
The platform is user-friendly, with each preset coming with a clear installation guide. Once installed, the presets integrate seamlessly into Lightroom’s interface, allowing you to focus on creativity rather than setup. With a 4.8-star rating from over 1,350 reviews, these presets are a trusted choice among creative professionals and enthusiasts alike.
To get the most out of Presets.io, experiment with different presets on the same image. For example, use presets to emphasize geometric shapes by increasing contrast, adjust color balance for muted tones reminiscent of Analytical Cubism, or boost saturation for the bold colors typical of Synthetic Cubism. Once applied, Lightroom’s adjustment tools allow you to refine the effects further, tailoring them to your specific vision.
Armed with these tools and presets, you’re ready to dive deeper into the world of Cubist photo editing.
Step-by-Step Guide to Cubism Photo Editing
Now that you've got the tools and presets ready, it's time to dive into the creative process. Cubist photo editing is all about breaking an image into fragments and reconstructing it to showcase multiple perspectives - just like Picasso and Braque did in their iconic paintings.
Creating Cubist Effects in Photoshop
Cubist editing involves slicing an image into pieces and reassembling them in unexpected ways. As one tutorial puts it:
"Cubist paintings often look as if the subject has been constructed from a hundred or more snapshots, all taken from different angles".
To start, open your image in Photoshop. The Marquee tool will be your go-to for this technique. Select a portion of the image - maybe an eye, a piece of clothing, or part of the background. Once selected, press Ctrl/Cmd + J to copy it onto a new layer. This is your first "fragment."
Next, give your fragment some depth. Apply an Inner Glow layer style, set the blending mode to Multiply, and adjust the size and opacity. This subtle shadowing helps each fragment stand out while keeping the overall composition cohesive.
Use Free Transform (Edit > Free Transform) to manipulate each fragment. Stretch, rotate, or skew the pieces to create that angular, distorted look that defines Cubist art. For added drama, hold Ctrl/Cmd and drag a corner to create unique distortions. Play around with these transformations to achieve a dynamic, fragmented effect.
A tutorial on PhotoshopSupport.com demonstrates how to transform an ordinary photograph into a Cubist masterpiece by slicing it into 25 layers and applying various Layer Styles. While 25 layers may sound like a lot, it highlights how thorough fragmentation can completely change an image.
To enhance the fragmented look, adjust blending modes and opacity. For example, setting a layer to Multiply mode at 10% opacity can create subtle overlaps without overwhelming the design. Copy and paste layer styles between similar fragments to maintain consistency.
When editing portraits, focus on the eyes. Start by isolating the pupil, then the iris, to keep a realistic touch while still achieving the fragmented aesthetic.
For smaller details, use the Polygonal Lasso Tool to select areas and apply Filter > Blur > Average (shortcut: Ctrl-Alt-F). This simplifies complex details into solid colors, reinforcing the geometric structure.
Finally, use Hue/Saturation adjustment layers to shift the color palette. Experiment with the Colorize option to explore different moods - whether muted tones for a more Analytical Cubism feel or vibrant hues for a Synthetic Cubist art vibe. Once your composition is complete, import it into Lightroom for final color and tone adjustments.
Enhancing Cubism Edits with Lightroom
After creating your fragmented composition in Photoshop, Lightroom is the perfect tool for fine-tuning the colors and tones. This is where presets from Presets.io can come in handy, serving as a great starting point for your creative vision.
Start by importing your Cubist image into Lightroom. Head to the Basic panel and tweak settings like Exposure, Contrast, Highlights, Shadows, Whites, and Blacks. For Cubist works, increasing contrast often helps highlight the geometric divisions between fragments.
The Tone Curve is another powerful tool for refining your image. Adjust shadows and highlights to create softer transitions between fragments. These subtle changes can make the difference between a harsh digital look and a more painterly feel.
Split Toning is especially effective for Cubist aesthetics. Add warm golden tones to highlights and cool blues to shadows to create striking color relationships reminiscent of early 20th-century Cubist paintings. This technique ties your fragmented pieces together while adding depth and interest.
Presets from Presets.io can speed up this process. Test different color palettes and tonal approaches by applying a preset, then tweak it to fit your vision. Use sliders like Clarity, Vibrance, and Saturation to control how defined or abstract your fragments appear.
For a finishing touch, consider adding subtle grain and vignetting to mimic the texture of traditional paintings. Adjust the Temperature slider to warm up or cool down your composition, dramatically altering its emotional tone.
Photographer Justin Tedford offers this advice:
"When it comes to Lightroom, it's a tool primarily to get started and then go a step further, tweaking the adjustments to your liking. I wouldn't rely entirely on it, as it will hinder your creativity and create bad habits".
Use presets as inspiration, but don't hesitate to experiment. Try applying the same preset to different versions of your image or layering multiple adjustments for added complexity. Remember, Cubist art is all about exploring multiple perspectives - your color grading should embody that same spirit of creativity and reconstruction.

The Master Preset Bundle

$57.00
$672.00
The Master Preset Bundle Every Style. Every Platform. One Download Get 56 high-quality Presets.io collections in one complete bundle — designed to help you edit faster, stay consistent, and get professional-looking results in seconds. Get All High-Quality Preset Collections For… continue reading
Different Styles in Cubism Editing
Once you've got the basics of editing down, diving into the stylistic details of Cubist art can take your work to a whole new level. Each style within Cubist art requires a unique approach to achieve its distinct look.
Analytical vs. Synthetic Cubism
Cubist art is often divided into two main phases, each with its own artistic approach and editing techniques. Analytical Cubism (1908–1912) is all about breaking subjects into geometric fragments, while Synthetic Cubism (around 1912–1919) focuses on constructing compositions with simpler shapes and vibrant elements.
Analytical Cubism thrives on deconstruction. It uses a subdued, mostly neutral palette and emphasizes sharp angles and overlapping planes. To replicate this style, fragment your subject into multiple perspectives and stick to a monochromatic color scheme. Neutral tones like browns and grays help highlight the structure without relying on bold colors.
Synthetic Cubism, on the other hand, takes a more playful and constructive approach. It features lighter compositions, brighter colors, and often incorporates textures and materials like newspaper clippings or fabric. When working in this style, think of it as building an abstract collage. Use varied textures and forms to create a layered, dynamic effect.
| Analytical Cubism | Synthetic Cubism |
|---|---|
| Breaks down subjects | Builds subjects up |
| Neutral, monochromatic tones | Bright, varied colors |
| Focuses on structure | Inspired by collage techniques |
The main difference lies in their methods: Analytical Cubism dissects, while Synthetic Cubism constructs. Understanding these contrasts can help you apply the right filters, textures, and techniques to authentically capture the essence of each style.
Using Filters and Effects for Cubist Aesthetics
With these stylistic foundations in mind, digital tools can help bring Cubist aesthetics to life. The key is to layer filters and effects thoughtfully to mimic the hand-crafted feel of original Cubist works.
Start with Photoshop’s Cutout filter to simplify your image into flat color blocks. Follow this with the Find Edges filter, then blend it using the Multiply mode to create the angular divisions typical of Cubist art.
To channel Synthetic Cubism, use Pattern Overlay effects to introduce textures like newspaper prints, fabric patterns, or geometric designs. Adjust blending modes and opacity to subtly layer these elements without overpowering the composition.
For color adjustments, Hue/Saturation layers with the Colorize option are invaluable. For Analytical edits, tone down saturation and shift hues toward earthy browns. For Synthetic edits, go bold - boost saturation and play with complementary colors.
Instead of relying on one filter, combine multiple effects at low opacities (15–30%) for a more intricate, less "digital" look. This layering approach adds depth and complexity, staying true to the multi-faceted nature of Cubist art.
You can also incorporate geometric elements directly into your design with tools like Custom Shape and Type. Adding angular text, triangles, or abstract symbols can enhance the collage-like feel of Synthetic Cubism.
AI-powered tools are another option for Cubist transformations. While these can provide a great starting point, manual refinement through fragmentation and layering will make your work feel more intentional and less automated.
As Picasso once said:
"It's no use looking at me. We paint what we know is beneath the surface of things".
Your edits should aim to uncover the deeper structure and multiple perspectives of your subject, not just create surface-level effects. Experiment boldly, but always with purpose.
Conclusion: Mastering Cubism Photo Editing
Cubist photo editing opens up a world of creative possibilities that go beyond the limits of traditional photography. By breaking objects into geometric shapes and merging multiple perspectives into a single image, you channel the innovative spirit of early Cubist artists.
At its heart, Cubist art challenges the standard ideas of depth and dimension. It focuses on a flat, two-dimensional plane while encouraging exploration of subjects from various angles. This shift in perspective naturally leads to the precise fragmentation that defines the Cubist style of editing.
To master Cubist photo editing, combine multiple viewpoints with geometric deconstruction and unconventional layouts. Focus on structural details and intricate elements rather than relying heavily on color.
The techniques you choose should align with your artistic vision, as discussed in the earlier section on Cubist styles.
For a smoother workflow, tools like Presets.io offer high-quality, easy-to-install presets. Their collections, which include aesthetic and cinematic options, can be tailored to create striking Cubist-inspired effects.
As mentioned earlier, Cubism's influence continues to shape modern visual culture, inspiring movements like Futurism and Constructivism.
Armed with these principles, keep pushing the boundaries of Cubist photo editing. Each image is a chance to deconstruct, reconstruct, and reimagine reality from fresh perspectives. This guide provides a solid starting point, but your creative instincts will ultimately determine how you bring this transformative art form to life.
FAQs
How do I create a Cubist-inspired photo edit using Adobe Photoshop?
To create a Cubist-inspired photo edit in Adobe Photoshop, begin by selecting small sections of your image using the Polygonal Lasso Tool. Once selected, fill these areas with bold colors or textures to craft a fragmented, multi-perspective composition. This approach captures the geometric, layered essence of Cubism.
To add more depth, try slicing the image into layers and applying effects like Gaussian Blur to abstract specific sections. You can also overlay geometric shapes, tweaking their opacity or blending modes to introduce striking contrasts. By blending these techniques, you can create a visually compelling design that highlights geometry and multiple perspectives.
What’s the difference between Analytical Cubism and Synthetic Cubism in photo editing?
Analytical Cubism in photo editing is all about deconstructing an image into geometric shapes while presenting multiple viewpoints simultaneously. This approach often results in a layered, fragmented aesthetic that leans toward the abstract and intricate.
In contrast, Synthetic Cubism focuses on simplified shapes, vivid colors, and a more unified, collage-inspired composition. By combining various elements into a single image, it creates a design that's less intricate but visually bold and attention-grabbing.
How can Presets.io presets simplify creating Cubist-style photo edits?
Presets.io simplifies the process of creating Cubist-inspired photo edits by offering a range of expertly designed presets that deliver bold, artistic effects with a single click. These presets are crafted to save you time while ensuring your edits maintain a cohesive, creative look, making it easy to achieve striking, geometric-inspired results.
With an array of styles available, Presets.io gives you the tools to bring your artistic vision to life - whether you're going for dramatic contrasts, vivid colors, or abstract designs. It's an effortless way to enhance your editing workflow and transform your photos with a Cubist flair.