Table of Contents
- AI Crop Tool in Luminar NEO: How It Works
- Luminar NEO: How to use the Crop AI Tool
- How to Use the AI Crop Tool: Step-by-Step Guide
- AI Cropping vs Manual Cropping
- Best Practices for Using Crop AI
- Using Presets with Crop AI for Better Workflow
- Conclusion: Getting the Most from AI Crop Tool in Luminar NEO
- FAQs
AI Crop Tool in Luminar NEO: How It Works
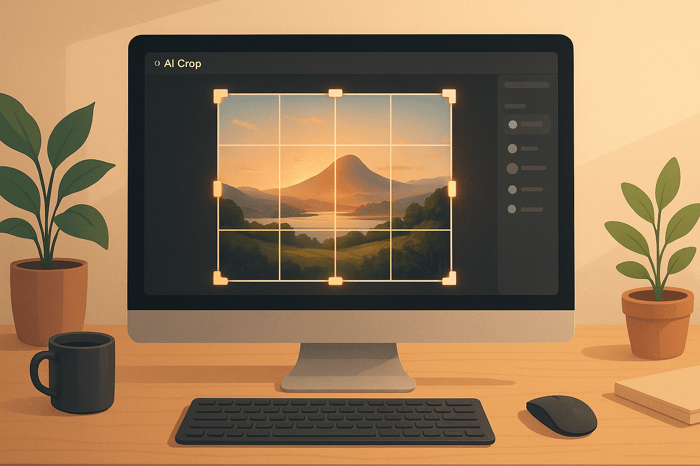
The AI Crop Tool in Luminar NEO simplifies photo cropping by automatically analyzing your image and suggesting optimized compositions. It evaluates elements like lines, levels, and the main subject to recommend balanced framing, saving time while maintaining flexibility for manual adjustments. This non-destructive tool allows you to experiment freely, ensuring your original image stays intact.
Key Features:
- Automatic Suggestions: AI evaluates your photo for ideal composition.
- Horizon Alignment: Fix tilted horizons with one click.
- Manual Control: Adjust crop size, position, rotation, and aspect ratios.
- Non-Destructive Editing: Original image remains untouched.
How to Use:
- Open your image in Luminar NEO and access the AI Crop Tool in the Edit module.
- Click "Crop AI" to let the algorithm suggest a crop.
- Refine the crop manually using drag controls or select from preset aspect ratios.
AI vs Manual Cropping:
- AI Cropping: Fast and consistent, ideal for batch processing and beginners.
- Manual Cropping: Offers full control for precise adjustments and artistic edits.
For best results, start with AI suggestions and refine manually to meet your needs. Pairing the AI Crop Tool with presets can further streamline your workflow, allowing you to focus on achieving polished, professional results.
Luminar NEO: How to use the Crop AI Tool
How to Use the AI Crop Tool: Step-by-Step Guide
Using Luminar NEO's AI Crop Tool is simple once you know where to find it and how to navigate its features. The process involves three main steps: locating the tool, applying AI suggestions, and making any necessary manual adjustments.
Finding the AI Crop Tool
The AI Crop Tool is housed in the Edit module, and there are a few ways to access it. Start by opening your image in Luminar NEO via the "Add Photos" button in the Catalog module. You can quickly bring up the Catalog by pressing "L" on your keyboard.
Once your photo is loaded, switch to the Edit module by pressing "E" or clicking the Edit tab. From there, you'll find the Crop AI tool at the top of the Tools toolbar. For even quicker access, press "C" on your keyboard to open the tool directly.
This shortcut is particularly useful when you're editing multiple images and want to keep things moving efficiently. The tool's prominent position in the toolbar also makes it easy to spot. After locating it, you're ready to let the AI analyze your image.
Applying AI Crop Suggestions
When the tool is open, click the "Crop AI" button to let the algorithm evaluate your photo. It analyzes elements like lines, levels, and the main subject to suggest an improved composition.
Use the "Horizon Alignment" feature to fix tilted horizons with a single click. This ensures the image is properly leveled before the AI applies its crop suggestion.
Once the AI completes its analysis, it automatically suggests a crop to enhance the photo's composition. The algorithm takes into account compositional principles and visual balance to determine the best framing for your image. This gives you a strong starting point to refine your photo.
If the AI's suggestion doesn't meet your expectations, you can cancel it by clicking the arrow above the Crop AI button. This lets you either try a different approach or move to manual adjustments without altering your original image.
Making Manual Adjustments
The flexibility of the AI Crop Tool shines when you begin customizing the composition after the AI's initial suggestion. You have full control to fine-tune the crop and positioning to suit your creative preferences.
- Drag the corners to resize the crop area.
- Drag inside the crop area to reposition the image.
- For rotation, drag near a corner to activate a grid overlay, helping you align the image precisely.
The tool also includes Rotate & Flip buttons for quick 90-degree rotations or flipping the image horizontally or vertically. You can further refine your crop by selecting from various aspect ratios tailored for social media, printing, or other formats.
All edits are non-destructive, so your original image remains intact. If you want to start over, simply click the Reset tool's reverse arrow icon to undo all changes.
AI Cropping vs Manual Cropping
Knowing when to use AI cropping versus manual cropping can make a big difference in your editing workflow and the final look of your images. Each method has its own strengths, depending on what you're trying to achieve creatively.
AI cropping works by automatically analyzing the content of an image. It evaluates visual patterns, identifies key elements, and suggests the most effective framing. This makes it a quick and efficient option.
On the other hand, manual cropping gives you full creative control. You can adjust the cropping rectangle, reposition the image, and even rotate it to match your exact vision. This freedom allows for a more personalized approach to image editing.
AI cropping is all about speed, while manual cropping is about precision. Depending on your needs, you can even combine the two for the best results.
Comparison Table: AI vs Manual Cropping
| Feature | AI Cropping | Manual Cropping |
|---|---|---|
| Speed | Quick analysis and instant suggestions | Requires more time for adjustments |
| Control Level | Decisions made by algorithms | Full user control |
| Ease for Beginners | Great for starting out | Demands knowledge of composition |
| Batch Processing | Perfect for large image volumes | Time-consuming for many photos |
| Creative Freedom | Limited to AI suggestions | Unlimited creative possibilities |
| Consistency | Delivers uniform results | Depends on user skill |
| Learning Curve | Minimal – one-click simplicity | Requires compositional expertise |
| Platform Adaptation | Automatically adjusts for formats | Manual tweaking needed |
| Focus on Subject | Highlights key elements | User decides focal points |
| Workflow | Streamlined and efficient | Hands-on and detailed |
This breakdown makes it easier to see where each method shines. For example, AI cropping is a lifesaver when you're dealing with a large number of images, like creating thumbnails for a website or editing eCommerce product photos. Its speed and consistency ensure professional results every time.
Manual cropping, however, is indispensable when you need to make precise adjustments that go beyond what AI can offer. Whether you're crafting a specific artistic look or tailoring an image for a unique platform, manual cropping puts you in charge.
Here's what the experts have to say:
"With the new image cropping function, photographers can now save even more time when editing photos with their SmartPreset - and retain full control." - Simon Diegmann, co-founder and CCO of Neurapix
A great approach? Start with AI cropping to establish a solid foundation, then refine your edits manually using tools like Luminar NEO for the ultimate in precision.
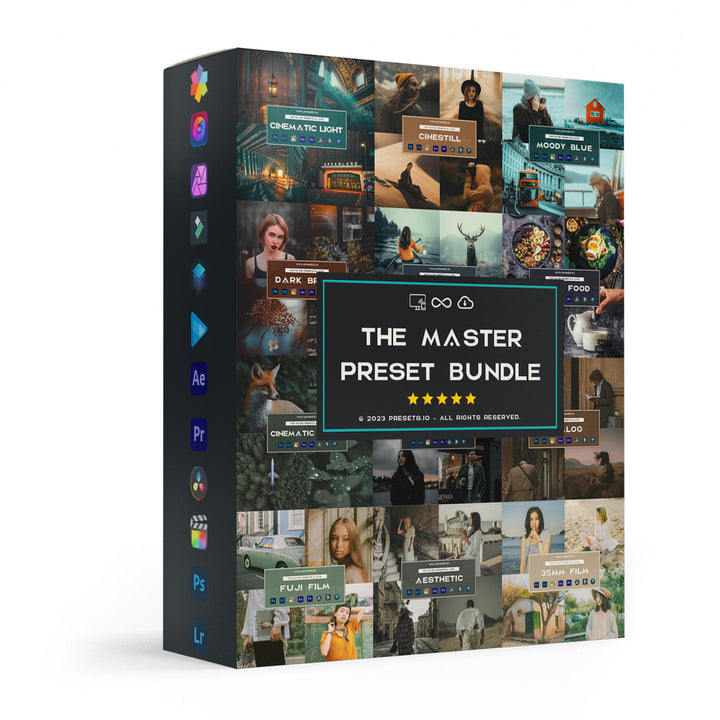
The Master Preset Bundle
$49.00
$672.00
Get All High-Quality Preset Collections For Just $49. Best Value! Every Style. Every Platform. One Download Get 56 high-quality Presets.io collections in one complete bundle — designed to help you edit faster, stay consistent, and get professional-looking results in seconds.… continue reading
Best Practices for Using Crop AI
Blend the speed of AI with the precision of manual adjustments to achieve polished, professional results.
When to Use AI vs. Manual Adjustments
Deciding between AI and manual cropping depends on the image and your creative goals.
AI is great for getting started. It quickly assesses your image and suggests adjustments you might not have considered - a real time-saver when working on multiple images or seeking fresh ideas. Start with AI to handle the basics, then step in manually for the fine details.
Manual adjustments come into play when you need full control. Once AI completes its initial work, you can refine the crop to suit a specific vision or address unique challenges in composition. This is especially useful when dealing with unconventional layouts or artistic projects.
The best results often come from combining both approaches. Use AI for speed, then manually tweak the image to perfection. Once you've nailed the adjustments, selecting the right aspect ratio is the next step in creating a standout composition.
Choosing the Right Aspect Ratios
The aspect ratio you choose can make or break your image’s impact, especially when optimizing for different platforms. After cropping, selecting the ideal ratio ensures your image fits its intended purpose perfectly.
For portrait photography, 1:1 (square) and 4:5 (vertical) ratios are excellent options. These formats highlight your subject, whether it’s a close-up headshot or a full-body portrait.
When it comes to landscapes, 16:9 (panoramic) ratios shine. This wide format captures the grandeur of open skies and sweeping horizons, maintaining a sense of balance and proportion.
Social media platforms have specific preferences for aspect ratios, and aligning with them can boost your content’s performance:
| Platform | Content Type | Recommended Aspect Ratio |
|---|---|---|
| Posts | 1:1 (square), 4:5 (portrait), 1.91:1 (landscape) | |
| Stories/Reels | 9:16 | |
| Timeline Photos | 1.91:1 | |
| TikTok | Videos | 9:16 |
| Standard Pins | 2:3 | |
| YouTube | Thumbnails | 16:9 |
The 3:2 ratio is a classic choice, rooted in 35mm film photography and widely used in full-frame digital cameras. Its versatility makes it suitable for both digital displays and traditional prints.
"Choosing the right aspect ratio is essential in ensuring that your composition works effectively" – Kav Dadfar, Photographer and Author
For creators repurposing content across platforms, shooting in 3:2 and cropping as needed is a smart move. This approach provides flexibility while preserving quality. However, keep in mind that cropping to a different ratio lowers resolution, which could impact the quality of large-format prints or high-resolution displays.
The rise of 9:16 (vertical) formats reflects the dominance of mobile-first platforms like Instagram and TikTok. This ratio is now a go-to for creators aiming to engage audiences who primarily consume content on their phones.
"The way you frame your picture will have a huge impact on just how effective it is in the composition, and certain scenes lend themselves to different ratios" – Daniel Wretham, Photographer
Using Presets with Crop AI for Better Workflow
Luminar NEO's AI Crop tool already makes editing more efficient, but combining it with high-quality presets can take your workflow to the next level. Once you’ve nailed your crop adjustments, presets allow you to refine your images further, seamlessly blending composition and style adjustments. Whether you’re working on a single image or a full photoshoot, this combination ensures a smoother editing process.
How Presets Improve Editing
Presets are a tried-and-true way to achieve fast and consistent edits, saving time while maintaining a professional look. When paired with the AI Crop tool, they create a powerful duo that addresses both the technical and creative aspects of photo editing.
You can apply presets either before or after cropping, depending on your vision. For instance, if you have a specific aesthetic in mind, applying a preset first allows you to preview the overall style. Then, you can fine-tune the composition using the AI Crop tool without disrupting the preset’s effect. On the other hand, starting with the Crop AI tool lets you lock in the composition before adding a preset, ensuring the final look aligns with your creative goals.
It’s worth noting that Crop AI settings aren’t saved within presets. This means you’ll need to handle cropping and preset application as separate steps. While this might seem like an extra step, it actually gives you more flexibility to experiment with different combinations without losing your progress.
Applying presets after cropping also gives you full control over the final look. Plus, presets aren’t rigid - you can always tweak them to match your specific needs. This approach balances the speed of automation with the precision of manual adjustments. Next, we’ll explore where to find and install these preset collections to enhance your workflow.
Finding Luminar NEO Preset Collections
To make your editing process even more efficient, you can explore a range of preset collections designed specifically for Luminar NEO. Websites like Presets.io offer a variety of options, including cinematic, vintage, and natural presets. These collections are designed to integrate smoothly with Luminar NEO’s tools, including the Crop AI feature, making them a great addition to your toolkit.
These presets are compatible with RAW, JPG, and DNG formats, and they work across devices - whether you’re editing on a laptop, tablet, or phone. This ensures consistency no matter where you’re working.
Pricing for Luminar NEO presets is also budget-friendly. Most collections are priced around $15.00, while bundle deals, like the Master Preset Bundle with 56 collections and 721 presets for $49, offer an affordable way to expand your editing resources.
Installing these presets is simple. Just go to File > Add Luminar Neo Preset Collection within the software. Presets.io also provides easy-to-follow installation guides and tutorials, so you can get started right away.
With such a variety of presets available, you’re sure to find ones that suit your photography style. Whether you’re into bold color grading or subtle adjustments, these presets help ensure your cropping and editing work together seamlessly. And as you grow more comfortable with Luminar NEO, you can even start creating your own custom presets to reflect your personal style and vision. This evolution from using ready-made presets to crafting your own is a natural step in developing your editing skills.
Conclusion: Getting the Most from AI Crop Tool in Luminar NEO
Luminar NEO's AI Crop tool makes photo composition easier by automatically adjusting the crop, composition, and perspective for your images. It serves as a great starting point for your editing process, offering intelligent suggestions that you can tweak manually to match your creative vision.
Pairing this smart cropping feature with presets can take your editing workflow to the next level. While the crop tool settings aren't saved with presets, this actually works to your advantage - it ensures every session begins with a fresh canvas, allowing you to experiment with different compositions and styles. For the best results, let the AI Crop tool suggest an initial composition, then refine it manually to perfect the framing. You can also create custom presets tailored to specific types of photos to streamline your process even further.
Since the crop tool is non-destructive, you can experiment without fear of losing your original image. You’re free to apply, adjust, or reset the crop at any time, making it a flexible and reliable tool for all your editing needs.
Combining the AI Crop tool with high-quality presets from resources like Presets.io creates a dynamic editing workflow. This approach not only saves time but also inspires creativity by encouraging you to try new styles and techniques. By blending AI-powered precision with creative presets, you open the door to endless possibilities in your photo editing journey.
FAQs
How does the AI Crop Tool in Luminar NEO preserve image quality while cropping?
The AI Crop Tool in Luminar NEO helps refine your photos by smartly adjusting the composition, crop, and perspective without compromising their quality. It ensures the framing is optimized while preserving essential details and clarity, giving your images a clean, professional look without losing resolution or sharpness.
How can combining AI and manual cropping in Luminar NEO improve photo composition?
Using AI and manual cropping in Luminar NEO strikes a great balance between speed and personal control. The AI crop tool offers quick suggestions for ideal compositions, helping you save time while still achieving polished, professional results. On the other hand, manual cropping lets you take the reins, adjusting the framing to perfectly align with your creative vision. By blending these two methods, you can refine your photos with both efficiency and a personal touch, ensuring they look exactly how you want.


.png)
