
Table of Contents
How to Use Cinematic Presets for HDR Photos
HDR photography combines multiple exposures to reveal details in both shadows and highlights, creating visually striking images. Cinematic presets simplify editing by applying adjustments like contrast and color balance, giving photos a polished, dramatic look. Here’s how to use them effectively:
- Shoot in RAW: RAW files retain more detail than JPEGs, essential for HDR editing.
- Bracket Exposures: Capture a sequence of shots at different exposures (-2, -1, 0, +1, +2 EV) for a full dynamic range.
- Use a Tripod: Stabilize your camera to avoid misalignment between shots.
- Import intoLightroom: Organize your bracketed photos, merge them into HDR files, and apply cinematic presets.
- Fine-Tune Settings: Adjust exposure, contrast, and color grading for the desired effect.
- Local Adjustments: Use brushes, filters, and masks for precise edits on specific areas.
- Export: Save in formats like AVIF for web or TIFF for print, ensuring HDR quality is preserved.
Cinematic presets are ideal for creating dramatic, professional-looking HDR photos quickly. They’re especially useful in genres like real estate, travel, and nature photography. Whether you’re a beginner or a seasoned photographer, presets streamline the editing process while allowing room for customization.
Create a Faux-HDR Look in Lightroom and Save It As a Preset
Preparing Your Photos for HDR Editing
Getting your photos ready for HDR editing starts with solid shooting techniques and proper file preparation. The way you capture your images sets the foundation for how effectively cinematic presets will transform them.
Shooting in RAW and Bracketing Exposures
When it comes to HDR photography, shoot in RAW format. Why? RAW files hold between 4,096 and 16,384 tonal levels, compared to just 256 levels in JPEGs. This extra data is a game-changer, especially when you're working with presets that adjust shadows, highlights, and colors.
"Think of a zip file. You're compressing a ton of information into a smaller package. But all that extra information in RAWs is what gives you the latitude to tweak the white balance and exposure, for example, to a much larger degree than with a JPEG." - Nicole Morrison, Photographer
RAW files also retain 12- to 14-bit depth, giving you the flexibility to recover details from both highlights and shadows that would be lost in JPEGs.
For HDR, bracketing exposures is key. This technique captures the full dynamic range needed for cinematic presets. Set your camera to Aperture Priority mode to ensure consistent depth of field across all shots. Use your camera's bracketing function with 1 EV steps in this sequence: -2, -1, 0, +1, +2. For fewer brackets, a two-stop difference works well.
Stabilization is a must for bracketing. Mount your camera on a tripod and use a cable release or remote shutter to avoid any shake. If you're shooting scenes with moving clouds or objects, take your frames quickly to minimize ghosting.
For exposure settings, rely on Matrix metering (Nikon) or Evaluative metering (Canon) to let your camera find the optimal exposure for the scene. Once you've captured reliable RAW files and bracketed exposures, you're ready to move into Lightroom for editing.
Importing Photos into Lightroom
After shooting, how you import your images into Lightroom can make a big difference in preserving their quality.
Start by opening Lightroom, creating or selecting a catalog, and importing your bracketed RAW files. In the Library module, click Import, locate your files, and select all the brackets for each HDR scene.
Turn off "Apply auto tone adjustments" in Lightroom's preferences during import. This prevents Lightroom from altering the exposure differences you worked hard to capture.
Choose ProPhoto RGB as your color profile. This profile includes a wide color gamut, ensuring that cinematic presets have access to the full range of color data to create those rich, dramatic looks.
To streamline your workflow, organize your brackets immediately after importing. Use Lightroom's auto-stack by capture time feature to group related exposures. Right-click your images, select Stacking, and then Auto-Stack by Capture Time. This groups your bracketed shots based on when they were taken.
You can also use color labels to mark your sets. For instance, green labels might denote landscape brackets, while blue labels could represent architectural shots.
"When you're shooting in JPEG, it's really important to nail your exposure. If you try to pull up shadows or bring down highlights on your JPEG, it could result in banding or posterization." - Nicole Morrison, Photographer
If you're merging brackets into a single HDR file, Lightroom makes it simple. Select your bracketed sequence, then go to Photo > Photo Merge > HDR. This creates a DNG file that retains the extended dynamic range, giving you a perfect starting point for applying cinematic presets.
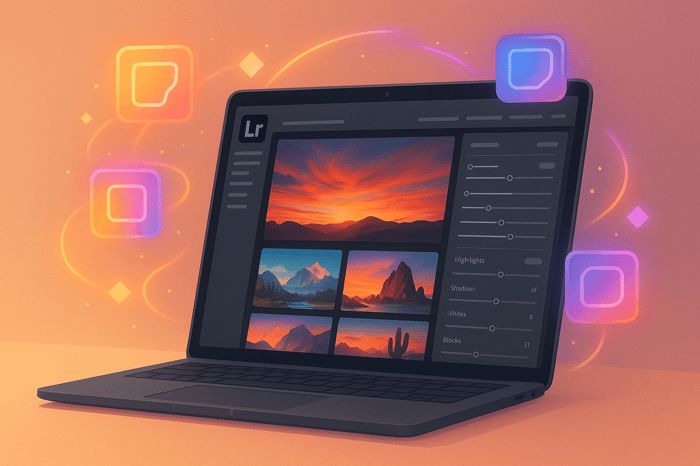
Applying Cinematic Presets in Lightroom
Now that your HDR photos are imported and neatly organized, it’s time to bring them to life with cinematic presets. This step is where your images take on that dramatic, movie-like quality that demands attention.
Installing and Selecting Cinematic Presets
Adding cinematic presets to Lightroom is a simple process, though it varies slightly depending on your version and device.
For desktop users (Lightroom Classic 7.3 or later, and Lightroom CC), start by extracting your preset ZIP file. Open Lightroom and head to the Develop module. In the Presets panel, click the "+" icon and choose "Import Presets" (or go to File > Import Profiles & Presets). Select your ZIP file and hit "Import." If you’re using an older version of Lightroom Classic (7.2 or earlier), you’ll need to manually copy the .lrtemplate files into the Develop Presets folder. To do this, go to Preferences > Presets > Show Lightroom Presets Folder, and place the files in the appropriate folder.
For mobile users, the process is slightly different. First, extract the ZIP file. On Android, go to the Presets tab, tap the menu (three dots), and select "Import Presets." On iOS, create a new folder containing the DNG files, open the first image, and tap the three dots to choose "Create Preset."
When choosing cinematic presets for HDR photos, focus on collections that emphasize rich contrasts, bold color grading, and a balanced dynamic range. Presets.io offers excellent options tailored for HDR photography, making it easier to achieve that polished, cinematic feel. These presets provide a strong foundation for fine-tuning your image’s depth and mood.
Adjusting Key Settings with Presets
Once your presets are installed, it’s time to apply and tweak them to suit your HDR photos. After applying a preset, fine-tune settings like exposure, contrast, and color grading to perfect the look.
Cinematic presets often rely on S-curve adjustments to boost contrast, while their color grading typically leans on bold palettes (like the popular orange-and-teal combination). They also balance highlights and shadows to make the most of HDR’s extended dynamic range. Use the Amount slider to control the preset’s intensity - starting at around 70–80% is a good idea rather than going full strength.
From there, you can make further refinements. Adjust texture and clarity to bring out details, add a touch of grain for a film-like effect, or apply a vignette to draw the viewer’s eye to the subject. HDR photos already excel in capturing detail across highlights and shadows, and these presets can amplify that while maintaining a cinematic balance.

The Master Preset Bundle

$57.00
$672.00
The Master Preset Bundle Every Style. Every Platform. One Download Get 56 high-quality Presets.io collections in one complete bundle — designed to help you edit faster, stay consistent, and get professional-looking results in seconds. Get All High-Quality Preset Collections For… continue reading
Refining and Improving the HDR Look
Once you’ve applied your cinematic preset, the next step is refining both global and local settings to truly maximize the dynamic range of your High Dynamic Range photo. This process brings out depth, drama, and that polished, professional touch.
Fine-Tuning Global Adjustments
Global adjustments impact the entire image and should always come first after applying a preset. Start with the exposure slider to adjust the overall brightness. Increasing exposure can reveal hidden details across the frame, while reducing it can add mood and atmosphere.
The shadows and highlights sliders are essential for HDR editing. Use the shadows slider to uncover details in darker areas, and pull the highlights slider to the left to recover blown-out areas that might appear overly bright after applying the preset.
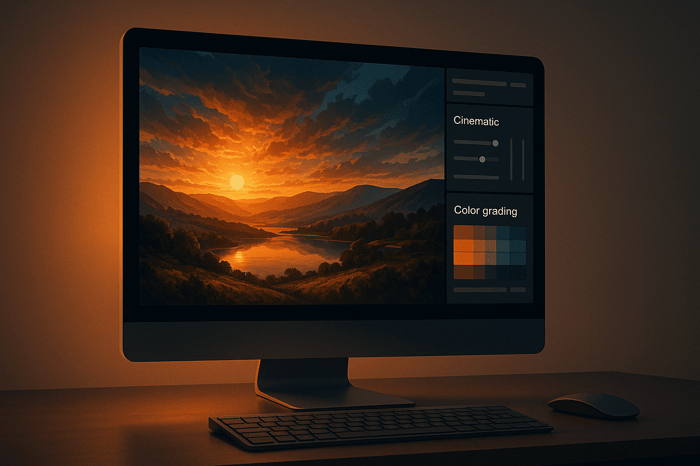
Contrast adjustments are key to achieving a cinematic feel. HDR displays provide extra highlight and shadow detail compared to standard displays, giving you more room to manipulate tonal separation and color vibrancy. Adjust the contrast to create striking distinctions between light and dark areas, enhancing the overall drama.
The Tone Curve allows for precise tonal control. For example, lifting the shadows section of the curve brightens darker areas selectively, while creating an S-curve adds punchy contrast. The Point Curve lets you fine-tune specific tonal ranges for even more control.
For color adjustments, the HSL/Color panel is incredibly useful. For instance, if your sky looks too dark, increase the luminance of the blues to bring out more detail. Once your global settings are balanced, you can move on to more targeted local adjustments.
Using Local Adjustments for Precision
Global adjustments set the tone, but local adjustments let you fine-tune specific areas for a more refined High Dynamic Range effect. Lightroom Classic offers several tools to help you precisely enhance details.
The Adjustment Brush is perfect for selective edits. You can paint over specific areas to adjust exposure, clarity, or brightness. This tool is great for brightening a subject’s face, adding drama to clouds, or enhancing texture in detailed areas. For natural results, use a soft brush with a low flow setting.
Graduated Filters are ideal for balancing exposure between regions, like the sky and foreground. Simply drag the filter across an area to create a smooth transition. For example, you can brighten a darker foreground while keeping the sky properly exposed or add warmth to a sunset without altering the rest of the image.
The Radial Filter is excellent for drawing attention to specific subjects. By creating an elliptical mask with a heavy feather, you can seamlessly brighten or darken areas around your subject. Use it for effects like vignettes, sun flares, or to subtly highlight your main subject.
Range Masks take precision a step further by refining adjustments based on color, luminance, or depth. After applying a graduated or radial filter, add a range mask to limit the effect to specific tones or colors. This ensures your adjustments don’t spill over into areas you want untouched.
For more complex edits, combine multiple filters and masks. Lightroom’s Masking tool simplifies this by offering automatic options like Subject, Sky, Background, Objects, and People, allowing you to quickly create accurate selections. Always start with global edits before diving into local adjustments for the best results.
Exporting HDR Photos for Web and Print
Export settings are crucial for maintaining the dynamic range and cinematic quality of your High Dynamic Range photos across different platforms.
For web sharing, export your image in AVIF or JPEG XL format with High Dynamic Range output enabled. In Lightroom Classic, go to File > Export > File Settings, choose your format, and check the "HDR Output" box. AVIF is supported by Google Chrome, making it a reliable choice for HDR photo sharing.
When exporting, you can select from color spaces like HDR sRGB (Rec. 709), HDR P3, or HDR Rec. 2020. For most web uses, HDR sRGB offers the best compatibility while preserving the enhanced dynamic range.
For printing, you’ll need to create an SDR-adjusted version, as prints can’t replicate highlights brighter than paper white. Export this version in TIFF format, and in the Export window, select the "Forced SDR" option under Dynamic Range to ensure the image is optimized for print.
If you plan on doing further HDR editing in other software, export in TIFF or PSD formats. These retain the full dynamic range, allowing for continued adjustments without loss of quality.
Troubleshooting and Best Practices
Working with cinematic presets for High Dynamic Range photos can be incredibly satisfying, but it’s easy to make mistakes that result in overly processed, unnatural images. By understanding common pitfalls and following some key tips, you can consistently produce polished, professional results.
Avoiding Over-Processed Looks
One common challenge with cinematic presets is knowing when to stop. It’s easy to get carried away, especially when you’ve been staring at edits for too long. Over-processing often happens when you become less sensitive to the changes you’re making, leading to overly dramatic results.
To avoid this, start with the preset intensity set to zero and gradually increase it, aiming for around 60–70% of the maximum effect. Take breaks during editing and occasionally review your work in thumbnail view to get a fresh perspective. If your image still feels overdone, consider blending the High Dynamic Range shot with a natural exposure to bring back some authentic detail.
The key here is subtlety. If your goal is to enhance the photo while keeping it natural, it’s better to lean toward under-processing. Overly artistic effects might work for some projects, but for most cases, a restrained approach will look more polished. Once you’ve achieved the perfect balance, take the time to save your custom adjustments for future use.
Saving Custom Presets for Future Use
After fine-tuning your cinematic HDR edits, saving them as custom presets can be a game-changer. Having your own presets not only saves time but also ensures consistency across projects, especially if you have a signature editing style.
To save a preset, finalize your adjustments, click the '+' in the Presets panel, and give it a descriptive name, like Cinematic HDR - Warm Sunset. Organize your presets into folders based on use cases - this could include categories like lighting conditions or specific moods. Make it a habit to review your saved presets periodically, removing ones you no longer use or renaming them for better clarity.
For even greater efficiency, create variations of your favorite presets tailored for different scenarios, such as golden hour, cloudy skies, or indoor lighting. These variations provide a quick starting point while still allowing you to add your personal touch. Understanding when to rely on presets versus manual editing can further refine your workflow.
Comparing Preset-Based Editing vs. Manual Editing
Knowing when to use presets and when to edit manually can help you work smarter, not harder. Here’s a quick breakdown:
| Aspect | Preset-Based Editing | Manual HDR Editing |
|---|---|---|
| Speed | Fast – apply with a single click | Slower – requires multiple adjustments |
| Consistency | High – uniform results across images | Variable – depends on attention to detail |
| Learning Curve | Low – beginner-friendly | High – requires deeper technical skills |
| Customization | Limited – preset-defined adjustments | Full control over every detail |
| Creative Control | Moderate – good for general styles | Maximum – endless creative possibilities |
| Professional Results | Good – especially with high-quality presets | Excellent – in the hands of skilled editors |
| Cost Efficiency | High – saves time on repetitive tasks | Low – more time-intensive per image |
Preset-based editing is ideal for quickly processing large batches of similar images, making it a favorite for event and wedding photographers. It’s also great for maintaining a consistent style when working under tight deadlines. On the other hand, manual editing shines when dealing with unique images that require precise adjustments, such as photos with complex lighting or mixed colors.
For many professionals, a hybrid approach works best. Start with a preset to handle 70–80% of the work, then fine-tune specific areas manually. This method combines the speed of presets with the precision of manual adjustments, ensuring high-quality results every time.
High-quality presets, like those from Presets.io, can help bridge the gap between convenience and control. They provide a solid foundation that often requires only minimal tweaking, saving you time while still delivering impressive results.
Conclusion
Cinematic presets take the hassle out of High Dynamic Range editing, turning what used to be a time-consuming process into something quick and efficient. By integrating these presets into your workflow, you can unlock their full potential.
What makes this method so appealing is its balance of speed and consistency. Instead of starting each project from scratch, these presets handle the initial adjustments for you. That means you can dive straight into refining the finer details - whether it’s highlighting dramatic skies, enhancing architectural elements, or perfecting complex lighting scenarios. For HDR photographers, these tools are a game-changer.
Presets.io offers a Cinematic Collection that includes 10 desktop presets, 10 mobile presets, and 10 video LUTs - all for just $27.00 (and often discounted to $12.00). If you’re looking for more options, the Master Preset Bundle features 721 presets for $49.00.
Photographer Kevin Patrick G. shares his experience:
"They are extremely useful and functional, they save me time in my workflow."
User feedback underscores the value of these presets, which not only save time but also maintain professional-quality results. The Cinematic Preset Collection boasts a 4.64 out of 5 rating based on user reviews, proving its reliability for HDR photography.
Monique adds:
"Absolutely great and as described! Simple to use and make my photos look amazing."
In today’s visually driven world, High Dynamic Range images are more important than ever. With 85% of Instagram and Threads users already recognizing the impact of High Dynamic Range photos, these presets are essential for creating standout content on social media and the web. Whether you’re working on a single image or an entire batch, cinematic presets deliver the speed and consistency needed to meet modern demands without compromising your creative vision.
And with new presets released weekly on Presets.io, your options are always expanding. This constant growth ensures you’ll have tools for every mood, lighting condition, or artistic style you want to explore. Investing in high-quality presets not only saves time but also guarantees polished, professional results. Streamline your HDR workflow and bring your creative ideas to life with cinematic presets.
FAQs
What makes cinematic presets a great choice for creating HDR photos?
Cinematic presets are a great way to create HDR photos, as they simplify the editing process and deliver high-quality results. With just one click, these presets can boost the dynamic range of your image, revealing intricate details in both the brightest highlights and deepest shadows - no need to spend hours tweaking settings manually.
Beyond saving time, they help maintain a consistent style across your edits, giving your photos a polished and cohesive cinematic feel. They’re an excellent choice for photographers aiming to produce striking, immersive visuals with minimal effort.
How can I keep my HDR photos looking natural when using cinematic presets?
To ensure your HDR photos maintain a natural appearance while using cinematic presets, always start with RAW images. These provide the highest level of detail and flexibility for editing, giving you more control over the final look.
When choosing presets, opt for those designed to make subtle adjustments rather than dramatic changes. Over-the-top effects can easily make your photos feel artificial. After applying a preset, take the time to adjust settings like contrast, highlights, and shadows. This helps maintain balance, depth, and a realistic feel. Remember, the best cinematic presets enhance the mood and story of the photo without overwhelming its natural beauty.
How can I fix my HDR photos if they look too over-processed after using cinematic presets?
If your HDR photos end up looking too artificial after applying cinematic presets, don’t worry - there are ways to tone it down. Start by tweaking the settings: lower the contrast, highlights, and whites, while lifting the shadows and blacks to create a more balanced dynamic range. This can help the image feel more natural.
You can also adjust clarity or texture to smooth out areas that might appear too sharp or detailed. Once you've made these changes, preview your edits on different screens to ensure they look consistent and realistic. Small, subtle adjustments can preserve the cinematic vibe without making the photo look overdone.