
Table of Contents
- How to Shoot a DOUBLE EXPOSURE In-Camera [2023]
- Basic Techniques for Double Exposure
- 1. Nature Overlays
- 2. Urban Dreamscapes
- 3. Silhouette with Texture
- 4. Motion and Time-Lapse Blends
- 5. Double Exposure Portraits
- 6. Abstract Patterns
- 7. Nature and Architecture Fusion
- 8. Light and Shadow Play
- 9. Multi-Layered Exposures
- 10. Spirit and Ghostly Effects
- Comparison Table
- Conclusion
- FAQs
10 Double Exposure Ideas for Surreal Photos
Double exposure photography blends two images into one, creating surreal visuals that evoke emotion and tell stories. This technique, once limited to film, has been revolutionized by digital tools, making it accessible for photographers at all levels. Here are 10 ways to experiment with double exposure:
- Nature Overlays: Combine textures like trees, clouds, or water with portraits or urban scenes for symbolic depth.
- Urban Dreamscapes: Fuse cityscapes with natural elements to explore contrasts between urban and organic forms.
- Silhouette with Texture: Fill bold silhouettes with intricate patterns or textures for striking visuals.
- Motion and Time-Lapse Blends: Add movement or time-lapse elements for dynamic, layered compositions.
- Double Exposure Portraits: Overlay human profiles with complementary imagery to convey emotions or narratives.
- Abstract Patterns: Use geometric or organic patterns to create visually engaging designs.
- Nature and Architecture Fusion: Merge natural elements with architectural structures for thought-provoking contrasts.
- Light and Shadow Play: Leverage high contrast between light and shadow for dramatic, surreal effects.
- Multi-Layered Exposures: Combine three or more images for complex, multi-dimensional visuals.
- Spirit and Ghostly Effects: Use translucence and layering to create eerie, ethereal imagery.
Whether you're a beginner or experienced, these techniques offer endless possibilities to experiment with blending, layering, and storytelling. For easier editing, tools like Lightroom presets can simplify the process while maintaining creative control.
How to Shoot a DOUBLE EXPOSURE In-Camera [2023]
Basic Techniques for Double Exposure
Creating striking double exposures starts with mastering the essential techniques that seamlessly blend two images into one cohesive composition. The process begins with layering images correctly and understanding how blending modes influence the final result.
Blending modes are the backbone of digital double exposure photography. These modes dictate how the top image interacts with the one beneath it. For instance:
- Screen mode brightens the image by inverting and multiplying the layers.
- Overlay mode combines Multiply and Screen effects to enhance contrast.
- Lighten mode highlights the brighter pixels.
- Multiply mode darkens the image by reinforcing base colors.
Adobe Photoshop graphic artist Erica Larson showcased this by layering a snowy landscape over a bison image. She used the Screen blending mode and adjusted the opacity to achieve a natural-looking double exposure effect.
Opacity adjustments are another critical factor. By setting the opacity of the top layer to around 50% and tweaking it, you can control how much of the underlying image shows through. Lower opacity creates a subtle overlay, while higher opacity makes the top image more dominant. Striking the right balance is essential for achieving the surreal, layered look that defines double exposures.
Contrast is equally important. High-contrast images help distinguish elements more clearly. In a double exposure, darker areas in the first image will be filled by the second, while brighter areas will stand out in the final composition. To capture a crisp silhouette, ensure your subject is underexposed and the background overexposed by about two stops.
Masking techniques offer precision by allowing you to control which parts of each image are visible in the final piece. Adding a mask to your top layer lets you selectively reveal or hide portions of the underlying image. This gives you greater control over the composition and helps create intentional, polished results.
Positioning and alignment are crucial for spatial harmony. Resize, move, or rotate the overlay image to ensure the elements naturally complement each other. Pay attention to how shapes, lines, and focal points from both images interact to create a balanced and engaging final frame.
Planning your shots can significantly impact the outcome. Think about how subjects, light, and shapes will align in the final composition. You can meticulously plan your exposures or shoot spontaneously, allowing the second image to surprise you.
Color and brightness adjustments are the finishing touches that tie everything together. Fine-tune brightness and contrast to ensure the images blend seamlessly. You can also use a color overlay to harmonize different color palettes, making the composition feel unified.
Finally, experimentation is key. Some of the most captivating double exposures come from unexpected combinations. Play around with blending modes, opacity, and positioning until you achieve that dreamlike, surreal quality you're aiming for.
Understanding how these technical elements work together is the foundation of successful double exposure photography. Once you've mastered these basics, you'll be ready to explore the endless creative possibilities this art form has to offer.
1. Nature Overlays
Nature overlays are a fascinating approach to double exposure photography, blending organic textures and patterns with base images to create surreal, dreamlike compositions. This technique transforms ordinary photos into visual stories that stir emotions and spark imagination.
Key Visual Effect
By layering natural textures - like tree branches, flowing water, or clouds - over portraits or urban landscapes, nature overlays craft symbolic connections. These compositions can reflect themes like a bond with the environment or personal introspection. The added textures and patterns bring depth and mood to your images, ranging from soft and dreamy to bold and dramatic.
The magic lies in how natural elements interact with the base image. Negative spaces become canvases for tree crowns, mountain silhouettes, or cloud formations, turning simple photos into striking works of art.
Best Subjects
Certain natural elements work particularly well for this technique:
- Trees and foliage: Intricate branches and leaf patterns beautifully fill silhouettes, adding texture and complexity.
- Mountain ranges: Their bold, geometric shapes create dramatic contrasts with softer subjects like human profiles or buildings.
- Water: Waves, reflections, and streams introduce movement and a surreal quality, enhancing the dreamlike feel.
- Clouds: From soft, wispy textures to intense stormy skies, clouds can dramatically alter the mood of your composition.
- Flowers: Delicate floral details add subtle, elegant touches that complement your subject without overpowering it.
Editing Difficulty
Creating seamless nature overlays requires intermediate editing skills. You’ll need to master blending modes, layer masks, and opacity adjustments to achieve smooth integration between textures and base images.
Blending modes like Overlay, Screen, Soft Light, or Multiply are essential tools. Layer masks allow for precise control, letting you determine which parts of each image are visible. Tools like the Gradient Tool, Brush Tool, or Eraser Tool help refine transitions, ensuring your final composition feels cohesive and polished.
Artistic Potential
Nature overlays offer endless creative opportunities. They tap into our shared connection with the natural world, allowing you to merge distinct images into meaningful, unified artworks. This technique can explore themes like environmental awareness, personal transformation, or seasonal changes.
The key to success lies in balancing light and shadow, choosing subjects that align in shape and contrast, and ensuring that textures complement rather than clash. Thoughtful choices in these areas not only enhance the visual appeal but also deepen the emotional impact of your work.
For those seeking to simplify the editing process, tools like Presets.io offer specialized Lightroom presets. These presets provide a great starting point for color grading and tonal adjustments, helping you bring out the best in your nature-inspired double exposure compositions.
2. Urban Dreamscapes
Urban dreamscapes bring a fresh perspective to cityscapes by blending architecture with contrasting elements. Like other double exposure techniques, this style relies on layering to craft surreal, eye-catching compositions. It captures the essence of urban life while adding dreamlike qualities that make us see familiar environments in a new way.
Key Visual Effect
The magic of urban dreamscapes lies in the contrast between technology and nature. Overlaying urban structures with natural elements creates a visual tension that tells a deeper story about how we interact with modern environments.
Reflections are a powerful tool in this style. They add fluidity and movement to otherwise rigid cityscapes. Think of street reflections, glass surfaces, or water features - these can transform sharp architectural lines into more organic, flowing shapes. Black-and-white filters are especially effective, stripping away color distractions to highlight the textures and shapes of urban structures, making the contrasts even more striking.
This technique uses shadows and empty spaces in the city as a canvas. Skyscrapers can hold drifting clouds, human silhouettes can merge with busy streets, and architectural shadows can blend with natural textures. These juxtapositions create a mix of the familiar and the surreal, setting the stage for compelling urban narratives.
Best Subjects
Choosing the right subjects is key to creating seamless and impactful urban dreamscapes. Structures with complementary lines work best, as they allow for smoother blends. For example, modern skyscrapers pair beautifully with lush forests, while street scenes can be enhanced with clouds or water reflections.
Combining blurred motion with sharp details adds another layer of interest. Imagine a blurred stream of traffic paired with a crisp silhouette of a person - it tells a story of movement and stillness. Long exposures of bustling city squares, merged with stationary elements, capture the rhythm and energy of urban life.
Some architectural features lend themselves particularly well to this technique. Geometric building facades, bridges, subway tunnels, and skylines provide strong frameworks that can support overlays without losing their identity.
Editing Difficulty
Once you've selected your subjects, the real work begins in the editing phase. Crafting polished urban dreamscapes requires intermediate to advanced editing skills. The challenge lies not just in technical execution but in conceptualizing how the elements will come together to create a cohesive scene.
Urban-specific challenges include balancing artificial lighting with natural overlays, managing intricate architectural details, and maintaining the city's character while adding surreal elements. The basic techniques for double exposures apply here, but adjustments are needed to account for urban textures and lighting.
Common mistakes include overexposure, misaligned layers, cluttered compositions, and over-editing. Achieving a balanced and polished look takes patience, practice, and attention to how textures and patterns interact.
Artistic Potential
Urban dreamscapes are more than just visually appealing - they're a platform for storytelling and commentary. Photographer Yoshitaka Goto captures this perfectly:
"I don't express the real world in my multiple exposures, I always create my fantasy (crazy) world in them by using some pieces of real world. I transform shapes, place things that should not be there and think about addition and subtraction for my multiple exposures."
This approach allows you to explore themes like urban isolation, the clash between nature and technology, or the beauty hidden in metropolitan chaos. Each composition becomes a layered narrative, inviting viewers to interpret and find their own meaning.
For those looking to simplify their workflow, tools like Presets.io offer specialized Lightroom presets designed for urban dreamscapes. These presets are a great starting point for achieving the cinematic tones and surreal effects that define this style, making the editing process more efficient while enhancing the final result.
3. Silhouette with Texture
This double exposure technique blends bold silhouettes with intricate textures, creating layered visuals that convey emotion and tell a story. By filling simple, striking shapes with detailed patterns, the result transforms basic outlines into captivating compositions.
Key Visual Effect
At its core, this method contrasts clean, bold silhouettes with intricate textures, inviting viewers to take a closer look.
"The concept is simple: if the first image has a lot of dark areas, the second image will fill those dark areas, but not the rest." - bayphotofilm.com
The magic lies in how the silhouette's dark regions are replaced by the second image, while the lighter areas remain untouched. This natural masking effect highlights the texture without overwhelming the overall design. Fine details like tree branches, ocean waves, clouds, or fabric patterns work exceptionally well, adding depth without cluttering the silhouette. The trick is to select textures that enhance, rather than compete with, the silhouette.
Next, think about which subjects lend themselves to this technique.
Best Subjects
The best results come from silhouettes that are clean and easily recognizable. Profile portraits, full-body poses, and familiar objects make excellent choices, as they maintain their identity even when filled with complex textures. Human figures, in particular, offer a wide range of possibilities - profiles, hands, dancers, or seated poses all provide dynamic shapes, while still keeping any held objects distinguishable.
For textures, nature is a reliable source. Patterns from trees, leaves, water, or rocks create a harmonious blend with human forms. For a more artistic or surreal touch, fabric textures or abstract designs can be used, depending on the mood you want to convey.
Editing Difficulty
Once the right subjects and textures are chosen, precise editing becomes key to achieving the desired effect. This technique requires intermediate editing skills and thoughtful planning. When capturing the texture layer, decide whether the final image will be monochrome or colorful. Keep in mind that only the dark areas of the silhouette will be replaced with the texture.
Achieving professional results involves paying close attention to edge sharpness, exposure alignment, and color balance. Challenges often include keeping the silhouette clear and ensuring the textures don't overpower the image.
Artistic Potential
Silhouette with texture photography is a powerful way to evoke emotions and add narrative depth. It naturally lends itself to themes of identity, connection, and the contrast between inner and outer worlds.
This style can inspire feelings of mystery, nostalgia, or even surrealism. For instance, a silhouette filled with childhood memories, natural textures, or abstract designs becomes a visual metaphor, resonating with viewers on multiple levels. It’s particularly effective for personal and conceptual photography projects, where the choice of texture can tell a unique story - whether exploring themes like environmental ties, urban life, or emotional states.
For those seeking efficiency, Presets.io offers Lightroom presets tailored for silhouette photography. These presets enhance contrast and mood, ensuring dramatic tonal separations and subtle color grading that elevate the final image.
This technique continues to expand the creative possibilities within surreal double exposure photography, offering endless opportunities to craft layered, meaningful visuals.
4. Motion and Time-Lapse Blends
Taking double exposure techniques to the next level, motion and time-lapse blends bring a sense of energy and progression to your images. By combining movement and the passage of time, this method creates visually dynamic compositions that feel alive within a single frame.
Key Visual Effect
Motion and time-lapse blends elevate standard double exposures into something more cinematic. They merge static images with motion elements - like a walking figure or moving traffic - to convey both energy and progression simultaneously.
For time-lapse effects, layering multiple shots taken over a period of time (such as shifting clouds or city lights transitioning from dusk to night) can add a narrative dimension. Imagine clouds sweeping across a portrait or star trails forming behind a silhouette. These elements don't just enhance the image - they tell a story of transformation.
The magic happens when the motion complements the main subject. For instance, a sharp portrait paired with the soft flow of water creates balance, while a static building juxtaposed with blurred pedestrians adds vitality. Choosing the right subjects is key to achieving this harmony.
Best Subjects
Subjects that combine motion and stillness are ideal for this technique. The contrast between these elements creates a striking visual effect.
- Urban energy: A blurred stream of traffic overlaid with a crisp human silhouette captures the fast pace of city life. Light trails from vehicles can add direction and vibrancy while keeping the person as the focal point.
- Water movement: Overlaying a serene portrait with dynamic water - whether flowing rivers, ocean waves, or even rain - offers a natural contrast between calmness and motion.
- Athletic motion: Sports images are another great option. Combining an athlete’s movement with a secondary subject can highlight both the intensity of the action and the surrounding environment.
- Time-lapse progression: Sunrise and sunset sequences, shifting cloud patterns, star trails, or cityscapes transitioning from day to night work beautifully. These elements add temporal depth to portraits or architectural shots.
Editing Difficulty
This technique leans toward intermediate to advanced editing skills. Incorporating motion and time-lapse elements demands a careful balance of technical precision and creative vision.
- Opacity and blur: Use these tools to blend moving and static elements seamlessly. Adjustments here are critical for smooth transitions.
- Frame selection: When working with time-lapse, choosing the right frames is crucial to avoid overpowering the main subject.
- Color grading: Time-lapse sequences often involve changing light conditions, making consistent color grading essential.
- Motion blur: Precision is key - too little blur can make the movement look unnatural, while too much can obscure the subject. Masking techniques can help isolate and refine specific areas.
Artistic Potential
Motion and time-lapse blends allow photographers to compress time and space into a single image, opening up creative storytelling possibilities. This approach is perfect for exploring themes like change, progress, or the relationship between people and their environments.
For example, a portrait combined with a full day of cloud movement might symbolize introspection or a connection to nature’s rhythms. Urban scenes with traffic motion can reflect the relentless pace of modern life. These images go beyond capturing a moment - they evoke emotions, memories, and the passage of time.
Photographers interested in this technique can explore tools like Presets.io, which offers Lightroom presets tailored for motion-based double exposures. These presets simplify the process of balancing colors and transitions, especially when dealing with complex time-lapse sequences.
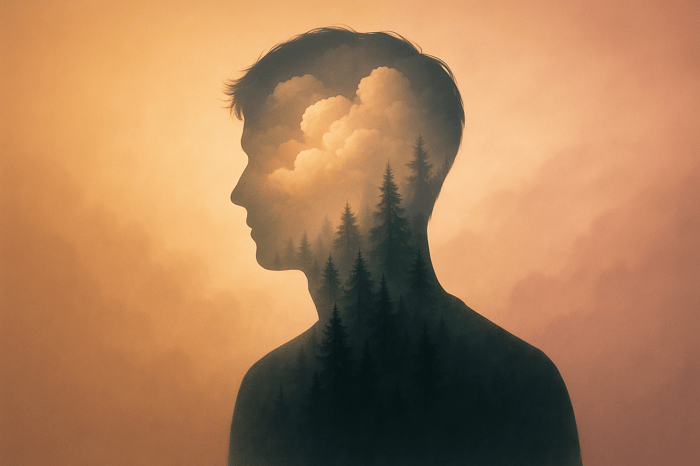
5. Double Exposure Portraits
Double exposure portraits take photography to the next level by blending human forms with striking imagery, creating a visual narrative that feels both personal and artistic. This technique allows photographers to explore deeper stories and emotions, merging a subject's silhouette with complementary elements from the world around them.
Key Visual Effect
At its core, this method overlays a person's face or profile with a secondary image, carefully balancing light and shadow. The result? A seamless flow where the secondary image appears to emerge from the subject's outline, offering a glimpse into their "inner world." The best results often come from silhouettes that clearly frame the overlaid image, giving viewers a window into the subject's emotions or story. This combination of elements makes the technique a powerful storytelling tool.
Best Subjects
The success of a double exposure portrait heavily relies on the clarity of the silhouette. Strong profile shots or three-quarter angles work best, as they provide well-defined shapes for layering. The subject's pose should also be intentional and expressive since their outline forms the foundation of the composition.
Pairing the silhouette with a thoughtfully chosen secondary image is key. For example, tree branches, ocean waves, or city skylines can add depth and context to the portrait. Contrasting elements - like a clean silhouette against a detailed background - often create the most visually engaging results. To enhance the narrative, consider using a cohesive theme, such as consistent environmental elements or multiple poses of the same subject. This approach strengthens the emotional and visual connection between the images.
Once the subject and secondary image are selected, editing becomes the next step in bringing the concept to life.
Editing Difficulty
Creating double exposure portraits is surprisingly approachable, falling within a beginner-to-intermediate skill range. Tools like Photoshop or mobile apps make it easier than ever to achieve this effect.
The process involves techniques like layer masking and blending modes, which were discussed earlier. Blending modes such as 'Screen' are especially useful for merging the two images, while opacity adjustments let you fine-tune the balance between the portrait and the secondary image.
"You can execute a shot so much more effectively now than when you were trying to double expose in the camera, especially with images that are taken at different times or in different spaces." - Carli Davidson
Modern editing tools offer a level of precision that traditional film techniques couldn't match. For those looking to speed up their workflow, platforms like Presets.io provide specialized Lightroom presets tailored for double exposure portraits. These presets simplify color grading and contrast adjustments, particularly when working with images captured under varying lighting conditions.
Artistic Potential
Double exposure portraits go beyond traditional photography, enabling artists to explore abstract ideas like dreams, memories, and emotions. By layering environmental or symbolic imagery onto a portrait, photographers can create surreal pieces that invite interpretation.
For instance, overlaying a forest on a portrait might symbolize a person's connection to nature or their desire for growth. Urban skylines can reflect an individual's relationship with city life, while abstract patterns delve into internal, personal themes. This technique is especially effective for telling dual narratives that connect identity with external influences, making it a favorite for personal branding, self-expression, and even documentary projects.
Careful planning is essential to ensure the two images complement each other. Thoughtfully considering how they interact can transform a simple portrait into a compelling story. The most impactful double exposure portraits feel deliberate, with every detail contributing to the overall message or emotion being conveyed.
6. Abstract Patterns
Abstract patterns take double exposure photography into a realm of creative experimentation, where geometric shapes, organic textures, and repeating elements combine to form surreal, dreamlike compositions. Unlike traditional techniques, this approach focuses on pure form, rhythm, and the interplay of visual elements, transforming familiar subjects into something entirely new.
Key Visual Effect
By layering repetitive elements, textures, and geometric shapes, you can create fresh forms and dynamic rhythms. Blending modes play a crucial role here, helping to add depth and contrast. The magic lies in how these patterns interact - smooth curves paired with sharp angles or organic textures juxtaposed with rigid geometric forms create striking contrasts. Think of cityscape lines or water ripples filling empty spaces, turning flat areas into vibrant, textured visuals. This intentional layering brings out the natural rhythm within abstract compositions, making the image feel alive.
Best Subjects
To achieve impactful abstract compositions, choose subjects that adapt well to varying scales and textures. For example, layering a portrait with textured elements like clouds, leaves, or fabric can produce a mesmerizing effect where the texture seamlessly interacts with the subject. The trick is to pair images that complement each other in shape, contrast, and overall meaning, creating a harmonious blend.
Editing Difficulty
Mastering abstract patterns in double exposure photography requires a solid understanding of editing tools, placing it in the intermediate skill category. Key techniques include using blending modes such as Overlay, Screen, Soft Light, and Multiply, along with opacity adjustments and layer masks. Each mode offers unique effects - Screen brightens the image, while Multiply intensifies darker areas. Precision is key, as these tools help control texture visibility, contrast, and color tones. For those looking to simplify the process, tools like Lightroom presets from Presets.io can streamline color grading and contrast adjustments.
Artistic Potential
Abstract patterns in double exposure photography allow for limitless artistic expression. Flowing, organic patterns can evoke themes of growth and nature, while sharp, geometric designs might reflect urban energy or technological influences. The process of layering becomes an art form itself, akin to visual music, where patterns create rhythms, pauses, and crescendos across the frame.
Textures like cracked paint, grunge overlays, leaves, or water droplets can add layers of depth to your compositions. Experimentation is key - blend modes, layer opacity, and even intentional camera movements can lead to unexpected and exciting results. The best abstract pattern double exposures often explore contrasts: order versus chaos, natural versus artificial, or macro versus micro perspectives, inviting viewers to uncover new details with every glance.

The Master Preset Bundle

$57.00
$672.00
The Master Preset Bundle Every Style. Every Platform. One Download Get 56 high-quality Presets.io collections in one complete bundle — designed to help you edit faster, stay consistent, and get professional-looking results in seconds. Get All High-Quality Preset Collections For… continue reading
7. Nature and Architecture Fusion
Nature and architecture fusion goes beyond simple overlays or urban dreamscapes. It’s about bringing together two seemingly opposite worlds - natural elements and man-made structures - into a single, cohesive image. This technique creates striking visual stories that explore the connection between our built environments and the natural world.
Key Visual Effect
Combining natural textures with architectural lines produces a captivating contrast. Imagine soft, flowing water or delicate leaves juxtaposed against the sharp edges of buildings. Reflections can add a sense of motion, while geometric elements like windows can be filled with organic patterns such as clouds or foliage. This interplay of textures and shapes draws attention to the relationship between the rigid and the organic.
Best Subjects
Choosing the right subjects is crucial for this type of fusion. Look for pairings that naturally complement each other. For example:
- Skyscrapers paired with tall trees or cascading waterfalls.
- Bridges combined with flowing rivers or rugged mountain ridges.
- Window grids filled with patterns of leaves or clouds.
Photographer Navid Baraty’s "Merging Worlds" series is a standout example of this technique. His work blends urban cityscapes, like New York City, with natural wonders such as White Sands National Park, creating images that highlight the deep connection between human-made and natural environments. Similarly, Erkin Demir’s double exposure portraits merge architectural forms, landscapes, and fragmented human figures, seamlessly weaving treetops or rooflines into the contours of faces.
Editing Difficulty
This technique isn’t for beginners - it requires careful alignment, blending, and attention to detail. You’ll need to master intermediate to advanced editing skills, including:
- Using blend modes like Overlay, Screen, Soft Light, or Multiply.
- Layer masking to balance textures and lighting.
- Fine-tuning opacity and utilizing advanced blending techniques to achieve a polished look.
Adobe artist Erica Larson provides a helpful example in her Photoshop tutorial, where she combines a snowy landscape with a bison image. She uses the "Screen" blend mode, adjusts opacity, and even incorporates a Gradient Fill layer with a Violet-Orange preset to create a dramatic effect.
For those who prefer a monochrome approach, black-and-white filters can simplify the process by emphasizing shapes and textures, making it easier to unify the composition. Specialized Lightroom presets from platforms like Presets.io can also help streamline color grading and contrast adjustments for these projects.
Artistic Potential
Nature and architecture fusion offers endless creative opportunities to explore themes of humanity’s interaction with the environment. This technique creates images that challenge viewers to think about urbanization, conservation, and the delicate balance between the natural and the man-made.
For instance, blending a forest with skyscrapers could symbolize urban growth, while overlaying ocean waves on cityscapes might evoke ideas of change and impermanence. Seasonal elements can also enhance these narratives - spring blossoms against concrete might suggest renewal, while autumn leaves over industrial settings could symbolize decay and rebirth. Reflections, too, add movement and depth, uniting the static with the dynamic.
8. Light and Shadow Play
Evolving from earlier double exposure techniques, this approach uses striking contrasts between light and shadow to create visually captivating images. By carefully balancing brightness and darkness, photographers can craft compositions that feel both dramatic and mysterious, offering a sense of the surreal. The technique blends technical precision with artistic creativity, resulting in images that challenge perception and seem to bend the rules of natural physics.
Key Visual Effect
The real charm of light and shadow play lies in how contrasting elements interact within a single frame. Shadows and highlights work together to create a seamless, almost dreamlike harmony. The trick is understanding how shadows in one shot can be filled by the second exposure, while overly bright areas might dominate and obscure details.
"The manipulation of light and shadow plays a vital role, often creating dramatic contrasts or ethereal effects that enhance the surreal quality of the image."
- Canonoutsideofauto.ca
This technique often relies on lighting from unexpected angles, creating unique shadows and highlights that wouldn’t naturally occur. The interaction between these elements adds depth and intrigue, pulling viewers into the scene and encouraging them to look closer.
Best Subjects
For this method, high-contrast scenes work best. Dark silhouettes against bright backdrops provide a strong foundation, as the darker areas let the second exposure shine through more clearly. On the other hand, overly bright sections can erase important details, so subject choice is key. Great options include:
- Architectural structures with bold, geometric shadows
- Portraits with dramatic lighting setups
- Landscapes captured during golden hour or blue hour, when natural contrasts are most striking
A helpful tip: Start with the darker image, then layer a brighter one. This ensures shadows act as a canvas for the second exposure.
Editing Difficulty
Creating impactful light and shadow compositions often requires intermediate editing skills. Familiarity with tools like blending modes and layer masks is essential for fine-tuning the final image. Balancing the exposure of each layer is critical to preserving key details, while adjustments to contrast, brightness, and shadows help achieve a cohesive look.
Layer masks allow for precise control, letting you reveal or hide specific parts of each photo. Experimenting with blending modes like "Overlay", "Screen", "Soft Light", or "Multiply" can also enhance the effect. If you're looking to save time, tools like Presets.io offer collections tailored to lighting effects, making it easier to achieve polished results.
Artistic Potential
The creative opportunities with light and shadow play are virtually limitless. This technique naturally lends itself to storytelling, inviting viewers to explore themes like duality, transformation, or the passage of time. Adding elements like colored gels, prisms, or textured glass can push the boundaries further, creating surreal effects that challenge the viewer’s expectations.
"In light and shadow, I'm looking at shape and texture, what I can highlight and what I can hide."
- Andrea Chapman
Reflective surfaces, such as mirrors or water, can add yet another layer of complexity. These elements introduce symmetrical distortions that guide the viewer’s eye while maintaining an air of mystery. By playing with what’s revealed and what’s hidden, you can craft images that leave a lasting impression and invite endless interpretation.
9. Multi-Layered Exposures
Taking the concept of double exposure to the next level, multi-layered exposures combine three or more images to create intricate, multi-dimensional visuals. This advanced technique stretches the boundaries of surreal photography, with each layer contributing unique elements. The outcome? A rich, dreamlike image that reveals fresh details every time you look.
Key Visual Effects
By layering multiple images, this method introduces a striking sense of depth. Subjects - whether people, objects, or landscapes - take on a ghostly, multi-dimensional quality. The magic lies in balancing the individuality of each layer while blending them into a unified, captivating visual story.
Best Subjects
The success of multi-layered exposures often hinges on choosing subjects that naturally work together in terms of shape, contrast, and symbolism. Organic elements like trees and foliage are especially effective; their textures and patterns integrate seamlessly with other layers, adding an artistic flair. A standout example is Idris Khan’s reinterpretation of Bernd and Hilla Becher’s architectural series, where overlapping forms transformed the original images into something entirely new. Darker subjects tend to blend more harmoniously, while brighter ones can risk washing out finer details. Silhouettes, in particular, serve as excellent base layers, allowing other images to shine through clearly.
Editing Difficulty
Once you’ve selected complementary subjects, the real challenge begins: editing. Multi-layered exposures demand precision. Mastering tools like opacity adjustments, blending modes, and layer masks is essential to align images, balance lighting, and ensure smooth transitions. Specialized tools, such as Presets.io’s collections, can help streamline this intricate process.
Artistic Potential
The creative possibilities with multi-layered exposures are endless. By incorporating textures, overlays, or filters, you can evoke themes of memory, time, or emotion. Thoughtful planning of how each layer interacts allows you to craft surreal compositions that challenge perception while maintaining a clear artistic direction. It’s a technique that invites viewers to lose themselves in a layered, imaginative world.
10. Spirit and Ghostly Effects
This technique leans into the eerie and supernatural by using translucence and spectral layers to create ethereal imagery. Double exposure plays a key role in crafting ghostly effects, giving subjects a transparent, otherworldly quality.
Key Visual Effect
The hallmark of this method lies in its ability to make subjects appear translucent or partially transparent. By reducing the opacity of overlaying elements, the image achieves a ghostly vibe, where solid forms seem to fade, blurring the line between the physical and the spectral.
Best Subjects
Silhouettes are a natural fit for spirit photography. Their bold, dark shapes contrast beautifully with ghostly overlays, making them a dramatic choice. Human figures, especially when captured in reflective or dynamic poses, can further heighten the eerie atmosphere.
High-contrast subjects are also ideal. Think of people standing against bright backdrops, architectural structures with pronounced shadows, or natural scenes where light filters through fog or tree branches. These settings provide a striking foundation for spectral overlays and ensure the ghostly elements stand out. Achieving this effect requires careful attention to lighting and subject clarity, which also ties into the precision needed during the editing phase.
Editing Difficulty
Creating convincing ghostly effects demands a solid grasp of photo editing, ranging from intermediate to advanced skills. Tools like Photoshop or GIMP are commonly used to fine-tune blending modes, adjust opacities, and apply layer masks. These steps are essential to balance the delicate interplay between clarity and transparency.
Black-and-white images often amplify the ghostly aesthetic, but color photos can work just as well with the right adjustments. Experimenting with blending modes such as Overlay, Screen, Soft Light, or Multiply can enhance the spectral quality. Adding motion blur or using layer masks can further heighten the ethereal effect. With practice, these technical tweaks can transform an image into a hauntingly beautiful composition.
Artistic Potential
Spirit effects open the door to dual storytelling, blending themes of memory and the supernatural. This technique allows photographers to explore concepts like loss, transformation, and the passage of time in ways traditional photography might not capture. The ghostly aesthetic often stirs feelings of nostalgia, mystery, and introspection.
Modern artists have taken inspiration from the historical roots of spirit photography to delve into deeper psychological and emotional themes. By layering images that represent different states of being - whether emotional, temporal, or subconscious - photographers can create powerful visual metaphors. For example, early filmmaker Georges Méliès used double exposure in his work, such as in Four Heads are Better Than One, to achieve ghostly visual effects that still inspire today.
For photographers looking to streamline the process, tools like Presets.io offer specialized options for achieving consistent ghostly effects without sacrificing creative control. Whether you're aiming for nostalgic storytelling or exploring the supernatural, these techniques provide a rich canvas for artistic expression.
Comparison Table
Here’s a quick look at how each double exposure technique stacks up across key factors:
| Technique | Visual Effect | Best Subjects | Editing Difficulty | Artistic Potential |
|---|---|---|---|---|
| Nature Overlays | Organic textures merge with portraits for a dreamy feel | Silhouettes, portraits, landscapes | Beginner to Intermediate | High – evokes a connection between people and nature |
| Urban Dreamscapes | Sharp architectural lines contrasted with softer elements | City skylines, buildings, human figures | Intermediate | Very High – explores themes of urban life and isolation |
| Silhouette with Texture | Bold shapes filled with intricate patterns or natural elements | Strong silhouettes, high-contrast subjects | Beginner | High – adds symbolic depth and mystery |
| Motion and Time-Lapse Blends | Captures dynamic movement across multiple frames | Sports, street scenes, flowing water | Advanced | Very High – great for storytelling through motion |
| Double Exposure Portraits | Layers human features for psychological depth | Face profiles, emotional expressions | Intermediate to Advanced | Extremely High – delves into identity and emotions |
| Abstract Patterns | Geometric or organic patterns create surreal compositions | Repetitive textures, architectural details | Intermediate | High – expands creative possibilities |
| Nature and Architecture Fusion | Contrasts organic and man-made elements dramatically | Buildings, trees, urban landscapes | Intermediate | Very High – reflects on the balance of civilization and nature |
| Light and Shadow Play | Highlights dramatic contrasts between light and dark | Backlighting, golden hour subjects | Beginner to Intermediate | High – emphasizes mood and atmosphere |
| Multi-Layered Exposures | Combines three or more image layers for intricate results | Varied complementary subjects | Advanced | Extremely High – offers endless creative opportunities |
| Spirit and Ghostly Effects | Creates a translucent, spectral quality | Silhouettes, high-contrast subjects | Intermediate to Advanced | Very High – perfect for exploring themes of memory and the supernatural |
Choosing the Right Technique
Your choice of double exposure technique should align with your skill level, creative vision, and storytelling goals. Simpler methods like Nature Overlays and Light and Shadow Play are ideal for beginners. These techniques help you grasp the basics of exposure layering without diving into overly complex editing.
On the other hand, advanced techniques such as Multi-Layered Exposures or Motion and Time-Lapse Blends demand a solid understanding of layer masking, blending modes, and opacity adjustments. For example, Erica Larson from Adobe Studio demonstrates how to combine multiple images in Photoshop using gradient fills and blend modes to achieve striking color effects.
Artistic Potential
Portrait-based techniques often stand out due to their ability to tap into human emotions and psychology. As Marc Newton from The School of Photography notes:
"Double exposure photography invites you to step outside the boundaries of conventional photography. It's a playground for experimentation and a canvas for your imagination."
Meanwhile, techniques like Urban Dreamscapes and Nature and Architecture Fusion excel in making social statements, while Spirit and Ghostly Effects and Multi-Layered Exposures push surrealism to new levels. These methods follow the legacy of visionaries like Man Ray and Jerry Uelsmann, who used double exposure to craft dreamlike portraits and intricate, surreal landscapes.
Getting Started
Begin with straightforward techniques to build your confidence. As you grow more comfortable, challenge yourself with more complex compositions. The goal is to balance your technical skills with your creative vision, producing surreal, impactful imagery.
For a smoother editing experience, consider using high-quality Lightroom and mobile presets from Presets.io to streamline your workflow.
Conclusion
Double exposure photography opens up a world of creative opportunities that go far beyond the limits of single-frame captures. By using the 10 techniques shared here, you can layer images to craft visual stories that traditional methods simply can't replicate.
What makes double exposure so captivating is its ability to add depth and dimension to your work, giving your images a dynamic and almost otherworldly feel. Whether you're blending nature-inspired overlays with portraits, creating urban dreamscapes, or experimenting with ghostly, ethereal effects, each approach offers a unique way to tell a story through your lens.
To truly master these techniques, it's essential to embrace experimentation and welcome the unexpected. Start simple - focus on high-contrast compositions like silhouettes or nature overlays. These are easier to work with and provide a solid foundation for your creative journey. As you grow more comfortable, you can move on to more intricate, multi-layered designs.
For a smoother workflow, consider using presets like those available from Presets.io. These tools can help you achieve a consistent, surreal aesthetic without having to build everything from scratch, giving you more time to explore and refine your style. With patience and practice, double exposure photography can become a powerful way to bring your creative vision to life.
FAQs
What are the best tools and techniques for creating stunning double exposure photos?
To craft stunning double exposure photos, start by using digital editing tools such as Photoshop or Lightroom. These programs let you layer images, tweak opacity, and play around with blending modes to create smooth, cohesive compositions. Focus on contrast and composition - choosing images with tones and shapes that work well together can make a big difference in the outcome.
For an extra touch, try adding textures like clouds, cityscapes, or abstract designs. Adjusting transparency levels and experimenting with light and shadow can bring depth and a dreamlike quality to your work. Want to make the process quicker? Use high-quality presets tailored for double exposure photography - they can help you save time while still delivering professional-looking results.
What are some easy ways for beginners to try double exposure photography?
Getting Started with Double Exposure Photography
If you're new to double exposure photography, don’t worry - it’s easier to start than you might think. Begin by using a camera that has a built-in double exposure mode. If you’re working with a film camera, you can manually expose the same frame twice to achieve the effect. For those using digital cameras, the process involves capturing two high-contrast images, preferably with clean and simple backgrounds, and then blending them together using photo editing software.
Not comfortable with editing yet? Tools like Lightroom presets can make things much easier. They help you add creative effects with just a few clicks, saving you time and effort. With some practice and a bit of experimentation, you’ll soon be creating eye-catching, surreal double exposure photographs.
What are some common mistakes in double exposure photography and how can you avoid them?
Creating double exposure images can be a bit challenging, and there are a few common pitfalls to be mindful of. One of the main issues is using low-contrast or unclear silhouettes, which can leave your final image looking flat or cluttered. To avoid this, choose high-contrast shots or strong, well-defined silhouettes. This helps ensure that both layers in your composition stand out and don't blend together in an unappealing way.
Another common problem is poor composition, where the two images don't work well together and end up clashing rather than enhancing each other. Take the time to plan your shots thoughtfully. Think about how the elements in each image will overlap and interact, aiming for balance and visual harmony between the layers. A well-composed double exposure feels intentional and cohesive.
Finally, relying too much on fixing errors after shooting - especially when working with film - is rarely effective. Double exposures demand careful planning right from the start. Spend time preparing and experimenting beforehand to get the best results straight out of the camera.