
Table of Contents
Sync Lightroom Presets with Capture One
Photographers often use both Lightroom and Capture One for their unique features, but syncing presets between the two can be challenging. Lightroom presets and Capture One styles differ in how they process RAW files and apply adjustments, making direct conversion impossible. This guide explains how to manually recreate Lightroom presets in Capture One to maintain a consistent editing style across both platforms.
Key Steps:
- Prepare Reference Images: Export JPEGs from Lightroom with presets applied and organize RAW files for Capture One.
- Recreate Adjustments: Use Capture One’s tools to match Lightroom’s look by eye, focusing on exposure, color grading, and tone curves.
- Save as Styles: Save recreated adjustments as Capture One styles for future use.
- Test and Refine: Apply styles to various images to ensure consistency.
Challenges:
- Some features, like Lightroom’s Blacks slider or split toning, don’t directly translate.
- Local adjustments need to be manually rebuilt in Capture One.
Benefits:
This process ensures your edits look consistent, even when switching between software. While it takes time to set up, it simplifies workflows for photographers using both programs.
Converting your Lightroom presets to Capture One with a few clicks
How Lightroom Presets and Capture One Styles Differ
Let’s dive deeper into the technical distinctions between Lightroom presets and Capture One styles, especially when it comes to how these tools process images and how adjustments translate between the two platforms. These differences are key to understanding why certain settings need manual tweaking when switching between them.
File Format and Feature Differences
Lightroom presets are stored as .xmp files, which contain adjustment parameters specific to Adobe's workflow. These presets control sliders and tools within Lightroom's Develop module - like the HSL panel, tone curve, and split toning. When you apply a preset, Lightroom uses its RAW processing engine to interpret and apply these adjustments.
Capture One styles, on the other hand, are saved as .costyle files, designed for Phase One's unique processing system. Because the two applications rely on different engines, the same adjustment values can produce noticeably different results.
The tools available in each program also differ. Capture One offers advanced color editing features, such as the ability to target specific color ranges based on luminosity and saturation. While Lightroom’s HSL panel offers some similar functionality, it doesn’t provide the same level of precision. Additionally, Capture One’s local adjustment tools include options like color range masking and luminosity masking, which don’t have direct equivalents in Lightroom’s masking system.
File organization is another area where the two programs diverge. Lightroom presets can include lens corrections and camera calibration profiles, integrating them into a single preset file. In contrast, Capture One styles focus on global adjustments, with local adjustments managed separately using adjustment layers. These structural differences directly impact how settings transfer - or fail to transfer - between the two platforms.
Which Settings Transfer and Which Don't
Understanding these technical distinctions helps clarify which adjustments can be carried over and which ones require manual recreation. Here’s a breakdown:
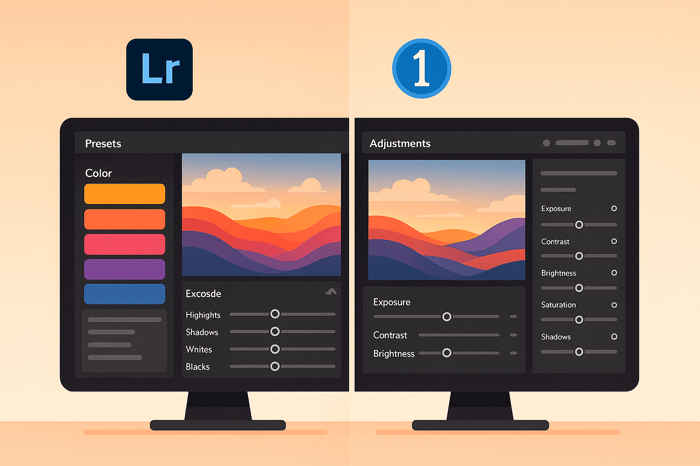
- Basic exposure settings - like highlights, shadows, whites, and blacks - generally transfer with minimal fine-tuning.
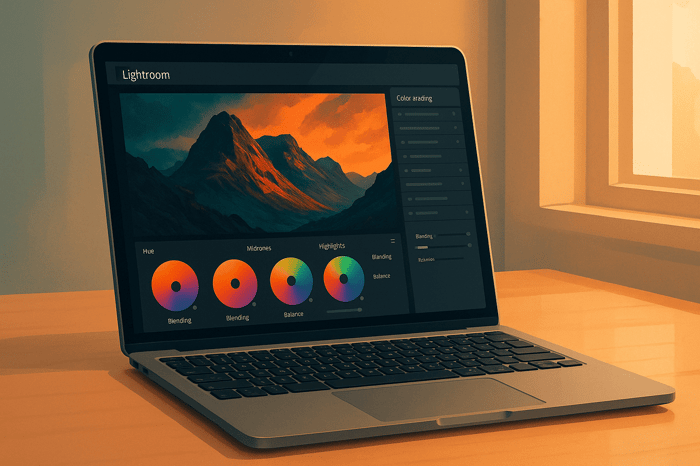
- Color adjustments can align somewhat. For instance, Lightroom's color wheels correspond loosely to Capture One's Color Balance tool, but Capture One’s three-way correction offers more refined control over highlights, midtones, and shadows.
- Tone curves are hit or miss. Simple curves often translate well, but complex ones usually require significant manual adjustments.
However, some settings don’t transfer seamlessly:
- Texture and Clarity sliders in Lightroom don’t have direct equivalents in Capture One. You can approximate these effects using Capture One’s Structure and Clarity tools, but the results will differ due to how each program processes these adjustments.
- Split toning from older Lightroom versions doesn’t exist in Capture One. To achieve a similar effect, you’ll need to use Capture One’s Color Balance tool.
- Local adjustments like radial filters, graduated filters, and masks don’t transfer at all. You’ll need to recreate these manually using Capture One’s masking tools, which operate differently and offer unique capabilities.
Other areas require special attention:
- Lens corrections can be tricky. While both programs support automatic lens profiles, any manual lens adjustments made in Lightroom won’t carry over. You’ll need to reapply these settings in Capture One’s Lens tab.
- Film emulation andcamera profiles are perhaps the most challenging to replicate. LR presets often rely on specific camera profiles or third-party profiles that aren’t available in Capture One. Since Capture One uses its own ICC profiles and film curve emulations, achieving a similar look involves experimenting with profile combinations and fine-tuning color adjustments manually.
These differences highlight the need for careful adjustments when transitioning between Lightroom and Capture One. While some settings can transfer with minor tweaks, others require a hands-on approach to achieve the desired results.
Preparing Your Lightroom Presets for Transfer
Getting your LR presets ready for transfer is all about preparation. Since there's no direct way to convert presets to Capture One, organizing your workflow upfront will save you time and frustration during the manual process.
Choosing and Organizing Presets
Start by selecting only the presets you truly need. Trying to convert every preset can quickly become overwhelming - especially since each one has to be manually recreated in Capture One. Focus on the ones you use most often or that are essential to your work.
To stay organized, create a dedicated folder titled "Lightroom to Capture One Transfer." Within this folder, sort your chosen presets into categories like Portrait, Landscape, Wedding, or Street Photography. This method keeps things tidy and helps you locate specific styles easily while converting.
Pay extra attention to presets that rely heavily on camera calibration profiles or the Blacks slider. These settings often don't translate well between Lightroom and Capture One. Photographer chris_holtmeier explains the challenges:
"I've tried converting some LR presets to C1. Didn't really work out very well. The Blacks slider works so differently between the two softwares that it really doesn't translate at all."
Since these presets will need the most tweaking, decide if they're worth the effort to recreate. Once you've narrowed down your presets, it's time to prepare reference images for a smoother conversion process.
Export Setup Steps
Reference images are key to successfully transferring your presets. They’ll act as visual guides when you’re manually recreating adjustments in Capture One.
Begin by selecting a variety of test images that reflect different shooting conditions, such as indoor portraits, outdoor landscapes, low-light scenes, and high-contrast environments. Apply each preset you plan to transfer to these test images in LR. Then, export the images as full-resolution JPEG files. Make sure to name the files clearly, like "Portrait_Preset_Warm_Indoor.jpg" or "Landscape_Preset_Moody_Sunset.jpg", so you can easily match them to their corresponding presets later.
In addition to the JPEGs, copy the original RAW files into your transfer folder. These RAW files will be imported into Capture One, where you'll use the exported JPEGs as a visual reference to replicate the preset effects.
For added consistency, reset LR's Develop module layout. This will help you clearly identify which tools and settings each preset modifies, making it easier to find equivalent adjustments in Capture One.
Take screenshots of the Develop panel to document key slider positions. Focus on areas like the Basic panel, HSL adjustments, tone curves, and split toning settings. While these adjustments won’t carry over directly, they’ll act as a guide for recreating similar effects in Capture One.
Lastly, don’t forget about local adjustments like radial filters, graduated filters, or masks. These won’t transfer and will need to be recreated manually in Capture One using its masking tools, which work differently from Lightroom’s system. Take note of these adjustments so you can rebuild them later with Capture One's tools.

The Master Preset Bundle

$57.00
$672.00
The Master Preset Bundle Every Style. Every Platform. One Download Get 56 high-quality Presets.io collections in one complete bundle — designed to help you edit faster, stay consistent, and get professional-looking results in seconds. Get All High-Quality Preset Collections For… continue reading
Step-by-Step Transfer Process
Now that your reference images are ready, it’s time to manually recreate your Lightroom presets in Capture One. This process relies heavily on visual comparison, as the two programs handle image processing in very different ways.
Moving Reference Images Between Programs
Start by importing the original RAW files into Capture One - the same files you used in Lightroom to create your JPEG references. Once imported, open both LR and Capture One side by side. This setup allows you to continuously compare the unedited RAW file in Capture One with its edited JPEG version from Lightroom.
Keep your JPEG reference visible at all times. This step is crucial because you’ll be matching the look by eye rather than copying exact slider values. The way LR and Capture One process images is so different that identical numeric settings won’t give the same results.
Once your reference images are aligned, you can start rebuilding your adjustments in Capture One.
Building Presets in Capture One
To begin, focus on basic adjustments like exposure, highlights, shadows, and contrast. Work through each adjustment panel systematically, always referencing your JPEG target. Be prepared to make frequent tweaks along the way.
Start by capturing the overall mood and color grading of your preset. Then, dive into specific settings. Pay close attention to tools that behave differently between the two programs. For example, Lightroom’s Blacks slider works very differently from the equivalent tools in Capture One, so you’ll need to experiment with various options to achieve a similar look.
It’s important to note that some LR features won’t translate directly. Adjustments like camera calibration and certain film emulation effects aren’t available in Capture One. When you hit these limitations, focus on getting as close as possible using the tools Capture One provides.
Once you’ve established a solid foundation, move on to fine-tuning. Use Capture One’s Color Editor to replicate HSL adjustments from Lightroom. While the interface is different, you can achieve similar results by selecting specific color ranges and adjusting their hue, saturation, and lightness.
For tone curve adjustments, Capture One’s Curve tool offers similar functionality to LR’s, but the default curve shapes differ. You may need to create custom curve points to match the contrast and tone mapping of your Lightroom preset.
If your LR preset included local adjustments like radial or graduated filters, you’ll need to recreate these in Capture One using the Local Adjustments panel. Capture One’s masking tools can help you achieve similar effects.
Creating and Storing Capture One Styles
Once you’ve recreated your preset, save it as a style in Capture One. Right-click on your adjusted image and select "Copy Adjustments" to capture all the settings you’ve applied.
Next, go to the Styles panel and click the "+" button to create a new style. Select "User Style" and name it something that reflects your original Lightroom preset. If you plan to refine this style in the future, consider adding a version number to the name.
During the style creation process, you can choose which adjustments to include. This flexibility allows you to create different versions of the same style - for example, one with local adjustments and another without, depending on how you plan to use it.
To keep your workflow organized, structure your new styles into folders that mirror your LR preset categories. For example, you might create folders like "Portrait Styles," "Landscape Styles," or "Wedding Styles" for easy access.
Finally, test your new style on a variety of reference photos to ensure consistency. Keep in mind that not all Lightroom adjustments will translate perfectly. Instead of aiming for a pixel-perfect match, focus on capturing the essence and mood of your original preset. Complex presets may require extra manual fine-tuning, but with practice, you’ll develop an efficient workflow and a better understanding of Capture One’s tools.
Keeping Both Programs in Sync
After successfully recreating your LR presets as Capture One styles, the next step is to ensure both programs stay aligned. This involves syncing workflows, settings, and processes to maintain consistency across your editing platforms. Here's how to do it.
Applying Styles to Multiple Images
To edit batches of photos efficiently, it’s important to understand how bulk edits work in each program. In Capture One, applying styles to multiple images is straightforward. Select the images in the browser, then click on your chosen style in the Styles panel. The adjustments will be instantly applied to all selected files.
For consistent batch exports, use Process Recipes in Capture One. These recipes let you define key settings like output format, color space, and sharpening. By tailoring these to match your LR export settings, you can ensure technical consistency between the two programs.
A good practice is to process a key image in both programs and compare the results side by side. This will highlight any differences in how adjustments are applied, giving you a baseline for fine-tuning your styles.
You might also consider creating style variants for different scenarios. For example, if your LR preset works perfectly for golden hour portraits, you may need a modified Capture One version for indoor lighting. Save these variants with clear names like "Portrait - Indoor" or "Portrait - Outdoor" to keep things organized.
Finally, test your styles regularly on various types of images. Skin tones, landscapes, and architectural shots can react differently to the same adjustments. Keep a set of test images that represent your typical work, and run your styles through these samples whenever you make updates to ensure they perform well across the board.
Matching Program Settings and Preferences
Consistency isn’t just about styles - it’s also about aligning settings and preferences across both programs. This ensures a seamless editing experience and uniform results.
Start with color management. Set both programs to use the same color profile, such as Adobe RGB or sRGB, depending on your workflow needs.
Next, align default import settings. In Capture One, create a base style that mimics the default corrections you use in LR. Apply this base style automatically during import so all images start with the same adjustments.
For exports, make sure both programs are configured to produce identical results. For web galleries, match resolution, quality, and color space settings. For print projects, ensure sharpening and color profiles are consistent. If you use specific keyword structures or embed copyright information in LR, set up Capture One to recognize and preserve these fields.
It’s also a good idea to conduct regular calibration checks. Software updates can sometimes alter how RAW files are processed or how adjustments are interpreted. Set a monthly reminder to process the same test image in both programs, using your synced presets, and compare the results. Document any changes and adjust your workflows as needed.
Backup strategies are essential for preserving your work across both platforms. Export your LR presets and Capture One styles regularly, and store them in a shared location. This not only protects your work but also simplifies syncing settings across devices or when upgrading software.
Lastly, keep a record of your process. Note which adjustments translate well between programs and which require extra care. Over time, this documentation will help you refine your workflow and make the process of syncing both programs feel second nature. With careful planning and regular maintenance, you’ll achieve consistent results across both platforms, making your dual-program workflow both efficient and reliable.
Summary
Syncing LR presets with Capture One involves manually recreating presets to maintain a consistent editing style across both platforms.
The process starts by exporting reference images from LR with your presets applied. Then, using Capture One's tools, you manually replicate those adjustments and save them as styles. This approach helps ensure your edits look cohesive, even when switching between the two programs.
However, technical differences between LR and Capture One mean some adjustments won't translate exactly. For example, Lightroom's tone curves often need extra tweaking in Capture One's color editor, and local adjustments may have to be entirely rebuilt using Capture One's masking tools. Being aware of these differences helps set realistic expectations and makes the transition smoother.
One of the key benefits of this workflow is greater flexibility. It allows you to retain your personal editing style while taking advantage of the unique features each software offers.
To keep things running smoothly, ongoing maintenance is crucial. Regularly checking calibration ensures both programs produce consistent results, especially after updates. Organizing your styles with clear naming conventions and keeping backup copies of your presets and styles adds another layer of security for your work.
While this dual-program workflow takes more time to set up compared to sticking with a single program, it pays off by offering a versatile editing process that adapts to various shooting needs and client demands. Syncing your presets not only improves efficiency but also guarantees consistent results across platforms.
FAQs
Why do Lightroom presets need to be recreated manually in Capture One instead of using an automatic conversion tool?
When it comes to photo editing, Lightroom and Capture One rely on entirely different processing engines and algorithms. This difference means their presets aren’t interchangeable. Each software approaches adjustments like color grading, contrast, and tone curves in its own way, making it tough for automated tools to replicate the same look across both platforms. By recreating presets manually, you get the chance to fine-tune settings, ensuring your edits stay consistent and match your preferred style and quality on both programs.
How can photographers maintain consistent editing styles when working with both Lightroom and Capture One?
Photographers often encounter hurdles when transitioning between Lightroom and Capture One. Variations in color grading tools, layer adjustments, and performance settings can make it challenging to maintain a consistent editing style across both platforms.
To tackle these challenges, it’s essential to familiarize yourself with the unique tools each software provides and tweak your workflow accordingly. For instance, you can manually replicate key adjustments to align with your preferred style or explore presets and styles tailored for both Lightroom and Capture One. On top of that, fine-tuning software settings - like enabling GPU acceleration in Capture One - can enhance performance and make your workflow smoother.
How can I streamline my editing process when working with both Lightroom and Capture One?
To streamline your editing process between Lightroom and Capture One, it's essential to keep your settings and organization consistent. Start by setting up session-based workflows in Capture One. These workflows not only keep your projects well-organized but also make them easier to transport. Pair this with a clear folder system to manage tethering sessions efficiently, ensuring everything stays tidy and accessible.
Don't forget about metadata! Syncing details like ratings and keywords between the two platforms is crucial. Regularly exporting and importing metadata can help maintain your editing style across both tools. By staying organized and tapping into the strengths of each software, you can handle a variety of photography projects while keeping your editing workflow seamless and cohesive.