
Table of Contents
- How to Add Presets and Color Grade Videos in Lightroom for Mobile #shorts #lightroom
- What You Need to Apply Presets to Videos in Lightroom Mobile
- How to Install Presets in Lightroom Mobile
- How to Apply Presets to Videos in Lightroom Mobile
- Tips and Common Problems with Video Presets in Lightroom Mobile
- Pros and Cons of Video Presets in Lightroom Mobile
- Conclusion: Make Video Editing Faster with Presets
- FAQs
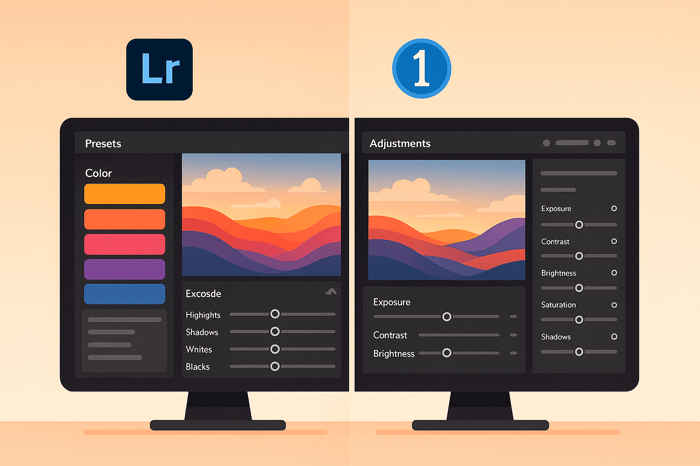
How to Apply Presets to Videos in Lightroom Mobile
Want to edit videos on your phone like a pro? Lightroom Mobile now lets you apply presets to videos for quick and consistent edits. Here’s what you need to know:
- Presets save time by applying a full set of adjustments (e.g., exposure, color balance) with one tap.
- Consistency matters: Use presets to maintain a unified look across multiple clips.
- Requires Adobe Lightroom Mobile Premium ($9.99/month).
- Works with .xmp files and other supported formats.
- Sync across devices using Adobe Creative Cloud.
To get started, ensure your app is updated, import your presets, and apply them to your videos. You can fine-tune settings for the perfect look. Presets are a great tool for fast, professional-quality video editing on the go.
How to Add Presets and Color Grade Videos in Lightroom for Mobile #shorts #lightroom
What You Need to Apply Presets to Videos in Lightroom Mobile
Before you dive into applying presets to videos in Lightroom Mobile, make sure your setup checks all the right boxes. This feature requires a premium subscription and compatible hardware to work smoothly.
Adobe Lightroom Mobile Premium Subscription
To unlock video editing features, including applying presets, you’ll need an Adobe Lightroom Mobile Premium subscription. These features aren’t available in the free version of the app. You can confirm your subscription status through the profile menu. If you’re already subscribed to the Adobe Creative Cloud Photography plan (which also includes Lightroom Classic and Photoshop), you’re good to go - premium features are included.
Keep the App Updated
The ability to edit videos and apply presets was introduced in Lightroom Mobile’s June 2022 update. To access these features, ensure your app is running the latest version.
"Manually check the App Store or Google Play for the latest version." – The Luxe Lens
On iOS, head to the App Store, and on Android, open the Google Play Store to update Lightroom Mobile. If you see "Open" instead of "Update", your app is already up to date. For convenience, you can enable automatic updates in your device’s settings.
Supported Preset Formats
Lightroom Mobile works with a variety of preset file types. The most common format is .xmp files, which are Lightroom’s standard. It also supports older .lrtemplate files, though these may not be fully compatible with video editing. Keep in mind that not all photo presets will work seamlessly with videos, so it’s best to use presets specifically designed or tested for video adjustments.
Lastly, ensure your device can handle video editing. Videos are larger and more demanding than photos, so devices with iOS 13.0+ or Android 6.0+ and at least 4GB of RAM are recommended for smooth performance.
Once you’ve confirmed all these requirements, you’re ready to start installing and applying presets in Lightroom Mobile.
How to Install Presets in Lightroom Mobile
You can add presets to Lightroom Mobile in two ways: directly importing them on your phone or syncing them from your desktop.
Import Presets Directly on Your Phone
Start by saving your preset files (.xmp or .zip) to your phone. If you’ve purchased presets from sources like Presets.io, you’ll usually receive them via email or a direct download link.
Open Lightroom Mobile and head to the Presets panel by tapping the preset icon at the bottom of the screen. Once there, find the three-dot menu (⋯) in the top-right corner of the presets section and select "Import Presets." This will open your phone’s file browser, where you can locate and select your saved preset files.
You can import multiple files at once, and Lightroom will automatically convert unsupported formats (like older .lrtemplate files). After importing, your presets will show up under "User Presets," ready to use on both photos and videos. The entire process is quick - usually under 30 seconds, depending on the number of presets you're adding.
If you frequently edit on your desktop, you might prefer syncing your presets. Read on to learn how.
Sync Presets from Lightroom Desktop
For those who use Lightroom Classic or Lightroom CC on a computer, syncing presets through Adobe Creative Cloud is a seamless option. Simply install your presets on Lightroom Desktop, and they’ll automatically sync to your mobile app.
Make sure you’re signed into the same Adobe account on both devices and that cloud sync is enabled. Syncing happens in the background, so there’s no need to initiate it manually. If your presets don’t appear right away, you can refresh the presets panel by pulling it down to trigger a sync.
This method is especially helpful if you have an extensive collection of presets stored on your computer.
Organize and Manage Your Presets
After importing your presets, take a moment to organize them for easier access. Use the presets panel’s menu to create and rename groups based on their style or purpose. For instance, you could set up groups like "Cinematic Video," "Portrait Presets," or "Black & White." This way, you can quickly find the right preset without wasting time.
For better usability, rename presets with descriptive titles like "Warm Sunset" or "Moody Blue" instead of generic names like "Preset_01." Clear names make it easier to locate the perfect look, especially when you're working under time constraints.
If you find yourself no longer using certain presets, clean up your library by long-pressing on the preset and selecting "Delete." Keeping your preset library organized ensures a smoother editing experience.
How to Apply Presets to Videos in Lightroom Mobile
With your presets ready to go, it's time to start applying them to your video clips. The process is straightforward, but there are a few steps you'll need to follow to ensure everything works seamlessly.
Select and Open a Video
First, you need to import your video into Lightroom Mobile. The steps differ slightly depending on whether you're using an Android or iOS device, but both methods are simple.
- On Android: Tap the "Add Photos" icon at the bottom of your screen. From there, select one or more videos and tap "Add" to import them.
- On iOS: Head to the "Device" view and tap directly on a video to start editing. Alternatively, open your Lightroom library, tap the blue import icon, choose "from camera roll," and then filter by "videos" to select and import your clips.
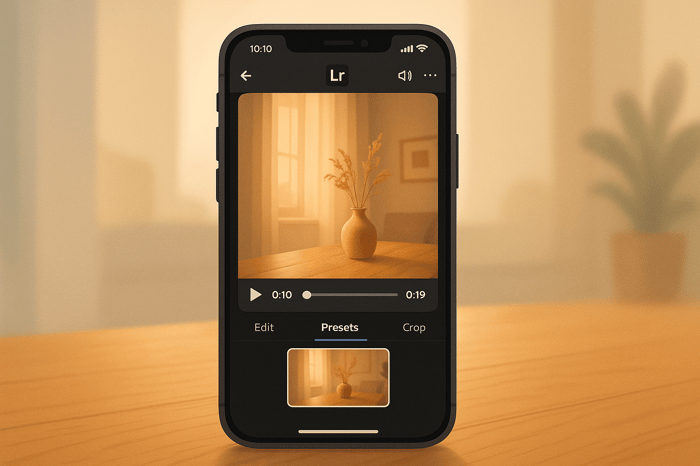
Once imported, your videos will appear in the Lightroom library with a small filmstrip icon in the top-right corner of their thumbnails. Tap on a video thumbnail to open it and access the editing tools. Now you're ready to apply your preset and give your video a polished look.
Apply Presets to Videos
Using your presets is quick and easy. With your video open in the editing interface, locate the Presets panel by tapping the preset icon at the bottom of your screen. Here, you'll find all your imported presets organized into groups, along with Lightroom's default options.
Browse through your preset collections and tap on any preset to see how it changes your video. The adjustments preview instantly, so you can see the effect in real time. Keep in mind that applying presets to videos requires a premium subscription, as this feature isn't available in the free version of Lightroom Mobile.
Occasionally, you might see a preset labeled as "Partially Incompatible" when applied to videos. This happens because certain features, like HDR effects or localized masks, aren't supported for video editing. Lightroom will still apply all compatible adjustments from the preset.
If you've downloaded cinematic presets from sources like Presets.io, you'll find these are often optimized for video use, reducing compatibility issues and delivering dramatic, professional-grade results.
Once your preset is applied, you can refine the look further to match your creative vision.
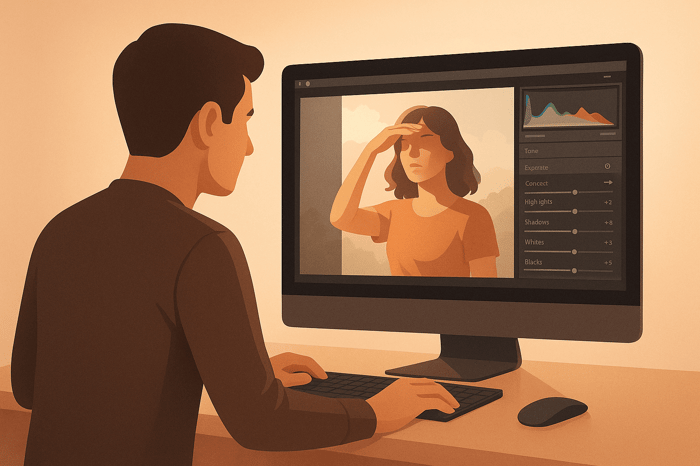
Adjust the Video After Applying Presets
Presets give you a great starting point, but fine-tuning your video can take it to the next level. Lightroom’s editing tools allow you to customize the look to suit your project.
- Use the Amount slider to tweak the intensity of the preset. Tap the applied preset thumbnail to access this slider, which lets you adjust the strength from 0 to 100. This is especially helpful if the preset feels too strong or too subtle for your footage.
- Explore the Light, Color, and Effects panels to adjust exposure, contrast, and texture. These tools let you perfect every detail.
- In the Effects panel, you can add finishing touches like vignette and grain. Fine-tune vignette settings such as midpoint, roundness, feather, and highlights, or adjust grain size and roughness for a film-like aesthetic.
While some advanced tools like point curves and tone curves aren't available for video editing on iOS, the core adjustment panels still offer plenty of flexibility. If you create a style you love, you can copy the edit settings and paste them onto other clips, ensuring a consistent look across your entire project.

The Master Preset Bundle

$57.00
$672.00
The Master Preset Bundle Every Style. Every Platform. One Download Get 56 high-quality Presets.io collections in one complete bundle — designed to help you edit faster, stay consistent, and get professional-looking results in seconds. Get All High-Quality Preset Collections For… continue reading
Tips and Common Problems with Video Presets in Lightroom Mobile
Editing videos with presets in Lightroom Mobile can be a game-changer, but it's not without its challenges. Whether you're troubleshooting missing presets or dealing with compatibility issues, understanding how to navigate these hurdles can save time and keep your workflow smooth. Let’s dive into some common problems and practical tips to get the most out of your video presets.
Fix Missing Presets
If your presets don’t show up in Lightroom Mobile after installation, the problem is often tied to an incomplete setup or a syncing issue. First, double-check that your presets were imported correctly and that they’re in the supported .xmp format.
Syncing between devices is another common culprit. If you’ve installed presets on Lightroom’s desktop version but can’t find them on mobile, ensure you’re logged into the same Adobe Creative Cloud account across devices. It may take 15-20 minutes for syncing to complete, especially with slower internet connections.
Still missing? Try force-closing the app. If this doesn’t work, log out of your Adobe account in Lightroom Mobile, then log back in to refresh the sync. This often resolves stubborn syncing issues.
Work with Partially Compatible Presets
Ever seen the "Partially Incompatible" label pop up when applying a photo preset to a video? That’s because Lightroom Mobile’s video editing tools don’t support certain advanced features like local adjustments, masking tools, or HDR effects. When this happens, Lightroom applies only the compatible settings from the preset.
To make the most of these partially compatible presets, focus on basic adjustments like color grading, exposure, and contrast - these typically transfer well to video. After applying the preset, head to the Effects panel to manually reintroduce missing elements.
For example:
- Recreate grain effects by tweaking the grain amount, size, and roughness.
- Adjust vignettes using the midpoint, roundness, and feather sliders to achieve that cinematic touch.
If you’re using presets specifically designed for video, like those from Presets.io, you’ll encounter fewer compatibility issues. These presets are optimized for Lightroom Mobile’s video features. However, you might still need to tweak the Amount slider to match your footage’s lighting and color profile for the best results.
Organize Presets for Faster Editing
A well-organized preset collection can dramatically speed up your editing process. Start by creating custom preset groups tailored to your needs. Use descriptive names like "Cinematic", "Social Media", "Corporate", or "Travel" to quickly locate the right style for your project.
Another helpful tip? Organize presets by intensity levels. Keep subtle, everyday presets separate from bold, dramatic styles. This makes it easier to pick the perfect look for your content - lighter presets for professional or minimalist projects, and bolder ones for more creative or experimental work.
To keep Lightroom Mobile running smoothly, especially on older devices, delete unused presets regularly. A cluttered preset library can slow down the app. Back up your full collection on Lightroom’s desktop version so you don’t lose anything important while keeping your mobile workspace streamlined.
Finally, test your presets on different types of footage. Some presets shine on outdoor scenes but might look too saturated for indoor shots. Knowing a preset’s strengths and limitations in advance helps you select the right one quickly and reduces the need for extensive corrections later.
Pros and Cons of Video Presets in Lightroom Mobile
Video presets in Lightroom Mobile offer a quick and efficient way to edit videos while maintaining a consistent style. By understanding their strengths and limitations, you can better decide how to incorporate them into your editing process.
One of the biggest advantages is the time saved during color grading. With just a few taps, you can apply professional-looking adjustments, making it especially useful when editing multiple videos that need a unified visual aesthetic. This is particularly important for creators aiming to establish a recognizable brand identity.
Another key benefit is consistency. Presets help ensure your videos maintain a uniform look, even if they were shot under different lighting conditions. Whether you're working with artificial lighting or natural sunlight, a well-crafted preset can tie everything together seamlessly.
However, there are some drawbacks to keep in mind. For starters, not all photo presets translate well to video. This can lead to compatibility issues, requiring additional adjustments to achieve the desired effect. Additionally, Adobe Lightroom Mobile's premium features, including video presets, come with a $9.99 monthly subscription fee. For casual users who only edit videos occasionally, this cost might outweigh the convenience.
Overreliance on presets can also result in generic-looking content. While presets provide a strong foundation, they often require fine-tuning to align with your creative vision. This is why it’s important to view presets as a starting point rather than a one-size-fits-all solution.
Comparison Table: Pros and Cons
| Pros | Cons |
|---|---|
| Fast editing – Quickly apply professional looks | Subscription cost – $9.99/month for premium features |
| Consistent branding – Maintain a cohesive style across videos | Compatibility issues – Photo presets may not work perfectly for video |
| Professional results – Access cinematic and film-inspired styles | Customization limits – Often need manual adjustments |
| Mobile-friendly – Edit on the go without desktop software | Creative limits – Overuse can lead to generic content |
| Learning tool – Study preset settings to improve your skills | Storage impact – Large collections may slow down the app |
| Sync across devices – Use presets on multiple devices | Internet required – Syncing needs a stable connection |
The key to making the most of video presets is striking a balance between speed and creativity. They can streamline your workflow and ensure visual consistency, but don’t shy away from tweaking settings to match your vision. High-quality preset collections, like those from Presets.io, are often better suited for mobile video editing, minimizing compatibility issues compared to generic photo presets.
Ultimately, whether video presets are worth it depends on your editing needs and budget. If you edit frequently and value efficiency, they can be a great tool. Just remember to blend their use with manual adjustments to create content that stands out.
Conclusion: Make Video Editing Faster with Presets
Using video presets in Lightroom Mobile can take your editing process from a lengthy chore to a quick and efficient task. In this guide, we’ve walked through everything from installing presets to applying them to your videos and addressing common troubleshooting tips. The main takeaway? Presets offer a fantastic starting point that can save you time while still delivering polished, professional results. This time-saving advantage not only speeds up your workflow but also leaves room for creative tweaks and personalization.
For those with a premium subscription ($9.99/month), importing and syncing presets is a breeze. Keep in mind that video editing and the ability to use presets are features exclusive to the premium plan. With it, you can easily access your entire preset library on your mobile device, making your editing process seamless and portable.
Customizing presets - adjusting things like exposure, highlights, and shadows - ensures your videos don’t end up looking generic. These tweaks allow you to create unique results that align with your creative vision.
For beginners, quality preset collections, such as those offered on Presets.io, can be a game-changer. As the creator Crestmage wisely pointed out:
"Yes it's good to create your own. But not every beginner knows where to start."
Collections like these are designed to provide polished color grading and cinematic effects, giving you a solid foundation as you refine your editing skills.
Lightroom Mobile’s mobile-first design adds another layer of convenience. You can edit on the go - whether you’re traveling, commuting, or simply away from your desktop. With cloud syncing across devices, it’s an ideal tool for modern creators who need flexibility and consistency in their work without being tied to a single location.
To make the most of these tools, start by building a well-organized preset collection that reflects your style. Test them on different types of footage and make adjustments to ensure consistency across your projects. The ultimate goal is to streamline your workflow so you can focus more on crafting compelling stories and less on tedious technical adjustments.
FAQs
How can I make sure my Lightroom Mobile presets work with videos?
To make sure your presets work smoothly with video editing in Lightroom Mobile, stick to presets that are specifically created for videos. Photo presets might not always work perfectly with video files since certain adjustments don't carry over.
To see which presets are compatible, turn on the 'Show Partially Incompatible Presets' option in the preset menu. Also, double-check that your presets are updated to match the latest version of Lightroom Mobile. Opting for video-specific presets ensures you get the best results without any hassle.
How can I organize my presets for quicker video editing in Lightroom Mobile?
To make your video editing workflow smoother in Lightroom Mobile, start by sorting your presets into folders based on their style, theme, or the type of project you’re working on. This way, you can quickly locate the perfect preset when you need it. For instance, you might create folders such as Cinematic, Vintage, or Aesthetic.
If you have presets you use frequently, you can ensure they stay at the top of your list by adding a prefix like 'zz' or another symbol to their folder names. It’s also a good idea to regularly go through your presets, remove the ones you no longer use, and back up your collections to prevent losing them. These small steps can cut down on clutter and speed up your editing process significantly.
Why aren't my presets showing up in Lightroom Mobile, and how can I fix it?
If your presets aren’t showing up in Lightroom Mobile, start by making sure you’re logged into the same Adobe account on both your mobile device and desktop. Using different accounts will prevent presets from syncing.
Next, double-check that your presets have completely synced in the desktop version of Lightroom. Once that’s confirmed, check your mobile app. If syncing still isn’t working, try restarting the Lightroom app or your device. Another option is to rebuild the sync data in Lightroom Classic. To do this, hold the Option key (Mac) or Alt key (Windows) and choose Rebuild Sync Data from the preferences menu.
If none of these steps work, signing out and back into your Adobe account or reinstalling the Lightroom Mobile app often fixes the issue. These troubleshooting methods should get your presets syncing smoothly across all your devices.