
Table of Contents
- Fix Harsh Midday Light with Bright Presets
- How Bright and Airy Presets Fix Midday Light Problems
- Main Editing Techniques for Midday Sunlight
- How to Apply Bright and Airy Presets Correctly
- Pros and Cons of Bright Presets in Harsh Sun
- How to Shoot and Edit Harsh Light
- Conclusion: Better Midday Photos with Bright Presets
- FAQs
Fix Harsh Midday Light with Bright Presets
Harsh midday light can ruin your photos with intense brightness, sharp shadows, and washed-out colors. But you don’t have to avoid shooting during these hours. Using bright and airy presets can transform your images, softening harsh contrasts and restoring balance to your photos.
Key Takeaways:
- Midday Challenges: Strong light creates unflattering shadows, overexposed highlights, and dull colors.
- Bright Presets: These editing tools adjust exposure, shadows, and highlights, making photos look polished and balanced.
- Simple Adjustments: Fine-tune settings like contrast, white balance, and shadows for natural results.
- Consistency Matters: Apply presets across sets for cohesive photo edits.
Bright presets save time and improve midday photos, but manual tweaks ensure your edits stay natural and visually appealing.
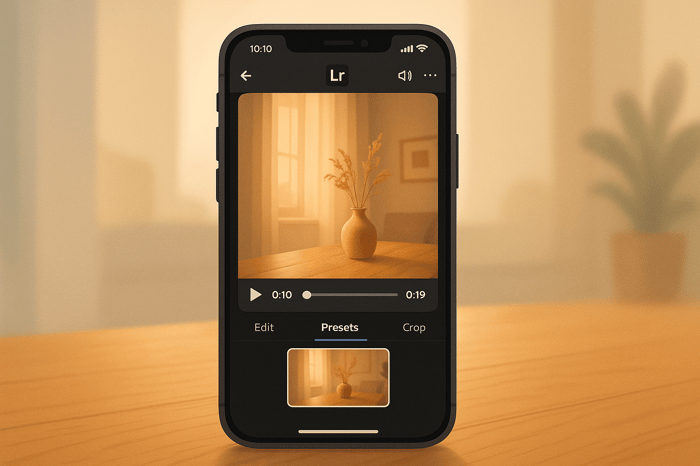
How Bright and Airy Presets Fix Midday Light Problems
What Are Bright and Airy Presets?
Bright and airy presets are editing tools crafted to transform harsh midday photos into polished, visually appealing images. They work by tweaking key settings like exposure, contrast, and tone curves to soften shadows and tame highlights, creating smooth transitions and reducing the intensity of dark areas.
These adjustments, done through Lightroom's basic panel and tone curve, include fine-tuning highlights, whites, blacks, and shadows. The result? Photos that feel light, inviting, and free from the harshness of midday sunlight. This makes bright and airy presets an essential tool for photographers dealing with challenging midday lighting.
Why Use Bright and Airy Presets?
Bright and airy presets simplify the challenge of managing harsh midday light. They balance extreme lighting conditions with just one click, saving you from time-consuming manual edits.
Another big advantage is the consistency they bring. When shooting in difficult lighting, these presets ensure your entire photo set has a cohesive, polished look. This is especially important for photographers delivering client work or curating content for social media.
For those using Presets.io, the variety of bright and airy options means there’s something for every situation - whether you’re capturing portraits, landscapes, or lifestyle shots. Plus, with new presets added weekly, you can always find fresh ways to tackle midday lighting challenges and elevate your editing game.
Main Editing Techniques for Midday Sunlight
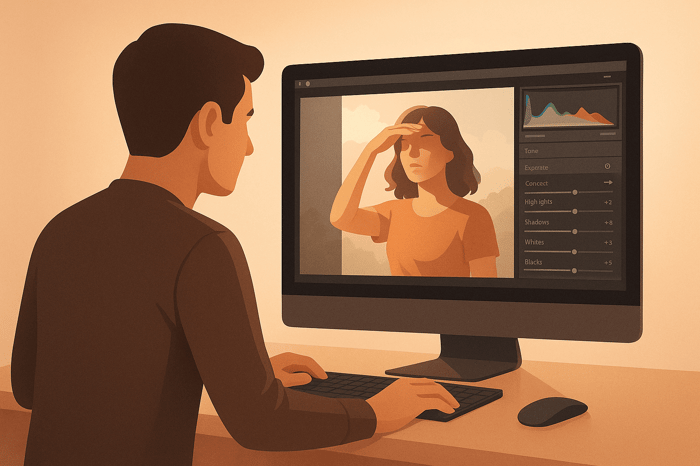
Exposure and Contrast Adjustments
When dealing with harsh midday sunlight, manual adjustments can make a big difference in refining your images beyond what automatic presets can achieve. Start by pulling down the highlights slider to recover details in bright areas, like the sky, and avoid a washed-out look. For portraits, lift the shadows to bring out hidden details, but be cautious - overdoing it can introduce noise and make the image look flat. Lowering the overall contrast by about 10–20 points can also help create smoother transitions between light and dark areas.
The key here is balance. Over-lifting shadows or reducing contrast too much can leave your photo looking dull and unnatural.
White Balance and Skin Tone Improvements
Once exposure and contrast are adjusted, it’s time to fine-tune the white balance. Midday sunlight, typically around 5,500–6,000 Kelvin, can create a cool cast that affects the natural warmth of your image. Adjust the white balance carefully to restore accurate colors and maintain natural skin tones. Harsh midday light often leads to unflattering shadows and desaturated colors, which can make scenes look washed out and lifeless.
Shooting in RAW format is highly recommended. RAW files allow for precise, non-destructive white balance adjustments during editing, giving you full control over color temperature without compromising image quality. For portraits, using your camera's "Shade" white balance preset during shooting can help counteract the cool blue tones often found in shadowed areas under bright sunlight.
Skin tones, in particular, need extra attention. Even small tweaks to the white balance can make someone’s complexion appear too cool (bluish or pale) or too warm (orange or yellow). As you edit, keep an eye on how these adjustments affect facial tones and make subtle corrections to achieve a natural, flattering look.
Targeted Adjustments for Specific Areas
Masking tools are your best friend when working with uneven lighting caused by harsh midday sun. Radial masks can be used to brighten dark faces without overexposing the background, ensuring balanced lighting for portraits.
For landscapes, linear gradients are effective for reducing sky exposure while adding warmth, helping to balance the bright sky with a darker foreground.
Brush adjustments can be used to fine-tune specific details, like brightening the eyes or toning down overly shiny areas (hot spots). Additionally, color range masking allows you to target specific tones, such as the brightest highlights or deepest shadows, ensuring precise corrections without affecting the mid-tones. This level of control helps you maintain a natural look while optimizing your photo’s overall balance.
How to Apply Bright and Airy Presets Correctly
Choosing the Right Presets for Midday Light
When working with midday sunlight, opt for presets specifically designed for harsh, bright conditions rather than those tailored for softer golden hour or indoor lighting. These specialized presets are better equipped to handle the intense contrasts and strong shadows that come with shooting at noon.
As you browse preset collections, take a close look at the sample images. The most effective midday presets will showcase their ability to handle high contrast, bright backgrounds, and pronounced shadows. Avoid presets that only feature soft, evenly lit photos, as they may not provide the adjustments needed for harsh sunlight. For a reliable selection, check out Presets.io's curated collections dedicated to challenging lighting scenarios.
Applying Presets and Fine-Tuning Adjustments
Once you've chosen the right preset, remember that it serves as a starting point, not a one-size-fits-all solution. Apply the preset first and then tweak the settings to address your specific lighting challenges.
- Highlights: If the preset doesn't sufficiently recover blown-out areas like bright skies, try reducing the highlights slider by 20-30 points to bring back detail.
- Shadows: Bright presets often lift shadows significantly, but you might need to adjust further. If faces or key details remain too dark, increase the shadows slider in small increments of 5 points. Be cautious not to exceed +60, as this can introduce noise and create an unnatural look.
- White Balance: Correct color casts by adjusting the temperature slider. Warm up the image if skin tones look too cool, or cool it down slightly if the preset has made everything overly yellow or orange.
- Clarity and Texture: Reduce clarity by 10-15 points and slightly lower the texture to soften harsh details while keeping the image natural.
Once you've refined one image, use these adjustments as a guide to maintain a cohesive look across your entire set.
Keeping Photos Consistent Across Sets
Midday light can create dramatic contrasts, so consistency across your images is key. Start by selecting one primary preset from your collection to use as a base for all the photos in your set. While you’ll still make individual adjustments, having a consistent starting point ensures a unified look.
Begin by editing one representative image to set your slider values. Then, use Lightroom's sync feature to apply these settings to similar photos in the set. If you find yourself consistently making adjustments - like reducing highlights by 25 points or increasing shadows by 15 points - apply these changes uniformly to maintain balance across the set.
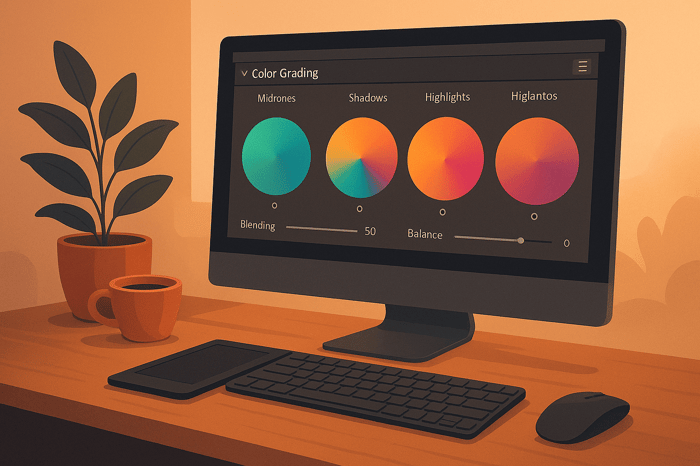
For portrait sessions or weddings, consistent skin tones are especially important. After applying your preset and making initial tweaks, use the HSL panel to adjust the orange and yellow luminance values. Keeping these adjustments uniform ensures flattering and consistent skin tones throughout. While syncing settings saves time, don’t skip minor individual tweaks for variations in exposure between shots.

The Master Preset Bundle

$57.00
$672.00
The Master Preset Bundle Every Style. Every Platform. One Download Get 56 high-quality Presets.io collections in one complete bundle — designed to help you edit faster, stay consistent, and get professional-looking results in seconds. Get All High-Quality Preset Collections For… continue reading
Pros and Cons of Bright Presets in Harsh Sun
Main Benefits and Drawbacks
Bright presets can be a powerful tool for dealing with harsh midday lighting, but they require thoughtful application to achieve the best results.
| Advantages | Disadvantages |
|---|---|
| Time-Saving: Speeds up the editing process by automating complex adjustments that would otherwise take significant time. | Needs Additional Tweaks: Often requires manual fine-tuning to adapt to unique lighting conditions. |
| Better Skin Tones: Balances harsh shadows on faces, creating more flattering and natural-looking results. | Limited Recovery Capability: Cannot fix severely overexposed highlights or deeply underexposed shadows. |
| Consistency: Offers a dependable starting point for maintaining a cohesive look across multiple photos. | Generic Adjustments: May not perfectly suit every lighting scenario or align with specific creative goals. |
| Shadow Recovery: Brightens dark areas and balances underexposed parts of the image effectively. | Risk of Over-Editing: Can result in an overly bright or unnatural look if not carefully adjusted. |
| Highlight Control: Helps manage blown-out highlights in bright backgrounds, reducing excessive light. | Restricts Creativity: May push images toward a pre-defined aesthetic that doesn’t always match your vision. |
Let’s break these points down further to understand how bright presets work and where they might fall short.
Bright presets shine when it comes to tackling exposure challenges during midday shoots. One of their standout strengths is how they simplify the editing process, as photography expert Eden Strader explains:
"Because harsh light photography can be more complex, post processing will be a lifesaver!"
However, while presets can save time, they’re not magic. If your image suffers from blown-out highlights or deep shadows, no preset will recover that lost detail. That’s why nailing your camera settings during a shoot is just as critical as the post-processing phase.
Beyond efficiency, understanding the limitations of bright presets is crucial. They excel at providing a quick starting point, helping you fine-tune images faster. But relying solely on them without manual adjustments risks losing creative control or achieving an unnatural look.
Over time, using bright presets can also teach you how to handle tricky lighting conditions more effectively. Even when you’re editing without presets, the experience gained from using them can refine your overall approach, reinforcing key techniques for managing harsh sunlight.
How to Shoot and Edit Harsh Light
Conclusion: Better Midday Photos with Bright Presets
Harsh midday sunlight doesn’t have to derail your photography plans. With the right techniques and bright, airy presets, you can turn even the most challenging lighting into beautifully polished images.
Shooting at midday requires a different approach compared to the soft, flattering light of golden hour. Bright presets help manage the intense contrasts of midday by lifting shadows, toning down highlights, and creating a balanced exposure - making them a powerful tool for tackling tricky lighting.
While presets provide a great starting point, they’re not a one-size-fits-all solution. Pair them with manual adjustments to fine-tune your photos and retain full creative control, all while saving valuable editing time.
These bright presets don’t just fix lighting issues - they enhance the mood of your images. Whether you’re capturing portraits, landscapes, or street scenes under the midday sun, they can give your photos that luminous, intentional feel. Plus, the time saved in post-processing lets you focus more on framing the perfect shot and catching the right moment.
Check out Presets.io’s expansive collection of bright presets - updated weekly with in-depth guides - to confidently handle midday lighting challenges and elevate your photography.
FAQs
How can bright and airy presets enhance photos taken in harsh midday sunlight?
Bright and airy presets are a great solution for photos taken under harsh midday sunlight. They work by softening intense shadows and reducing the glare that comes from direct light. This is done by increasing brightness, tweaking exposure, and dialing back the contrast to create a more balanced and pleasing image.
These presets also lend a light, pastel-like touch to your photos, giving them a softer, more inviting feel - even in tough lighting conditions. It's an easy way to enhance your photos without much hassle.
How can I fine-tune my photos after using a bright preset to keep them looking natural?
After using a bright preset, you might need to tweak a few settings to keep your photo looking natural. Start with the exposure - adjust it to get the brightness just right. Then, work on the shadows to reveal details in the darker areas. Don’t forget to check the white balance; this is key for keeping skin tones and colors looking true to life. If the photo seems a bit flat, dial down the contrast slightly for a softer, more balanced feel. These subtle adjustments can make your photos look polished while still feeling authentic.
Are bright presets suitable for all photography styles, or do they work better for specific types of photos?
Bright presets work beautifully for photography styles that focus on a soft, luminous, and airy look. Think portraits, weddings, lifestyle, and family photography - these are the genres where bright presets truly elevate the imagery. They enhance natural light and pastel shades, creating a dreamy, light-filled vibe that feels almost magical.
However, these presets might not be the best choice for styles that demand high contrast, moody tones, or dramatic black-and-white effects. Their strength lies in bringing out a bright and uplifting atmosphere, making them perfect for scenes and subjects that thrive in a gentle, light-soaked aesthetic.