
Table of Contents
- How to Fix Harsh Lighting in Lightroom
- Do THIS to FIX HARSH LIGHT in (Lightroom Classic Tutorial)
- Main Lightroom Tools for Fixing Harsh Lighting
- Step-by-Step Guide to Fix Harsh Lighting
- Before and After Examples: Real Photo Transformations
- How to Avoid and Handle Harsh Lighting
- Conclusion: Fix Harsh Lighting Like a Pro
- FAQs
How to Fix Harsh Lighting in Lightroom
Harsh lighting can ruin your photos by creating extreme contrasts, blown-out highlights, and deep shadows. Thankfully, Lightroom offers tools to fix these issues and bring balance to your images. Here's what you need to know:
- Start with Basic Adjustments: Use the Exposure, Highlights, Shadows, Whites, and Blacks sliders to fix overall brightness and recover lost details.
- Fine-Tune with Tone Curve: Adjust specific tonal ranges like highlights and shadows for smooth transitions.
- Use Masking Tools: Apply targeted edits with the Brush, Radial, or Graduated Filters to fix problem areas like overexposed skies or shadowed subjects.
- Soften Harsh Light: Use the Clarity and Dehaze sliders sparingly to reduce midtone contrast and glare.
- Presets for Efficiency: Pre-made presets can save time and ensure consistent results for tricky lighting situations.
Do THIS to FIX HARSH LIGHT in (Lightroom Classic Tutorial)

Main Lightroom Tools for Fixing Harsh Lighting

Lightroom's Develop module is packed with tools designed to help you balance exposure, recover details, and create polished results from even the most challenging photos. With the right approach, you can transform overly bright midday shots or shadow-heavy images into well-balanced masterpieces.
Exposure and Contrast Sliders
The Exposure slider is your go-to tool for adjusting overall brightness. If your photo is overexposed due to harsh sunlight, pull the slider to the left to reduce brightness. On the flip side, if your image is too dark with heavy shadows, move it to the right to brighten things up.
Once you've adjusted exposure, the image might appear flat. That’s where the Contrast slider steps in. This tool restores depth and definition, bringing back some of the natural contrast that can get lost during other edits.
Highlights, Shadows, Whites, and Blacks Controls
These four sliders are the heavy lifters when it comes to recovering details in tricky lighting.
- Use the Highlights slider to tone down overly bright areas by moving it to the left. This is especially useful for pulling back blown-out sections of your image.
- The Whites slider helps fine-tune the overall brightness of the lightest parts of your photo. Adjust it carefully to maintain balance.
For shadow-heavy areas, the Shadows slider brightens dark regions when moved to the right, revealing hidden details. The Blacks slider adjusts the darkest tones, helping you set a strong black point without losing subtle shadow details.
Tone Curve for Fine-Tuning
The Tone Curve gives you precise control over specific tonal ranges, making it a great tool for refining your edits. You can adjust highlights, midtones, and shadows separately to achieve the perfect balance.
A popular technique is the "S-Curve", where you slightly lower the shadows on the left side of the curve and raise the highlights on the right. This method enhances contrast and smooths out harsh transitions between light and dark areas.
Dehaze and Clarity for Softening
The Clarity slider is perfect for softening harsh light by reducing midtone contrast. This works wonders in portraits, where it can tone down intense sunlight without losing important details.
The Dehaze tool is another option, especially for reducing glare or softening overly bright areas. Use it sparingly to avoid overprocessing.
Masking Tools for Specific Areas
Lightroom's masking tools - such as the Brush, Radial Filter, and Graduated Filter - are essential for making targeted adjustments to specific parts of your image.
- The Radial Filter is great for isolating subjects or modifying backgrounds. For example, you can darken an overly bright background or brighten a shadowed face.
- The Brush tool allows for precise adjustments, letting you work on small areas like recovering highlights in specific spots or lightening shadows selectively.
- The Graduated Filter is ideal for correcting uneven lighting across a scene. It gradually transitions your edits, helping to balance exposure in landscapes or other wide compositions.
These tools, when used together, give you the control to refine every detail and fix harsh lighting with precision.
Step-by-Step Guide to Fix Harsh Lighting
Now that you’re familiar with the tools at your disposal, let’s dive into a practical workflow for fixing harsh lighting in your photos. Following this process ensures you tackle the most critical adjustments first before honing in on the finer details.
Import and Set Up Your Photo
Start by importing your photo into Lightroom's Library module. Once it’s imported, switch over to the Develop module, where all the editing magic happens. Before making any changes, zoom in to 100% to spot trouble areas like blown-out highlights, deep shadows, or uneven lighting.
Take a look at the histogram in the upper-right corner of the Develop panel. If you notice spikes hitting the edges on the left or right, it means you’ve got clipped shadows or highlights that need immediate attention. The histogram serves as your guide, helping you prioritize what to fix first. Begin by addressing the overall exposure before moving on to specific areas.
Make Overall Adjustments First
Head to the Basic panel to start adjusting the overall exposure. If your photo is too bright, drag the Exposure slider to the left. If it’s too dark, move the slider to the right to brighten things up.
Next, tackle clipped highlights by pulling the Highlights slider to the left. This helps recover blown-out white areas. To lift details hidden in dark shadows, push the Shadows slider to the right.
Fine-tune the extremes of your tonal range using the Whites and Blacks sliders. These adjustments help Lightroom interpret the brightest and darkest areas more accurately, giving you better control over the image’s tonal balance. After making these corrections, your photo might look a bit flat - use the Contrast slider to bring back depth and definition.
Check your white balance too. Harsh lighting can create unwanted color casts, so adjust the Temperature and Tint sliders as needed. For a quick fix, use the Eyedropper Tool on a neutral white or gray spot in your photo to correct the colors.
Fix Problem Areas with Selective Edits
Once the overall adjustments are in place, shift your focus to specific problem areas using Lightroom’s masking tools. A Radial Filter is great for isolating your subject and applying different settings to the background - handy when your subject is well-lit but the background needs balancing.
The Brush tool is another powerful option. Use it to paint over areas that need highlight recovery or shadow lifting. Adjust the brush size and feathering for smooth, natural blending.
For scenes like landscapes with uneven lighting - such as a bright sky and a darker foreground - the Graduated Filter is your best friend. It creates a gradual transition between adjustments, balancing exposure without introducing harsh lines.
Apply Final Adjustments
After fine-tuning the problem areas, it’s time for the finishing touches. Use the Tone Curve to add subtle contrast by creating an S-curve, which enhances the overall depth of your image. Adjust the Clarity slider to either sharpen edges or soften the photo, depending on your desired look.
If harsh lighting has introduced graininess, head to the Details panel and use the Noise Reduction slider to smooth out the image. For photos affected by atmospheric haze or intense sunlight, the Dehaze slider can help. Keep things subtle here - these tweaks should enhance your photo without making it look over-edited.
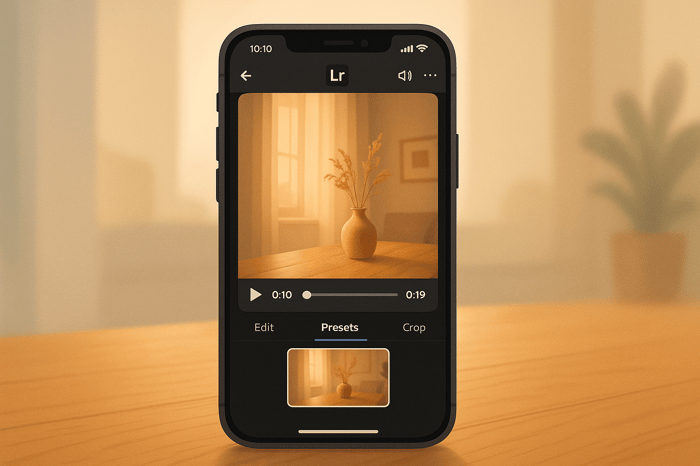
Speed Up Your Workflow with Presets.io
Want to save time? High-quality presets can simplify your workflow and deliver consistent results. After fine-tuning your manual edits, consider using presets to streamline future projects. Presets.io offers collections tailored for tricky lighting situations, including options for balancing harsh highlights and recovering shadow details.
For dramatic lighting, their cinematic presets work wonders, while their aesthetic options can soften harsh sunlight for a gentler look. Instead of starting from scratch every time, apply a preset as your starting point and refine it using the techniques outlined above. It’s a game-changer for speeding up your editing process while maintaining high-quality results.

The Master Preset Bundle

$57.00
$672.00
The Master Preset Bundle Every Style. Every Platform. One Download Get 56 high-quality Presets.io collections in one complete bundle — designed to help you edit faster, stay consistent, and get professional-looking results in seconds. Get All High-Quality Preset Collections For… continue reading
Before and After Examples: Real Photo Transformations
Seeing the techniques applied in real scenarios can make a world of difference. Below, you'll find two examples that showcase how the methods we’ve discussed can rescue photos affected by harsh lighting conditions. These examples highlight both overall and targeted fixes.
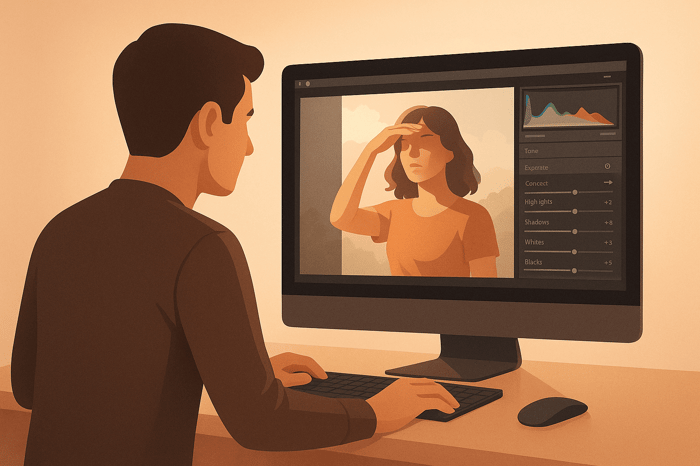
Example 1: Fixing Overall Lighting Issues
Imagine a portrait taken in the glaring midday sun. Harsh shadows form under the eyes and nose, while the forehead is overexposed. The original photo suffers from classic harsh lighting problems: the highlights are clipped, as shown by a histogram spike on the right, and the deep shadows create an unflattering contrast.
To address this, start by reducing the Exposure by -0.8 to tone down the brightness. Then, tweak the following settings to balance the tonal range:
- Highlights: -85
- Shadows: +45
- Whites: -25
- Blacks: +15
Finally, increase the Contrast by +20 to restore depth without reintroducing the harshness.
The result? A well-lit portrait with natural skin tones and clear details. The harsh midday lighting is replaced with a soft, professional-quality look.
Example 2: Targeted Adjustments for Specific Areas
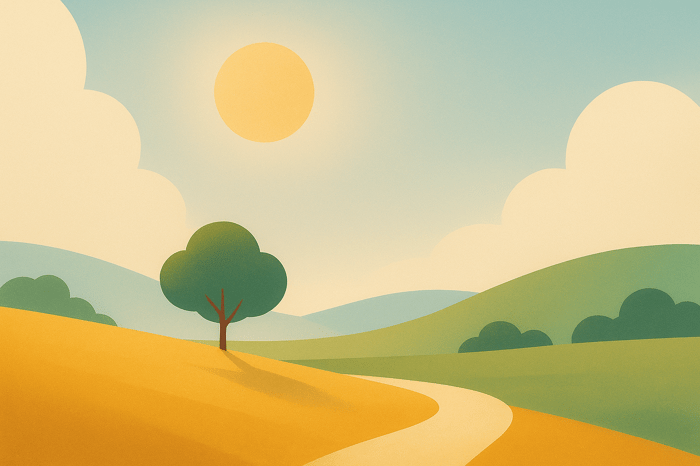
Now, consider a golden hour landscape photo. While the scene is bathed in warm light, part of it is overexposed due to direct sunlight, and the shadowed areas lack detail, appearing muddy. This uneven lighting requires localized adjustments.
Using masking techniques, start with a Graduated Filter applied from the bright sky downward. Adjust the following settings:
- Exposure: -1.2
- Highlights: -75
- Dehaze: +25
Next, focus on the shadowed foreground. Apply a mask to boost the Shadows by +60 and the Exposure by +0.5, ensuring smooth transitions with feathered edges.
To enhance a specific element, like a rock formation in the mid-ground, use a Radial Filter to add selective contrast and clarity. This naturally draws attention to the focal point without any obvious signs of editing.
The result is a balanced landscape where every part of the image contributes to the composition. The lighting now guides the viewer’s eye through the scene, rather than distracting from it.
Quick Fixes with Presets.io
For those short on time, Presets.io offers an efficient solution. Applying an aesthetic preset can instantly correct exposure, highlights, and shadows. A quick fine-tuning - like increasing Exposure by +0.2 and Shadows by +15 - can perfect the result. These presets handle the heavy lifting, such as highlight recovery and shadow adjustments, while also adding subtle color grading to enhance the image.
For high-contrast situations, the cinematic presets work wonders, softening harsh digital tones and adding an organic, film-like quality. They even introduce gentle grain and color characteristics, turning harsh lighting into an intentional artistic choice.
This approach cuts editing time dramatically - from 15-20 minutes down to just 2-3 minutes - while still delivering polished, professional results. With the technical corrections handled, you’re free to focus on the creative finishing touches.
How to Avoid and Handle Harsh Lighting
Harsh lighting can be a challenge for photographers, but with the right techniques, you can manage it effectively. While editing tools like Lightroom can help fix harsh lighting issues, it’s always better to address these problems during the shoot. This saves time and ensures better results.
Shooting Tips to Avoid Harsh Lighting
The golden hour - the hour after sunrise and the hour before sunset - is a photographer's secret weapon. During this time, the sun is low on the horizon, providing soft, diffused light that naturally reduces harsh shadows and overexposed highlights.
If you have to shoot during midday, try positioning your subjects in open shade. Look for shade created by trees, buildings, or overhangs to avoid direct sunlight. For portraits, turn your subject away from the sun and use a reflector to bounce soft light back onto their face. You can even use a simple white poster board as a reflector to balance out the lighting.
For even more control, consider diffusion. A diffuser panel or even a white bedsheet can soften sunlight, making it less harsh and more flattering.
Indoor photographers should pay attention to window light. North-facing windows are ideal for soft, consistent light throughout the day. East and west-facing windows, however, can create strong directional light at certain times. To soften this, use sheer curtains as natural diffusers - they reduce harshness without blocking the light entirely.
Editing Tips for Natural Results
When editing photos with harsh lighting, subtlety is key. Avoid making drastic changes, as these can strip the image of its natural feel. For instance, when adjusting highlights, start with small changes - try reducing them by -20 or -30 instead of immediately dropping them to -100. This gradual approach keeps the photo looking balanced.
Feathering is essential when using masking tools. Set the feathering to at least 50-75% to create smooth transitions between edited and unedited areas. Hard edges from masks can make your edits look unnatural.
For portraits, pay special attention to skin tones. Overcorrecting shadows can make skin look overly bright, while aggressive highlight recovery can leave it looking flat. Use the Alt/Option key while adjusting to preview the affected areas and ensure your edits stay natural.
Harsh lighting can also impact color temperature. Shadows often appear cooler (with a bluish tint), while highlights lean warmer (with a yellowish tint). After fixing exposure issues, fine-tune the white balance to maintain consistent colors across the image.
To streamline your workflow, combine these techniques with presets for efficient editing.
Try Different Presets.io Collections
Presets.io offers a variety of collections tailored to handle tricky lighting situations. These presets are designed to simplify the editing process while achieving polished results.
- The aesthetic presets are great for softening harsh digital lighting while keeping colors vibrant. They include built-in tools for recovering highlights and lifting shadows, making them ideal for quick fixes on overexposed or high-contrast photos.
- For dramatic lighting, the cinematic collection adds a film-like quality to your images. These presets introduce subtle grain and color grading to mask heavy digital corrections, creating smoother tonal transitions and a more polished look.
- The vintage presets naturally compress highlights and lift shadows, mimicking the qualities of film. This makes them particularly effective in taming overly bright areas while adding a distinctive character to your images.
- The film look presets are perfect for outdoor photos taken in challenging midday conditions. They replicate the smooth highlight rolloff and shadow detail of analog film, giving harsh digital captures a more natural, pleasing aesthetic.
Each preset collection offers a unique way to tackle harsh lighting. Aesthetic presets are great for clean, modern edits, while cinematic options add mood and atmosphere. Vintage and film presets solve technical issues while giving your photos a distinct style. Experiment with these collections to find the best fit for your lighting challenges and creative vision.
Conclusion: Fix Harsh Lighting Like a Pro
When you know how to tackle harsh lighting, what once seemed like a challenge becomes an opportunity to create stunning images. Tools like the exposure and contrast sliders help with broad adjustments, while controls for highlights, shadows, whites, and blacks give you the precision to fine-tune your shots. To take things a step further, the tone curve and masking tools allow you to focus on specific areas for even greater control.
The secret to professional-looking results lies in layering your edits. Start with overall exposure adjustments, move on to selective tweaks, and finish with subtle refinements. This step-by-step approach not only keeps your edits natural but also avoids the risk of overcorrecting.
For a more efficient workflow, consider incorporating presets into your process. Collections like those from Presets.io are excellent for speeding things up and ensuring consistency. They provide a solid foundation, which you can then customize to suit your unique style.
Of course, the best way to deal with harsh lighting is to avoid it when possible. Shooting during the golden hour or using reflectors can save you hours in post-processing. But when you can’t avoid it, Lightroom’s tools and high-quality presets can turn even the harshest light into a polished masterpiece.
FAQs
How can I avoid harsh lighting when taking photos?
To avoid harsh lighting in your photos, aim to shoot during the golden hour - the hour right after sunrise or just before sunset. During this time, natural light is softer and more flattering. If you have to shoot under the bright midday sun, consider using a diffuser to soften the light. Don’t have one? A simple white sheet can do the trick. You can also use a reflector to bounce light into shadowed areas, creating a more even exposure.
On the technical side, tweak your camera settings to handle the brightness. Set a low ISO, such as ISO 100, to minimize noise. Pair that with faster shutter speeds and smaller apertures to better control the light entering your lens. Finally, plan ahead by positioning your subject in shaded areas to naturally reduce the intensity of direct sunlight.
What mistakes should I avoid when fixing harsh lighting in Lightroom?
When working to fix harsh lighting in Lightroom, there are a few missteps you’ll want to avoid to keep your edits looking natural:
- Overdoing the sliders: Pushing sliders like exposure, highlights, or shadows too far can lead to issues like added noise, halo effects, or unnatural colors creeping into your image. Subtlety is key here.
- Skipping local adjustments: Relying solely on global edits can make your photo appear flat and lifeless. Instead, make use of tools like the brush or radial filter to adjust specific areas and create a more balanced, realistic result.
- Over-relying on the temperature slider: Using only the temperature slider to add warmth can produce tones that feel off. For better results, balance temperature adjustments with tweaks to tint and vibrance.
By focusing on small, calculated changes and incorporating Lightroom's local adjustment tools, you can tame harsh lighting while keeping your photo polished and natural.
Can Lightroom presets help fix harsh lighting quickly and consistently?
Using Lightroom presets can be a game-changer when working with photos taken in harsh lighting. They allow you to quickly adjust multiple settings - like exposure, highlights, and contrast - all in one go, saving you the hassle of making manual edits for each image.
What’s even better is that presets aren’t one-size-fits-all. You can tweak them to suit the unique lighting conditions of your photo, giving you the flexibility to achieve the exact look you’re going for. This makes them a handy tool for producing polished, professional-quality images without spending hours on edits.