
The Ultimate Guide to Photo Presets: Make Your Photos Pop in Minutes
Photo presets are pre-defined editing settings that transform your photos instantly, saving time and ensuring a consistent look. Whether you're a beginner or a pro, they help you:
- Save Time: Edit multiple photos quickly with batch editing.
- Maintain Consistency: Create a uniform style across your images.
- Learn Editing: Understand how adjustments like exposure, contrast, and color tones work.
Popular photo presets like Honey & Gold (warm tones for nature), Lemon (bright tones for portraits), and Slate & Ivory (clean, film-inspired looks) cater to different photography styles. Tools like Adobe Lightroom make applying and tweaking photo presets simple, even on mobile. Platforms like Presets.io offer curated collections to match your creative vision. Ready to edit faster and smarter? Let’s dive in!
How to Use Presets in Lightroom
How to Use Lightroom Presets
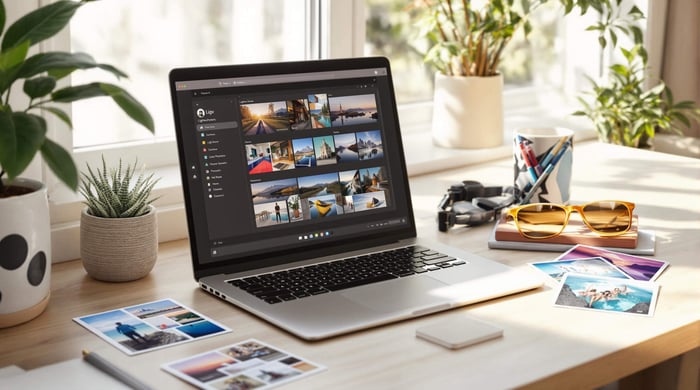
Adobe Lightroom is a go-to tool for editing photos, known for its ability to handle presets efficiently on both desktop and mobile platforms.
Steps to Create and Apply Presets
To use photo presets, start by downloading and importing them into Lightroom's Develop module. They’ll be automatically sorted for quick access. Pick a photo, select a preset from the panel, and Lightroom will apply the adjustments instantly.
Want to create your own photo presets? Follow these steps:
- Edit a photo until you achieve the look you want.
- Click the "+" icon in the Presets panel.
- Choose which adjustments to include in your preset.
- Give it a name and decide where to save it.
Tweaking Presets to Match Your Style
Presets are great for starting edits, but they often need some adjustments to suit your specific photo. Here’s a quick guide:
| Adjustment Type | Areas to Tweak |
|---|---|
| Basic Tone | Exposure, Contrast, Highlights |
| Color | Temperature, Tint, Vibrance |
| Detail | Sharpening, Noise Reduction |
Start by making small changes to basics like exposure or contrast. Once the image looks closer to your vision, you can dive into more detailed settings. This way, you keep the preset's overall look while tailoring it to your photo. If you like the final result, save it as a new custom preset to make future edits faster.
Lightroom’s mobile app includes many of the same preset features as the desktop version, making it easy to edit wherever you are [1]. Whether you're at your desk or on your phone, you can maintain a consistent editing style.
Once you're comfortable creating and adjusting presets, you can start applying them to multiple photos for efficient editing.
Finding the Best Presets for Your Photos
Choosing the right presets can simplify your editing process and help you maintain a consistent look across your photos. Below are some top collections and resources to improve your workflow.
Top Preset Collections to Explore
The best presets depend on your photography style and the types of scenes you typically shoot. Here are a few standout options:
| Preset Collection | Ideal For |
|---|---|
| Mastin Labs | Replicating classic film tones |
| Luxe Lens | Warm, natural portraits |
| DVLOP | A variety of styles for different genres |
Luxe Lens is known for its warm, organic portrait presets, while DVLOP offers a wide range of styles, created in collaboration with professional photographers, making it suitable for many genres.
Presets.io: A Reliable Source for Presets
Presets.io has become a go-to platform for photographers looking for high-quality presets. It offers:
- Regularly updated collections with a variety of styles.
- Compatibility with multiple platforms, including Lightroom, Capture One, and Luminar NEO.
- Step-by-step guides for easy installation.
What sets Presets.io apart is its carefully curated collections tailored to specific styles, ranging from vintage-inspired looks to sleek, modern presets.
With these resources in hand, you're ready to take your editing process to the next level. Next, we’ll look at how to make the most of these presets in your workflow.
Tips for Getting the Most Out of Presets
Photo presets can make your editing workflow much faster and more efficient. Here’s how to use them effectively and achieve professional-quality results in no time.
How to Edit Multiple Photos with Presets
Batch editing with presets is a great way to save time. In Lightroom, start by selecting a photo that represents the group, apply your preset, and adjust it as needed. Once you're happy with the result, use Lightroom's sync tool to apply those settings to similar images. You might still need to tweak exposure or white balance for a few shots, but this method can cut down your editing time significantly.
Using Multiple Presets Together
Layering presets can help you create personalized looks. Here's how some combinations work:
| Preset Combination | Ideal For | Outcome |
|---|---|---|
| Base + Color Grade | Portraits | Natural skin tones with added mood |
| B&W + Grain | Street Photography | Classic, film-inspired black-and-white effects |
To experiment, start with a base preset and then fine-tune with others for subtle enhancements. This method not only speeds up your process but also helps you craft distinctive styles that reflect your creative vision.
These techniques will help you take your editing skills to the next level while keeping your workflow efficient and effective.
Advanced Preset Techniques and Resources
How to Fine-Tune Presets
Start by selecting a preset, then tweak it using Lightroom's tools to match your creative goals. Here's a quick guide to refining presets:
| Adjustment Type | Key Settings to Modify |
|---|---|
| Basic Tone | Tweak exposure, contrast, highlights, and shadows to balance the image |
| Color Grading | Use split toning, color mix, and white balance to set the mood |
| Detail | Adjust texture, clarity, sharpening, and noise reduction for sharper results |
Save your changes as custom presets to maintain consistency and speed up future edits. Once you're comfortable with adjustments, building a broader library of presets can streamline your editing process even further.
Where to Find More Presets
There are plenty of preset marketplaces offering options for all kinds of styles. For example, Presets.io provides curated collections and guides, with regular updates featuring aesthetic, cinematic, and vintage looks.
If you're looking to expand your collection, check out these reliable sources:
- DVLOP: Known for film-inspired presets and bold black-and-white styles.
- Luxe Lens: Offers collections tailored for portraits, weddings, and landscapes.
Adobe also offers tutorials to help you customize presets to suit your projects [1]. Remember, presets are just starting points - they’re there to help you bring your creative vision to life faster and more efficiently.
Conclusion
Why Use Presets?
Presets simplify photo editing in a big way. They save time, keep your editing style consistent, and even help you learn advanced techniques. Plus, they’re perfect for handling large batches of photos, making them a go-to for photographers with extensive collections.
Your Next Steps
Start with Lightroom’s built-in presets to get comfortable with the basics. Once you’ve got the hang of it, try experimenting with different styles to discover what works best for your photography. Adjust settings to create a look that’s uniquely yours. For inspiration, check out platforms like Presets.io, which offer a wide range of collections. DVLOP is a great option for film-inspired presets, while Luxe Lens focuses on portrait and wedding photography collections.
If you want to sharpen your skills, Adobe’s tutorials are a great resource [1]. As mentioned earlier, the key is to experiment and tweak presets to match your style. This approach can help you achieve professional-level results with less effort, making presets an invaluable tool for photographers at any level.