Table of Contents
Moody Tones for Portrait Photography
Moody portrait photography emphasize atmosphere and emotion through deep shadows, muted colors, and selective lighting. This style creates cinematic, dramatic effects by focusing on the subject's essence rather than technical perfection. Here's how to achieve it:
- Lighting: Use low-key setups, single light sources, and creative shadow techniques like window blinds or branches.
- Editing Basics: Underexpose by 1–2 stops, adjust contrast (+15 to +40), and use tone curves for depth.
- Color Grading: Desaturate greens, blues, and purples while enhancing oranges for vibrant skin tones.
- Local Adjustments: Highlight facial details, refine skin tones, and isolate the subject with masking tools.
- Presets: Tools like Presets.io offer collections like "Deep Moody" and "Film Noir" to streamline your workflow.
A moody portrait strip away distractions, focusing on emotion and storytelling. With practice, you can craft a moody portrait that leaves a lasting impression.
What Makes Moody Tones Work
What Are Moody Tones
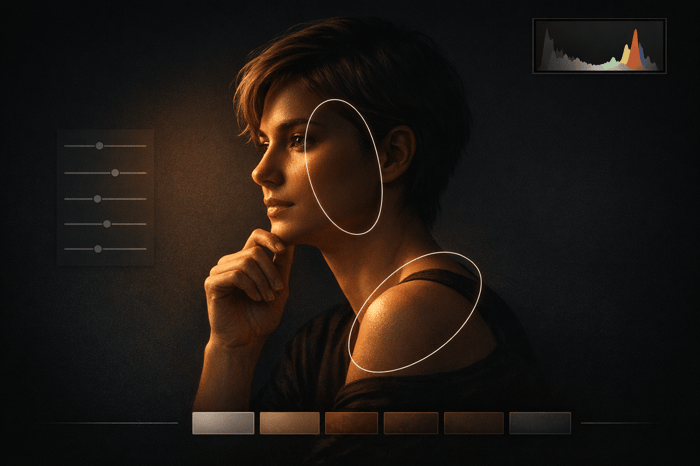
Moody tones rely on low-key lighting to create striking portraits, where deep shadows dominate, and only specific features are illuminated. This effect is often achieved with a left-shifted histogram, resulting in an image where atmosphere takes center stage over brightness.
A key characteristic of this style is its muted color palette, achieved by desaturating colors - particularly greens and yellows - during post-processing. This tweak lends the image an almost ethereal quality. To enhance this aesthetic further, many photographers add texture and grain, mimicking the raw, nostalgic feel of film photography. A matte finish, created by lifting the black point on the tone curve (making blacks appear as dark gray), adds to the overall moodiness.
Lighting is equally critical. A single light source positioned at a 45-degree angle or from behind can sculpt the subject's features, casting dramatic shadows that give the image depth. Photographers often use creative techniques, like casting shadows with window blinds, curtains, or even branches, to add visual interest. For heightened drama, narrow beams of light may be used to highlight specific areas - like the eyes or lips - while the rest of the frame is engulfed in shadow.
Why Use Moody Tones in Portraits
Moody tones go beyond technical execution; they transform the way stories are told through portraits. Photographer Susana Bodamer captures this sentiment perfectly:
Moody photography isn't about darkness for its own sake - it's about storytelling.
By removing the distraction of vibrant colors, often through desaturation or even black-and-white conversion, the viewer's focus is drawn directly to the subject's expression and the emotions conveyed. The interplay of shadows and selective highlights creates an intimate, mysterious atmosphere that sparks curiosity and invites interpretation. This cinematic appeal makes a moody portrait perfect for imagery that aims to evoke deeper thought or suggest a hidden narrative.
Interestingly, the technique isn't limited to somber or serious themes. Photographer Taya Ivanova explains that moody photography is shaped by lighting and editing choices rather than the subject's mood. Even a joyful expression can work within this style if the tonal approach aligns. Using large apertures (f/1.2 to f/4) adds softness and a dreamlike quality, making portraits feel more emotional and less clinical.
These artistic and technical aspects create the foundation for fine-tuning images in Lightroom.
sbb-itb-b27063b
How to Edit a DARK MOODY Portrait with Lightroom - Step by step
How to Create Moody Tones in Lightroom
Step-by-Step Guide to Creating Moody Portrait Tones in Lightroom
Adjusting Exposure and Contrast
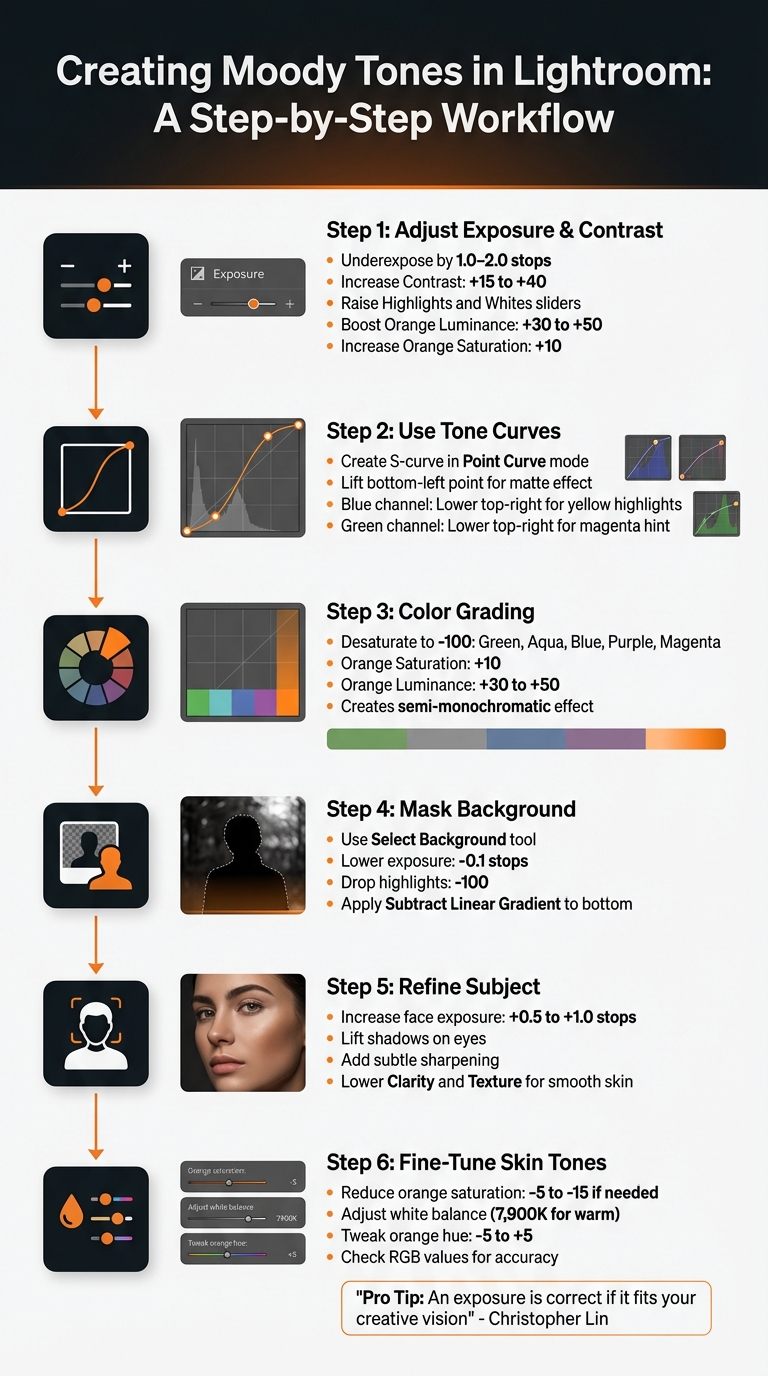
To achieve moody tones, start by intentionally underexposing your image. Instead of darkening shadows in post-processing, lower your base exposure by 1.0 to 2.0 stops. This technique shifts the histogram to the left, emphasizing shadows and minimizing highlights, creating what’s known as a "low key" look.
Christopher Lin, CEO of SLR Lounge, suggests a slightly unconventional method:
Simply darken your exposure 1.5 to 2.5 stops, and then raise your Highlights and Whites sliders.
This approach helps create contrast against darker backgrounds. If underexposing dulls skin tones, head to the Color Mixer. Increase the Orange Luminance (+30 to +50) and slightly boost Orange Saturation (+10) to keep skin tones vibrant and distinct against the moody backdrop.
Next, adjust the Contrast slider to a range between +15 and +40. This step enhances the separation between your subject and the darker areas, reinforcing the overall dramatic feel. Once your base exposure and contrast are set, it’s time to refine the tonal depth with curves.
Using Curves for Tonal Depth
For precise control, switch to Point Curve mode. Create an S-curve by anchoring the midtones with a point in the center, then adding another point in the lower-left quadrant and pulling it downward. This deepens the shadows while keeping them natural and not overly processed.
To achieve the signature matte effect, adjust the bottom-left point of the Tone Curve (representing blacks) by lifting it slightly upward. This softens the pure black tones into dark grays, giving your image a faded, film-like quality. If needed, drag this point slightly to the right to "crush" the blacks, maintaining depth and weight in the darkest areas.
For a warm, cinematic glow, tweak the color channels. In the Blue channel, lower the top-right point to introduce yellow tones into the highlights. Then, in the Green channel, slightly lower the top-right point to add a hint of magenta. Together, these adjustments create a rich, golden-hour-inspired warmth that enhances your image’s mood and prepares it for color grading.
Color Grading for a Moody Palette
With contrast and curves defining the atmosphere, move on to refining your color palette. A moody portrait often relies on selective color isolation. In the HSL panel, desaturate green, aqua, blue, purple, and magenta tones by setting their saturation to –100. This creates a semi-monochromatic effect, allowing skin tones (oranges) to stand out and draw attention to the subject.
To keep skin tones vibrant, set the orange saturation to around +10 and the luminance between +30 and +50. This selective approach eliminates distractions and ensures your subject remains the focal point. As Christopher Lin aptly puts it:
An exposure is correct if it fits your creative vision.
Achieving moody tones often means breaking traditional exposure rules, but these adjustments help craft a captivating atmosphere that aligns with your artistic intent.
The Seasons Bundle

$39.00
$135.00
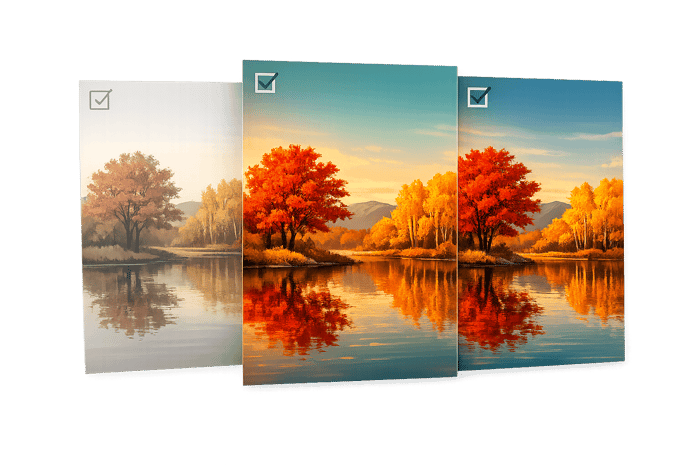
The Seasonal Bundle brings together a versatile range of Lightroom presets inspired by the shifting tones and textures of the year — from cool, muted winter scenes to rich, golden autumn light. Inside, you’ll find collections like Winter, Gingerbread, Old… continue reading
Using Local Adjustments to Refine Portraits
Masking for Subject Emphasis
Once you've nailed your global adjustments, it's time to focus on masking to make your subject stand out. Think of masking as a way to build light after the fact, rather than just slapping on a preset. Photographer Mark McGee summarizes it perfectly:
Stop treating 'moody' as a preset and start treating it like lighting you build after the fact.
Start by using Lightroom's Select Background tool. Lower the exposure slightly - around –0.1 stops - and drop the highlights to –100. This helps neutralize the background into softer midtones. If you notice any distracting halos, enable Auto Mask and use a soft brush to clean up the edges for smoother transitions.
Next, focus on the subject's face. Increase exposure by 0.5–1.0 stops to bring out facial details, ensuring they remain clear and sharp. Pay special attention to the eyes - lift the shadows and add a touch of sharpening, but avoid going overboard to keep it natural.
For added depth, use the Subtract Linear Gradient tool on your background mask. Apply it to the lower part of the frame to create a gradual fade, preventing the darker areas from feeling too heavy or abrupt.
Once your subject is properly isolated, fine-tune the skin tones to maintain a natural, warm texture.
Adjusting Skin Tones
After separating your subject with masking, it's time to refine skin tones for a cohesive, moody vibe. Local adjustments can address nuances that global edits might overlook.
If the skin appears too orange, reduce the orange saturation by 5–15 using a local mask. You can also slightly cool the white balance within that mask to counteract any excessive warmth.
To achieve smoother skin, gently lower the Clarity and Texture sliders on the face. This keeps the skin looking soft yet retains an organic, unpolished feel. To draw the viewer's eye, apply selective sharpening to areas like the eyes, freckles, and hair - these subtle details make the portrait pop.
If your edit leans warm, with a white balance around 7,900K, be mindful of ambient lighting. It can sometimes cause skin tones to look muddy or overly brown. Use the HSL panel within your local mask to tweak the orange hue slightly - between –5 and +5. Keep these adjustments minimal for a natural finish. For accuracy, hover over skin areas in the Develop Module and check the RGB values to ensure balanced and realistic tones, even under heavy moody filters.
Using Presets.io to Speed Up Your Workflow

Once you've manually refined your image, you can save time and maintain quality by incorporating curated presets into your editing process.
Finding Moody Presets
Presets are a great way to cut down on editing time without sacrificing professional results. Presets.io offers a variety of collections tailored for a moody portrait, each designed to enhance the dark, atmospheric style photographers often seek.
The Deep Moody Collection (priced at $15.00, down from $27.00) includes 12 presets for both desktop and mobile, along with 12 video LUTs. With a perfect 5.0/5 rating from 8 reviews, users praise this collection as an "excellent starting point for the editing process", delivering "amazing transformations" with just one click. It’s designed to enhance shadows and highlights while maintaining a mysterious, dramatic feel.
For those who prefer warmer tones, the Moody Brunette Collection (also $15.00, regularly $47.00) is ideal. It’s crafted specifically for portraits and street photography, emphasizing light and shadow to create a naturally dramatic look. On the other hand, if you’re drawn to a vintage aesthetic, the Film Noir Collection ($15.00, down from $27.00) replicates the high-contrast, deep-shadow style of 1940s and 50s cinema. With a 5.0/5 rating from 11 reviews, users appreciate how it’s "dark without making the photos hard to see".
Presets.io boasts an overall 4.8/5 star rating from 1,433 reviews and frequently updates its collections to reflect current trends in photography. Once you’ve chosen the perfect collection, you can begin tailoring the presets to fit your unique style.
Customizing Presets for Your Style
Applying a preset is just the starting point. To truly make it your own, you’ll need to customize it to suit your specific vision. Start by working with your existing exposure and contrast adjustments, then fine-tune the preset to enhance your moody aesthetic.
For a deeper, more dramatic effect, try applying the preset at 50–70% strength and lowering the exposure by 1–2 stops. Presets.io highlights that their collections are designed to give you a variety of moody looks quickly, allowing you to focus on perfecting each image.
Adjust the Temperature slider to maintain natural skin tones - use warmer tones (5,500K–6,500K) for indoor portraits and cooler tones (4,500K–5,000K) for outdoor shots. Adding a vignette (–10 to –20) and a touch of grain (5–10) can give your photos a focused, film-like quality.
The HSL panel is another powerful tool for tweaking colors. Desaturate any distracting hues or adjust specific colors to better fit your overall look. For portraits with heavy moody filters, use a Radial Gradient to subtly brighten or sharpen the subject’s face, creating a soft spotlight effect.
Finally, organize your customized presets into folders like "Portrait Basics" or "Skin Tones" to keep your workflow smooth and efficient, especially when working on multiple shoots. These steps ensure your images retain the deep, cinematic quality you’re aiming for while still reflecting your personal style.
Conclusion
Moody portrait photography starts with capturing the right atmosphere in-camera and perfecting it during editing. To achieve this, focus on using directional light, dark backdrops, and slight underexposure to preserve highlight details. These steps create a solid base for further refinement during post-processing.
When editing, tonal adjustments are essential. Fine-tune exposure and contrast to add depth, use the Tone Curve for smooth transitions, and tweak the HSL panel to mute distracting colors. Local adjustments, like radial filters, can help emphasize the mood and direct the viewer's attention.
Kirk Mastin, founder of Mastin Labs, emphasizes this point:
The most important factor to a dark and moody photo happens at the moment you take the photo - not the preset.
While presets can save time, their true power lies in how you customize them. Platforms like Presets.io offer options such as the Deep Moody Collection and Film Noir Collection, providing a professional base for your edits.
Don’t hesitate to experiment. Try desaturating less important colors for an ethereal vibe, adding subtle grain for texture, or converting the image to black and white to highlight emotion and expression. With practice, you’ll develop a distinct style that tells a story and captures the emotion central to moody portrait photography.
FAQs
How do I keep skin tones natural in a moody edit?
To achieve a moody edit while keeping skin tones looking natural, focus on precise adjustments to maintain color accuracy. Be cautious not to oversaturate reds or overly flatten highlights, as these can make skin tones appear unnatural. Instead, use subtle contrast and fine-tune the tone curve to strike the right balance. For even more control, try targeted masking or selective edits to refine highlights and shadows. This approach ensures the skin retains its natural appearance while still embracing the moody aesthetic.
What’s the best way to avoid crushing shadows too much?
When shooting moody portraits, it's all about striking the right balance between light and shadow. To keep shadows rich and full of detail, you need to be intentional with your lighting choices.
Use controlled light sources like spotlights or sunset lamps to shape the mood. These tools allow you to highlight your subject while maintaining texture in the darker areas. The goal is to embrace low light and darkness without letting shadows turn into flat, featureless black.
During editing, handle contrast adjustments with care. Over-darkening shadows might erase important details and flatten your image. Instead, aim to preserve the depth and texture that give your portraits their character.
How can I customize a Presets.io preset for different lighting?
To tweak a Presets.io preset for different lighting conditions, adjust settings such as exposure, contrast, shadows, and highlights in your editing software. These changes help maintain the mood and depth of your portraits, whether you're working with natural light, studio setups, or a combination of both. For detailed, step-by-step instructions on modifying presets, check out the resources provided on Presets.io.