
Table of Contents
- Ultimate Guide to Texture Overlays in Lightroom
- How to use PNG overlays in lightroom classic? | Create stunning Overlay effects in Lightroom classic
- Getting Started with Texture Overlays in Lightroom
- Advanced Techniques for Using Texture Overlays
- Creative Applications of Texture Overlays
- Tips for Choosing and Managing Texture Overlays
- Conclusion
- FAQs
Ultimate Guide to Texture Overlays in Lightroom
Texture overlays in Lightroom can transform your photos by adding depth, mood, and style. Whether you're working on portraits, landscapes, or artistic projects, overlays allow you to layer visual elements like fabric, fog, or peeling paint onto your images. Lightroom's tools, such as the Texture slider and masking features, make the process precise and efficient. Here's what you need to know:
- What are texture overlays? They are visual layers added to photos to enhance details or introduce effects like mist, snow, or grunge.
- Why use Lightroom? Its non-destructive editing and tools like the Texture slider allow you to adjust textures without losing image quality.
- Who benefits? Portrait, landscape, and macro photographers, as well as digital artists, can all use overlays to achieve unique effects.
- How to start? Import textures or use a comprehensive preset bundle in Lightroom, apply them using blending modes (e.g., Soft Light, Multiply), and adjust opacity for balance.
This guide covers everything from importing textures to advanced techniques like masking and combining multiple overlays. By experimenting with these methods, you can create striking, polished images tailored to your vision.
How to use PNG overlays in lightroom classic? | Create stunning Overlay effects in Lightroom classic
sbb-itb-b27063b
Getting Started with Texture Overlays in Lightroom
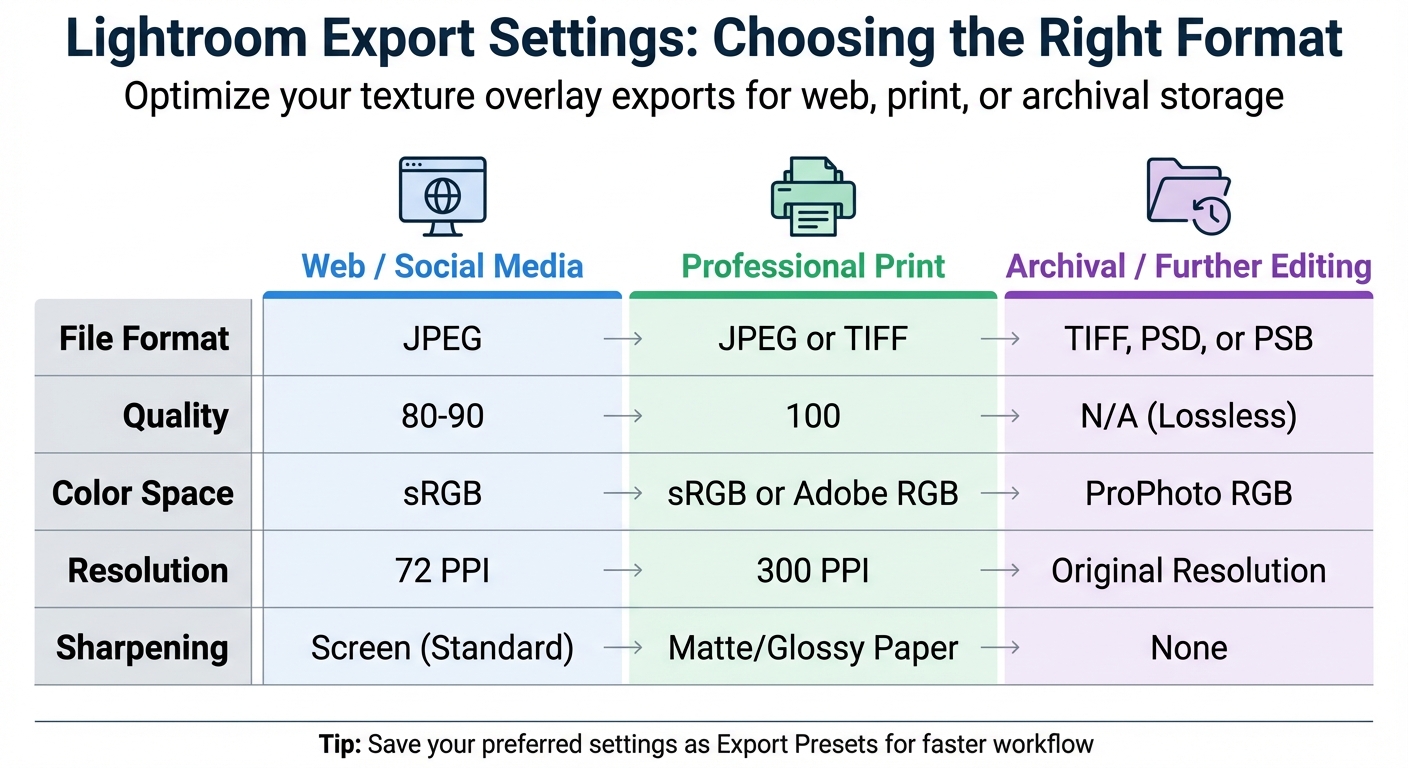
Lightroom Export Settings Guide for Web, Print, and Archival Use
Dive into the world of texture overlays in Lightroom by following these straightforward steps.
Importing Textures into Lightroom
Before you can apply texture overlays, you need to add them to your Lightroom catalog. Start by opening the Library module and clicking the Import button, or head to File > Import Photos and Video. In the Import window, use the Source panel to locate the folder where your texture files are stored.
Select the texture files you want by ticking their checkboxes. At the top of the Import window, choose the Add option to catalog the textures without moving them from their current location. To make locating them easier later, use the Apply During Import panel to add keywords like "grunge", "paper", or "bokeh".
"Lightroom can catalog them [textures] perfectly for you, so when you want to use them in Photoshop, you can find what you need very quickly." - Jimmsp, Senior Member, Lightroom Queen Forums
File format matters. Lightroom supports formats like JPEG, TIFF, PNG, PSD, AVIF, and HEIC. Use high-resolution textures for better-quality overlays. For PSD files, ensure "Maximize PSD and PSB File Compatibility" is enabled in Photoshop preferences before importing.
To keep your catalog organized, enable "Don't Import Suspected Duplicates" under the File Handling panel. Once your textures are imported, you’re ready to start applying them to your photos.
Basic Application of Texture Overlays
To apply a texture overlay in Lightroom, layer the texture image directly above your base photo. The blending mode you choose determines how the texture interacts with the image. For beginners, Soft Light is a great starting point as it creates a subtle effect. If you want the texture to stand out more, try Overlay, while Multiply darkens the image and lets the texture dominate by removing white areas.
Once you've selected a blending mode, tweak the opacity to control the intensity. A range of 60% to 85% often works well for a balanced look.
For portraits or images where you want to retain specific details, use masking to remove the texture from areas like skin, eyes, or clothing. When masking, keep in mind: "Black conceals and white reveals". Use a soft brush with low opacity to create smooth transitions between textured and untouched areas.
To maintain your photo’s original colors while adding depth, consider desaturating the texture layer before applying it. You can even create your own textures by photographing surfaces like wood, fabric, or metal. Just make sure to use proper exposure settings for sharp, high-contrast results. Once your overlay is perfect, you’re ready to export your masterpiece.
Saving and Exporting Your Edited Photos
Lightroom doesn’t save edits in the traditional sense; instead, you’ll export your finished work as a new file. Use Ctrl+Shift+E (Windows) or Cmd+Shift+E (macOS) to open the Export window.
Choose the right file format based on your needs. For web or social media, JPEG is ideal, while TIFF or PSD is better for professional printing or further editing. If exporting as JPEG, set the quality slider between 80 and 100 for optimal resolution.
"My goal when exporting high-resolution JPEG images is to get as much of the best resolution as possible so I can then throw it onto a drive, onto a cloud, and back it up." - Joy Michelle, Photographer
For web display or most print labs, use the sRGB color space. For high-end printing, consider Adobe RGB or ProPhoto RGB for a broader color range. Set the resolution to 300 pixels per inch (PPI) for high-quality prints, and apply output sharpening based on the medium - Screen, Matte Paper, or Glossy Paper - at a "Standard" amount.
To streamline future exports, save your settings as an Export Preset by clicking "Add" in the Preset panel. You can also use the "File Naming" panel to add labels like "-textured" to distinguish edited images from originals.
| Setting | Web / Social Media | Professional Print | Archival / Further Editing |
|---|---|---|---|
| File Format | JPEG | JPEG or TIFF | TIFF, PSD, or PSB |
| Quality | 80-90 | 100 | N/A (Lossless) |
| Color Space | sRGB | sRGB or Adobe RGB | ProPhoto RGB |
| Resolution | 72 PPI | 300 PPI | Original Resolution |
| Sharpening | Screen (Standard) | Matte/Glossy Paper | None |
Advanced Techniques for Using Texture Overlays
Fine-tuning how textures interact with your photos takes your editing to the next level. Lightroom’s non-destructive editing tools and precision adjustments give you a solid foundation, but these advanced techniques can help you push creative boundaries even further.
Masking and Selective Editing
Lightroom's AI-powered masking tools make it easy to apply textures to specific parts of your image. Features like "Select Subject" or "Select Sky" allow you to target particular areas automatically, saving you from tedious manual work. You can refine these masks further by combining them. For instance, intersecting a sky mask with a linear gradient lets you apply texture to just the upper portion of the sky, creating a smooth, natural transition.
You can also add or subtract masks for pinpoint accuracy. For example, apply a texture to the foreground but subtract the subject to keep it clean. Or invert a subject mask to focus the texture on the background. Manual adjustments with the Brush tool give you even more control.
"Masking refines your best photos." - Andrew S. Gibson, Author and Photographer
For even more precision, try luminosity masking. This technique blends textures based on brightness levels, making it perfect for adding texture to shadows while keeping highlights intact.
Once your masks are set, you can refine the texture application with blending modes and opacity adjustments.
Blending Modes and Opacity Adjustments
Blending modes control how your texture interacts with the photo underneath. Each mode has a neutral color that becomes transparent: white for darken modes like Multiply, black for lighten modes like Screen, and 50% gray for contrast modes such as Overlay.
- Overlay and Soft Light: These modes enhance light and shadow naturally while preserving details. Soft Light offers a gentler effect if Overlay feels too intense.
- Multiply: Ideal for adding texture to darker areas, as it removes white from the texture layer and lets highlights shine through.
- Screen: Great for bright textures like sun flares or dust, as it makes dark areas transparent and emphasizes light elements.
Adjusting the opacity slider is crucial. Lowering it to 20–50% helps textures blend seamlessly into your image. If a mode feels too strong, tweaking the opacity or switching to a softer mode like Soft Light can create a more balanced result. Pre-adjusting texture color and contrast can also refine the effect - brightening specific areas, for instance, can make them disappear when using Multiply.
| Blending Mode Group | Key Modes | Neutral Color | Best Use Case |
|---|---|---|---|
| Darken | Multiply, Darken | Pure White | Enhancing shadows |
| Lighten | Screen, Lighten | Pure Black | Adding light leaks, flares, fog, or snow |
| Contrast | Overlay, Soft Light, Hard Light | 50% Gray | Boosting depth and character |
For quicker edits or inspiration, check out preset collections like those available at Presets.io.
Combining Multiple Overlays for Different Effects
Once you’ve mastered selective editing and blending, try layering multiple textures to create intricate, multidimensional effects. Stacking overlays adds complexity and depth that a single texture can’t achieve.
Take photographer Jason Hahn’s technique as an example. He started with a high-resolution image of galloping horses, added a wood texture background, and then layered another wood texture on top. By using Multiply on the horse layer and Screen on the top wood layer - along with carefully copied and inverted masks to isolate the horses - he created a stunning effect where the horses appeared etched into the wood.
"Stacking multiple textures is a great way to increase variety and find a new look." - Joe Lenton, Photographer
Control each layer’s opacity individually to ensure the textures enhance rather than overpower your image. With selective masking, you can apply textures to specific areas or exclude them from focal points like faces. Desaturating the texture layers removes unwanted color shifts, while a Gaussian blur can create a softer, more shallow depth-of-field effect.
For efficiency, you can copy a mask from one layer, paste it onto another, and invert it to apply contrasting effects to different parts of the image - like the background versus the subject. If you’re using Multiply mode, adding a white vignette to the texture layer can automatically fade the edges, eliminating the need for manual adjustments.
These techniques open up endless possibilities for creative experimentation, giving your images a distinctive and polished finish.
Creative Applications of Texture Overlays
Texture overlays can breathe life into photos, adding depth, mood, and a distinct style across various photography genres.
Adding Character to Portraits and Landscapes
Textures bring dimension to images, making them feel more dynamic and visually engaging. In portrait photography, overlays can introduce painterly effects or soften transitions without requiring elaborate setups. For instance, using layer masks allows you to apply textures to the background while keeping facial details and clothing sharp. This approach enhances plain backdrops without compromising the subject's clarity.
"Textures add layers and help create the illusion of depth, making images more engaging and three-dimensional." - Alana Lee, Creator, The Imaginator Studio
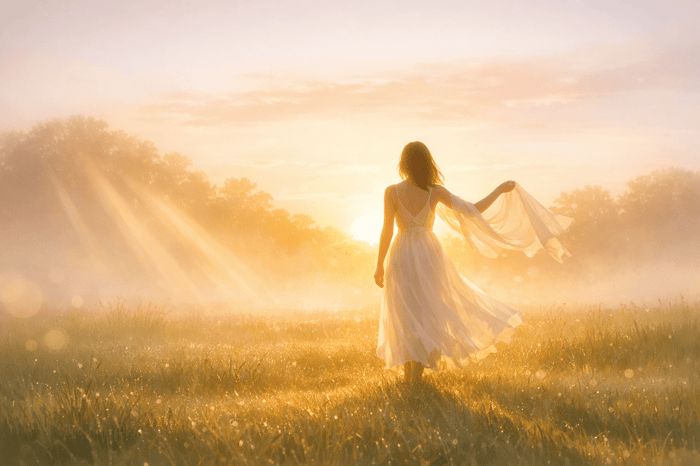
In landscapes, textures can unify colors and soften harsh elements like bright skies. By incorporating effects such as fog, snow, or sun flares, you can create atmospheric storytelling that evokes nostalgia, whimsy, or drama. Digital tools make it easy to experiment with natural elements like falling leaves or stylistic touches like bokeh lights, offering endless possibilities for crafting cinematic or vintage aesthetics.
Creating Cinematic and Vintage Looks
Texture overlays are key to achieving cinematic and vintage vibes. Effects like film grain, light leaks, and subtle adjustments to opacity can transform a photo, enhancing its narrative and adding character. These techniques are particularly effective for creating a cohesive visual identity. By fine-tuning opacity and experimenting with blend modes, you can strike the perfect balance between enhancing the photo and preserving its original details.
"Overlays transform a photograph and can work to improve an otherwise uninspiring image or enhance it dramatically using the power of textures and layers." - Gayle Vehar, Lightroom Instructor
Once you've mastered textures for portraits, landscapes, and cinematic styles, presets can simplify the process even further.
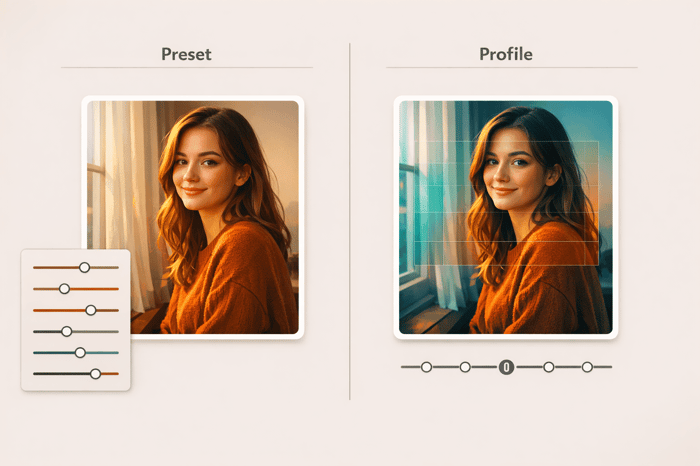
Using Presets for Faster Application
Lightroom presets make applying texture effects quicker and more efficient. These presets combine intricate adjustments - like film grain, tone curves, and split toning - into a single click. For example, platforms like Presets.io offer genre-specific collections tailored for portraits, landscapes, and aerial photography, streamlining your workflow for various scenarios. Presets not only save time but also serve as a learning tool. By exploring the settings in Lightroom’s Effects and Detail panels, you can uncover the techniques behind each adjustment. They also help maintain a consistent style across large photo batches while leaving room for personal tweaks.
"My presets will speed up your workflow in Lightroom and will act as a base to transform your edits." - WithLuke
Luminar Neo Perpetual Desktop Software

$99.50
$119.00
Luminar Neo Perpetual Desktop Software Luminar Neo is a visionary AI-powered photo editor that redefines creativity with cutting-edge technology. Effortlessly achieve studio-quality results with next-gen tools designed to empower and inspire. Harness the power of GenAI to erase distractions, expand… continue reading
Tips for Choosing and Managing Texture Overlays
Keeping your texture library organized can save you a ton of time and make your editing process smoother. By carefully selecting and managing your overlays, you’ll always have the perfect texture at your fingertips without sacrificing image quality.
Selecting High-Quality Texture Overlays
The quality of your texture overlays matters - a lot. Always pick textures that match or exceed your photo's dimensions and resolution to avoid any loss in quality. For instance, using a small 200px/72dpi texture on a large 3,200px/300dpi image will result in visible quality issues. Megan Kennedy puts it best:
"A texture image with matching or greater dimensions and resolution to the destination photograph is ideal. Anything smaller and you could compromise the quality of the finished product".
Natural textures like rust, chipped paint, or weathered stone often work beautifully. If you're capturing your own textures, shoot in RAW to retain every detail.
Also, don’t overlook copyright and licensing. Keep your homemade textures separate from those you’ve downloaded or purchased. As photographer Joe Lenton advises:
"Make sure that you keep your homemade textures and the ones you acquire from others in separate folders, so you don't accidentally confuse the two".
Organizing Your Texture Library
Once you’ve gathered high-quality overlays, organizing them is key to speeding up your workflow. Create a dedicated textures folder on your hard drive, keeping it separate from your main photo library for easier access.
If you’re using Lightroom Classic, take advantage of the "Favorite Sources" feature. Right-click on your texture folder in the Folders panel and select "Mark Favorite" to make it accessible from the Filmstrip in any module. You can also use the Target Collections shortcut (press the B key) to sort and group your textures quickly without affecting your main catalog.
For those working with texture presets, clean up the Presets panel by hiding unused groups and marking your go-to presets as "Favorites." Sites like Presets.io offer curated collections designed for various photography styles, helping you stay consistent and efficient.
Customizing Overlays to Fit Your Style
After organizing your library, it’s time to make those overlays work for your creative vision. If a texture’s color doesn’t quite match your photo, desaturate it to focus on its pattern and contrast. You can also use a Gaussian or lens blur to soften harsh edges, helping the texture blend more naturally into your image.
Consider saving different versions of your textures for various lighting conditions. For example, after tweaking a texture’s contrast, grain, or color, save it as a new preset with a clear, descriptive name.
Another handy tip: Use the white balance eyedropper tool to adjust the texture’s color temperature to better suit your photo. Pair this with Lightroom’s Texture slider in the Effects panel to fine-tune mid-frequency details - either sharpening them for a crisp look or smoothing them out for a subtle finish.
These small adjustments ensure your overlays don’t just fit your photos - they enhance them, setting the stage for an impressive final export.
Conclusion
Texture overlays can breathe life into your photos, adding depth and personality that make your images stand out. This guide walked you through the essentials - importing textures, mastering advanced masking and blending techniques, and managing your library efficiently. With these tools, you can create anything from vintage-inspired looks to bold, cinematic effects.
Now it's time to put these ideas into action. As Lightroom instructor Gayle Vehar wisely says:
"The best way to learn and improve skills using overlays is to play around with them and try different blending modes to create the perfect effect for your photographs. There are no rules with overlays, so have some fun with them."
Experimenting is key to understanding how light, color, and texture interact in your edits. Lightroom gives you precise controls, whether you're fine-tuning with Texture, Clarity, and Dehaze sliders or layering external overlays for a striking transformation. The trick is to keep your edits balanced and natural.
Start simple - try adding one texture to a portrait or landscape. As you grow more confident, you can layer multiple textures and explore more intricate techniques. Each experiment helps shape your editing style. So, grab a few of your favorite photos, collect or create some textures, and dive in. Developing your own artistic flair with texture overlays is not just a skill - it's a creative journey worth every step.
FAQs
What’s the best way to avoid overdoing a texture overlay?
To keep a texture overlay from becoming too overpowering, try using layer masks to precisely control where the texture shows up. You can also tweak the opacity or experiment with different blending modes to create a more subtle and refined effect. This way, you can enhance your image while keeping its overall look balanced and natural.
How do I keep textures off faces but on the background?
To keep textures off faces but apply them to the background in Lightroom, use the masking tools for precise adjustments. Start by creating a mask that excludes the face area. You can manually brush over the face or use Lightroom's AI-powered subject selection to isolate it. Once the mask is set, apply texture effects to the background while leaving the face untouched. Adjust the mask's edges and tweak the opacity for a seamless blend. This method helps maintain natural skin textures while enhancing the background.
Why does my overlay change the photo’s colors, and how do I fix it?
Overlays can change the colors in your photo because of how blending modes and opacity settings interact with the image. To address this, try switching the blending mode to options like "Normal" or "Overlay", and lower the opacity to reduce any unwanted color shifts. You can also use layer masks to control exactly where the overlay is applied, keeping certain areas of your photo untouched.