
Table of Contents
How to Install and Manage Lightroom Plugins
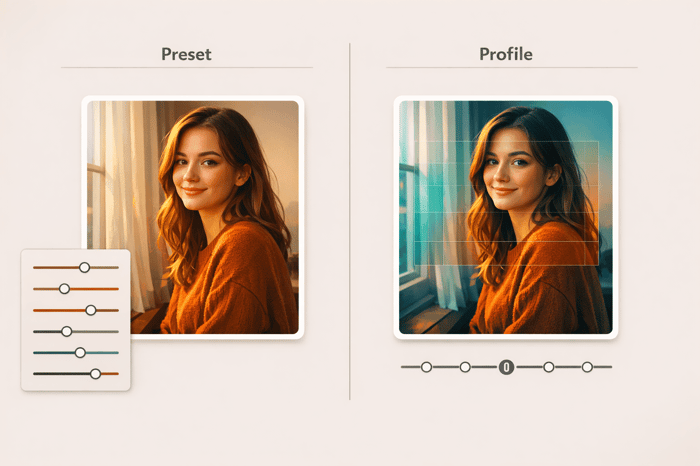
Lightroom(LR) plugins are tools that extend Lightroom Classic's functionality, offering features like advanced export options, metadata handling, or integration with third-party apps. Unlike Lightroom presets, which adjust photo settings, plugins add entirely new capabilities to your editing workflow.
Key Steps to Get Started:
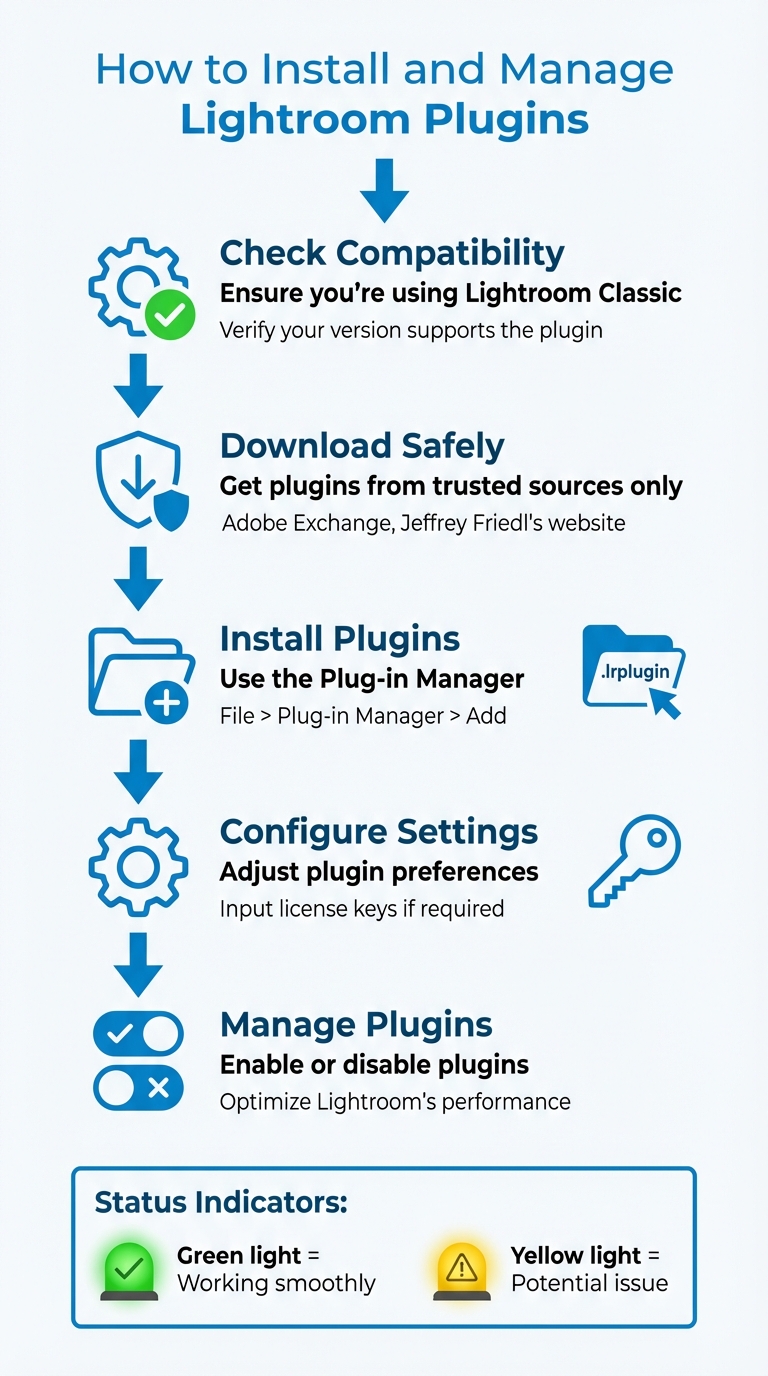
- Check Compatibility: Ensure you're using Lightroom Classic and verify your version supports the plugin.
- Download Safely: Only get plugins from trusted sources like Adobe Exchange or Jeffrey Friedl's website.
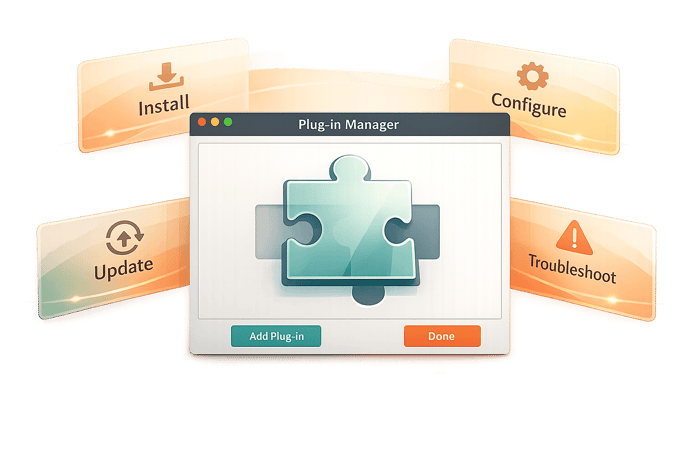
- Install Plugins: Use the Plug-in Manager to manually add plugins or place them in the correct system folder for automatic detection.
- Configure Settings: Adjust plugin preferences and input license keys if required.
- Manage Plugins: Enable or disable plugins in the Plug-in Manager to optimize LR's performance.
Troubleshooting Tips:
- If a plugin fails to load, check file paths, permissions, or compatibility.
- Store plugins in a permanent directory to avoid connection issues.
- Update plugins manually when needed, as LR doesn’t auto-update third-party tools.
Plugins can simplify repetitive tasks and expand LR's capabilities, making them a useful addition to your photo editing toolkit.
5-Step Guide to Installing and Managing LR Plugins
Manually Installing and Managing LR Plugins
sbb-itb-b27063b
Preparing for Plugin Installation
Before diving into plugin installation, make sure your LR setup is ready. Always download plugins from trusted sources to keep your workflow secure. Start by confirming your LR version.
Check Your LR Version
First things first: ensure you're using LR Classic, as plugins are only compatible with this version. To check, navigate to Help > About Adobe Lightroom Classic on Windows or Lightroom > About Adobe Lightroom Classic on Mac.
Plugin developers often specify version requirements on their download pages or in a "Readme" file included with the plugin. Double-check these details to confirm your LR version is supported. If your version is outdated, you may need to update it before proceeding with The Master Preset Bundle or other tools. Starting with Creative Cloud desktop app version 5.8 (released in July 2022), Adobe Exchange introduced automated installation support for Lightroom Classic versions 11.4 and newer.
Once installed, the Plugin Manager (found under File > Plug-in Manager) uses color-coded indicators to show the plugin's status. A green light means everything is working smoothly, while a yellow light signals a potential issue, such as needing an update or resolving compatibility problems. LR expert Rob Sylvan explains:
"A yellow light indicates there may be a problem with the plug-in such as an update being required".
By confirming compatibility upfront, you can avoid frustrating plugin errors down the line.
Now that your version is verified, the next step is to ensure you're downloading plugins from reliable sources.
Download Plugins From Trusted Sources
Plugins interact with your system files, so it's critical to download them only from reputable platforms. Reliable sources include Adobe Exchange, Jeffrey Friedl's "Lightroom Goodies", and The Photographer's Toolbox. These platforms host experienced developers with strong reputations and active user communities.
Before downloading, check for developer documentation and read any included "Readme" files to understand installation requirements. Genuine plugins are typically provided as folders ending in .lrplugin or .lrdevplugin and must include an Info.lua file to function correctly.
How to Install Plugins in LR
Installing plugins in LR is a straightforward process once you've downloaded the plugin and confirmed its compatibility. The Plug-in Manager is your go-to tool for managing installations, whether you're on Mac or Windows. While the steps are similar for both systems, there are slight differences in file paths. Plugins can be added manually through the manager or automatically by placing them in a specific folder.
Installing Plugins on Mac
After downloading and unzipping the plugin, you'll find a folder with the .lrplugin extension. This is the file LR recognizes. For better organization, consider creating a folder like "LR Plugins" in your Documents directory to store your plugins.
- Manual Installation:
Open Lightroom Classic and go to File > Plug-in Manager. Click Add, locate your.lrpluginfile, select it, and click Add Plug-in. Once added, the plugin should display a green light, signaling that it's enabled and ready to use. - Automatic Installation:
Move the.lrpluginfile to the following folder:/Users/[your username]/Library/Application Support/Adobe/Lightroom/Modules/.
If the Modules folder doesn’t exist, you’ll need to create it. After placing the file, restart Lightroom, and it will automatically detect and load the plugin.
Pro Tip:
To quickly find the LRfolder, open Lightroom Classic, go to Preferences, select the Presets tab, and click Show All Other Lightroom Presets. This will open the Finder window where you can locate or create the Modules folder. This trick works the same way on Windows.
Luminar Neo Perpetual Desktop Software

$99.50
$119.00
Luminar Neo Perpetual Desktop Software Luminar Neo is a visionary AI-powered photo editor that redefines creativity with cutting-edge technology. Effortlessly achieve studio-quality results with next-gen tools designed to empower and inspire. Harness the power of GenAI to erase distractions, expand… continue reading
Installing Plugins on Windows
The process on Windows is very similar to Mac, but the file paths differ slightly. After unzipping the plugin, you’ll have a .lrplugin folder. Create a dedicated folder like "LR Plugins" in your Documents directory for easy access.
- Manual Installation:
Open Lightroom and go to File > Plug-in Manager. Click Add, navigate to your.lrpluginfolder, select it, and confirm. Once added, ensure the plugin shows a green light, indicating it’s active. Keep in mind that LR references the folder's location, so avoid moving or deleting the plugin files after installation. - Automatic Loading:
Place the.lrpluginfolder in this directory:\Users\[your username]\AppData\Roaming\Adobe\Lightroom\Modules\.
LR will detect and load any plugins in this folder when it starts up.
Once installed, you can access plugins through File > Plug-in Extras, Library > Plug-in Extras, or within the Export dialog, depending on the plugin's functionality. These tools integrate seamlessly into LR, adding new features to enhance your workflow.
Configuring and Managing Plugins
Configuring Plugins After Installation
To get started, open the Plug-in Manager (File > Plug-in Manager) and check the status of your plugins using the color indicators provided. Many third-party plugins will require you to input a license key or registration code - this can be done in the plugin's properties panel within the Plug-in Manager. Some plugins may also need additional adjustments in Preferences > External Editing, where you can set options like File Format, Color Space, Bit Depth, and Resolution.
If you encounter issues with a plugin after configuration or an update, try using the Reload Plug-in button in the "Plug-in Author Tools" section of the Manager. Alternatively, restarting LR can often resolve plugin-related glitches.
Once all your plugins are configured, it's time to focus on managing them effectively to ensure LR runs smoothly. You might also consider trending LR presets to further streamline your creative workflow.
Managing Multiple Plugins
After setting up individual plugins, use the Plug-in Manager to oversee and maintain all your installed plugins. This tool acts as your control center, allowing you to enable or disable plugins via the Status panel. Disabling plugins you’re not currently using can help improve LR’s performance. If LR starts to lag or behave unpredictably, try disabling non-essential plugins, restarting the program, and re-enabling them one at a time to identify the culprit.
Keep your plugins updated by visiting the developer’s website or using any built-in "Update" buttons within the plugin’s panel. Since LR doesn’t have an automatic update system for third-party plugins, you’ll need to manually replace the .lrplugin folder on your hard drive when updating. Afterward, click Reload Plug-in in the Manager or restart LR to ensure the new version is active. Be aware that only one version of a plugin can be enabled at a time; if you have multiple versions installed, disable or remove the older ones to avoid conflicts.
Important: Once you’ve added a plugin using the "Add" button in the Plug-in Manager, avoid moving or renaming the .lrplugin folder on your hard drive. LR relies on the original file path, and moving the folder will break the connection. To remove a plugin, simply select it in the Manager and click Remove - this option is only available for plugins you’ve added manually.
Troubleshooting Common Plugin Issues
Fixing Installation Failures
When a plugin fails to install, the issue often traces back to incorrect file paths or permissions. If you've added a plugin through the Plug-in Manager but it doesn't show up, double-check that its status is listed as active in the Plug-in Manager.
Another common pitfall is selecting the wrong file type during installation. Make sure to choose the entire .lrplugin folder - not a compressed file like .zip. If you've downloaded a plugin as an archive, extract it first, then use the Add button in the Plug-in Manager to locate and add the .lrplugin folder. On macOS, you might also need to grant LR full disk access. To do this, go to System Settings > Security & Privacy and adjust permissions, especially if the plugins are stored in protected directories. System updates on macOS can sometimes create permission conflicts, so this step is crucial.
If plugins still fail to load or disappear, follow the recovery steps outlined below.
Recovering Missing Plugins
Plugins can sometimes vanish after system updates, catalog changes, or even after switching between catalogs. For example, in August 2021, a Lightroom Classic v10.3 user on macOS Big Sur experienced an issue where third-party plugins like ON1 Suite and Topaz Sharpen disappeared from the "Edit In" menu after opening a catalog from another photographer. Although the Plug-in Manager showed these plugins as "Installed and Running", they were inaccessible. The problem was resolved by manually re-linking the applications in the External Editing preferences for the active catalog.
To recover missing plugins, start by checking Preferences > Presets and unchecking Store presets with catalog. This setting ensures LR looks in the global system folder instead of restricting itself to the current catalog folder, which can sometimes hide plugins. If this doesn’t resolve the issue, reopen the Plug-in Manager and use the Add button to manually locate and re-add your .lrplugin files. For a more seamless experience, store plugins in LR's default Modules folder (refer to earlier installation instructions for the exact file paths).
If LR becomes unstable or crashes, disable all plugins in the Plug-in Manager and re-enable them one by one. This method can help identify any problematic plugins. Additionally, outdated plugins may cause compatibility issues, so check for updates from the plugin developers before reinstalling.
Conclusion
Streamlining how you manage plugins is essential for a seamless LR experience. The process is straightforward: download plugins from trusted sources, unzip them into a dedicated folder, and add them via the Plug-in Manager. Once installed, take the time to configure settings and disable any unnecessary plugins to keep performance running smoothly.
As professional photographer Christopher O'Donnell puts it:
"Presets will perform exhaustive, repetitive tasks for you in LR with the click of a button... while plugins will do tasks that LR alone can't complete – think of them like add-ons".
Presets and plugins each play a unique role in your editing workflow. Presets handle repetitive adjustments with precision and speed, while plugins expand LR’s capabilities by adding features like advanced export options or specialized post-processing tools. Together, they create a balanced toolkit for photographers. If you're looking to enhance your workflow, platforms like Presets.io offer a variety of LR presets - from cinematic tones to vintage aesthetics - that pair well with plugins to deliver both efficiency and creative flair.
To avoid headaches, keep your plugins organized in a permanent directory. This prevents broken file paths and simplifies troubleshooting. If a plugin stops working, especially after a system update or catalog change, the Plug-in Manager is the first place to check its status.
FAQs
Why isn’t my Lightroom plugin showing up after installation?
If your plugin isn’t showing up, it might be listed in the wrong menu. Look under Photo > Edit In, as many plugins don’t appear in Library > Plug-in Extras. Also, double-check that Preferences > Presets > Store presets with catalog is unchecked. If the plugin is still not visible, you can manually add it through File > Plug-in Manager. Lastly, make sure the plugin is properly installed and compatible with your version of Lightroom.
Where should I store plugins so Lightroom doesn’t lose them?
To keep your plugins safe and easily accessible, store them in a specific folder that Lightroom recognizes. By default, this is the "Modules" folder within Lightroom's support directories.
- On Windows:
\Users\[user]\AppData\Roaming\Adobe\Lightroom\Modules - On Mac:
[user]/Library/Application Support/Adobe/Lightroom/Modules
Once stored, use Lightroom’s Plug-in Manager (found under File > Plug-in Manager) to add or enable your plugins. This ensures they stay functional and accessible, even after software updates.
How do I find which plugin is slowing Lightroom down?
To figure out which plugin might be slowing down Lightroom, start by opening the Plugin Manager. You can do this by navigating to File > Plug-in Manager. Once there, check the status of each plugin. A yellow or red indicator means there’s a problem with that plugin. Try disabling plugins one at a time and see if the performance improves. Plugins with a green light are working as expected, so concentrate on those showing warnings or errors to pinpoint and fix the slowdown.