
Table of Contents
- How White Balance Affects Macro Photography Colors
- Your White Balance in your Camera - Get those correct colors in camera.
- How Color Temperature and White Balance Work
- How White Balance Affects Macro Photography Colors
- Methods for Getting Accurate White Balance in Macro Photography
- Comparing White Balance Methods for Macro Photography
- Conclusion: Getting Better Colors in Macro Photography
- FAQs
How White Balance Affects Macro Photography Colors
White balance is key to capturing accurate colors in macro photography. It ensures your camera correctly interprets the light source, avoiding unnatural color casts like blue or orange hues. This is especially important in macro shots, where even small color errors can stand out due to high magnification and shallow depth of field.
Here’s what you need to know:
- White balance adjusts for light temperature: Light sources vary in warmth or coolness, measured in Kelvin (K). For example, daylight is around 5,500K, while tungsten bulbs are about 3,200K.
- Mixed lighting complicates things: Combining natural and artificial light often leads to uneven colors.
- RAWformat saves the day: Shooting in RAW allows you to fine-tune white balance during editing without losing image quality.
- Use tools for precision: Gray cards or custom white balance settings help match your camera to the light source for accurate results.
To get the best results, match your white balance to your lighting, shoot in RAW, and use post-processing tools for fine adjustments. Consistency is key, especially when working on focus-stacked images or series shots.
Your White Balance in your Camera - Get those correct colors in camera.
How Color Temperature and White Balance Work
To truly master color accuracy in macro photography, it’s essential to understand the relationship between color temperature and white balance. These concepts directly influence how your camera interprets and captures the colors in your close-up shots, making them crucial for achieving vibrant and accurate results.
Color Temperature Basics
Color temperature is measured on a Kelvin (K) scale, which spans from warm orange tones at lower values to cool blue tones at higher values. Interestingly, while we associate blue with cold and red with heat in everyday life, the Kelvin scale in photography works in reverse.
- Warm light sources (lower Kelvin values) create orange or yellow tones. For instance, standard tungsten bulbs typically range between 2,700K and 3,000K.
- Cool light sources (higher Kelvin values) produce blue-tinted light. Overcast daylight, for example, measures around 6,000K to 7,000K.
The neutral point on this scale is midday sunlight, which is why many cameras set their "daylight" white balance preset to around 5,500K. This baseline helps photographers understand how different light sources affect their macro shots.
Light Sources in Macro Photography
Lighting can be tricky in macro photography because you're working so close to your subject. Controlling color temperature precisely is essential when capturing fine details.
- Natural light is often the go-to option for its color accuracy. However, it’s not always practical when dealing with tiny subjects that require careful positioning and extended preparation.
- LED panels and ring lights (ranging from 3,200K to 5,600K) offer adjustable color temperatures, but lower-quality LEDs can emit uneven color spectrums, leading to unwanted color casts that are hard to fix later.
- Flash units, including ring flashes designed for close-ups, usually emit light close to 5,500K, mimicking daylight. This makes them a reliable choice for consistent and even lighting.
- Mixed lighting, such as combining daylight (5,500K) with fluorescent light (4,000K), can create challenging color casts. Since your camera can only match one white balance setting at a time, one light source will always introduce some imbalance.
- Fluorescent lights are particularly challenging because they emit light in specific wavelengths rather than a continuous spectrum. Even with proper white balance, they can cause unusual color shifts, which is especially problematic in macro photography where precision matters.
Matching White Balance to Your Light Source
Achieving accurate colors starts with matching your camera’s white balance to your primary light source. While this sounds simple, macro photography often involves multiple light sources or shifting lighting conditions, adding complexity.
Auto white balance (AWB) can struggle in macro scenarios. For example, if your subject is a vibrant red flower or a green leaf, the camera might misinterpret the dominant color and overcorrect, trying to neutralize what it sees as a color cast.
- Manual white balance settings offer more control. Most cameras include presets like Daylight (5,200K), Cloudy (6,000K), Shade (7,000K), Tungsten (3,200K), and Fluorescent (4,000K). These work well under consistent lighting but may fall short in mixed conditions or with specialized macro lighting gear.
- Custom white balance is the most precise option. By photographing a neutral gray or white card under your actual lighting setup, you can calibrate your camera to match the specific conditions. This is especially useful when working with artificial lights or multiple light sources that don’t align with standard presets.
In macro photography, even the color temperature of your background lighting plays a significant role. With shallow depth of field, blurred background tones can subtly influence the overall color balance of your image, making precise adjustments to white balance even more critical.
How White Balance Affects Macro Photography Colors
In macro photography, even a slight mistake in white balance can throw off the entire color palette, drastically altering the mood and feel of the image. This precision becomes even more important when shooting in varied lighting conditions, as macro subjects tend to magnify these errors.
Challenges of Incorrect White Balance
Getting white balance wrong can lead to unwanted color casts that misrepresent your subject. For example, if you photograph a flower under tungsten lighting but use a daylight white balance setting, the image will look overly orange. On the flip side, shooting in shaded light with a tungsten setting can make your subject look unnaturally cool and blue. These color distortions don’t just affect the overall image - they fundamentally misrepresent the subject’s true colors.
In macro photography, where subjects like flower petals, butterfly wings, or dewdrops often dominate the frame, even minor white balance mistakes become glaringly obvious. Unlike in landscape photography, where color casts can sometimes blend into the broader scene, macro photography offers no such camouflage. Every detail is under scrutiny, and white balance errors can make your work look unnatural or even amateur.
Mixed lighting adds another layer of complexity. You might find some parts of your subject properly balanced while others show clear color casts, creating a jarring, uneven look. This mismatch can also affect shadow and highlight details, leading to unnatural tones and diminishing the overall impact of your image.
Why Shooting in RAW Format Helps
One of the best ways to address white balance challenges is to shoot in RAW format. Unlike JPEGs, which lock in white balance settings during capture, RAW files save the original sensor data along with metadata about the camera’s white balance settings. This means you can adjust the white balance later without degrading image quality.
RAW files are particularly useful in tricky macro lighting situations. For instance, when dealing with mixed lighting, you can make precise adjustments in post-processing to ensure even color across the entire image. The ability to tweak color temperature in tiny increments - such as 50 Kelvin - gives you a level of control that in-camera presets simply can’t match.
Another advantage of RAW files is their ability to retain more color information, especially in highlights and shadows. This ensures smooth gradations and prevents harsh transitions that can occur when you push JPEG files too far during editing. With RAW, you also benefit from 16-bit color depth, which allows for significant white balance corrections without introducing issues like color banding or posterization.
Insights from Experts on Color Accuracy
Professional macro photographers stress that accurate white balance is the foundation of color fidelity. When working at close distances, even small changes in lighting can dramatically affect the colors in your shot, making precise white balance adjustments critical.
Research supports this, showing that minor color shifts stand out more in macro photography than in other genres like landscapes or architecture. When you’re capturing highly detailed subjects like insects or flowers, even slight inaccuracies in color can be distracting.
The type of light you use also matters. For example, standard fluorescent lights emit light in discrete wavelengths rather than a continuous spectrum. Even with perfect white balance settings, these gaps in the spectrum can cause certain colors to appear muted or off. This is why many professionals choose high-CRI (Color Rendering Index) lighting, which replicates the continuous spectrum of natural sunlight more closely.
Studies on color constancy - our brain’s ability to perceive stable colors under different lighting - highlight why white balance is so crucial in photography. While our eyes naturally adapt to varying light conditions, cameras don’t. Without proper white balance, the camera captures the exact color cast of the scene, which can look unnatural to viewers expecting color-corrected images.
If you’re using Lightroom presets to enhance your macro shots, starting with accurate white balance is essential. Tools like Presets.io offer specialized macro photography presets, but their effectiveness depends on a well-balanced base image. Proper white balance ensures these creative enhancements complement your work rather than clash with it.

The Master Preset Bundle

$57.00
$672.00
The Master Preset Bundle Every Style. Every Platform. One Download Get 56 high-quality Presets.io collections in one complete bundle — designed to help you edit faster, stay consistent, and get professional-looking results in seconds. Get All High-Quality Preset Collections For… continue reading
Methods for Getting Accurate White Balance in Macro Photography
Achieving accurate white balance is a critical step in macro photography. It ensures that every detail is captured with true-to-life colors, making your images pop while maintaining their natural look. Let’s explore some reliable methods to get it right, both during the shoot and in post-processing.
Using White or Gray Cards
White and gray cards are trusted tools for nailing white balance in macro photography. These cards provide a neutral reference point to help your camera interpret the light source accurately.
Gray cards tend to be more reliable than white cards for macro photography. Why? Gray cards reflect 18% of the light, which matches the standard your camera’s meter is calibrated for. White cards, on the other hand, can sometimes confuse the camera’s metering system, especially in bright lighting, leading to overexposure.
Here’s how to use a gray card effectively:
- Place the card in the same light as your subject.
- Ensure the card fills your camera’s frame.
- Switch to custom white balance mode on your camera and take a reference shot. The camera will analyze the light hitting the card and create a custom white balance setting for that lighting condition.
- Once set, remove the card and continue shooting, keeping the same lighting setup.
For macro photography, using a full-size gray card helps avoid shadows that might distort the reading, especially on small subjects. Many professional macro photographers use a gray card at the start of each focus stacking sequence to ensure consistent color across all the frames they’ll later combine into a single image.
Camera Settings and Presets
Modern cameras come with a variety of white balance options, and knowing how to use them can make a big difference in your macro shots. Auto white balance might work for casual photography, but macro work often requires more precision.
Preset white balance modes like Daylight (5,500K), Shade (7,000K), or Tungsten (3,200K) offer predictable results when you know your light source. For example:
- Daylight works well for most outdoor shots.
- Shade is ideal for cooler light, like under trees or cloudy skies.
Many macro photographers prefer to bypass auto white balance altogether, opting instead for fixed settings or manual adjustments. This approach ensures consistent color across multiple frames, which is crucial for techniques like focus stacking or when shooting a series of related images.
For situations where you frequently use the same lighting setup - like an LED ring light or a specific studio environment - custom white balance presets can save you time. These presets allow you to quickly achieve consistent results without having to adjust settings for every session.
Post-Processing Adjustments
Even with careful in-camera adjustments, post-processing is where you can fine-tune your white balance to perfection. This step is especially important when working with RAW files, which retain all the color data captured by your camera.
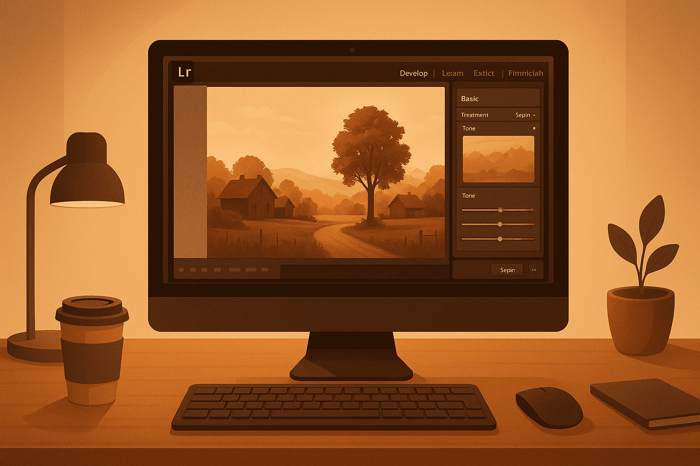
Tools like the eyedropper in Lightroom make this process straightforward. Simply click on a neutral area in your image, such as a white flower petal, a gray rock, or a neutral backdrop, and Lightroom will automatically adjust the white balance for you.
If the automatic tools don’t give you the desired results, you can manually tweak the temperature and tint sliders:
- Move the temperature slider toward blue (lower values) to cool the image.
- Move it toward yellow (higher values) to warm it up.
- Adjust the tint slider to fix green or magenta color casts caused by specific light sources.
For photographers using Presets.io's macro photography presets, starting with accurate white balance is essential. These presets are designed to enhance images with proper color balance, and an incorrect base can lead to unnatural results. With the right white balance, these presets can amplify colors, contrast, and mood without compromising the natural appearance of your subject.
Lightroom’s batch processing feature is a lifesaver for macro photographers, especially when you’ve captured dozens of frames under the same lighting. You can apply white balance corrections to all your images in one go, saving time while ensuring consistency.
For advanced users, custom camera profiles are another powerful tool. These profiles account for the unique color characteristics of your specific camera and lens combination, providing a solid foundation for accurate color reproduction during RAW processing. Once applied, you’ll have a perfectly balanced starting point for any further adjustments.
Getting white balance right might take a little extra effort, but it’s worth it for the vibrant, true-to-life images you’ll create.
Comparing White Balance Methods for Macro Photography
Selecting the right white balance method can make a big difference in achieving accurate colors in macro photography. Each method has its own strengths and limitations, and knowing when to use each one can help you get consistent results. Here’s a breakdown of the main options and how they perform in macro photography.
Auto white balance is convenient for general use but can struggle in macro photography. When your subject fills most of the frame, the camera may have trouble finding a neutral reference point, leading to noticeable color shifts.
Preset modes like Daylight, Shade, and Tungsten are straightforward and work well under consistent lighting. However, they can falter when dealing with mixed light sources, making them more suitable for simple outdoor shots or controlled studio environments.
Custom white balance using a white or gray card is the most precise option for in-camera adjustments. This method works especially well in controlled settings with stable lighting. The downside? It can slow you down if the lighting conditions change frequently, as you’ll need to recalibrate often.
Post-processing adjustments offer unmatched flexibility, especially if you shoot in RAW format. Using a reference shot, you can fine-tune the white balance during editing, ensuring consistent colors across multiple images. This method is particularly useful for macro photographers who need precise control over color accuracy.
White Balance Methods Comparison Table
Here’s a quick comparison of the different white balance methods and their suitability for macro photography:
| Method | Color Accuracy | Ease of Use | Flexibility | Macro Photography Suitability | Key Considerations |
|---|---|---|---|---|---|
| Auto White Balance | Decent under simple lighting but struggles with dominant colors or mixed sources | Very easy - automatic adjustments by the camera | Low - limited control over results | Works for basic shots but less reliable in complex lighting | Convenient but inconsistent in challenging setups |
| Preset Modes | Adequate for single, uniform light sources | Easy - just select the preset that matches your lighting | Low - only handles one type of light source at a time | Works in straightforward setups but not ideal for mixed lighting | Struggles with varied or changing light |
| Custom/Manual with Card | Excellent - uses a neutral reference for precise results | Moderate - requires setup and a reference shot | High - can be recalibrated for changing conditions | Ideal for controlled macro environments with consistent lighting | Gray cards help avoid overexposure issues |
| Post-Processing (RAW) | Outstanding - allows precise adjustments after capture | Moderate - requires software and reference shots | Very high - preserves data for multiple edits | Perfect for macro work needing maximum color control | Requires RAW format; JPEG limits correction options |
For serious macro photography, the best results come from shooting in RAW format combined with a reference card for post-processing. This approach blends precision with efficiency, giving you full control over color adjustments while simplifying your workflow.
When techniques like focus stacking are involved, maintaining consistent white balance across all frames is crucial for a seamless and natural final image. Post-processing tools shine here, as they allow you to apply the same settings across an entire sequence with minimal effort.
If you’re using Presets.io's macro photography presets, starting with a well-balanced image is critical. These presets are designed to enhance photos with accurate white balance, ensuring the final image looks natural and visually appealing. This comparison highlights the importance of choosing a method that matches both your shooting conditions and your post-processing needs.
Conclusion: Getting Better Colors in Macro Photography
Getting the colors right in macro photography isn't just about technical precision; it's about bringing your creative vision to life. Mastering white balance is key to achieving accurate and vibrant colors in your shots. The techniques discussed earlier are designed to help you tackle the unique challenges of macro photography, where even the smallest details can make a big difference.
No single method is perfect, which is why combining approaches often works best. Shooting in RAW gives you flexibility, using a gray or white card provides a solid reference, and fine-tuning in post-production lets you perfect your images. Tools like Presets.io's presets can also simplify your workflow when applied to images with well-balanced colors.
Your approach might vary depending on your environment. For indoor macro photography with controlled lighting, custom white balance settings can be a game-changer. On the other hand, outdoor shoots might benefit more from adjustments during post-processing. With practice, you'll figure out which methods suit your style and conditions best.
Consistency is crucial, especially for projects like focus stacking or creating a series of images. Keeping your white balance steady across shots ensures a polished and professional final result that stands out.
FAQs
What are the benefits of shooting in RAW for adjusting white balance in macro photography?
Shooting in RAW format gives you a major edge when it comes to adjusting white balance in macro photography. Unlike other file formats, RAW files preserve all the data captured by your camera's sensor. This means you can tweak the white balance during post-processing without compromising image quality.
This flexibility is a game-changer for macro photography, where color accuracy plays a key role in highlighting intricate details and textures. RAW files let you achieve more lifelike and precise colors, ensuring your macro images appear vibrant and true to what you saw through the lens.
What are the challenges of using mixed lighting in macro photography, and how can you overcome them?
Mixed lighting in macro photography often leads to color mismatches and uneven lighting, which can cause distracting color casts and inaccurate tones. This happens because natural and artificial light sources usually have different color temperatures.
To tackle this, you can use color correction gels to match the color temperatures of your light sources and diffusers to soften and even out the light. Additionally, adjusting your camera's white balance settings during the shoot or refining them in post-processing can help eliminate color casts and enhance color accuracy. These simple adjustments can make a noticeable difference, resulting in more consistent and visually pleasing macro shots.
Why is a gray card better than a white card for setting white balance in macro photography?
When it comes to setting a custom white balance, a gray card is often the go-to choice. Why? Because it offers a neutral and consistent reference point. Unlike a white card, which can sometimes reflect light unevenly or appear overly bright, a gray card is specifically designed to reflect light evenly across all wavelengths. This helps your camera capture colors that are true to life, even in tricky or mixed lighting situations.
This tool becomes especially valuable in macro photography, where precise color accuracy is key to showcasing fine details and subtle tones. A gray card ensures your colors stay faithful, making your close-up shots look as natural and detailed as possible.