
Table of Contents
- How Analogous Colors Create Cinematic Edits
- Color Theory in Film | Using Color in Storytelling
- Preparing Your Photo for Analogous Color Grading
- Applying Analogous Color Grading in Lightroom
- Using Lightroom Presets for Better Results
- Fixing Problems and Improving Your Edits
- Conclusion: The Power of Analogous Colors in Cinematic Editing
- FAQs
How Analogous Colors Create Cinematic Edits
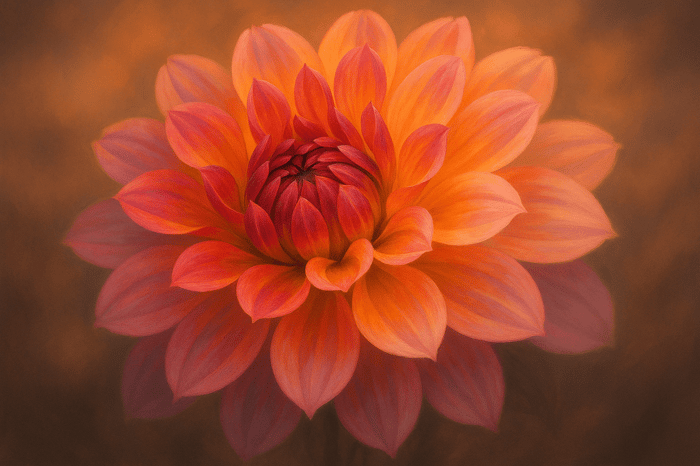
Analogous colors schemes, made up of 3-5 neighboring colors on the color wheel, are a key tool for creating cinematic edits that feel polished and visually harmonious. These colors, like blue, teal, and green, or orange, red, and yellow, evoke specific emotions - calm, warmth, or mystery - and help guide the viewer’s focus naturally. Unlike complementary colors, which emphasize contrast, analogous hues blend smoothly, making them a go-to for professional editing.
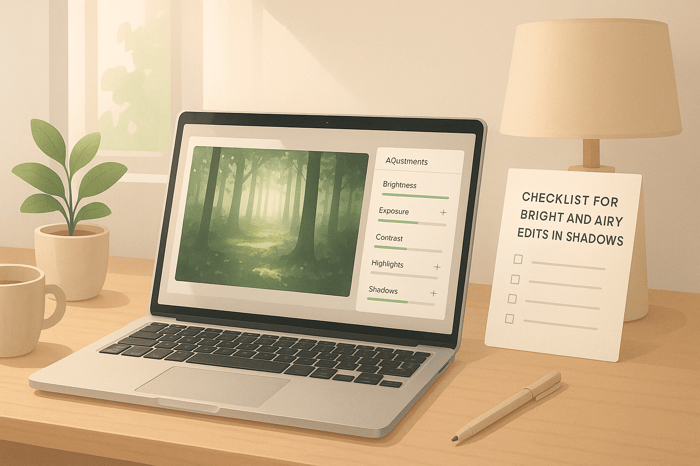
To achieve this effect, start with a well-exposed RAW image and adjust its white balance for accurate tones. Tools like Lightroom’s Color Grading panel allow precise adjustments to shadows, midtones, and highlights, while features like saturation and luminance fine-tune the look. Presets, such as those from Presets.io, can simplify the process, offering pre-designed cinematic styles as starting points.
The key is balance - avoiding over-saturation, muddy transitions, or lost details. With practice, analogous colors can transform your edits into emotionally resonant, film-like visuals.
Color Theory in Film | Using Color in Storytelling
Preparing Your Photo for Analogous Color Grading
Before you dive into the world of analogous color schemes, it’s important to start with a solid foundation. Proper preparation is what separates amateur edits from professional, cinematic results. Without this groundwork, even the most advanced grading techniques can fall flat.
The goal is to work with clean, well-balanced images that allow for maximum flexibility during the color grading process. This involves addressing exposure issues, correcting the white balance, and understanding the current color relationships in your image before making any adjustments. Essentially, you’re setting the stage for precise and effective color transformations.
Start with a Well-Exposed Photo
When preparing your images for analogous color grading, always work with RAW files. Unlike JPEGs, RAW files preserve significantly more data, offering greater flexibility for exposure corrections and detail recovery.
Your photo’s exposure should clearly capture your subject without leaning too far into extreme blacks or whites. This approach mimics natural vision and ensures more balanced results. Slight underexposure can be helpful, as it retains highlight detail better than overexposure, where lost details are often irrecoverable.
Use the histogram in Lightroom to evaluate your image’s exposure. A histogram leaning too far left indicates underexposure, while one leaning too far right signals overexposure. Aim for a balanced distribution to avoid clipping at either extreme.
Start by adjusting the Exposure slider in Lightroom’s Develop module. You’ll find this tool under the Light section or Basic > Tone in Lightroom Classic. This slider mimics your camera’s exposure compensation, allowing you to establish the overall brightness of your image. Think of it as your starting point before diving into more detailed adjustments.
Once the base exposure is set, refine it further by adjusting the Highlights and Shadows sliders. These tools let you recover bright areas and bring out details in darker zones, offering a more balanced tonal range. This method gives you more control compared to pushing the overall exposure too far in either direction.
After achieving proper exposure, it’s time to evaluate your image’s color profile to ensure color integrity is maintained.
Check Your Image's Color Profile
Understanding your image’s color profile is a key step in achieving accurate analogous color grading. Digital devices capture a limited color spectrum, and each operates within a specific color space or gamut. Managing these color spaces properly ensures predictable and consistent results.
Start by calibrating your monitor to a standard specification, and make it a habit to recalibrate monthly. An uncalibrated display can distort your perception of colors, leading to edits that look great on your screen but completely off elsewhere. Use a monitor capable of displaying millions of colors (24-bit or higher), and set your desktop background to a neutral gray to avoid any color interference.
Lightroom Classic simplifies color management by using device-independent color spaces. In the Develop module, previews are displayed in the ProPhoto RGB color space, which includes all the colors digital cameras can capture. This expansive color space gives you the freedom to push colors further during grading without running into limitations. It’s the perfect setup for aligning your base image with cinematic color grading goals.
The first step in working with color is adjusting the white balance. This adjustment allows you to control the overall warmth or coolness of your image, ensuring that white objects appear true to life. White balance sets the mood and color temperature, creating a foundation for more specific analogous relationships.
For precise control, consider using the Kelvin scale for manual white balance adjustments. For example:
- Use around 7,500K for shaded environments
- 5,500K for sunlight
- 2,500K for sunset scenes
These values serve as great starting points and can be tailored to suit the specific color scheme you’re aiming for.
Finally, identify the key tonal areas in your photo that will benefit most from analogous color grading. Focus on elements like skin tones, the sky, foliage, or architectural details. Knowing which areas to enhance ensures that your color adjustments support the story of your image rather than detract from it.
Applying Analogous Color Grading in Lightroom
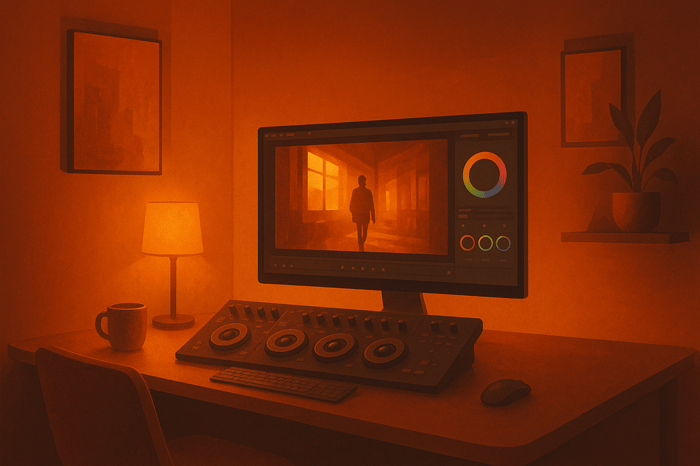
Once you've fine-tuned your exposure and color profile, it's time to dive into analogous color grading. This technique uses neighboring colors on the color wheel to create a smooth, cinematic feel. Lightroom’s Color Grading panel gives you the tools to make these adjustments with precision. Here’s how you can use it to craft a cohesive and polished look for your images.
Using the Color Grading Panel
Lightroom's Color Grading panel, which replaced the older Split Toning tool, offers more flexibility and precision for tinting different tonal ranges. You can access it by navigating to Edit > Color > Color Grading icon.
"The Color Grading tool allows you to add color tints to different tonal ranges in a photo, including shadows, midtones, and highlights, to help create specific moods, enhance color harmony, or give your photos a stylized look." - Adobe Lightroom User Guide
The panel is divided into three sections - Shadows, Midtones, and Highlights. Switch between these sections by selecting the icons or swiping horizontally. Each section includes a color wheel, letting you assign hues to specific tonal areas. Building on your earlier adjustments, this step adds targeted color transitions to enhance the image's mood.
For a cinematic vibe, experiment with teal, blue, and violet - three adjacent colors that create a cool, professional atmosphere. Start with the Shadows section, applying a subtle teal tone. Move to the Midtones and introduce a slightly warmer blue for a smooth transition. Finally, in the Highlights section, add a soft violet or purple tone. This progression keeps the analogous color scheme intact while adding depth and dimension.
"An analogous color scheme consists of three or more adjacent colors on the color wheel. These colors share a common base hue, resulting in a visually cohesive and harmonious palette." - Pixflow
To adjust each hue’s intensity, drag the circle outward to increase saturation or inward to reduce it. Begin with subtle changes - you can always intensify the effect later.
Adjusting Saturation and Luminance
Once your analogous colors are in place, tweak their intensity for a balanced cinematic effect. Often, small adjustments to saturation and luminance yield the best results.
Open the Color Mix panel via the Color icon and select Mix. This tool allows you to refine saturation and luminance for individual color ranges like red, yellow, green, aqua, and blue.
For this color scheme, focus on the blue and aqua tones. Slightly boost the saturation of blues while darkening their luminance to create a rich, cinematic depth - perfect for enhancing skies or water. Use the Targeted Adjustment tool for precise control: select "Saturation" or "Luminance", then click on the desired color in your image and drag horizontally or vertically to adjust it. Keep in mind that luminance changes can also impact saturation - lowering luminance can intensify saturation, while increasing it may reduce the color's richness.
Blend these changes carefully to ensure smooth transitions between tones.
Blending and Balancing Colors
To complete the process, use Lightroom’s blending and balance controls for seamless color transitions. These tools help unify your tonal adjustments and refine the overall look.
The Blending slider determines how smoothly colors transition between Shadows, Midtones, and Highlights. Moving the slider to the right creates softer, more gradual transitions, which are key to maintaining the harmony of an analogous scheme.
The Balance slider adjusts the emphasis between Shadows and Highlights. For instance, if the teal shadows feel too overpowering, shifting the Balance slider toward the highlights can bring out warmer violet tones, creating a more even distribution of color.
The goal is to achieve a balanced look where all tonal ranges contribute without dominating the image. Make small, deliberate adjustments to keep the edit natural yet dramatic, avoiding over-saturation that could make the image appear harsh.

The Master Preset Bundle

$57.00
$672.00
The Master Preset Bundle Every Style. Every Platform. One Download Get 56 high-quality Presets.io collections in one complete bundle — designed to help you edit faster, stay consistent, and get professional-looking results in seconds. Get All High-Quality Preset Collections For… continue reading
Using Lightroom Presets for Better Results
Once you've honed your manual editing skills, Lightroom presets can take your workflow to the next level. While manual grading gives you complete creative control, presets simplify the process and ensure consistent results, especially when working across multiple images.
Why Use Presets for Analogous Edits?
Presets act as a professional foundation, offering smooth color transitions without starting from scratch. They’re particularly useful when editing a series of photos - whether it’s a wedding, a portrait session, or a travel collection. Using presets ensures your analogous color schemes stay cohesive, giving your work a polished and unified aesthetic.
They also provide an excellent way to learn color theory. By studying how presets handle color grading, you can see which combinations work well in various lighting conditions and for different subjects. Over time, this can sharpen your manual editing skills.
For beginners, presets remove much of the trial and error involved in achieving cinematic looks. You don’t need to memorize which shades of blue complement teal or how to balance violet highlights with cooler shadows - the preset does the heavy lifting.
Finding Cinematic Presets at Presets.io
If you’re looking for presets tailored to cinematic and analogous colors grading, Presets.io offers specialized collections. Their Cinematic Collections and Movie Preset Collection are designed to produce film-like aesthetics that align perfectly with analogous colors schemes.
"Our presets help you achieve a unique cinematic style." - Presets.io
One standout option is the Cinematic Bundle, available for $37 (regularly $432). It focuses on the blue–teal–violet range, which is ideal for cinematic edits. For those seeking variety, the Master Preset Bundle includes 56 collections with 721 presets for $49.
"We take pride in the quality of our presets and offer only the best, premium products to our customers." - Presets.io
Installing these presets is straightforward. After purchasing, you’ll receive a ZIP file with .XMP files for desktop Lightroom versions. In Lightroom Classic, head to the Develop module, click the + icon in the Presets panel, and import the .XMP files. Once installed, you can use these presets as a starting point, then fine-tune your edits with the Color Grading panel and Color Mix tools to match your creative vision.
These presets are versatile, working across various photography genres like portraits, landscapes, or street photography. No matter the subject, they maintain the harmonious color relationships essential for achieving that cinematic look.
Fixing Problems and Improving Your Edits
Even with well-chosen presets and careful tweaks, analogous grading can sometimes lead to unexpected results. Spotting and addressing these issues is key to refining your cinematic look. Here are some common challenges and tips to help perfect your edits.
Common Mistakes to Avoid
When working with analogous colors grading, keeping your cinematic vision intact means steering clear of these frequent pitfalls:
- Over-saturation: One of the biggest challenges with analogous colors is overdoing it, especially with blues, teals, and greens. Pushing these hues too far can make skin tones look unnatural and even cartoonish. If this happens, tone down the saturation in the Color Grading panel and check the Luminance settings to maintain lifelike skin tones.
- Muddy color transitions: Uneven blending of analogous hues can create unpleasant gray or brown patches, especially in areas like skies or water where similar colors meet. To smooth these transitions, fine-tune the Hue sliders in the Color Mix panel. For instance, shifting blue slightly toward cyan can create a more seamless blend.
- Lost shadow and highlight detail: Heavy grading can sometimes erase important details in shadows and highlights. Use the Shadows and Highlights sliders to bring back lost information and maintain depth in your image.
- Inconsistent white balance: Mixed lighting sources can throw off your color harmony, with some areas resisting the applied grade. For scenes like these - think indoor shots with both natural and artificial light - use the Masking tool to make targeted white balance corrections.
Once you’ve tackled these issues, take a step back and review your overall edit systematically.
Reviewing and Improving Your Work
After making adjustments, step away for 10 minutes before reviewing your edits. Use Lightroom's Before/After view (shortcut: press Y) to catch any missed issues. The goal is to enhance the mood of the image without making it look artificial.
Test your edits on multiple devices to ensure balanced saturation and brightness. Sometimes, what looks perfect on your main screen might reveal imbalances when viewed elsewhere.
Pay special attention to skin tones. Even with heavy edits, skin should appear natural. If it looks too cool or warm, use the Color Range masking tool to make subtle temperature adjustments.
Keep an eye out for unwanted color casts in neutral areas like white walls or gray pavements. These should stay neutral even in stylized edits. If they start to pick up too much of your color scheme, reduce midtone saturation in the Color Grading panel.
Don’t forget about the Histogram. This tool is your ally for spotting technical issues. Severe clipping in any color channel means your adjustments may be too extreme. Adjust your settings until the histogram shows a balanced range of tones without harsh cutoffs.
For inspiration and guidance, you can refer to Presets.io's cinematic collections. These presets are carefully crafted and can serve as a benchmark to help you fine-tune your edits and achieve a polished, professional look.
Conclusion: The Power of Analogous Colors in Cinematic Editing
Analogous colors offer a way to create cinematic edits that feel both visually cohesive and emotionally resonant. By focusing on hues that sit side by side on the color wheel, you can design images that naturally captivate viewers while maintaining the polished aesthetic associated with professional cinematography.
It all starts with a solid foundation - begin with a well-balanced photo and the right color profile. From there, tools like Lightroom’s Color Grading panel become essential. This feature allows you to carefully adjust shadows, midtones, and highlights, ensuring your color scheme stays balanced. Pay special attention to saturation and luminance to avoid the common mistake of over-saturation, which can strip your edits of their cinematic quality.
For added efficiency, presets from platforms like Presets.io can be a game-changer. These presets provide expertly crafted starting points that showcase how analogous colors schemes work in action. They not only save time but also serve as a guide for creating dramatic mood shifts. Once applied, you can tweak these presets to align with your creative vision while maintaining that film-inspired vibe.
After applying these techniques, consistent review is crucial. Regularly stepping back to evaluate your edits ensures that your adjustments enhance the image rather than overpower it. This practice helps you avoid the trap of overprocessing, keeping your work polished and natural.
What makes analogous colors grading so impactful is its subtlety. When done right, the edits evoke emotion and set the mood without drawing attention to the process itself. This finesse is what separates amateur edits from those with a truly professional edge.
Now it’s time to put these principles into action. Experiment with the combinations mentioned earlier - like blue, teal, and green for landscapes or orange, red, and yellow for portraits. With practice, you'll develop a natural instinct for blending these hues, bringing your cinematic vision to life.
FAQs
What’s the difference between analogous and complementary color schemes in creating a cinematic look?
Analogous color schemes bring together colors that are neighbors on the color wheel, offering a seamless and unified look. This method works great when you want to set a particular mood or add a polished, cohesive vibe to your cinematic edits.
In contrast, complementary color schemes combine colors from opposite sides of the wheel, delivering a striking contrast and a burst of energy. These pairings are often used to heighten drama or emphasize tension in a story. Each approach has its own appeal, and the choice between them depends on the emotional tone you're aiming to achieve in your edits.
Why should I use RAW files instead of JPEGs for analogous color grading in Lightroom?
When working on analogous color grading in Lightroom, using RAW files offers a level of flexibility and precision that JPEGs simply can't match. RAW files contain unprocessed image data with a higher bit depth, which means you can fine-tune exposure, white balance, and colors without sacrificing image quality.
In contrast, JPEGs are compressed and pre-processed, which limits the available color and tonal information. This makes it harder to achieve smooth, cinematic color transitions - essential for analogous color schemes. By starting with RAW files, you can take full advantage of Lightroom's tools to create polished, professional edits that stand out.
How can I prevent over-saturation and muddy transitions when editing with analogous colors?
When working with analogous colors, it's important to keep color harmony and balance in check to avoid over-saturation and awkward transitions. Start with subtle tweaks to saturation levels, steering clear of overly intense colors. This approach helps your tones stay lively without overpowering the overall composition.
Also, keep an eye on contrast and white balance to ensure your edits stay sharp and visually appealing. Even slight changes in hue can create seamless transitions between colors while maintaining a cinematic aesthetic. In this case, less truly is more - small, thoughtful adjustments can go a long way in achieving a polished, professional look.