
How to Edit Landscapes with Black & White Presets
Want to make your landscape photos stand out? Black & white presets can transform your images by emphasizing textures, contrast, and light. Here’s how to get started:
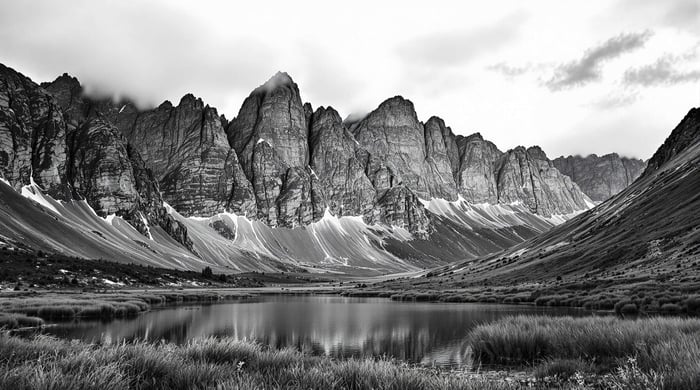
- Why Black & White Works: Stripping color highlights details like rugged mountains or soft mist, focusing on texture and form.
- What Are Presets?: One-click editing tools in Lightroom that adjust exposure, contrast, and shadows for a polished look.
- Choosing Presets: Pick styles like high-contrast for drama, moody for atmosphere, or vintage for timeless appeal.
- Editing Tips: Use tools like the Black & White Mix panel to tweak color channels, and apply selective edits for precision.
With the right presets and techniques, you can create bold, dramatic landscapes that grab attention.
The Secret to Black and White Landscape Photography Editing
How to Pick the Right Black & White Presets
Choosing black-and-white presets that match your artistic vision can significantly improve your editing results.
Styles of Black & White Presets
Each preset style serves a unique purpose, depending on the mood and composition of your landscape photography:
- High-contrast presets: Ideal for dramatic landscapes, these enhance deep shadows and bright highlights, making elements like mountains or clouds stand out.
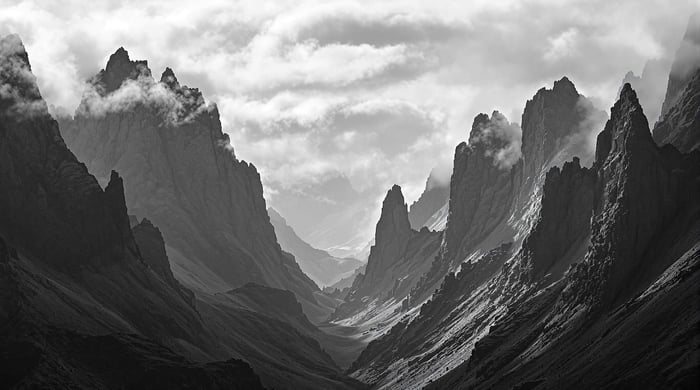
- Moody presets: These create depth and atmosphere, perfect for misty scenes or brooding seascapes.
- Vintage and film-inspired presets: Designed to give your digital photos a timeless look, these mimic traditional darkroom techniques with subtle grain and tonal adjustments.
Once you’ve identified the style that suits your vision, it’s time to focus on the technical aspects that can improve your workflow.
What to Look for in Black & White Presets
When selecting presets for landscape photography, keep an eye on these important features:
- Compatibility: Ensure the presets work with your editing software. For example, Northlandscapes offers options compatible with Adobe Lightroom 4-6, CC, and Classic CC [1].
- File Format Support: Choose presets that support both JPG and RAW formats to maintain flexibility in your editing [2].
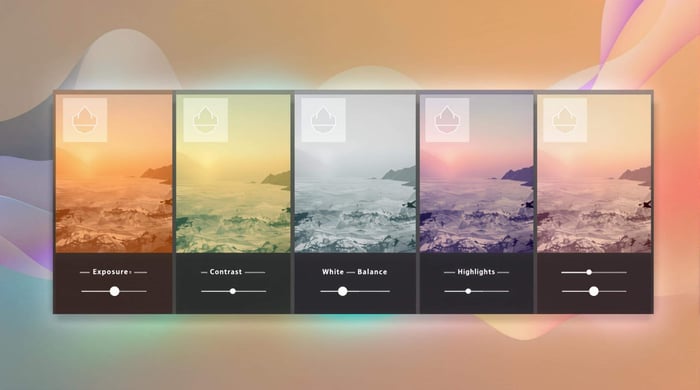
- Customization Options: Look for presets that allow you to adjust exposure, contrast, shadows, highlights, and even selective color mixing for black-and-white conversions.
These features make editing more efficient while giving you the tools to fine-tune your landscapes.
Platforms Like Presets.io for Black & White Presets
Platforms such as Presets.io provide curated collections tailored for landscape photography. Their offerings include styles like cinematic and vintage, with new collections added weekly. They also provide user-friendly installation guides, support for multiple file formats, and regular updates, ensuring consistent results across different cameras and software.
Before purchasing, test presets on your own images to see how they perform. With the right tools, you’ll be ready to create stunning black-and-white landscapes that leave a lasting impression.

Step-by-Step Instructions for Editing Landscapes with Presets
Follow these steps to create stunning black-and-white landscapes that highlight texture, contrast, and depth.
How to Apply Presets in Lightroom
Head to Lightroom's Develop module and find the Presets panel on the left sidebar. Hover over different presets to preview how each one changes your image. Once you find the right look, click to apply it. From there, you can tweak the settings to match your creative goals.
Fine-Tuning Landscapes with Basic Adjustments
Refine your image by focusing on key tonal and contrast elements. Start with these adjustments:
- Exposure and Contrast: Adjust these settings to balance brightness and bring out depth, while keeping details in both highlights and shadows.
- Black & White Mix: Modify individual color channels to control how specific parts of the landscape appear in grayscale.
For example, if you want a dramatic sky, lower the brightness of the blue channel to darken it and boost contrast to make clouds pop. This method adds depth and makes your black-and-white landscapes more striking.
Using Selective Edits for Precision
Lightroom’s masking tools let you make targeted adjustments to specific areas of your photo:
- Gradient Filter: Ideal for smooth transitions, like darkening skies or brightening the foreground.
- Adjustment Brush: Great for fine-tuning textures, dodging and burning, or softening water surfaces.
When applying selective edits, use soft brush edges and feathering to blend changes naturally. Regularly compare your edits with the original image using Lightroom’s "Before" view to ensure your adjustments look natural yet impactful.
Advanced Tips for Black & White Landscape Edits
Adding Long Exposure Effects
Long exposure techniques can transform black-and-white landscapes into captivating works of art. Using a 10-stop ND filter allows for 30-second exposures, even in bright daylight. This creates smooth, glass-like water and dramatic cloud movements, adding a sense of motion and mood to your images [3].
To bring out the best in long exposure shots during editing:
- Use clarity and dehaze tools to highlight cloud movement and reduce haze in areas with motion.
- Adjust highlights carefully to avoid overly bright spots, which can occur in extended exposures.
Using Grain and Texture for Style
Grain and texture can add depth and personality to your black-and-white landscapes. Fine grain offers a subtle touch, while heavier grain creates a bold, vintage feel. Texture adjustments, on the other hand, can make rocky surfaces stand out or enhance the soft transitions of fog.
| Effect Type | Ideal For | Impact on Image |
|---|---|---|
| Grain (Fine/Heavy) | Various landscapes | Adds anything from a gentle texture to a bold, retro style |
| Enhanced Texture | Rocky surfaces | Highlights intricate details and patterns |
Many black-and-white presets already include slight grain and texture tweaks, giving you a solid starting point. For the best results, apply grain more prominently in shadowed areas while keeping highlights clear and sharp. This creates a sense of depth without sacrificing overall image quality.
These techniques can elevate your black-and-white landscapes, giving them a polished and artistic edge while opening up new creative possibilities.
Final Thoughts and Next Steps
Key Takeaways
To excel in black-and-white landscape photography, focus on both technical and artistic elements. Turning raw shots into striking monochrome landscapes means understanding how to use contrast, texture, and composition effectively. The real challenge - and reward - comes from balancing these elements and refining your editing skills through practice.
Once you've got the basics down, the next step is finding the right presets to match your creative vision.
Finding Presets That Work for You
Platforms like Presets.io offer curated collections specifically designed for landscape photography. Using presets can speed up your editing process while still giving you the freedom to make the final tweaks.
| Preset Type | Ideal For |
|---|---|
| Classic B&W | Timeless, traditional shots |
| Dramatic B&W | High-contrast, bold scenes |
| Fine Art B&W | More artistic interpretations |
Start with free presets to explore different styles and see what works best for you. Once you’re comfortable, consider upgrading to premium options for more advanced features. Don’t forget to share your edited photos on platforms like Flickr or Reddit to get feedback and stay inspired. Over time, experimenting with various editing techniques will help you carve out your own unique style in black-and-white landscape photography.