
Table of Contents
- How to Batch Edit Photos in Lightroom
- 3 Ways to Batch Edit Your Photos in Lightroom and Lightroom Classic
- Preparing Your Photos for Batch Editing
- 3 Main Methods for Batch Editing in Lightroom
- Using Presets for Consistent Batch Edits
- Tips for Better Batch Editing Results
- Conclusion: Mastering Batch Editing in Lightroom
- FAQs
How to Batch Edit Photos in Lightroom
Batch editing photos in Lightroom saves you hours by applying the same edits - like exposure, color balance, or contrast - to multiple images at once. This ensures a consistent look across your collection, whether you're editing wedding photos, travel shots, or product images. Lightroom offers three main methods for batch editing:
- Copy and Paste Settings: Edit one photo, then copy and paste those adjustments to others.
- Auto Sync: Apply edits in real-time to multiple selected images.
- Presets: Use pre-designed styles to quickly apply a unified look to your photos.
Before starting, organize your photos in Lightroom, use the import tools to apply basic settings, and group similar images for efficient editing. Presets, especially custom ones, are a powerful way to create consistent edits and save time. Whether you're working on a few photos or hundreds, these techniques make Lightroom an essential tool for photographers handling large projects.
3 Ways to Batch Edit Your Photos in Lightroom and Lightroom Classic
Preparing Your Photos for Batch Editing
Getting your photos organized before batch editing can save you a lot of time and ensure your edits remain consistent across the board.
Importing Photos into Lightroom
Start by importing your photos into Lightroom's catalog. This allows you to manage and edit images without altering the original files. To import, open Lightroom Classic, head to the Library module, and click the Import button in the bottom-left corner. You can also use the keyboard shortcut Ctrl+Shift+I (Windows) or Cmd+Shift+I (Mac).
During the import process, take advantage of the "Apply During Import" panel. Here, you can add develop settings, metadata, and keywords to all your photos at once. This is a great way to apply common adjustments - like lens corrections or profiles - to every image right from the start.
When importing, choose the method that fits your workflow. Use Copy if you want Lightroom to duplicate files to a new location, or Add if your photos are already stored in the desired folder. For better organization, label folders by date or project - this makes selecting and managing files much easier later on.
If you're working with a large batch of photos, consider enabling Build Previews during the import. While this might take a bit more time initially, having previews ready will make the selection and editing process a lot faster.
Organizing and Selecting Photos
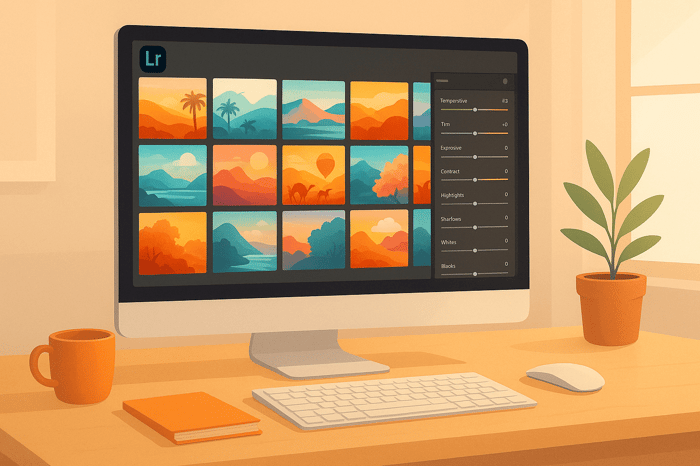
After importing, Lightroom's Library module becomes your best friend for grouping and selecting photos with similar characteristics. Switch to the Grid view (press G) to see thumbnails of all your images. This makes it simple to spot photos that need similar adjustments - like shots taken in the same lighting or location.
To select specific images, hold Ctrl (Windows) or Command (Mac) and click on each photo. For a range of images, click the first one, hold Shift, and then click the last in the sequence.
Smart organization tools in Lightroom can save even more time. Use the Filter Bar (toggle it on with _) to narrow down your collection based on star ratings, color labels, or metadata. For example, if you've already rated your favorite shots with 4 or 5 stars, you can filter your view to focus only on those.
In the Develop module, the Filmstrip highlights your selected images and lets you set a reference photo for syncing adjustments.
With your photos neatly organized and selected, you're ready to move on to the batch editing techniques that make this preparation worthwhile.
3 Main Methods for Batch Editing in Lightroom
Lightroom provides three key ways to batch edit photos, each suited to different editing scenarios.
Copy and Paste Settings
This method lets you copy settings from one photo and apply them to others, offering precise control over which adjustments are transferred.
Start by editing one photo, then copy its settings using the "Copy Edit Settings" button or the shortcut Ctrl+C (Windows) or Command+C (Mac). You can even choose specific settings to copy, like exposure and color adjustments, while leaving others, such as cropping, untouched.
Once the settings are copied, select the photos you want to edit. Hold Ctrl (Windows) or Command (Mac) while clicking each photo to select multiple images. Then, paste the settings using Ctrl+V (Windows) or Command+V (Mac).
This technique is ideal for photos with similar lighting but taken at different times. For example, wedding photographers often use it to edit ceremony shots taken in the same church lighting, or landscape photographers might apply it to a series of sunset images.
Using Auto Sync for Real-Time Edits
Auto Sync allows you to apply edits simultaneously to multiple photos. Simply select the images in the Develop module and toggle the Sync switch to enable it.
To activate Auto Sync in Lightroom Classic, select multiple photos, then click the Sync button in the bottom-right corner of the Develop module. Flip the switch to turn on Auto Sync, and the button will update to display "Auto Sync" when active.
With Auto Sync enabled, any adjustment you make - like changing exposure or tweaking highlights - updates instantly across all selected photos. This is especially useful for photos from the same shoot that require identical edits, such as a portrait session with consistent lighting or product shots taken under the same studio setup.
However, be cautious with local adjustments, like masks or graduated filters, as these might not translate well across different compositions.
Applying Presets to Multiple Photos
Presets are the quickest way to batch edit when you want to apply a consistent style across many images. You can use them during import or after selecting multiple photos in your catalog.
To apply a preset, select the images, open the Presets panel, and click on your chosen preset. The edits will apply instantly to all selected photos.
For an even faster workflow, apply presets during the import process. In the Import dialog, find the "Apply During Import" panel and select a preset. Lightroom will automatically apply it to every photo as it imports them into your catalog.
Presets are particularly handy for maintaining a consistent look. For instance, travel photographers often rely on presets to create a cohesive aesthetic for an entire trip's photos, while wedding photographers might use different presets to match the mood of various moments - light and airy for preparation shots, warm and romantic for the ceremony.
The great thing about presets is that they provide a strong starting point. After applying a preset, you can still fine-tune individual photos, giving you both consistency and the flexibility to make adjustments where needed.
Next, we’ll dive deeper into how presets can streamline your workflow and help you achieve consistent results.

The Master Preset Bundle

$57.00
$672.00
The Master Preset Bundle Every Style. Every Platform. One Download Get 56 high-quality Presets.io collections in one complete bundle — designed to help you edit faster, stay consistent, and get professional-looking results in seconds. Get All High-Quality Preset Collections For… continue reading
Using Presets for Consistent Batch Edits
When it comes to streamlining Lightroom's batch editing process, presets are a game-changer. They allow you to apply a cohesive style across a large set of photos in just a few clicks. By automating repetitive adjustments, presets save time and ensure that every image has a consistent, polished appearance.
How Presets Simplify Batch Editing
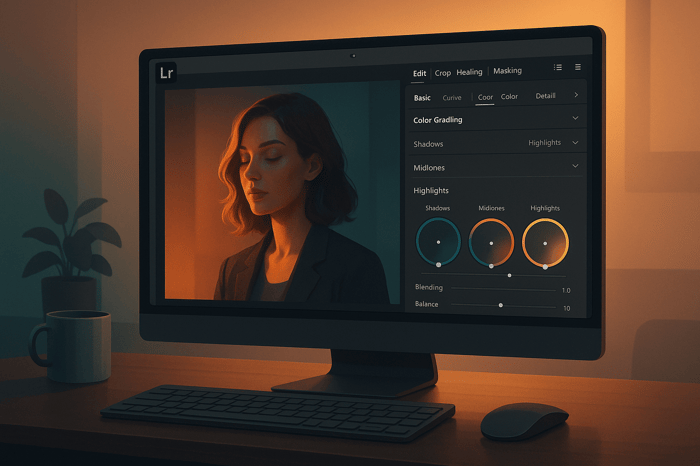
Presets work by automatically adjusting multiple settings at once, from basic tweaks like exposure and highlights to more advanced features like color grading and tone curves. This makes them especially useful for photographers handling large volumes of images.
Take wedding photographers, for example. With thousands of photos to edit, they can use a preset to give the entire gallery a unified style in minutes. Similarly, portrait photographers can ensure consistent skin tones and moods across a session, while landscape photographers can match the warmth and vibrancy of their sunrise shots effortlessly.
One of the best things about presets is that they’re not set in stone. They act as starting points for further refinement. After applying a preset to a batch of photos, you can still make individual adjustments. For instance, you might use a cinematic preset for an event's photos and then tweak the exposure on darker images or adjust highlights on overexposed ones. Pairing presets with copy/paste techniques can make these fine-tuning steps even more efficient.
If you're looking to elevate your workflow, tools like Presets.io offer curated collections that can take your editing consistency to the next level.
Applying Presets from Presets.io
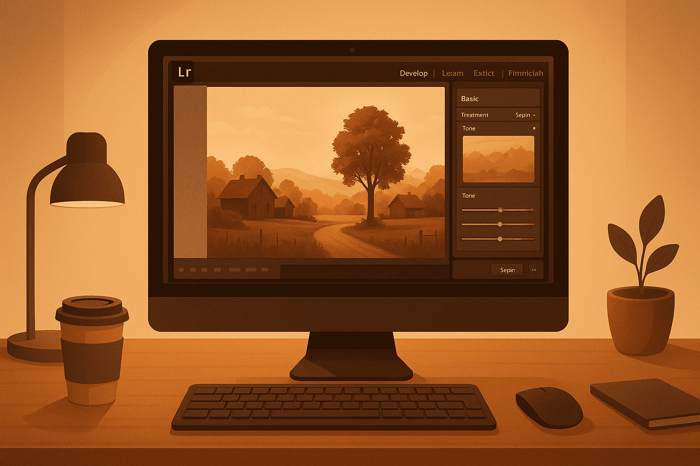
Presets.io provides a variety of preset collections tailored for batch editing. Their cinematic presets are perfect for applying film-inspired color grading across an entire series, while their vintage collections lend an analog warmth to your photos, ideal for creating a nostalgic feel.
For social media photographers, Presets.io’s aesthetic presets are a lifesaver. They ensure cohesive skin tones and color palettes, even when working with different lighting conditions, making them particularly suited for lifestyle or fashion photography.
Applying these presets is simple. During the import process or while in grid view, you can apply your chosen Presets.io preset to an entire batch of photos instantly. To refine the process further, use Lightroom's synchronize feature. Start by applying a preset to one image, make any adjustments needed for specific lighting conditions, and then sync those settings to the rest of the batch. Use Command+Shift+S (Mac) or Ctrl+Shift+S (Windows) to open the Sync dialog, select the settings you want to transfer, and click Synchronize. This approach ensures that your edits remain consistent while allowing for subtle, image-specific tweaks.
Presets.io makes setup easy with detailed installation guides, so you can start editing right after downloading. Plus, their weekly preset releases keep your editing tools fresh with new styles designed for various projects and seasonal trends. Whether you're editing wedding photos, portraits, or social media content, their presets can help you achieve professional results with minimal effort.
Tips for Better Batch Editing Results
Getting consistent results when batch editing takes more than just applying the same settings to all your photos. These practical strategies will help you achieve polished, professional edits that maintain a cohesive style while respecting the unique qualities of each image.
Using Reference Images
Start by selecting your best photo as a reference image - this will act as the foundation for your entire batch. Your reference should reflect the lighting, color tones, and overall mood you want across the series. Many photographers rely on this method to ensure consistency in their edits.
Fully edit your reference photo first, fine-tuning elements like exposure, highlights, shadows, and color grading until it matches your vision. Once perfected, this image becomes your editing blueprint for the rest of the batch.
If you're working with varied lighting conditions, create multiple reference images tailored to each scenario. For instance, at an outdoor event, you might need one reference for bright daylight, another for shaded areas, and a third for golden hour shots. This ensures that each lighting condition gets the right adjustments while keeping the overall style unified.
To stay on track, use Lightroom's reference view (shortcut: R) for side-by-side comparisons. This feature helps you avoid deviating from your intended look as you edit through a large collection of photos. Once your reference edits are finalized, consider creating custom presets for similar projects in the future.
Creating Custom Presets for Repeat Projects
Custom presets can save time and ensure consistency, especially for recurring projects. Turn your most effective editing settings into presets that you can quickly apply to future batches.
For client work, create presets tailored to their specific needs or branding. For example, portrait photographers often develop presets that suit their style, like warm tones for family sessions or bold, high-contrast looks for senior portraits. These presets become part of your professional identity.
Use clear, descriptive names for your presets to make them easy to identify later. Instead of generic names like "Preset 1", opt for something like "Outdoor Portraits - Soft Glow" or "Studio Headshots - Neutral Tones." This kind of labeling helps you stay organized, especially as your preset library grows.
Before relying on a preset for client work, test it across different lighting conditions and subjects. A preset that works beautifully outdoors might need tweaks for indoor settings. You can even create variations of your presets to handle these differences while maintaining your signature style.
Lastly, protect your presets by exporting and backing them up regularly. Lightroom lets you save preset files that can be shared or restored if needed. This ensures you won’t lose the time and effort you’ve invested in building your editing tools.
Lightroom Tools and Shortcuts That Save Time
Lightroom offers several tools and shortcuts to make batch editing faster and more efficient. Here are a few essentials:
Handy Shortcuts:
- Command+A (Mac) or Ctrl+A (Windows): Select all photos
- Command+Shift+S or Ctrl+Shift+S: Open the sync settings dialog
- Command+' (Mac) or Ctrl+' (Windows): Create virtual copies to test different edits
Time-Saving Features:
- Virtual copies: Experiment with multiple editing styles without altering your original photo.
- Snapshots: Save different versions of your edits as checkpoints to compare later.
- Auto-advance: Enable this in preferences to automatically move to the next photo after making adjustments.
To streamline your workflow further, use library filters to group similar images. For example, you can filter by camera settings, lens type, or color labels to tackle photos with similar lighting or subjects together. This avoids jumping between drastically different images that require separate editing approaches, saving both time and effort.
Conclusion: Mastering Batch Editing in Lightroom
Batch editing in Lightroom transforms the way photographers handle large photo collections, cutting down hours of repetitive tasks into just minutes. By using three main methods - copy and paste settings, Auto Sync, and applying presets - you can adapt your workflow to tackle any editing challenge with ease.
These tools work best when combined. Start with presets to establish a consistent base look, use Auto Sync to make adjustments across photos with similar lighting, and rely on copy and paste for targeted corrections on individual images. Together, these techniques streamline your process while maintaining the quality and creativity of your edits.
For an extra edge, professional presets from Presets.io offer ready-made solutions for color grading, tone adjustments, and stylistic tweaks. Their collections include everything from cinematic tones to vintage film effects, saving you the time it would take to create these looks from scratch.
Expanding your preset library not only speeds up your workflow but also ensures consistency in your creative output. Batch editing becomes a systematic process, allowing you to manage large photo volumes efficiently without compromising your artistic vision. Whether you're a professional or an enthusiast, mastering these techniques will make your editing faster, smoother, and more reliable.
FAQs
What makes using presets for batch editing in Lightroom better than methods like copy-paste or Auto Sync?
Using presets in Lightroom for batch editing can dramatically speed up your workflow while ensuring a consistent style across multiple photos. With just a single click, presets apply a set of pre-determined adjustments to an entire batch of images, cutting down on repetitive tasks and saving valuable time.
Compared to manual approaches like copy-paste or Auto Sync, presets offer greater accuracy and reduce the chances of missing steps or creating inconsistencies. This makes them a game-changer for photographers handling large photo collections, simplifying the editing process and making it easier to achieve polished, professional results.
How can I keep my edits consistent when batch editing photos with different lighting conditions?
To keep your photo edits consistent in Lightroom, especially when dealing with varying lighting conditions, start by using a preset that aligns with the style you're aiming for. Presets act as a great starting point, applying a uniform look across all your images. After applying the preset, you can adjust settings like exposure and white balance on individual photos to account for specific lighting variations.
Another handy feature in Lightroom is sync settings. Once you’ve fine-tuned one photo, you can select the others you want to match and sync the adjustments. This approach not only saves time but also ensures a cohesive edit across multiple images.
For an even smoother workflow, try using high-quality presets designed for particular styles or lighting conditions. These can make it easier to maintain a consistent look throughout your photo collection.
What are the best ways to organize photos in Lightroom for faster and easier batch editing?
To make batch editing in Lightroom smoother and faster, start by setting up a clear folder structure for your photos. Use albums or collections to group similar images together. Adding keywords and metadata can help you categorize your photos by themes, locations, or events, making it easier to find and edit them later. You might also want to group images with similar lighting or backgrounds to keep your edits consistent.
Before diving into editing, make sure your photos are properly organized in the Library module. This module is specifically designed for sorting and categorizing your images. Taking the time to prepare your photos this way will simplify your workflow and make it easier to apply adjustments to multiple images at once.