Free vs Paid Lightroom Presets: Night Sky Guide
Editing night sky photos can be challenging, but Lightroom presets simplify the process. The choice between free and paid presets depends on your needs:
- Free Presets: Great for beginners, cost nothing, and let you experiment. However, they often lack quality, updates, and customization.
- Paid Presets: Offer professional-grade adjustments, regular updates, and customer support. They’re ideal for advanced users but come with a cost.
Quick Comparison
| Feature | Free Presets | Paid Presets |
|---|---|---|
| Cost | Free | $10-$100+ |
| Quality | Inconsistent, basic | Professional, reliable |
| Updates | Rare | Regular |
| Support | None | Available |
| Customization | Limited | Advanced |
| Special Features | General editing tools | Night sky-specific adjustments |
Free presets are perfect for learning, while paid options provide advanced tools for serious astrophotography. Choose based on your goals and experience.
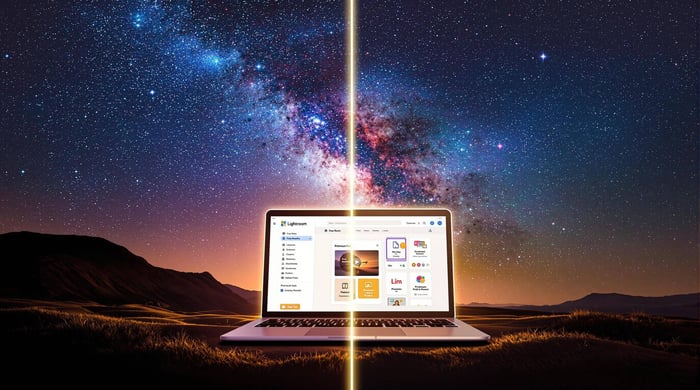
How To Edit Astrophotography and Milky Way Photos | Adobe Lightroom
Free Lightroom Presets: Benefits and Drawbacks
Benefits of Free Presets
Free Lightroom presets offer a great way for night sky photographers, especially beginners, to dive into astrophotography editing without spending money. Since they’re free, they provide an opportunity to experiment with different editing styles and understand how various adjustments can transform night sky images.
Many free presets tailored for astrophotography focus on bringing out star details and balancing the contrast between the sky and foreground. They often include tweaks to highlight subtle purple and blue tones, which are common in night sky photography.
For example, the North Landscapes' "FREE Astrophotography & Night Sky Lightroom Presets" pack is a popular choice. These presets are compatible with both desktop and mobile Lightroom versions, making it easier to maintain a smooth editing workflow. Using free presets can also help photographers learn how specific adjustments impact their photos, laying the groundwork for refining their own editing style.
Drawbacks of Free Presets
Despite their appeal, free presets come with some notable downsides. One of the biggest issues is inconsistent quality. Since they're not always professionally developed or tested, users might need to make significant extra adjustments to get the desired results for night sky photos.
Another common problem is the lack of updates, which can cause compatibility issues with newer Lightroom versions. Additionally, because free presets are widely available, images edited with them may lack originality, blending in with other astrophotography shots seen online.
Free Lightroom presets also don’t come with customer support, leaving photographers to troubleshoot problems on their own. This can be especially challenging when working on night sky images that demand precise adjustments. These limitations are summarized in the table below.
Overview Table: Free Presets
| Aspect | Details | Impact on Night Sky Photography |
|---|---|---|
| Cost | No financial investment | Great for beginners exploring editing techniques |
| Quality | Variable and inconsistent | Often requires extra manual adjustments |
| Features | Basic astrophotography settings | Limited control over specific night sky details |
| Support | Minimal to none | Users must handle technical issues themselves |
| Updates | Rare or nonexistent | May not work with the latest Lightroom versions |
| Customization | Limited | Less flexibility for intricate night sky edits |
To get the most out of free presets, choose ones from trusted sources and be ready to make manual adjustments as needed. While they’re a great starting point, knowing their limitations can help you approach night sky editing with realistic expectations.
Paid Lightroom Presets: Benefits and Drawbacks
Benefits of Paid Presets
Paid Lightroom presets offer tools specifically tailored for night sky photography. These are often crafted by experienced astrophotographers who understand the challenges of capturing celestial scenes. They include specialized adjustments to enhance star details, bring out the colors of the Milky Way, and balance exposure between the foreground and the night sky.
Another advantage is that they are regularly updated to stay compatible with the latest Lightroom versions. Many paid presets also come with customer support, which can help with troubleshooting and editing questions. For instance, Rory Bjorkman's Night Sky Collection is well-known for focusing on Milky Way enhancements.
These presets are built with professional-grade quality, offering precise color grading and tonal adjustments. For photographers seeking cinematic or artistic looks, collections on platforms like Presets.io provide a variety of options that can elevate astrophotography to the next level.
Drawbacks of Paid Presets
The cost is a significant downside, especially for beginners who may not want to make a financial commitment early on. Another concern is the risk of becoming reliant on these presets, which could hinder the development of personal editing skills.
Even with premium options, not every preset will work perfectly in all situations. Factors like atmospheric conditions, light pollution, and individual camera settings mean that manual adjustments are often still necessary. Despite these limitations, paid presets can still be a powerful tool for photographers aiming to improve their night sky images.
Overview Table: Paid Presets
| Aspect | Details | Impact on Night Sky Photography |
|---|---|---|
| Quality | Professional-grade adjustments | Consistent results with enhanced star details and colors |
| Support | Customer service for troubleshooting | Quick help with technical and editing challenges |
| Updates | Regular compatibility updates | Ensures usability with the latest Lightroom versions |
| Specialization | Designed for astrophotography | Precise control over night sky elements and color grading |
| Investment | Higher upfront cost | Offers long-term value for dedicated photographers |
| Customization | Advanced adjustment options | Flexibility to adapt to different shooting conditions |
Paid presets can be a helpful addition to a photographer's toolkit, offering efficiency and high-quality results. However, it's important to use them as a complement to your own editing skills, ensuring you maintain creative control over your final images.
Choosing the Best Presets for Night Sky Photography
Important Things to Consider
When selecting presets for night sky photography, focus on tools that improve star clarity, balance exposure, and handle light pollution effectively. Adjustments to dynamic range are key to preserving details in both the darkest shadows and brightest highlights, ensuring that stars and foreground elements stand out. High-quality presets should include options for tone adjustments and light pollution reduction, while remaining adaptable to various shooting conditions.
| Feature | Purpose | Impact on Night Photography |
|---|---|---|
| Dynamic Range Control | Balances exposure, retaining shadow and highlight details | Preserves detail in both sky and landscape |
| Star Enhancement | Highlights stellar details | Produces sharper, more defined stars |
| Color Temperature Tools | Adjusts for atmospheric effects | Delivers natural and realistic sky colors |
| Light Pollution Control | Minimizes urban glow | Improves contrast in cityscape shots |
Suggestions for Beginners and Professionals
After identifying key features, it's essential to pick presets that match your skill level and editing needs. If you're new to editing, start with free presets to practice and learn the basics. On the other hand, professionals may prefer paid options that include advanced tools like noise reduction and selective color grading. Regardless of your experience, manual adjustments are often needed to perfect the results based on your specific photos.
For professionals, premium presets can unlock more creative possibilities while maintaining high image quality.
If you're searching for a collection of well-crafted astrophotography presets, platforms like Presets.io are worth exploring. They offer specialized night sky photography presets, updated weekly, and include detailed installation guides. Their presets combine technical precision with aesthetic appeal, helping you achieve stunning, natural-looking results in your night sky photos.
Deciding Between Free and Paid Presets
Comparing Free and Paid Presets
Choosing between free and paid presets for night sky photography depends on your goals and experience. Free presets are ideal for beginners wanting to explore editing styles without spending money. However, they often lack consistency, quality, and advanced customization options.
Paid presets, which typically cost between $10 and $100 per pack, cater to more serious photographers. They offer precise adjustments, better tools for enhancing stars, and features designed to manage light pollution. Many also come with updates and technical support, making them a reliable long-term option.
| Feature | Free Presets | Paid Presets |
|---|---|---|
| Cost | Free | $10-$100+ |
| Quality | Inconsistent, varies widely | Professionally tested, reliable |
| Updates & Support | Rare or unavailable | Regular updates, tech support |
| Customization | Basic | Advanced fine-tuning options |
| Specialized Tools | General editing tools | Night sky-specific enhancements |
Understanding these distinctions can help you decide which option aligns with your needs.
Choosing What’s Right for You
If you’re just starting, free presets let you try out different styles without spending money. As Beart-Presets explains:
"Free presets can be a great way to experiment with different looks without investing money upfront. However, paid presets are often higher quality, come with useful tutorials, and support the work of talented creators."
For photographers looking to elevate their astrophotography, paid presets from trusted sources can make a big difference. Focus on presets designed to tackle common challenges like star clarity and light pollution. Platforms like Presets.io offer collections tailored to these needs, combining precision with stunning results.
FAQs
How do I edit starry night photos in Lightroom?
Editing starry night photos in Lightroom involves fine-tuning specific settings to make the stars stand out while keeping the sky looking natural. Whether you're using free or paid presets, knowing how to tweak these settings is key. Here are some recommended adjustments:
| Setting | Recommended Adjustment | Purpose |
|---|---|---|
| Highlights | +70 | Brighten stars |
| Whites | Moderate increase | Boost star clarity |
| Exposure | Subtle adjustments | Keep the overall look natural |
| Color Balance | Adjust as needed | Maintain the natural sky colors |
Steps to enhance your starry night photos:
- Boost highlights: Set highlights to around +70 to make the stars more prominent against the dark background.
- Adjust whites carefully: Increase whites to bring out star brightness, but avoid washing out the darker areas of the sky.
- Tweak exposure: Make slight changes to exposure to ensure the sky retains its natural feel.
"To achieve a natural look in your night sky photos using Lightroom presets, choose presets that make subtle adjustments without over-editing the images. Look for presets that preserve the natural colors and contrast of the night sky."
For those new to night sky editing, astrophotography presets can be a great starting point. Websites like Presets.io offer collections tailored for night sky photography, helping you see how different settings impact your photos. Remember, presets are just a starting point - manual adjustments are crucial for the best results since lighting conditions and camera equipment can vary widely.
With the right tweaks and presets, your night sky photos can truly shine.


.png)
