
Table of Contents
- Checklist for Perfect Preset Adjustments
- Step 1: Set Up Your Workspace and Select Images
- Step 2: Apply Presets and Check Initial Results
- Step 3: Adjust and Customize the Preset
- Step 4: Refine and Perfect Your Edits
- Step 5: Save and Organize Your Custom Presets
- Final Review Before Export
- Presets Module in Luminar NEO 2025 – Complete Guide & Tips
- Conclusion
- FAQs
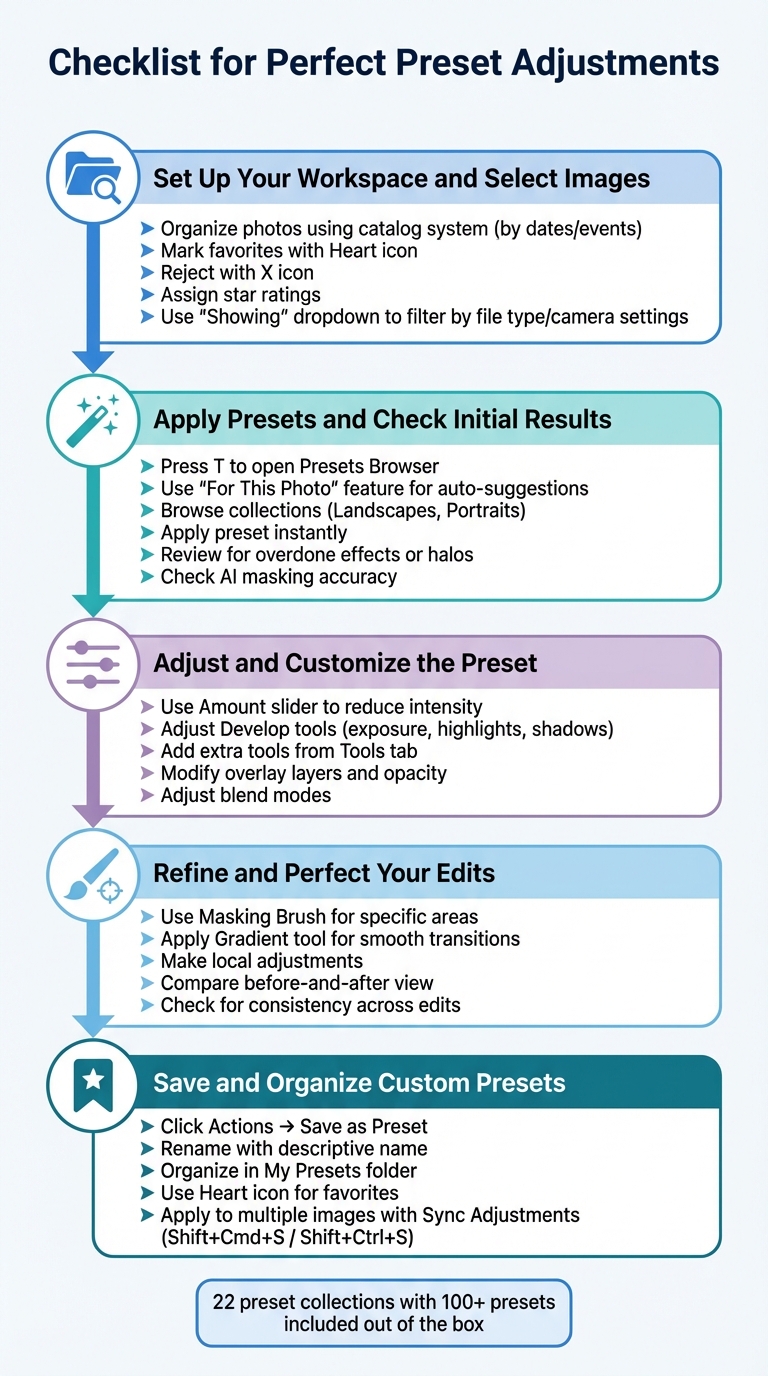
Checklist for Perfect Preset Adjustments
Photo editing a preset in Luminar NEO simplify the editing process by applying detailed adjustments with a single click. But to achieve polished results, you need to fine-tune pre-sets and follow a structured workflow. Here's a quick guide:
- Organize Photos: Use Luminar NEO’s catalog system to sort files by dates or events and mark favorites for editing.
- Choose Presets: Use the "For This Photo" feature or browse collections like "Landscapes" or "Portraits" for suitable pre-sets.
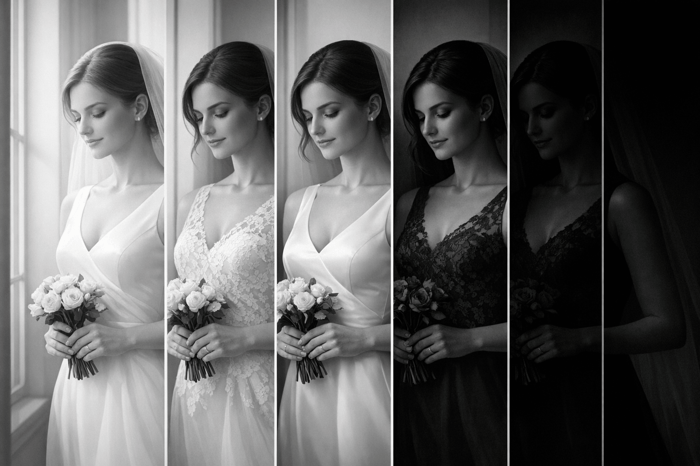
- Apply and Review: Apply pre-sets, check for overdone effects, and adjust intensity if needed.
- Customize and Refine: Modify sliders, add tools, and make local adjustments using masking brushes or gradients.
- Save Custom Presets: Save your adjustments as a new pre-set for future use and batch editing.
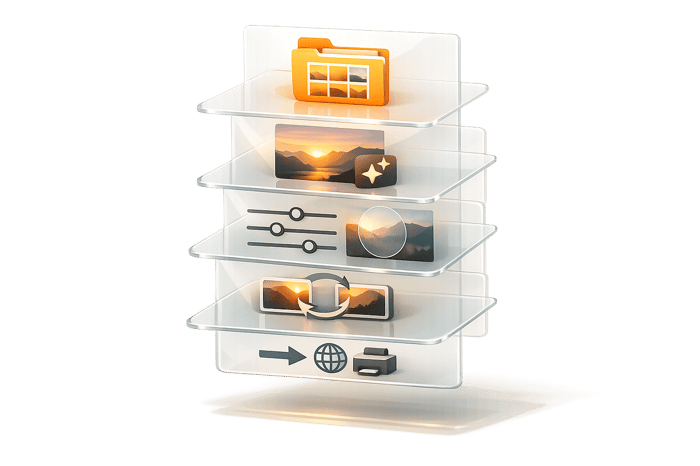
5-Step Workflow for Perfect Luminar NEO Pre-set Adjustments
Step 1: Set Up Your Workspace and Select Images
Sort and Review Your Photos
Before diving into editing, start by organizing your photos. Luminar NEO uses a non-destructive catalog system, meaning it treats your hard drive as the primary source for your files. Any changes you make within NEO - like renaming or moving files - are directly mirrored on your actual disk. To keep things tidy, create a clear folder structure based on dates or events. For example, you might use something like "03/04/2026 – Spring Portraits." This method works well since NEO doesn’t offer advanced keyword tagging.
Once your files are organized, use NEO’s culling tools to streamline the selection process. In the Gallery view, you can mark your best shots with the Heart icon, reject others with the X, and assign star ratings to prioritize your favorites. The "Showing" dropdown filter is especially helpful - it lets you focus on specific file types like RAW images or filter by camera settings such as ISO or aperture. This step helps you eliminate unnecessary clutter and concentrate on the photos that are worth editing.
"Taking the time to organize in Luminar Neo is essential." - Skylum Support
With your photos sorted and curated, you’re ready to move on to selecting the perfect pre-set pack.
Select the Appropriate Preset Pack
After narrowing down your selection, find a pre-set collection that aligns with your vision. Luminar NEO’s "For This Photo" feature is a great starting point - it automatically suggests pre-sets that suit the characteristics of your image.
You can also browse pre-set collections by genre to match your subject matter. For instance, look under "Landscapes" for nature photography or "Portraits" for shots of people. Hover over pre-set names to see a live preview of how each one will transform your image before applying it. If you find pre-sets that match your style consistently, use the Heart icon to save them as favorites for quick access during future edits.
Pre-sets in NEO are divided into four main categories: X Membership, Favorites, My Pre-sets, and Purchased collections. This structure makes it easy to locate the styles you need when editing. Whether you're aiming for a dramatic landscape or a warm portrait, the right pre-set can elevate your photo in seconds.
sbb-itb-b27063b
Step 2: Apply Presets and Check Initial Results
Apply Your Chosen Preset
Once your images are ready, head to the Presets tab or press T to open the Pre-sets Browser. Here, you'll find categories like Favorites, My Presets, Purchased, and Premium Membership, making it easy to locate your desired pre-set.
Click on the pre-set you want, and its effect will be applied instantly, replacing any manual edits you've made. If you need to undo the change, simply press Ctrl+Z (Windows) or Command+Z (Mac). After applying the pre-set, take a moment to review the changes. Ensure the effect enhances your image without overpowering it.
Review the Preset's Effect
Once the pre-set is applied, carefully evaluate the result. Pre-sets, especially on JPEG images, can sometimes feel excessive. Open the Edits tab to inspect for any technical flaws, such as halos around high-contrast edges, which might signal that the pre-set's intensity needs adjustment.
Pay special attention to AI masking accuracy. While Luminar NEO uses artificial intelligence to separate subjects from backgrounds, it's not always perfect. A review from Fstoppers highlighted this limitation:
"Most of the pre-sets were too overworked for my taste, but they could be reduced in their strength. This one resulted in an obvious halo."
Professional photographer Nick Church also shares his perspective on the benefits of AI-driven tools:
"The AI works out where the face, the light, the background is, so you can focus on how you want to treat those areas with a single slider."
Taking the time to review these details ensures you're ready to fine-tune your image in the next steps.

The Master Preset Bundle: Volume II

$69.00
$990.00
The Master Preset Bundle Volume II New Looks. More Styles. Even More Creative Control. Get 66 brand-new Presets.io collections in one powerful Volume 2 bundle — crafted to expand your editing range, refresh your workflow, and deliver polished, professional results in… continue reading
Step 3: Adjust and Customize the Preset
Adjust Core Settings and Sliders
Once you've picked a pre-set, it's time to tweak it to match your image's lighting and mood. Start by clicking the Edit button to access the pre-set's sliders and tools. If the pre-set feels too overpowering, simply use the global Amount slider to tone it down.
Fine-tune specific aspects using the Develop tools. Adjust settings like exposure, highlights, shadows, and color balance to better align with your photo. As the Skylum Blog points out:
"If the pre-set effect is strong like this time, you can easily adjust it by weakening the slider amount." – Skylum Blog
This method allows you to keep the pre-set's original style while tailoring it to fit your photo perfectly.
Add Extra Tools and Effects
Need something the pre-set doesn’t include? Head over to the Tools tab to find and add any missing adjustments. The Skylum team advises:
"If you want to add a tool that is not on the list of the pre-set's edits, come back to the Tools tab and select the tool." – Team Skylum
You can layer on additional enhancements, like sharpening details, AI-powered adjustments, or unique color effects, to bring your vision to life. Once you've added these adjustments, you're ready to refine the overlay layers.
Modify Overlay Layers
Finally, take a look at any overlays included in the pre-set. Some pre-sets come with textures or layers that can be further customized. Use the Layers icon to tweak the overlay's opacity, blend modes, or other properties. Just remember that applying a new pre-set will overwrite any manual changes you've made. To avoid losing your edits, always apply your base pre-set first, then adjust the overlays. If you want to save your customizations for future use, save your edits as a new custom pre-set in your User Pre-sets Collection.
Step 4: Refine and Perfect Your Edits
Make Local Adjustments
After completing the main edits in Step 3, it’s time to zero in on the finer details. Luminar NEO offers tools like the Masking Brush and Gradient tool to help you fine-tune specific areas of your image without altering the entire frame.
The Masking Brush allows you to apply adjustments to precise sections, making it ideal for enhancing particular spots like brightening shadows or softening harsh highlights. Meanwhile, the Gradient tool helps create smooth transitions, perfect for balancing elements like the sky and foreground.
These localized tweaks are essential for addressing problem areas while maintaining the overall creative style of your pre-set. Once you’ve made these adjustments, take a moment to review your work using the before-and-after comparison feature.
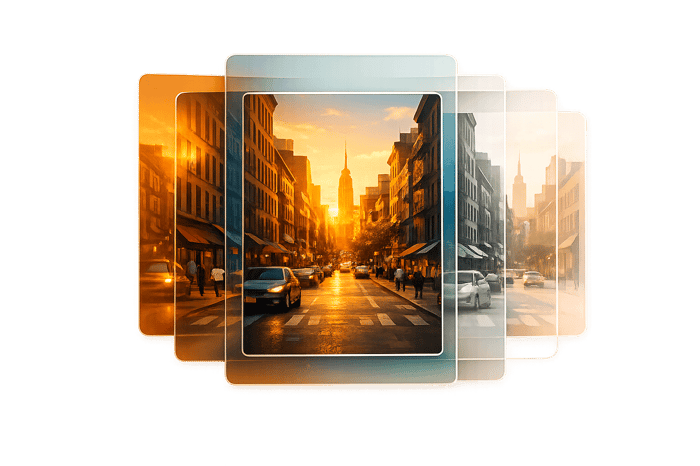
Compare Before and After
With your local edits done, use the before-and-after view to evaluate the overall impact of your changes. This feature lets you see the original and edited versions side by side, helping you ensure your adjustments look natural and cohesive.
Pay attention to how different edits interact. For instance, if you’ve applied a dramatic effect to your image before replacing the sky, the new sky might not match the tone or style of the rest of the scene. By revisiting earlier stages in the Edits Tab, you can tweak these inconsistencies early on and create a polished, harmonious final result.
Step 5: Save and Organize Your Custom Presets
Create a New Preset from Your Adjustments
Once you're happy with your edits, save them as a pre-set for future use. Simply click the Actions button at the bottom of the interface and select Save as Preset. This allows you to save your adjustments in a reusable format, making it easy to apply the same settings to other images with just one click.
While Luminar NEO automatically saves edits to individual images as .state files in the Catalog, creating a custom pre-set is perfect for batch editing. Before saving, double-check your adjustment history in the Edits tab to ensure everything is exactly how you want it. Rename the default "My Preset" to something more descriptive, like "Golden Hour Portrait", so it’s easy to identify later.
Once saved, your pre-set becomes part of your workflow, simplifying future projects.
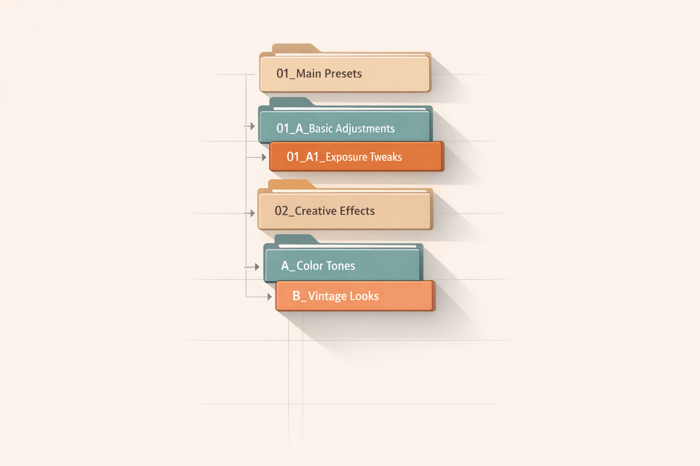
Manage Your Preset Library
Your custom pre-sets will appear under Presets > My Presets, alongside the software’s built-in collections. Luminar NEO comes with 22 pre-set collections featuring over 100 individual pre-sets right out of the box. To keep your library organized, click the three dots (...) on a pre-set icon to rename or delete it.
Want quick access to a favorite pre-set? Click the heart icon to add it to your Favorites. If you need to locate the file, use the "Show in Explorer" (Windows) or "Show in Finder" (macOS) option, which opens the folder where your pre-set files are stored. This feature also makes it simple to back up or transfer pre-sets to another device. For external pre-set collections, such as those purchased from Presets.io, install them by clicking Add near "Purchased" or selecting File > Add Luminar Neo Preset Collection.
Final Review Before Export
Apply Edits to Multiple Images
Once you've fine-tuned a single image, you can save time by applying those adjustments to a batch of photos using the Sync Adjustments command. On macOS, press Shift+Cmd+S, or on Windows, use Shift+Ctrl+S to copy all settings from your edited image to the selected ones, ensuring a consistent look across the set.
To select multiple images, click the first one, then hold Shift to select a continuous range, or use Cmd/Ctrl to pick individual images. After syncing, check for the adjustment badge on each thumbnail in the Gallery view - this confirms the edits were applied.
AI-driven tools like AccentAI, StructureAI, and SkinAI are particularly effective for batch processing since they automatically adapt to each image's unique features. However, some tools - such as Crop, Erase AI, and Background Removal - cannot be synced and must be applied individually. Additionally, if you've used selective masks on handheld shots, keep in mind that these masks might need manual tweaking, as they could shift slightly.
"The best practice is to batch edit for speed, then fine-tune standout shots individually." - Stephen Walton, iPhotography
After syncing, take a moment to carefully review each image to ensure the adjustments meet your expectations before moving forward.
Check Final Image Quality
Once your edits are synced, switch to a full-resolution view for a thorough quality check. Thumbnails can be misleading, so use Single view or Edit mode to inspect details like highlights, shadows, contrast, and overall balance at full resolution.
If a pre-set feels too intense during this review, adjust it using the Amount slider to achieve a more natural look. Before exporting, double-check your settings in the Options dialog. For web use, choose sRGB, and for printing, opt for Adobe RGB. Social media exports should use JPEG at 100% quality, resized to fit platform specifications. For archiving, export as TIFF with 16-bit depth, ProPhoto RGB, and a resolution of 300–600 PPI.
| Intended Use | Format | Color Space | Resolution | Key Setting |
|---|---|---|---|---|
| Web / Social Media | JPEG | sRGB | 72–96 PPI | 70–100 Quality |
| Professional Print | TIFF/JPEG | Adobe RGB | 300 PPI | 8-bit / 100 Quality |
| High-Quality Archive | TIFF | ProPhoto RGB | 300–600 PPI | 16-bit / No Compression |
This final quality check ensures your images retain the precision and care you've put into the editing process. If any image doesn't meet your standards after syncing, use Actions > Revert To Original or Reset Adjustments to start fresh on that specific file.
Presets Module in Luminar NEO 2025 – Complete Guide & Tips
Conclusion
Taking a structured approach to pre-set adjustments can transform your workflow into a smooth and consistent process. By following a clear checklist - starting with workspace setup and pre-set application, followed by fine-tuning and quality checks - you can save time without compromising your creative vision. Think of pre-sets as a launchpad, not the finish line. They give you a head start while leaving plenty of room to infuse your personal style into every edit.
This method ensures each image gets the attention it deserves while keeping your process efficient.
"Pre-sets combine efficiency with creativity. By using AI to understand the strengths and weaknesses of every image, Pre--sets automatically correct common capture problems and apply enhancements that inspire new ideas." - Skylum
Once you've perfected your custom look, save it as a pre-set for future use. It’s a simple way to maintain consistency and speed up your workflow.
For even more inspiration, check out Presets.io, where you'll find a wide selection of professional Luminar NEO pre-sets crafted by experienced photographers. These pre-sets blend timeless design with contemporary styles, offering impactful results with minimal effort. With new collections added weekly, you’ll always have fresh ideas for any photography genre - whether it’s landscapes, portraits, cinematic edits, or vintage aesthetics.
FAQs
When should I lower a preset’s Amount slider?
When using the preset, adjust the Amount slider to control the intensity of the effect. If it feels too strong, lowering the slider can help achieve a more natural appearance. For a balanced and subtle outcome, try keeping the slider below 40.
Why do presets sometimes create halos or weird edges?
When presets boost contrast or sharpness unevenly, they can create halos or odd edges in your image. These appear as unnatural borders or glowing effects, often because the preset’s adjustments don’t align well with the specific details of the photo. To prevent this, adjust the preset settings carefully to suit the unique features of your image.
What edits shouldn’t I sync when batch editing?
Avoid applying syncing adjustments that target specific scenes or objects, as this can create results that feel off or unnatural. For instance, edits like darkening the sky or tweaking individual objects should always be done manually. This ensures the changes are precise and consistent across all images.