Switching from Lightroom to Capture One? Here's your quick guide:
- Layout: Use the Migration workspace to ease the transition.
- Photo Migration: Import your Lightroom catalog into Capture One.
- Workspace Setup: Customize your layout to match your workflow.
- Tools: Master Capture One's powerful editing features, especially color tools and layers.
- Exporting: Use Process Recipes for efficient, customized exports.
Key differences:
- More flexible interface
- Advanced color editing
- Layer-based adjustments
- Sessions and Catalogs for organization
Why switch? Better color control, customizable workspace, and powerful tethering. But be prepared for a learning curve.
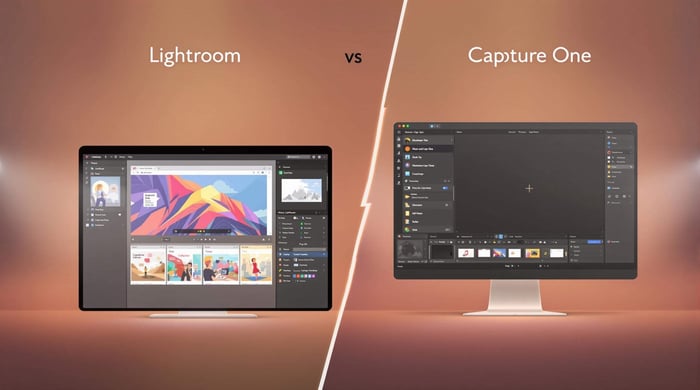
Quick Comparison:
| Feature | Lightroom | Capture One |
|---|---|---|
| Interface | Fixed modules | Customizable workspace |
| Color editing | HSL panel | Advanced Color Editor |
| Local adjustments | Brushes and filters | Layer-based |
| File management | Catalogs only | Sessions and Catalogs |
| Tethering | Basic | Advanced |
Ready to make the switch? Let's dive in.
Related video from YouTube
Step 1: Getting to Know the Layout
Switching from Lightroom to C - One? Don't sweat it. Let's break down Capture One's layout and make you feel at home.
Using the Migration Layout
Capture One has a trick up its sleeve for Lightroom users: the Migration workspace. Here's how to find it:
- Go to Window > Workspace > Migration
This feature rearranges Capture One to look more like Lightroom. It moves the filmstrip to the bottom and organizes adjustments in a familiar way. It's like Lightroom's cousin - similar, but with its own personality.
"When you view Capture One Pro's interface for the first time, there is a lot to take in." - Nils Wille Christoffersen, Freelance Journalist and Technical Writer
Pro tip: Right-click in the top section of the interface to add text labels to icons. Trust me, your future self will thank you.
Main Differences from Lightroom
The Migration layout helps, but there are some key differences:
1. Flexibility
C - One lets you move tools around. It's like rearranging furniture in your digital editing room.
2. Layers
Unlike Lightroom, C - One supports multiple adjustment layers. This opens up new editing possibilities.
3. Tool Organization
In Capture One, panels are called "Tools", grouped in "Tabs." It's just a different way of keeping things tidy.
4. Variants vs. Virtual Copies
C - One doesn't separate original files and virtual copies. Everything's a "Variant."
Where to Find Basic Tools
Let's play a quick game of "Find the Tool":
| Lightroom Tool | Capture One Equivalent |
|---|---|
| Library Module | Library Tool Tab |
| Develop Module | Default workspace |
| Metadata | Metadata Tool Tab |
| Histogram | Exposure & Color Tool Tabs |
| Navigator | Details Tool Tab |
| Presets | Styles in Adjustment Tool Tab |
Capture One's default layout might look different, but most tools are just a click away. As you dig in, you'll find Capture One has some powerful features Lightroom doesn't.
"Capture One Pro is the definite winner here. It's as complex as Lightroom but with a more versatile, cleaner interface." - Industry Expert
Don't be scared to play around with the layout. C - One's flexibility is one of its strong points. Once you're comfortable, you can save your perfect setup under Window > Workspace.
Next up, we'll tackle moving your photos into Capture One. For now, explore this new terrain. You might stumble upon some hidden gems.
Step 2: Moving Your Photos
Switching from Lightroom to Capture One? Let's tackle moving your photo library.
Sessions vs. Catalogs
Capture One offers two ways to organize photos: Sessions and Catalogs.
Sessions are for project-based work. They're self-contained units with four sub-folders:
- Capture (imported images)
- Selects (chosen picks)
- Output (exported files)
- Trash (discarded shots)
Sessions work well for distinct projects like weddings or studio shoots. They're easy to move between devices.
Catalogs are more like databases. They're great for managing large, diverse image libraries. You can organize files virtually without moving them on your hard drive.
"Sessions allow you to follow a step-by-step process with your editing workflow, meaning that you always stay organized without having to worry about flags, color labels and ratings." - Nils Wille Christoffersen, Freelance Journalist and Technical Writer
Moving Lightroom Catalogs
Here's how to bring your Lightroom catalog into C - One:
1. Prepare Your Lightroom Catalog
Make sure your Lightroom catalog links to the original files. Smart Previews won't work.
2. Import the Catalog
In C - One:
- Click "File" in the menu bar
- Hover over "Import Catalog"
- Select "Lightroom Catalog"
3. Review the Import
Capture One imports most Lightroom data, including:
- Basic adjustments
- Crop and rotation
- Collections (except Smart Collections)
Some complex edits and virtual copies won't transfer.
"With your Capture One catalog open, click File in the menu bar, hover your cursor over Import Catalog and select the Lightroom catalog." - Dustin Lucas, Photography Expert
Organizing Your Photos
Once your photos are in C - One, get organized:
Use Groups and Projects to create a hierarchy. For example, have a group for each client, with projects for individual shoots.
Smart Albums automatically filter photos based on your criteria. They're great for quick access to your best shots.
Consider a hybrid approach. Use Sessions for active projects, then import them into a master Catalog for long-term storage.
Set aside time for regular maintenance. It's easier to stay organized than to clean up later.
Find a system that works for you. Try different organizational methods until you hit your stride.
Step 3: Setting Up Your Workspace
You've got your photos in C - One. Now let's make it feel like home. We'll customize your workspace to match how you like to edit.
Making It Feel Familiar
Missing Lightroom's layout? No problem. Capture One has a trick:
Go to Window > Workspace > Migration
This rearranges Capture One to look more like Lightroom. It's not exact, but it'll help you find your way.
But here's where Capture One really shines: you can move tools around freely. It's like rearranging furniture in your digital editing room.
Setting Up Tool Tabs
Tool Tabs in Capture One are like Lightroom's panels, but with superpowers. Here's how to use them:
- To beef up existing tabs: Right-click on a tab and pick "Add Tool"
- To create new tabs: Right-click on the tab bar, name it, and add your favorite tools
- To rearrange tabs: Hold Command (Mac) or Alt (Windows) and drag them around
Try this: Make a "Culling" tab with just selection tools, and an "Editing" tab packed with adjustment tools.
"Having less tools available on a page can be less distracting and I find it easier to move about when it's set that way." - Two Hot Shoes Photographer
Saving Your Layout
Don't let your perfect workspace disappear. Here's how to save it:
- Go to Window > Workspace
- Pick "Save Workspace"
- Give it a name you'll remember
Now you can switch between layouts for different tasks. Make workspaces for tethered shooting, client reviews, or color grading.
Pro Tip: To customize the top toolbar, right-click on it and select "Customize." Drag and drop tools to create your ideal quick-access bar.
sbb-itb-b27063b
Step 4: Learning the Tools
Switching from Lightroom to C - One means getting to know a new toolkit. While many functions are similar, C - One has some unique features that can take your editing to the next level.
Main Editing Tools
Capture One's main editing tools pack a punch. You'll find the usual suspects like exposure, contrast, and white balance in the Exposure and Color tool tabs. But Capture One goes the extra mile:
- The High Dynamic Range tool gives you more control over highlights and shadows than Lightroom's basic panel.
- Levels and Curves tools let you fine-tune your tones, similar to Photoshop.
- C - One's Clarity tool is more refined, offering different ways to boost local contrast.
Here's a pro tip: Play around with the Structure slider in the Details tool. It's Capture One's secret sauce for adding some oomph to your images without going overboard.
Color Magic
Capture One's color tools? They're in a league of their own. The Color Editor is a game-changer:
- Basic: Think Lightroom's HSL panel, but sharper.
- Advanced: Pick specific color ranges and tweak them independently.
- Skin Tone: A tool just for perfecting skin tones - something Lightroom doesn't have.
Food photographer and stylist Michaela Hartwig says:
"You can create masks by luminosity –> you can apply adjustments to just the shadows or just the highlights of an image."
The Color Range tool is a powerhouse. It lets you stretch predefined color ranges for super precise adjustments. Want to dial down pink but crank up red in an image? No problem. You've got total control over color grading.
Layers: A New World
Layers in C - One are a revelation for Lightroom users. Forget adjustment brushes - you can create multiple adjustment layers, each with its own set of edits:
1. Click the + icon in the Layers panel to create a new layer.
2. Use the brush tool (hit B) to paint your adjustment area.
3. Apply edits that only affect that layer.
This approach gives you more wiggle room than Lightroom's local adjustments. You can even adjust each layer's opacity, fine-tuning your edits without losing the original adjustments.
Variants: The New Virtual Copies
In Lightroom, you make Virtual Copies to play with different edits. C - One uses Variants:
- Variants are different versions of the same image in one file.
- They're neater and easier to handle than Lightroom's Virtual Copies.
- You can quickly flip between Variants to compare different editing approaches.
Want a new Variant? Just right-click on an image and pick "New Variant" or hit Ctrl+' (Command+' on Mac).
Step 5: Exporting Photos
You've got C - One's interface and editing tools down. Now, let's get your photos out into the world. Here's how to use Capture One's export features like a pro.
Using Process Recipes
Process Recipes are C - One's export powerhouse. They're like supercharged presets that save you time and hassle. Here's why they're awesome:
- Set export settings once, use them over and over
- Make different recipes for web, print, or client delivery
- Export multiple formats at the same time
To make a new Process Recipe:
- Go to the Output Tool Tab
- Hit the + button in Process Recipes
- Name it something clear (like "Web JPEG 2000px sRGB")
- Set up your export in the Basic, File, Adjustments, Metadata, and Watermark tabs
Quick Tip: Want to see how your export will look? Use recipe proofing. Zoom to 100% and click the Proof You Icon for a preview.
Export Settings
Getting your export settings right is key. Here's what to focus on:
- Format: Pick JPEG, TIFF, or PSD based on what you need
- Quality: For JPEGs, start at 80% and tweak from there
- Resolution: 72 PPI for web, 300 PPI for print
- Color Space: sRGB for web, Adobe RGB or ProPhoto RGB for print
- Metadata: Choose what info to include (copyright, camera settings, etc.)
- Watermark: Add one if you're sharing online or sending proofs
Make different recipes for different needs. For example:
- "Web JPEG": 2000px long edge, sRGB, 80% quality
- "Print TIFF": Full resolution, Adobe RGB, 16-bit
- "Client Proof": Watermarked JPEG, smaller size
Batch Exporting
Exporting multiple photos at once is easy:
- Select the images you want to export
- Check the boxes next to the Process Recipes you want to use
- Click "Process" or use Cmd+D (Mac) / Ctrl+D (Windows)
You can watch the progress in the Batch tool at the bottom of the Output tab. Capture One will export your images based on the recipes you picked.
Tip: Set where your exports go in the "Process Recipe" tool. You can send them to a specific folder or even a cloud-synced one for easy sharing.
Thomas Fitzgerald, a photographer and blogger, puts it simply:
"When you 'Process' your file you're basically converting from a RAW to a Jpeg, Tiff or another format."
This conversion lets you keep the best quality while optimizing for how you'll use the photo.
Conclusion
You've made it through the 5-step journey from Lightroom to C - One. Let's recap what we've covered and look at how to keep growing with your new software.
Key Points Review
We explored C - One's interface, including the Migration workspace that helps Lightroom users feel at home. C - One's flexibility lets you customize your workspace to fit your style.
We covered the difference between Sessions and Catalogs, and how to import your Lightroom catalog. This step is crucial for a smooth transition, preserving your work from Lightroom.
You learned how to make C - One feel familiar by customizing tool tabs and saving your layout. This personalization is key to working efficiently in your new environment.
We dove into C - One's editing tools, especially the Color Editor and Layers. These features offer more precise control than what you might be used to in Lightroom.
Finally, we covered Process Recipes, C - One's export system that allows for multiple export formats simultaneously – a real time-saver for professionals.
Moving Forward
Transitioning to new software is a journey, not a destination. Here are some tips to help you continue growing with Capture One:
Practice Regularly: The more you use C - One, the more comfortable you'll become. Try editing different types of images to explore various tools and techniques.
Explore Advanced Features: Once you're comfortable with the basics, dig into C - One's advanced features. The Color Range tool and Layers system offer editing possibilities that go beyond Lightroom's capabilities.
Join the Community: Connect with other C - One users through forums, social media groups, or local photography clubs. Sharing experiences and tips can speed up your learning.
Use Official Resources: C - One offers free learning materials. As Sarah Silver, a renowned fashion and beauty photographer, puts it:
"Knowing your software is power. It lets you express yourself creatively because you don't waste time thinking 'how do I do this?' and leaves more room to think 'how can I take this ten steps further?'"
Consider Further Training: If you want to dive deeper, take the C - One Basics class. This two-hour course covers the fundamentals and can serve as a solid foundation for more advanced learning.
Customize Your Workflow: Take advantage of C - One's flexibility. Create custom keyboard shortcuts, adjust your workspace, and set up Process Recipes that match your typical output needs.
Stay Updated: Keep an eye out for C - One updates. New versions often bring performance improvements and new features that can enhance your workflow.
Remember, the goal is to make C - One work for you, not the other way around. As you become more proficient, you'll likely find that C - One's advanced color editing and flexible workspace allow for a more refined and efficient editing process.
The switch from Lightroom to C - One might seem tough at first, but with practice and exploration, you'll discover new ways to enhance your photos and streamline your workflow. Embrace the learning process, and soon you'll be using Capture One's features to take your photography to new heights.
FAQs
Does Capture One work with Lightroom?
Capture One and Lightroom are separate programs, but you can bring your Lightroom catalogs into Capture One. Here's how:
- Open Capture One
- Go to File > Import Catalog > Lightroom Catalog
- Pick your Lightroom catalog file
This brings over important stuff like ratings, color labels, keywords, and IPTC data. It also imports basic edits like white balance, exposure, and saturation.
"The migration process is non-destructive. It will not have any impact on your Lightroom Catalog, so you can continue using it as normal." - Capture One Documentation
How do I move from Lightroom to Capture One?
To switch from Lightroom to Capture One:
- Clean up your Lightroom catalog
- Make a new C - One catalog (you can't import into a Session)
- In C - One, go to File > Import Catalog > Lightroom Catalog
- Double-check your imported data
Keep in mind: Most stuff transfers fine, but some fancy Lightroom features might not have exact matches in Capture One.
Why switch from Lightroom to Capture One?
Photographers often jump to C - One for its advanced tools and flexibility. Here's why:
- Better color editing: C - One's Color Editor gives you more control than Lightroom's HSL panel.
- Layers: Unlike Lightroom, you can use adjustment layers in C - One, like in Photoshop.
- Custom workspace: You can set up the interface to fit your workflow.
- Tethered shooting: C - One shines in studio setups with its tethering features.
"Capture One isn't for everyone. It's much more complicated than Lightroom, but it allows you to get better images overall." - Chris Gampat, Author
Capture One can be trickier to learn, but many photographers find its advanced tools lead to better edits and a smoother workflow once you get the hang of it.


.png)
