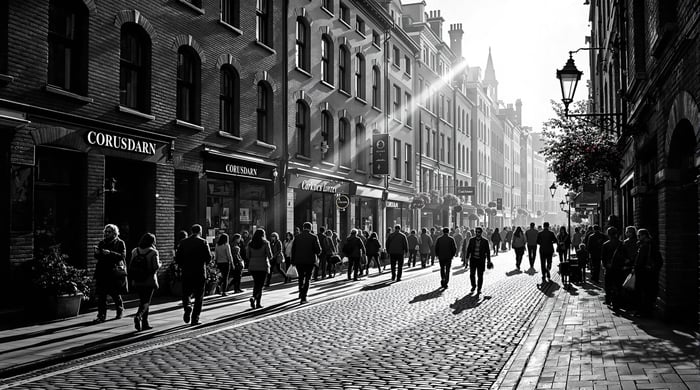

Want to transform your street photos into striking black and white images? Here's Black & White Street Photography in 5 steps for Lightroom:
In 5 simple steps:
- Pick photos with strong contrast and textures
- Set basic exposure and white balance
- Convert to B&W using profiles or presets
- Fine-tune using B&W Mix panel
- Add grain and vignette for finishing touches
Pro tip: Shoot in RAW format to get more editing flexibility with shadows and highlights.
Key tools you'll use:
- Basic panel adjustments
- B&W Mix color channels
- Grain and vignette effects
- Crop tool for composition
Quick settings guide:
| Effect | Recommended Range |
|---|---|
| Vignette | -15 to -25 |
| Grain Amount | 25-35 |
| Grain Size | 35-45 |
You don't need complex techniques to create powerful B&W street photos. Just follow these steps, and you'll get consistent results that highlight the raw energy of Black & White Street Photography.
Related video from YouTube
Step 1: Pick the Right Photo
Choosing the right photo is key when converting to black and white in Lightroom. The best monochrome images tend to highlight strong composition and visual impact even without the help of color. For street photography, look for shots with a clear structure and bold contrasts.
Focus on Textures and Light
In Black & White Street Photography, textures and lighting take center stage. Pay attention to scenes with:
- Rough brick walls next to smooth glass surfaces
- Ornate or detailed architectural features
- Dramatic shadow patterns created by buildings or people
- Interesting interactions between natural light and surfaces
The balance of light and shadows makes a huge difference in monochrome images. Photos rich in highlights and deep shadows allow you to shape depth and emphasize the story during the editing process.
Before You Dive Into Editing
If you're aiming for Black & White Street Photography, shoot in RAW format. RAW files retain all the image data your camera collects, giving you more range to adjust:
- Exposure and brightness
- Shadows and highlights
- Fine details in both light and dark areas
- Overall tones and contrasts
When out shooting, think about how your composition will translate into black and white. Focus on contrast through bold geometric shapes, sweeping lines, and mixed textures. This approach lays a solid groundwork for editing, especially if you plan on experimenting with presets later in Lightroom.
"Black and white street photography emphasizes form, texture, and light, making it a powerful medium for capturing street scenes and portraits."
While presets can speed up the editing process, starting with a well-thought-out, contrast-rich photo is the best way to achieve stunning Black & White Street Photography.
Step 2: Set Basic Settings
Before diving into the black-and-white conversion of your street photo, it’s essential to fine-tune a few key settings in the Basic panel of Lightroom. These adjustments lay the groundwork for the captivating monochrome results you’re aiming for.
Fix Light and Contrast
To start, refine the exposure and contrast of your image for better balance and detail. Use the Exposure slider to adjust the overall brightness of the scene - it sets the stage for everything else. Once that’s done, move to the contrast settings.
In street photography, the Highlights and Shadows sliders are your go-to tools. Lower the highlights to recover details from bright spots like sunny skies or shiny surfaces. Raise the shadows to pull out hidden elements in dark spaces, such as doorways or shaded corners.
Next, use the Whites and Blacks sliders for fine-tuning. Slightly increase the Whites to add brighter accents, and slightly decrease the Blacks to deepen the dark tones. This step intensifies the contrast, giving your photo the dramatic look street photography thrives on.
"The key to compelling black and white street photography lies in mastering contrast through careful adjustment of highlights and shadows, ensuring no detail is lost in the transformation process."
Adjust White Balance
It might sound unnecessary at first, but setting the white balance is critical - even for Black & White Street Photography. This step influences how colors are translated into shades of gray.
When working with mixed lighting in street scenes, avoid relying on Lightroom’s Auto White Balance, as it might deliver inconsistent results. Instead, use the eyedropper tool to select a neutral gray area within your photo. This helps create a solid basis for the monochrome conversion.
For photos with artificial lighting, such as store signs or streetlights, slightly warm up the Temperature slider to avoid overly sterile grays. You can also adjust the Tint slider to correct any unwelcome green or magenta tones.
Taking your time with these adjustments ensures the resulting black-and-white image feels balanced and dynamic. These foundational tweaks are the first steps to creating monochrome street photos that truly stand out.

sbb-itb-b27063b
Step 3: Make it Black and White
Now that your basic settings are in place, it's time to turn your street photo into a striking black and white image. Lightroom gives you several ways to do this, from quick one-click options to more detailed adjustments.
Use Lightroom's Monochrome Profile

Head to the Profile Browser in Lightroom’s Develop module to access the monochrome profiles. These act as a base for your black and white edits. Look for the four-squares icon next to "Profile" in the Basic panel to open the menu.
For Black & White Street Photography, the B&W Modern profile is often a good starting point. It keeps the contrast strong while maintaining subtle details in highlights and shadows. Want something bolder? The B&W High Contrast profile amps up the drama, adding extra depth to your scenes.
"The key to compelling Black & White Street Photography lies in selecting the right profile as your foundation. A good profile can reduce editing time by 50% while maintaining the authenticity of the scene", says Justin Mott, creator of the BW Street Grit preset collection.
Try Lightroom Presets
While the built-in profiles are a great starting point, presets can make your workflow faster and add polished effects tailored for this style. For example, the SLR Lounge Lightroom Presets v5 collection offers options perfect for creating textured, film-inspired black and white edits that amplify the gritty vibe of urban photography.
Start by choosing a preset that matches your creative goal, then tweak the settings as needed. For instance, the BW Street Grit preset is known for its high-contrast, faded aesthetic, making it ideal for capturing the unfiltered energy of the streets.
To streamline editing and maintain a consistent style, consider creating your own preset after fine-tuning your favorite black and white look. This will ensure your photos share a uniform style while saving time in future projects.
Step 4: Fine-tune with B&W Mix
Once you've applied a basic black-and-white conversion, the Black & White Mix panel becomes your secret weapon for adding depth and drama to your street photography. With this tool, you can control how various colors from the original image are translated into grayscale.
Adjust Color Channels
The Black & White Mix panel includes eight sliders, each tied to a specific color channel from the original photo. These sliders let you tweak how individual colors appear in the grayscale version. For example, adjusting the blue slider can dramatically alter the look of the sky, while the red slider impacts skin tones and brick walls. Simple changes here can significantly shape the mood and detail of your shot.
"The Black & White Mix panel is where the magic happens. By adjusting individual color channels, you can achieve up to 40% more detail in your street photography compared to basic black and white conversion", says the SLR Lounge tutorial team in their guide to black-and-white editing.
Use these sliders effectively by following this quick reference:
| Color Channel | Common Street Elements | Suggested Adjustment |
|---|---|---|
| Red | Brick walls, skin tones | +15 to +30 |
| Orange | Stone buildings, warm lights | +10 to +25 |
| Yellow | Street signs, sunlit areas | -10 to +20 |
| Blue | Sky, shadows | -20 to -40 |
Build Strong Contrast
For standout Black & White Street Photography, subtle but strategic contrast adjustments are key. Start by identifying your main subject and its surroundings. Use the sliders to separate these elements tonally, giving your main subject more presence.
When shooting urban architecture, darken the blue slider to create a dramatic sky, while boosting the yellow and orange sliders to highlight building details. This combination adds a natural contrast between structures and their environment.
For shots featuring people, tweak the red and orange sliders with care. Small boosts, like +15 to +20, can make skin tones stand out while keeping them realistic. This careful balance ensures your subjects draw attention without feeling unnatural.
Step 5: Add Final Effects
With your black-and-white tones in place, it’s time to apply the finishing touches that can take your street photography to the next level. These small yet impactful adjustments can transform your images, enhancing both their mood and visual appeal.
Crop Your Photo
Cropping can work wonders in refining your composition and removing anything that feels out of place. To get started in Lightroom, use the crop tool (shortcut: 'R') and keep these tips in mind:
- Activate the Rule of Thirds overlay (press 'O' to toggle grid options) to guide your composition.
- Remove bright spots or distractions at the edges - they can pull attention away from your subject.
- Align architectural lines and street elements to keep things natural and balanced.
- Allow space around your main subject but avoid overly wide shots that lose focus.
In Black & White Street Photography, a tight crop often creates a sense of connection and immediacy, drawing the viewer into the scene. Experiment with classic aspect ratios like 4:5 for vertical framing or 16:9 for cinematic cityscapes.
Add Grain and Vignette
Now it's time to add subtle details that give your photos texture and depth. Start with a vignette to gently darken the edges of the frame, which naturally brings more focus to your subject. A soft vignette (between -15 and -25) typically works great for most street photography scenarios.
"Adding a film grain effect can make your photos look like they were shot on film." - SLR Lounge, "Black and White Street Photography With Film Grain Effect"
For that timeless look, try incorporating some grain. Here's a quick guide to achieving a natural, film-like feel:
| Setting | Suggested Range | Why It Matters |
|---|---|---|
| Amount | 25-35 | Adjusts overall grain intensity |
| Size | 35-45 | Controls the coarseness of the grain |
| Roughness | 50-60 | Adds variation to the grain pattern |
Blend these effects with black-and-white film presets for an extra layer of character. Presets.io offers film-inspired options that can help you achieve that iconic street photography style. Fine-tune both the grain and vignette to suit each photo - you want these effects to enhance your image, not overpower it.
Wrap-up
Editing black and white street photography in Lightroom doesn't have to be overwhelming. By breaking it down into five clear steps - from picking the right shot to fine-tuning the final details - you can create a reliable editing routine that highlights the essence of your monochrome images.
While adjusting settings manually gives you full control, quality presets can save a lot of time and effort. For example, the BW Street Grit preset by Justin MOTT ($4.99) is a solid starting point for achieving a classic street photography look. You can then tweak it further to align with your personal style.
If you're open to trying out different black and white styles, Presets.io offers a wide range of monochrome presets tailored specifically for street photography. They frequently update their collections, giving you fresh options to experiment with while keeping your workflow smooth and efficient.
The best black and white street photos strike a balance between technical precision and creative expression. Whether you choose manual edits or start with a preset, the goal is to craft an editing approach that reflects your personal style while celebrating the timeless charm of monochrome street photography.