

Table of Contents
- How Batch Processing Saves Time for Photographers
- What Is Batch Processing and How Does It Work?
- 3 Ways to Batch Edit Your Photos in Lightroom and Lightroom Classic
- Time-Saving Benefits of Batch Processing
- How to Use Batch Processing in Lightroom and Luminar NEO
- Best Practices for Batch Processing Without Losing Quality
- Conclusion: How Batch Processing Changes the Way You Edit
- FAQs
How Batch Processing Saves Time for Photographers
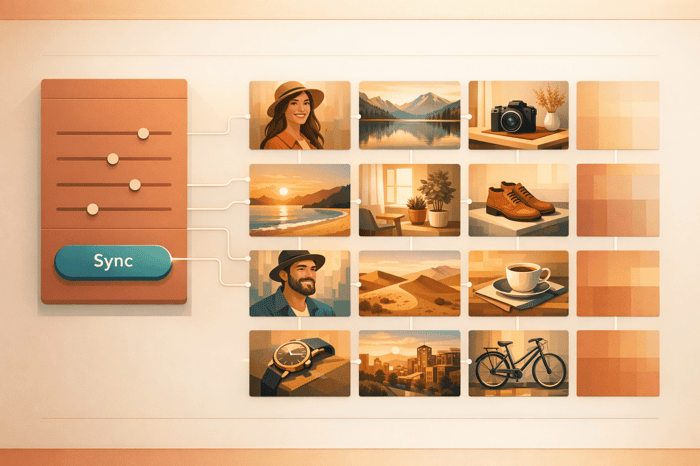
Batch editing/processing is a faster way to edit photos by applying the same adjustments to multiple images at once. Instead of editing each photo individually, you can edit one photo, then sync those settings across your entire gallery. This approach saves hours of work while ensuring consistent results.
Key Benefits of Batch Processing:
- Time Savings: Cuts editing time by 75–90%. For example, editing 1,200 event photos can take under 3 hours instead of 40+ hours.
- Consistency: Ensures uniform adjustments like exposure, white balance, and color grading across all images.
- Reduced Fatigue: Minimizes decision fatigue, helping you focus on high-impact edits.
- Efficiency: Handles repetitive tasks like metadata updates, lens corrections, and copyright info in bulk.
Tools to Use:
- Lightroom: Features like Sync Settings, Auto Sync, and Quick Develop make it ideal for large galleries.
- Luminar NEO: AI-powered tools and presets simplify batch editing for smaller collections.
Batch processing is especially effective for photos with similar lighting or settings, like weddings, events, or studio shoots. By systematizing edits, you can spend less time on technical adjustments and more time on creative work or growing your business.
What Is Batch Processing and How Does It Work?
Batch Processing Defined
Batch processing, often referred to as bulk editing, involves applying the same set of adjustments to multiple images simultaneously, rather than editing each one individually. You define the edits on a single photo and then replicate them across an entire collection. This process can include changes like exposure adjustments, white balance corrections, color grading, and even lens corrections - all applied in just seconds.
"Batch editing, or bulk photo editing, means applying the same or adaptive adjustments to many images at once." - Adobe
Beyond visual tweaks, batch processing also handles metadata tasks, such as adding copyright details, contact information, or watermarks, to hundreds of images at once. This method ensures consistency and saves significant time, especially when working with tools like Lightroom or Luminar NEO.
How It Works in Lightroom and Luminar NEO

In Lightroom Classic, batch processing relies on two main features. Sync Settings allows you to fully edit one photo and then apply those exact settings to a group of selected images with a single click. Auto Sync takes it a step further by enabling live adjustments - any slider changes you make are instantly applied to all selected photos. Additionally, the Quick Develop tool in the Library module offers basic tonal adjustments for multiple images without needing to enter the Develop module.
Luminar NEO takes a slightly different approach, using presets and AI-powered tools for batch processing. Its AI masking technology identifies key elements like the sky or the subject and applies targeted adjustments across all selected images. This is particularly useful when dealing with photos that have slight compositional differences but share similar lighting conditions.
Both tools are designed to eliminate the repetitive nature of manual editing, saving time while maintaining consistency.
Here’s a comparison of batch processing features in Lightroom:
| Feature | Lightroom Classic | Lightroom CC |
|---|---|---|
| Sync Settings | Yes (Sync Button) | Yes (Paste Settings) |
| Auto Sync | Yes (Toggle Switch) | No (Manual Paste) |
| Apply on Import | Yes (Develop Settings) | Limited (Raw Defaults) |
| Quick Develop | Yes (Library Module) | No |
| AI Mask Sync | Yes | Yes |
| Metadata Batching | Yes (Presets) | Yes (Info Panel) |
Batch processing shines when working with photos that share consistent lighting and exposure conditions.
When Batch Processing Works Best
Batch processing is most effective when your images share similar lighting and exposure settings. For example, it’s perfect for editing studio portraits, event photos taken in the same venue, or product shots against a consistent backdrop. The greater the uniformity in the source material, the more accurate and efficient the batch adjustments will be.
For optimal results, it’s helpful to tackle batch edits in stages. Start with technical corrections, like exposure and white balance, and then move on to stylistic adjustments. For instance, professional photographer Arthur G. applied this method during a 140-image portrait shoot in Lisbon's Gulbenkian Garden in August 2025. Using batch processing, he completed the editing in just 26 minutes - a task that would have taken over two hours with manual editing.
"A well-designed preset workflow isn't about cutting corners or compromising your artistic vision. It's about systematizing the technical aspects so you can focus on what truly matters." - Arthur G, Professional Photographer
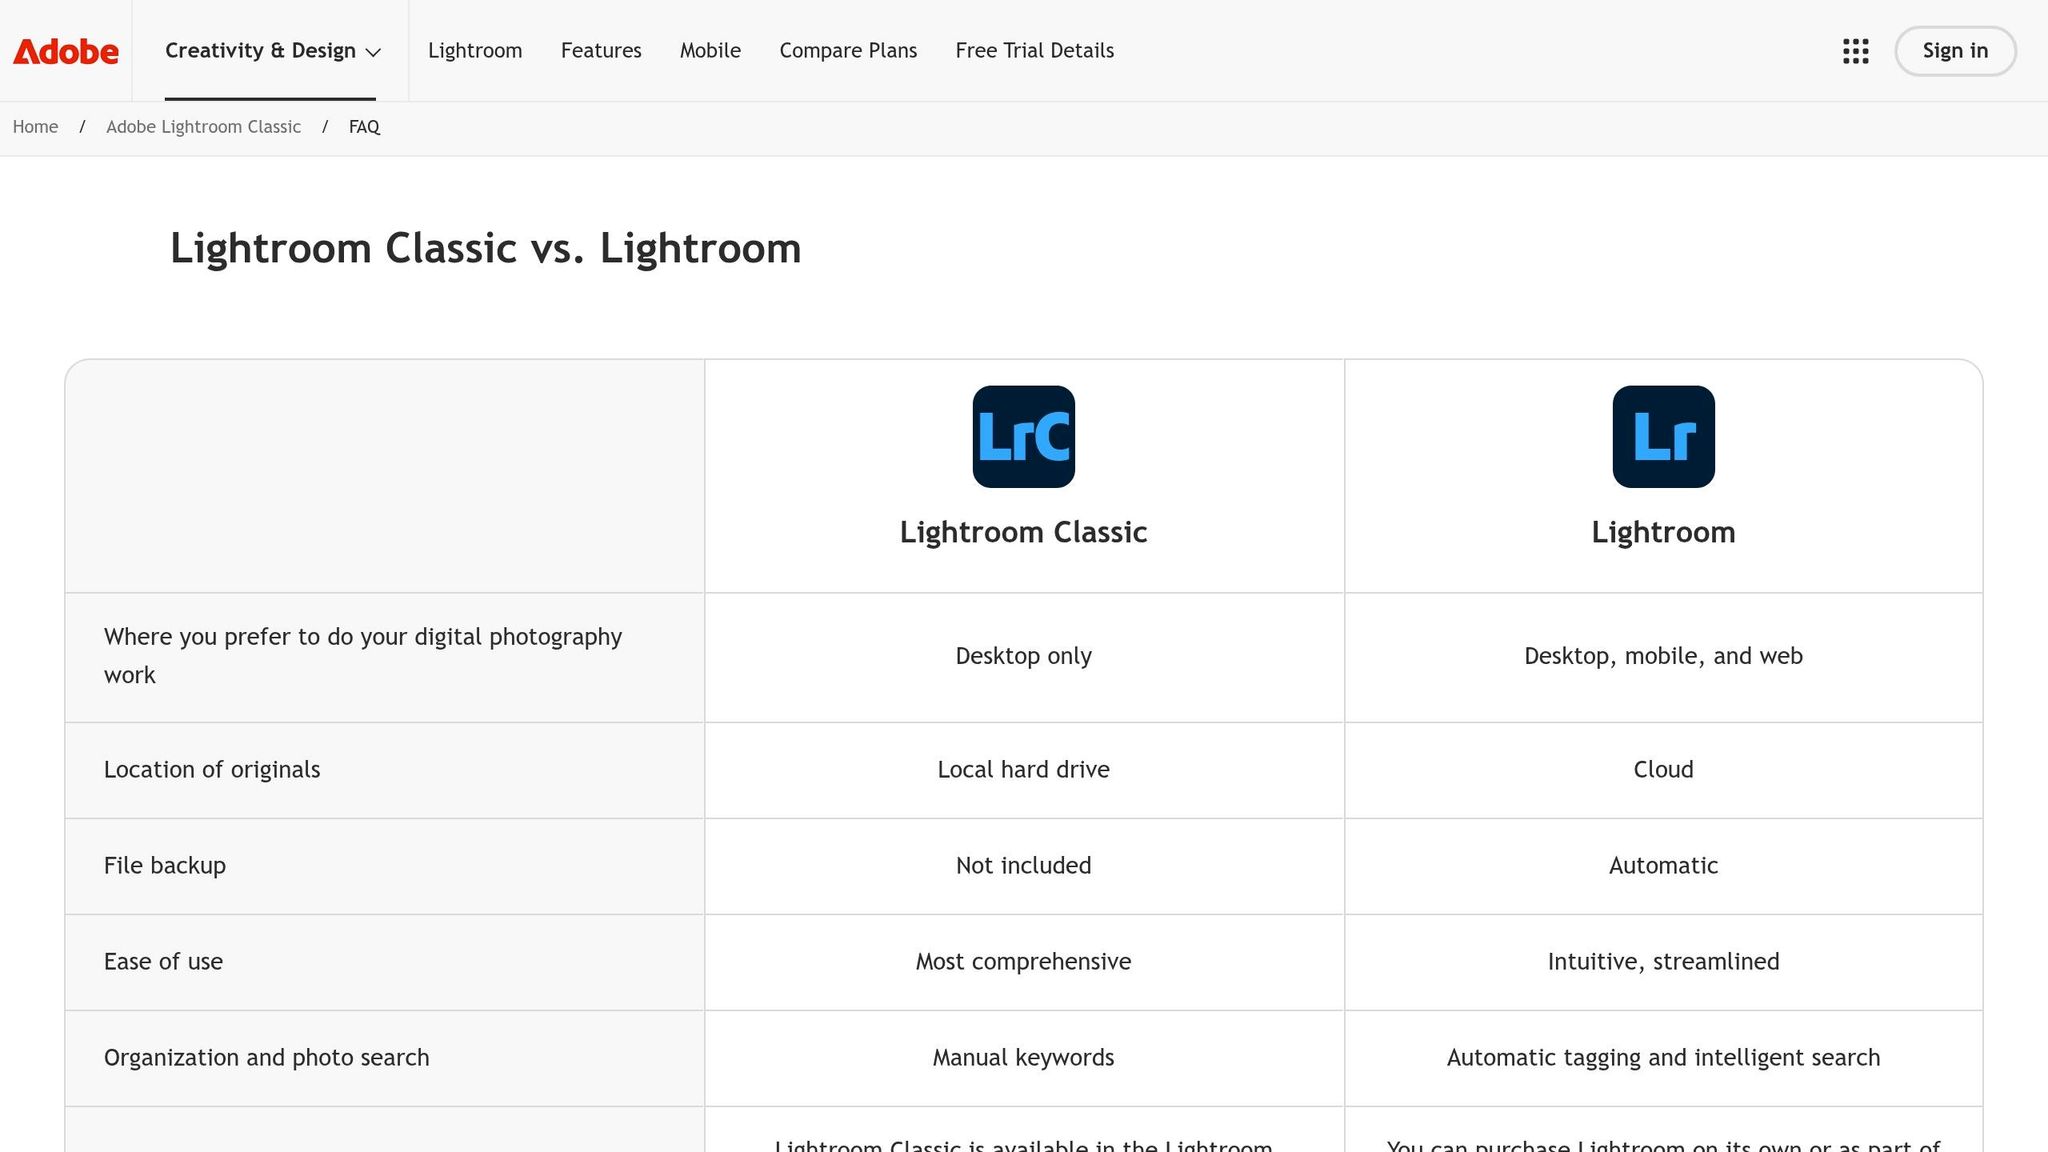
3 Ways to Batch Edit Your Photos in Lightroom and Lightroom Classic
Time-Saving Benefits of Batch Processing
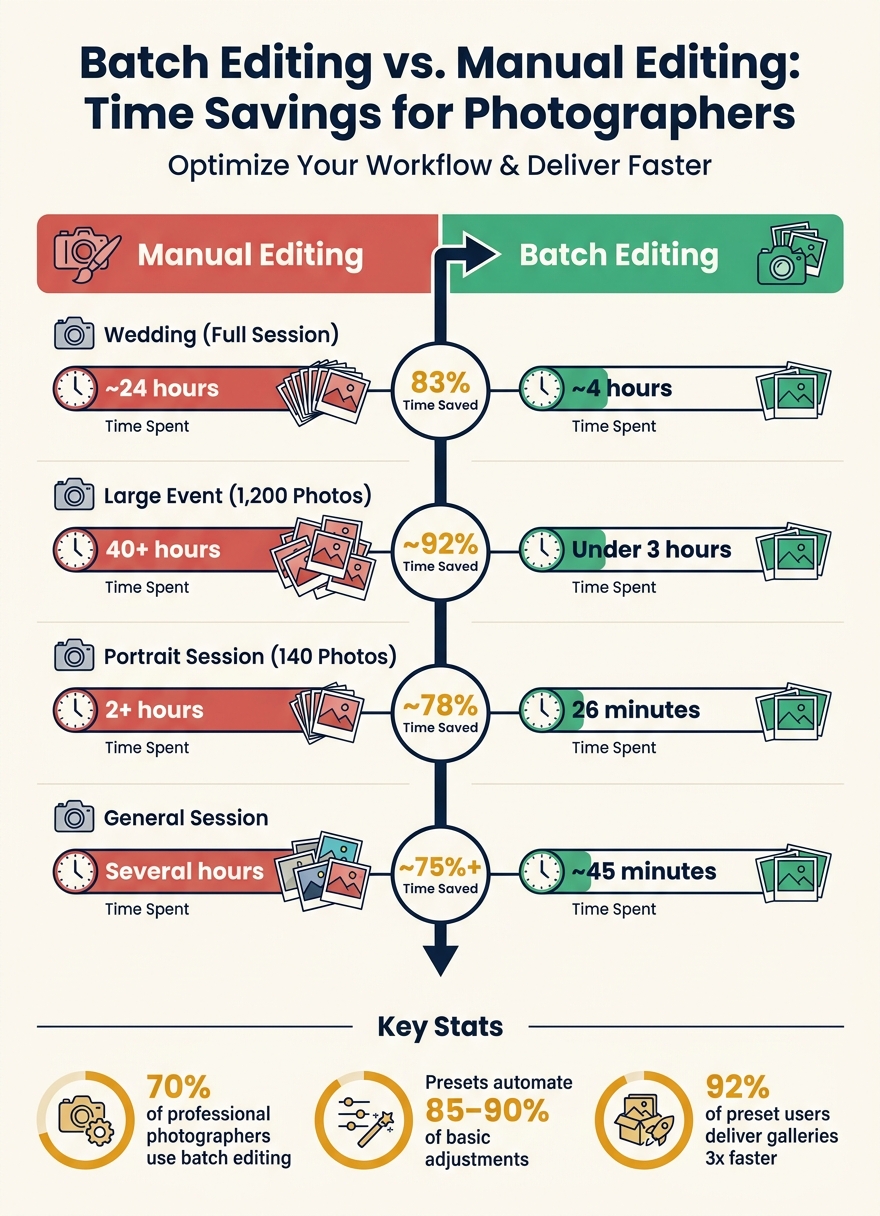
Batch Editing vs. Manual Editing: Time Savings for Photographers
Manual Editing vs. Batch Editing: A Time Comparison
Batch processing can drastically cut down editing time, often by as much as 75–90%. Here's a comparison of manual editing versus batch editing for different photography scenarios:
| Photography Type | Manual Editing Time | Batch Editing Time | Time Saved |
|---|---|---|---|
| Wedding (full session) | ~24 hours | ~4 hours | 83% |
| Large Event (1,200 photos) | 40+ hours | Under 3 hours | ~92% |
| Portrait Session (140 photos) | 2+ hours | 26 minutes | ~78% |
| General Session | Several hours | ~45 minutes | ~75%+ |
These numbers reflect actual outcomes reported by photographers. Studies show that batch editing can speed up post-processing by up to 70% overall. Using presets alone can automate 85–90% of basic image adjustments, such as exposure and color corrections. Professional experiences consistently back up these findings.
What Photographers Say About Batch Processing
Photographers who rely on batch processing emphasize its transformative impact on their workflows. Cole from Cole's Classroom shared:
"I remember taking 24 hours on average to edit each wedding. That wasn't fun at all, and it cut into my profits big time! Now, I only spend 4 hours editing per wedding. Presets, combined with smart batch editing, do the trick every time!" - Cole, Photographer, Cole's Classroom
In January 2026, Alex Rowe of Pixel Bubble tackled a 1,200-photo event gallery using a batch workflow. By grouping photos based on lighting conditions and syncing edits from a single "hero" image, he completed the gallery in under three hours - a task that would have taken over 40 hours manually.
"Batch editing isn't about cutting corners - it's about making consistent, repeatable editing decisions and applying them intelligently." - Alex Rowe, Photographer
Today, about 70% of professional photographers consider batch editing an essential part of their process. Among those using batch presets, 92% report delivering galleries three times faster.
Tasks That Batch Editing Makes Faster
Batch processing streamlines nearly every aspect of post-production. Here’s how it helps:
- Global adjustments: Changes to exposure, white balance, contrast, and tone curves can be applied to hundreds of images instantly.
- Color management: Tasks like HSL adjustments, color grading, and applying a signature look through presets become nearly effortless.
- Technical corrections: Noise reduction, sharpening, and lens corrections can be handled in bulk, eliminating repetitive steps.
- Metadata updates: Applying copyright information, keywords, and ratings takes a fraction of the time compared to manual input.

The Ultimate Presets.IO Bundle

$89.00
$1,662.00
The Ultimate Presets.io Bundle combines The Master Preset Bundle Volume I and The Master Preset Bundle Volume II into one complete collection, giving you every editing style you need in a single download. Save $37 vs. Volume I and II… continue reading
- AI-powered edits: Modern tools allow complex adjustments, such as subject or sky masking, to be applied across an entire set of images.
As Dorothy Laurent, a photographer, put it:
"Batch editing... reduces session editing from hours to 45 minutes." - Dorothy Laurent, Photographer
sbb-itb-b27063b
How to Use Batch Processing in Lightroom and Luminar NEO
Batch Editing in Lightroom
Lightroom makes batch editing straightforward and flexible. Start by editing one photo as your reference image. Once you're happy with the adjustments, select additional photos and hit the Sync button (Cmd+Shift+S on Mac; Ctrl+Shift+S on Windows). A dialog box will appear, allowing you to pick which settings - like exposure, white balance, or color grading - you want to apply to the rest of the images.
For real-time editing across multiple photos, enable Auto Sync. This feature lets you make live slider adjustments to all selected images simultaneously. Alternatively, the Quick Develop panel in the Library module is perfect for quick, grid-based edits.
Another great time-saver is applying a preset during import. In the Apply During Import panel, you can assign a preset to every new image, giving you a solid starting point and cutting down repetitive adjustments later.
Batch Editing in Luminar NEO
Luminar NEO offers a different approach, leaning on AI-powered tools for a faster workflow. Begin by editing one photo with features like AI Auto-Tone and White Balance to create a clean, polished look. Then, select the rest of your images and sync the settings across the batch. Luminar’s AI simplifies the process, making it ideal for smaller sets of photos where speed and stylized results are key.
For consistent results, Luminar uses Templates (its version of presets). Once you’ve saved a specific look, you can apply it across your batch with just a few clicks. While Lightroom is better suited for handling massive collections, Luminar NEO excels when working with smaller groups of images and creating quick, professional results.
"Batch editing isn't just about speed, it's about building a professional workflow that makes your work consistent and reliable." - Hamed Media
This balance of efficiency and creativity highlights how presets and templates can transform your editing process.
Using Presets.io to Speed Up Your Editing

Presets are a game-changer for maintaining a cohesive style across your photo sets. They streamline adjustments like exposure, contrast, and color grading. Presets.io offers a variety of collections designed for both Lightroom and Luminar NEO, covering styles like cinematic, vintage, and film-inspired looks. These presets provide a quick starting point, saving time without sacrificing quality.
Here’s a real-world example: In August 2025, photographer Arthur G demonstrated the power of presets. He applied a technical correction preset to 140 photos in just one minute. Then, he spent nine minutes applying style-specific presets and another 16 minutes fine-tuning 15 key portraits. The entire process took 26 minutes - a massive improvement compared to over two hours of manual editing.
"A well-designed preset workflow isn't about cutting corners or compromising your artistic vision. It's about systematizing the technical aspects so you can focus on what truly matters: capturing amazing moments and growing your business." - Arthur G, Photographer
To optimize your workflow, apply presets to your batch and use tools like Sync (in Lightroom Classic) or Paste Edit Settings (in Lightroom CC) to spread the adjustments across all images. Stick to four to six core presets that align with your style for a consistent portfolio and quicker decision-making.
Best Practices for Batch Processing Without Losing Quality
Batch processing is a huge time-saver, but it’s important to follow certain steps to ensure you don’t sacrifice quality along the way. Here’s how to get it right.
Start with a Well-Edited Reference Image
The foundation of a successful batch edit lies in the first image you work on. Choose a standout "hero" image from your shoot - one that represents the overall tone and conditions of the batch. Focus on perfecting this image by adjusting exposure, white balance, tone curves, and noise reduction. As Alex Rowe from Pixel Bubble explains:
"Every minute spent perfecting the hero image saves ten minutes across the batch."
Once your hero image is polished, sync its settings to the rest of the batch. However, avoid syncing adjustments that are frame-specific, like spot healing, local brush masks, or cropping. These edits are tied to the unique composition of each image and won’t translate well across the batch.
Group Images Before You Batch Edit
After perfecting your reference image, organizing your photos is the next critical step. Applying the same edits to images taken under varying lighting conditions can lead to inconsistent results. Instead, sort your photos by lighting scenarios - like outdoor shade, direct sunlight, or indoor settings.
Jane Allan, a professional portrait photographer at The Lens Lounge, highlights the importance of this step:
"You can sync the edits only to other images taken in that setting, with that lighting."
Camera settings also play a role. If you used Auto White Balance during your shoot, you might notice variations in color temperature across your images. Grouping photos by white balance and exposure settings before editing ensures more accurate adjustments. Lightroom’s Quick Develop panel can be particularly useful here, allowing you to make relative tweaks without forcing every image into the same exact values. Once your images are grouped logically, you can apply consistent edits with confidence.
Use Presets to Keep Your Edits Consistent
Presets are your best friend for maintaining a cohesive look across your batch. Stick to 4–6 core presets that align with your style. Use a technical preset during import to handle basic corrections, then apply a style preset during the editing phase for a polished finish. This approach not only keeps your portfolio visually consistent but also reduces decision fatigue, making your edits feel deliberate rather than repetitive.
For inspiration, platforms like Presets.io offer collections designed for Lightroom and Luminar NEO, featuring styles like cinematic, vintage, and film-inspired looks. These can serve as a great starting point for your batch workflow.
Conclusion: How Batch Processing Changes the Way You Edit
Batch processing has proven to be a game-changer for photographers, significantly cutting down editing time. For example, wedding photographers have slashed their editing hours from 24 to just 4, while portrait photographers like Arthur G managed to edit a 140-photo session in only 26 minutes - work that would have otherwise taken over 2 hours manually. These results aren’t outliers; they’re the norm when using a well-structured batch workflow.
Beyond saving time, batch processing ensures a consistent editing style across your entire gallery. This consistency is crucial, especially for professional event, wedding, and portrait photography, where uniformity in style can make or break the final presentation. It tackles common challenges like inconsistency and editing fatigue, delivering a polished and cohesive look.
"Batch editing isn't about cutting corners - it's about making consistent, repeatable editing decisions and applying them intelligently." - Alex Rowe, Photographer, Pixel Bubble
Another major benefit is the reduction in editing fatigue. By automating 85–90% of basic tasks, you can shift your attention to the creative, high-impact edits - the kind of fine-tuning that turns good photos into standout images. This approach not only enhances the artistic quality of your work but also streamlines your business. Turnaround times can drop from 2 weeks to just 3–5 days, and some photographers have seen session bookings increase by as much as 35% annually. Incorporating batch processing into your workflow isn’t just about efficiency - it’s about freeing up your time to focus on what truly matters: creativity and growing your business.
FAQs
Which edits should I avoid syncing in a batch?
Avoid syncing edits that depend heavily on specific image composition or lighting, as these adjustments can fail to work well across multiple frames. Be mindful when using local adjustments such as masks, spot removal, or graduated filters - these are best reserved for situations where all shots were taken from a fixed tripod setup. Additionally, syncing exposure and white balance across photos with different lighting conditions can lead to inconsistent results. Always take the time to review your images and make individual tweaks to ensure skin tones and highlights remain consistent.
How do I batch edit photos with mixed lighting?
To handle batch photo editing when dealing with mixed lighting, start by sorting your images into smaller groups based on their lighting conditions - like indoor, outdoor, or specific venues. Choose one photo that represents each group and focus on perfecting its lighting, tone, and overall mood. Once you're satisfied, use the Sync feature or copy-paste those settings to the rest of the photos in that group. Afterward, go through the batch and make manual tweaks to fine-tune any photos that still stand out.
Will batch processing change my signature style?
Batch processing doesn’t interfere with your signature style - it helps maintain it. By ensuring a consistent look across all your images, it creates a solid base while still allowing you to tweak details like skin tones or lighting as needed. Tools such as high-quality presets from Presets.io make it simple to achieve a polished, unified aesthetic for every project.