
Ultimate Guide to Luminar NEO Workspace Customization
Luminar NEO lets you fully customize your workspace to match your photo editing needs. Whether you're editing portraits, landscapes, or experimenting with creative effects, here's what you need to know:
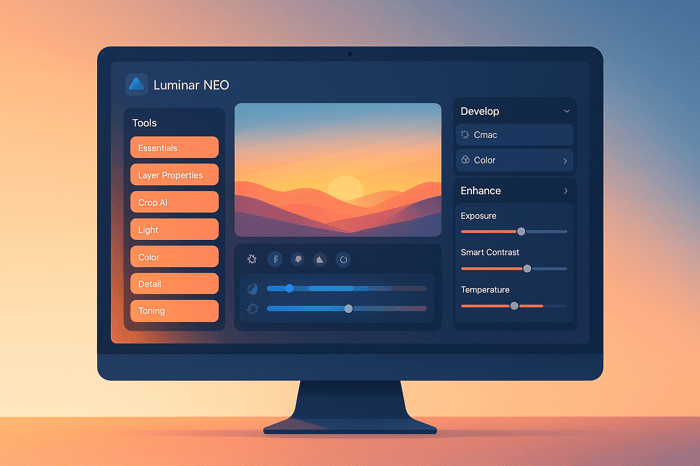
- Default Workspaces: Start with pre-designed layouts like Essentials, Portrait, Landscape, Black & White, or Pro.
- Customization Options: Rearrange tools, hide panels, and create hybrid layouts. Save your setup for future use.
- Why Customize?: Save time, simplify your workflow, and focus better by keeping tools organized and clutter-free.
- Advanced Features: Use keyboard shortcuts, create project-specific layouts, and sync setups across multiple devices.
- Preset Integration: Enhance your workflow by adding and organizing presets like Presets.io collections.
Here’s a quick comparison of Luminar NEO’s default workspace options:
| Workspace | Focus Area | Key Features |
|---|---|---|
| Essentials | Basic editing | Core tools for general edits |
| Portrait | People/faces | Skin AI, Portrait Bokeh AI |
| Landscape | Nature/scenery | Gradient filters, Dehaze |
| Black & White | Monochrome | Toning tools, contrast tweaks |
| Pro | Advanced editing | Layers, specialized tools |
Start with the Essentials workspace, then customize it to fit your style. Save time and boost productivity by tailoring Luminar NEO to your needs.
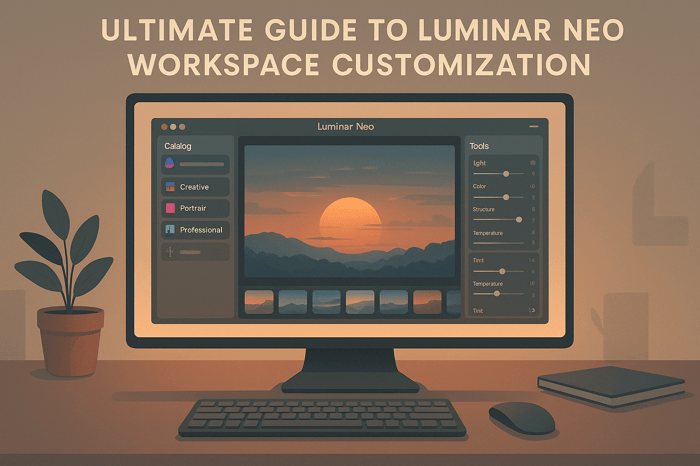
A New Approach to Workspaces in Luminar
Workspace Customization Basics
Luminar NEO gives you plenty of options to customize your editing setup with ready-made layouts and adjustable settings. Start by understanding the default workspace layouts and how they’re designed to suit different photography styles.
Default Workspace Options
Luminar NEO comes with five pre-designed workspace layouts, each tailored to a specific photography focus:
| Workspace | Focus Area | Key Features |
|---|---|---|
| Essentials | Basic editing | 8–10 core adjustment tools |
| Portrait | People/faces | Skin AI, Portrait Bokeh AI |
| Landscape | Nature/scenery | Gradient filters, Dehaze |
| Black & White | Monochrome | Toning controls, contrast tweaks |
| Pro | Advanced editing | 15+ specialized panels, layers |
A 2024 Skylum survey found that 73% of new users stick to these default layouts during their first month before exploring personalized setups. For beginners, the Essentials workspace is a great starting point - it includes all the must-have tools without overwhelming you.
Customization Settings
To customize your workspace, click the gear icon in the top-right corner. This opens a drag-and-drop panel where you can:
- Show or hide specific tools
- Rearrange panels to match your workflow
- Combine tools from different workspaces to create a hybrid layout
Professional retoucher Jane Doe suggests:
"Before making changes, duplicate a default workspace and rename it - like 'My Portrait Edit.' Group similar tools together, such as keeping all color adjustments in one column and sharpening tools in another."
For optimal performance, especially on high-resolution displays, try these settings:
- Panel opacity: Set to 90% for better visibility
- Text size: Choose "Large" under Preferences > Interface
- Layout orientation: Use vertical mode for ultrawide monitors
Power users can also take advantage of keyboard shortcuts (Ctrl+[1-9] on Windows, Cmd+[1-9] on Mac) to quickly switch between saved workspace configurations. If you need to reset a workspace, go to Workspace > Manage Workspaces, right-click on the layout, and select Reset to Default.
According to 2025 Luminar Community Data, the most commonly added tools in custom workspaces are:
- Histogram (used by 62% of users)
- Layers Panel (55%)
- Presets Integration (48%)
Moreover, workspace layouts automatically adjust to fit resolutions ranging from 1080p to 8K, ensuring a smooth experience across all display types.
Building Custom Workspaces
Designing a custom Luminar NEO workspace can streamline your editing process to suit your specific needs. Here's how to create and manage workspaces that fit your workflow perfectly.
Organizing Tools and Panels
Arrange your workspace by positioning tools where they make the most sense for your editing style.
Here’s how to do it:
- Click the Customize button in the top toolbar.
- Drag and drop tools into your workspace.
- Group tools with similar functions together.
- Place tools you use most often at eye level for quick access.
| Panel Location | Tool Category | Examples |
|---|---|---|
| Top Right | AI Tools | Sky AI, Portrait AI, Relight AI |
| Mid Right | Basic Adjustments | Exposure, Color, Structure |
| Bottom Right | Creative Effects | Textures, Glow, Film Grain |
| Left Side | Technical Tools | Histogram, Layers, Masks |
| Bottom | Quick Access Options | Before/After, Export, History |
After arranging your tools, save the layout to ensure it’s ready for future use.
Saving Custom Layouts
Keep your workspace setup consistent by saving your layout. Luminar NEO lets you create multiple custom workspaces for different editing tasks.
To save a workspace:
- Go to Workspace > Save Workspace As.
- Name your layout clearly (e.g., "Portrait Editing" or "Landscape Enhancements").
- Optionally, assign a shortcut for quick access.
- Click Save.
For added convenience, enable Auto-Save in Preferences to automatically preserve any changes you make.
 Power User Features
Take your editing sessions to the next level with advanced tools designed for precision and efficiency.
Keyboard Shortcuts Guide
Keyboard shortcuts can make editing faster and more efficient. According to a 2024 study, using custom shortcuts can cut task times by 15–20%, saving up to 45 minutes for every 100 images edited.
Here are some handy shortcuts:
| Shortcut | Action |
|---|---|
| Tab | Hide/Show All Panels |
| Ctrl/Cmd + 1-9 | Switch Workspace Presets |
| Alt + Scroll | Zoom in/out on the Canvas |
| Shift + T | Toggle Toolbar |
| Ctrl/Cmd + Alt + S | Save Custom Workspace Layouts |
Easily switch between saved layouts with Ctrl/Cmd + 1-9.
"Combining Tab with Ctrl+1 reduces panel clutter by 40% during color grading sessions", says professional retoucher Jane Doe.
Project-Specific Layouts
Tailor your workspace to fit the needs of different photography styles. For example:
- Portrait editing: Highlight retouching tools and skin adjustments.
- Landscape editing: Focus on detail enhancements and LUT mapping tools.
Professional wedding photographer John Smith suggests this layout:
- Place exposure, white balance, and tone tools on the left for quick adjustments.
- Keep batch-export and watermark settings in collapsible panels on the right.
- Assign Ctrl+E for fast file exports.
For smoother performance, enable 'Match Display Settings' under Preferences > Performance.
Multi-Device Workspace Setup
Want to use your custom workspace on multiple devices? Here's how:
- Export your workspace as a
.lworkspacefile (File > Export Workspace). - Save it to a cloud service for easy access.
- Import it on another device running the same version of Luminar NEO (File > Import Workspace).
If issues arise, try resetting panel positions (Window > Workspace > Reset), turn off GPU acceleration on older devices, or use floating panels for smaller screens.
For tablet users, enable Touch-Friendly Mode under Preferences > Interface to optimize the workspace for touch controls.
"The key to consistent workspaces across devices is a solid export/import routine", advises the Clever Photographer YouTube channel. "Organizing workspace files in a year-based folder system helps track changes and maintain version control."
Using Presets.io with Custom Workspaces

You can integrate Presets.io collections into your Luminar NEO workspace to simplify your editing process and quickly access your favorite presets. This setup enhances your workspace by making preset management more organized and efficient.
Adding Presets.io Collections
To install and organize Presets.io collections in Luminar, follow these steps:
- Download and Install
- Locate the XMP preset files you’ve downloaded.
- Open Luminar NEO’s preset management panel.
- Use the "Import Presets" function to add the XMP files.
- Organize your presets into custom categories for easier access.
- Organize Collections
Set up a clear system for managing your presets in Luminar. Here's a simple guide:Category Purpose Suggested Location Portrait Presets Enhance facial features and skin tones Left sidebar, top section Landscape Presets Improve scenic and nature edits Left sidebar, middle section Creative Effects Add artistic styles and effects Right panel, quick access area
Once your presets are imported and organized, you can adjust your workspace to make applying them even faster.
Preset-Focused Workspace Setup
Set up your workspace to make the most of your Presets.io collections:
- Add a dedicated preset panel featuring your most-used collections, recently applied presets, and custom combinations.
- Place the preset browser in a spot that’s easy to reach.
- Position adjustment tools close to the preset panel for quick fine-tuning.
- Designate specific areas for different preset categories to keep everything organized.
If you work on multiple types of projects, consider creating separate workspace layouts for each preset category. This way, you’ll always have the right tools and presets at your fingertips.
Summary
Set up Luminar to match your editing workflow and make your workspace more efficient. Use these tips to simplify your editing process, especially when incorporating presets to save time.
By combining an organized workspace with Presets.io collections, you can significantly improve your workflow. Presets.io offers Luminar presets starting at $12.00, and you can get the Master Preset Bundle with 721 presets for $49.00.
Here’s how to make your Luminar NEO workspace more effective:
| Feature | How It Helps | How to Use It |
|---|---|---|
| Custom Layout | Quicker tool access | Place your most-used tools in key areas |
| Preset Integration | Faster style application | Add Presets.io collections to your panels |
| Keyboard Shortcuts | Speeds up adjustments | Set shortcuts for frequently used actions |
| Multi-Device Setup | Keeps workflow consistent | Sync your workspace settings across devices |
Make adjustments to your workspace as your projects change - whether you're editing portraits, landscapes, or experimenting with creative effects. Always keep your go-to tools and presets within reach for maximum efficiency.
FAQs
How can I customize my workspace in Luminar NEO to streamline my photo editing process?
Customizing your workspace in Luminar is a great way to make your photo editing more efficient and tailored to your needs. To get started, you can arrange tools and panels by dragging and dropping them to your preferred locations. Focus on keeping frequently used features easily accessible while minimizing distractions.
Additionally, Luminar allows you to save your workspace layout, so you can quickly return to your preferred setup anytime. Experiment with different arrangements to find what works best for your workflow. This flexibility ensures that you spend less time searching for tools and more time perfecting your photos.
How can I save and manage multiple custom workspace layouts in Luminar NEO?
To save and manage your custom workspace layouts in Luminar, start by arranging the tools and panels to suit your workflow. Once you're satisfied with the layout, save it as a custom workspace for easy access later. This allows you to quickly switch between different setups depending on your editing needs.
To manage your saved workspaces, you can rename or delete them to keep your workspace library organized. Regularly reviewing and updating your saved layouts ensures they remain relevant to your editing style and preferences.
How do I keep my customized Luminar NEO workspace consistent across multiple devices?
Currently, Luminar does not offer a built-in feature to sync customized workspaces across multiple devices. However, you can manually replicate your workspace settings by saving your preferences and applying them on each device. If this functionality becomes available in future updates, check the official Luminar NEO documentation or announcements for details.