Match Lightroom Colors in Capture One
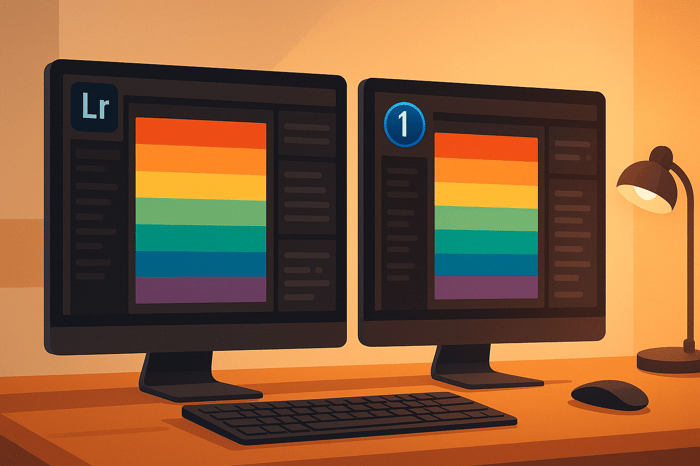
Want your images to look consistent across Lightroom(LR) and Capture One? Matching colors between these platforms ensures your photos maintain their intended look, no matter where you edit them. Here's what you need to know:
- Why It's Important: Consistent colors are essential for professional work, preserving client trust, and maintaining a smooth workflow.
- Key Differences: LR uses Adobe Color profiles, while Capture One relies on ICC-based profiles tailored to cameras.
- How to Match Colors: Convert Lightroom presets, adjust white balance, and fine-tune using Capture One's advanced tools like the Color Balance and Advanced Color Editor.
- Pro Tips: Use tools like the Quick Match Look for batch edits and rely on a gray card for precise white balance alignment.
Quick Comparison
| Feature | Lightroom | Capture One |
|---|---|---|
| Default Color Profiles | Adobe Color (vibrant) | ICC-based (neutral) |
| Color Adjustment Tools | HSL panel (basic adjustments) | Basic & Advanced Color Editor |
| Split Toning | Limited | 3-Way Color Balance Tool |
| Batch Color Matching | Copy/paste settings | Quick Match Look Tool |
Bottom line: With patience and the right techniques, you can achieve consistent, professional-grade color matching between LR and Capture One. Ready to dive in? Let's get started.
New Lightroom Color Panel declares WAR on Capture One
Color Handling: Lightroom vs Capture One
LR and Capture One handle color processing in distinct ways, which can impact your editing workflow. Here's a closer look at how these two platforms differ.
Default Color Profile Systems
LR relies on Adobe's proprietary Adobe Color profile, designed to produce vibrant and eye-catching results. On the other hand, Capture One uses ICC-based profiles tailored to individual camera models, offering a more neutral and adaptable approach to color reproduction.
Color Adjustment Tools Compared
In Lightroom, the HSL panel is a straightforward tool for adjusting hue, saturation, and luminance independently. Capture One, however, provides more advanced options with its Basic and Advanced Color Editor tools, allowing for highly precise and detailed color refinements.
Camera Profile Limitations
The default profiles in each program interpret colors differently, which can lead to variations in how your images appear. Understanding these differences is key to ensuring consistent color matching and adapting your workflow effectively. These distinctions lay the groundwork for the editing techniques discussed next.
How to Match Colors Step by Step
Converting Lightroom Presets
To bring your Lightroom presets into Capture One, start by identifying the key adjustments like exposure, contrast, and color balance. Once you’ve noted these settings, replicate them in Capture One. Use the Basic Color Editor to make initial color tweaks, apply the Color Balance tool for split toning, and fine-tune specific colors with the Advanced Color Editor. If you're looking to save time, explore Capture One's preset options to streamline your workflow.
Presets.io Styles for Capture One
Presets.io offers a variety of Capture One Styles that can act as a great starting point. For example, the Cinematic Light Collection is available for $15.00. If you're after film-inspired looks, Presets.io's Kodak Portra and Fuji Film Styles provide detailed color profiles that you can easily adjust to align with your LR presets.
Adjusting for Perfect Matches
Once you’ve converted your presets, follow these steps to refine your colors for an ideal match:
- Base Corrections: Begin by adjusting the white balance and exposure to ensure a solid foundation.
- Color Grading: Use the Color Balance tool to fine-tune highlights, midtones, and shadows for a polished look.
- Selective Adjustments: Refine specific color ranges or tones using the Advanced Color Editor for those final, precise tweaks.
Pro-Level Color Matching Methods
Once you've mastered the basics, it's time to dive into advanced techniques that give you more precise control over color matching.
3-Way Color Balance Settings
Capture One's Color Balance tool is a powerhouse for adjusting shadows, midtones, and highlights all in one place. Here's how you can replicate the split toning effects found in Lightroom:
- Open the Color Balance tool in the Color Editor.
- Use the Shadow wheel to tweak deep tones.
- Adjust the Highlight wheel for brighter areas.
- Refine the Midtone wheel for smoother transitions.
- Fine-tune the Amount slider to control intensity.
Want that cinematic orange-teal vibe? Set your shadows to a blue hue (around 210°) with 15–20% saturation, and your highlights to an orange hue (around 30°) with 10–15% saturation. The tool's unified interface lets you see all changes at once, making it easier to achieve a well-balanced look.
Color Range Selection Tools
For more targeted adjustments, Capture One's advanced selection tools let you refine specific colors with precision. The Advanced Color Editor is particularly handy for this:
- Width Control: Adjust the range of colors you want to edit. For example, when working with foliage, increasing the width can include more variations of green for a natural outcome.
- Smoothness Adjustment: This controls how sharply selected and unselected areas transition. Set it to 0 for sharp edges, 50 for a balanced blend, or 100 for the smoothest transitions.
| Selection Feature | Purpose | Typical Usage |
|---|---|---|
| Width Control | Defines the range of colors | Broad color families |
| Smoothness | Controls edge transitions | Natural blending |
| Selected Colors | Visualizes the selection | Precision checking |
These tools are perfect for fine-tuning specific areas, ensuring adjustments look seamless and professional.
Quick Match Look Tool
When working with multiple images, the Quick Match Look tool can save you time by syncing colors across photos. Here's how to use it:
- Choose a reference image with the desired color profile.
- Go to Edit With > Match Colors.
- Select the target image(s) you want to match.
- Adjust settings like color temperature, tint, saturation, and brightness as needed.
Unlike simply copying and pasting adjustments, the Match Colors tool analyzes the relationship between colors, tailoring the results to each image. For the best outcome, use it on photos taken under similar lighting conditions, and fine-tune individual images afterward. This tool is especially helpful for batch editing, such as during wedding or event photography.
These advanced techniques build on the basics, giving you a complete workflow for achieving consistent and polished color matching across your work.
Fix Common Color Matching Problems
Switching between LR and Capture One can sometimes lead to issues with white balance, making your images look inconsistent.
White Balance Matching Tips
One of the easiest ways to tackle this is by using a gray card during your shoot. A gray card acts as a neutral reference point. Once you import your photos into both LR and Capture One, use the white balance picker to click on the gray card area. This sets a baseline for your adjustments.
From there, fine-tune the temperature and tint sliders in each program until the white balance aligns. Keep in mind that every image and lighting setup is different, so small, careful tweaks are key to achieving a natural and consistent result. This step works hand-in-hand with the broader color matching techniques we’ve discussed earlier.
Conclusion: Main Points for Color Matching
Let’s sum up the essential strategies for achieving smooth color matching between LR and Capture One. As highlighted earlier, success in this process relies on a structured approach and the right tools. These adjustments are vital for maintaining the intended mood and feel of your images.
For photographers aiming to save time, advanced tools can simplify the workflow. For instance, Presets.io's Capture One Styles collections, such as Cinematic Light and Kodak Portra, offer professional-grade options for consistent color grading across platforms - all for just $15.00.
When transitioning between these platforms, focus on these key steps:
- Calibrate white balance to ensure a neutral starting point.
- Adjust color profiles incrementally to match the look.
- Fine-tune tonal ranges for balanced highlights and shadows.
- Use 3-way color balance to refine overall tones.
- Target specific colors with range selection for precision.
Mastering color matching is all about patience and a methodical approach. Take the time to understand how each platform handles color, and make adjustments carefully. The ultimate goal is to create a cohesive visual experience that stays true to your creative vision across both editing tools.
FAQs
How do I match Lightroom color profiles in Capture One for consistent editing?
To maintain consistent color profiles when moving between LR and Capture One, the first step is to ensure both programs are set to the same color space, such as sRGB or Adobe RGB. This alignment ensures colors are displayed and edited in a similar way across both platforms.
You can also tweak Capture One's color settings manually to match Lightroom's appearance more closely. Focus on adjusting key parameters like white balance, tone curves, and saturation. If you rely on presets or styles, look for tools that work with both platforms to simplify the process.
For a more refined approach, consider using styles tailored for Capture One that mimic Lightroom's look. With a bit of practice, you can fine-tune your workflow to create a smooth editing experience between the two programs.
How can I match Lightroom colors when switching to Capture One?
To maintain consistent colors when moving from LR to Capture One, the first step is to ensure both programs are using the same color profiles for your images. Capture One provides tools that let you manually tweak colors, tones, and curves, allowing you to closely mimic the appearance of your Lightroom edits. Although LR presets can’t be directly transferred into Capture One, you can recreate similar effects by carefully adjusting settings like contrast, saturation, and white balance.
For a smoother editing process, you might want to explore styles specifically designed for Capture One. These styles can simplify your workflow and help you achieve polished, uniform results across your projects.
What tools in Capture One can help achieve precise color adjustments for professional results?
Capture One provides a suite of powerful tools designed to elevate your color editing to a professional level. The Color Editor lets you tweak specific hues, saturation, and lightness with pinpoint accuracy, giving you complete control over individual color ranges. If you're working on portraits, the Skin Tone Tool is a game-changer, allowing you to achieve smooth and consistent skin tones effortlessly.
For those looking to add a creative touch, the Color Balance Tool is perfect for color grading, helping you craft the mood and atmosphere of your images. Meanwhile, the Advanced Color Grading Wheel ensures smooth and natural blending of tones, making it easier to achieve the exact look you want. These tools not only help you refine your images to align with your artistic vision but also allow you to replicate familiar color profiles, like those from Lightroom, with ease.


.png)
