
Ultimate Guide to Candid Street Presets
Candid street presets are tools that enhance urban photography by improving contrast, sharpness, and color balance. They save time, ensure a consistent style, and bring out details in urban textures and architecture. This guide covers everything you need to know about selecting, installing, and using these presets effectively.
Key Takeaways:
- Why Use Presets?: Save time, maintain a consistent style, and enhance urban details.
- Preset Features to Look For: Light balance, contrast range, color settings, and tonal range.
- Styles: Choose between black-and-white for a classic look or color presets for vibrant cityscapes.
- Installation: Easily set up presets on desktop (XMP/LRTEMPLATE files) or mobile (DNG files).
- Pricing: Individual presets cost $12–$27; bundles are around $49.
Quick Comparison of Platforms:
| Platform | Key Features |
|---|---|
| Adobe Lightroom | Enhances urban aesthetics |
| Capture One | Fine-tunes contrast and texture |
| Luminar NEO | Smart adjustments for street scenes |
Presets.io offers top-rated presets compatible with popular software, helping photographers refine their street photography with ease.
Selecting Street Photography Presets
Key Features to Look For
When choosing presets for street photography, focus on options that bring out the best in urban scenes while keeping details intact. Look for presets that excel in these areas:
| Feature | Purpose | Impact |
|---|---|---|
| Light Balance | Recovers shadow detail | Maintains the mood in high-contrast settings |
| Contrast Range | Enhances texture definition | Highlights architecture and street textures |
| Color Settings | Adjusts color temperature | Keeps the urban atmosphere natural |
| Tonal Range | Balances highlights and shadows | Preserves details in bright skies and dark areas |
The best presets allow precise adjustments to suit various lighting conditions, giving you control while staying true to your creative vision.
Choosing a Preset Style
Once you've identified the technical features, it's time to match your presets to the mood of your urban photography. Here are two main styles to consider:
Black and White Street Photography
For a timeless look, choose presets that emphasize:
- Deep shadow detail
- Accurate highlight control
- Adjustable contrast for added drama
- Options for film grain to evoke a classic feel
Color Street Photography
To capture vibrant city life, look for presets with:
- Natural skin tone adjustments
- Flexible white balance controls
- Selective color adjustments to highlight key elements
- Grading options tailored to the mood of your scene
High-quality presets should work seamlessly in both bright daylight and low-light evening settings. Expect to pay between $12.00 and $27.00 for individual presets, with bundles priced around $49.00. Always prioritize quality and flexibility over sheer quantity.
Finally, opt for presets that can be adjusted to suit different urban environments. The goal is to enhance your unique style - not to completely alter it.
Why Lightroom Presets are Great For Street Photographers
Preset Setup and Management
Here’s how you can set up and manage your urban photography presets on both desktop and mobile devices.
Installation Steps
Desktop Installation
Installing presets in Lightroom desktop involves working with XMP or LRTEMPLATE files, which store all the necessary adjustments for urban photography. Follow these steps:
- Download and Extract: Save the preset files to a specific folder on your computer.
- Open Lightroom: Launch the application and navigate to the Develop module.
- Import Presets: Use the "Import Presets" option in the Presets panel to add your files.
- Check Installation: Ensure your new presets appear in the Presets panel and are ready to use.
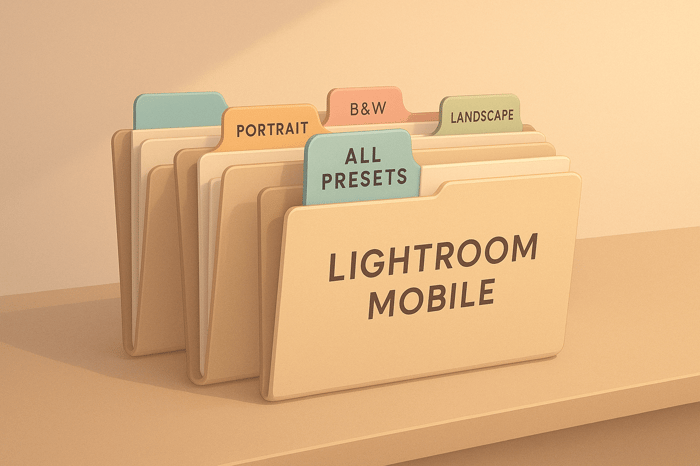
Mobile Installation
For mobile, presets are typically provided as DNG files optimized for editing on the go. The Master Preset Bundle includes mobile-ready versions to ensure consistent results across devices. Once installed, take some time to organize them for a smoother workflow.
Organizing Your Presets
Having a clear system for organizing your presets ensures you can quickly find the right one during a shoot. Here’s how you can structure them:
| Category | How to Organize | Why It Helps |
|---|---|---|
| Time of Day | Group by lighting conditions | Quickly find presets for different times of day |
| Location Type | Sort by urban environments | Easily select presets for specific urban scenes |
| Style | Separate color and B&W presets | Switch between color and monochrome looks efficiently |
| Intensity | Arrange by effect strength | Gain better control over the final image's impact |
Smart Collections Setup
Create folders tailored to various urban photography scenarios, such as:
- Urban architecture presets
- Street portrait adjustments
- Night photography settings
- High-contrast daylight presets
Naming Conventions
Use clear, descriptive names to make your presets easy to identify. For example:
- Highlight the main effect: Urban_Contrast
- Specify time of day: Night_Street
- Indicate color profile: Street_Color or Street_BW
This approach keeps your presets organized and ensures a seamless editing experience.

sbb-itb-b27063b
Street Photo Editing Methods
Core Street Photo Adjustments
Street photography often relies on balancing light and shadows to reflect the urban vibe. Here are some key adjustments to improve your candid shots:
Exposure Balance
Tweak the exposure to bring out details. Adjust highlights and shadows to ensure nothing looks too washed out or too dark.
Shadow Recovery
Use the shadows slider to bring out hidden details in darker areas. Adjust black levels to add depth and contrast.
Color Temperature Management
Fine-tune the temperature slider to suit the scene. Go for warmer tones during sunrise or sunset, and cooler tones for daylight or artificial lighting.
Advanced Preset Effects
Once you've nailed the basics, take your edits up a notch with these advanced techniques:
Tonal Control
Use the tone curve to create an S-curve, boosting contrast and details. Apply split toning to add subtle color tints to highlights and shadows.
Local Adjustments
Use adjustment brushes to brighten dark areas, soften harsh highlights, or highlight architectural features for a dramatic effect.
Using Presets in Different City Settings
Urban photography often calls for fine-tuned adjustments to capture the unique blend of lighting and architecture found in cityscapes. Whether you're shooting during the day or at night, making specific edits can bring out the best in your photos.
Day and Night Preset Settings
Daytime
- Lower highlights to keep bright areas detailed.
- Increase shadows to bring out details in darker spots.
- Use moderate contrast for a natural, balanced look.
- Adjust white balance to match the natural light.
Nighttime
- Brighten the image and sharpen details while minimizing noise.
- Adjust white balance to suit artificial lighting.
- Refine the color temperature to match different light sources.
In addition to time-of-day adjustments, consider tailoring your presets to reflect the unique vibe of each urban setting.
Location-Based Preset Adjustments
Modern Districts
- Add clarity to highlight sleek glass and steel designs.
- Use cooler tones to match the feel of contemporary architecture.
- Apply dehaze and vibrance for a polished, modern aesthetic.
Historic Areas
- Increase texture to emphasize aged surfaces and intricate details.
- Use split toning to add warmth and enhance the historical ambiance.
- Experiment with a light grain effect for a vintage, timeless look.
Conclusion: Street Photography with Presets.io
Preset tools have changed the game for urban photography, and Presets.io is at the forefront. With a 4.8-star rating from more than 1,300 reviews, it’s clear that photographers trust this platform to refine their candid urban shots.
Presets.io offers a wide range of preset collections tailored to various urban scenes. Whether you're shooting bustling city streets or quiet, historic neighborhoods, you’ll find options that match your vision. Plus, their pricing ensures high-quality editing tools are within reach for photographers at all levels.
"Our presets are easy to use, even for beginners, so you can quickly edit your photos like a pro." - Presets.io
These presets are designed to handle different urban settings with ease. From the sleek reflections of skyscrapers to the textured beauty of older architecture, the platform provides tools to bring out the best in your photos. Weekly updates mean you’ll always have fresh options to keep your edits dynamic and relevant.
Presets.io works with popular software like Lightroom, Photoshop, and Luminar NEO, making it easy to integrate into your workflow. With detailed installation guides, you can spend less time troubleshooting and more time capturing the energy of the streets. By simplifying the editing process, Presets.io helps you focus on blending creativity with technical skill in your urban photography.
FAQs
How can I pick the best preset style for different urban photography settings?
Choosing the right preset style for urban photography depends on the mood and setting of your shot. For vibrant cityscapes, consider presets that emphasize bold colors and contrast to highlight the energy of the scene. For a more nostalgic or cinematic vibe, opt for presets with muted tones or film-inspired effects.
Tip: Think about the story you want your photo to tell. A preset with warm tones can evoke a cozy, inviting atmosphere, while cooler tones might create a modern, sleek feel. Experiment with different styles to find what works best for your vision.
How can I install and organize presets on desktop and mobile devices?
To install and organize presets on your devices, follow these simple steps:
On Desktop:
- Open Lightroom and go to the 'Develop' module.
- In the Presets panel, click the '+' icon and select 'Import Presets.'
- Choose the preset files from your computer and click 'Import.'
- Once imported, organize your presets into folders by right-clicking on a preset and selecting 'Move to Group.'
On Mobile:
- Download the preset files to your device (usually in .DNG format).
- Open Lightroom Mobile and import the .DNG files as photos.
- Tap on a photo, click the three-dot menu, and select 'Create Preset.'
- Name your preset and save it into a folder for easy access.
By organizing your presets into folders, you can quickly find and apply them for streamlined editing, whether on desktop or mobile.
How do I use presets to improve my street photography in different lighting conditions?
To make the most of presets for street photography, start by considering the lighting conditions of your scene. Whether you're working with harsh midday sunlight, soft evening glows, or the shadows of urban environments, presets can help bring out the best in your photos.
Experiment with styles that complement your vision - moody tones for dramatic shots, vintage looks for a timeless feel, or cinematic presets for a polished, storytelling vibe. Adjust the intensity of the preset and fine-tune settings like exposure or contrast to suit the unique lighting of each shot. This flexibility ensures your urban photography captures both the mood and the moment perfectly.