
Preset Editing and the Benefits of Shooting RAW
Shooting in RAW gives photographers unmatched flexibility and control during editing, especially when using presets. Unlike JPEGs, RAW files store significantly more data, allowing for precise adjustments in exposure, white balance, and color grading without losing quality. Here’s why RAW is the go-to format for professional results:
- More Data: RAW files capture up to 68.7 billion colors (12-bit) or 4.4 trillion colors (14-bit), compared to JPEG’s 16.8 million.
- Better Recovery: Easily fix underexposed (-2 stops) or overexposed (+1 to +2 stops) areas and recover shadow and highlight details.
- Non-Destructive Editing: RAW preserves the original file, letting you test presets and re-edit without degrading quality.
- Dynamic Range: Ideal for tricky lighting conditions like sunsets or low light, ensuring consistent results with presets.
- White Balance Adjustments: Unlike JPEGs, RAW lets you fine-tune color temperature and tint post-capture.
Quick Comparison: RAW vs. JPEG
| Feature | RAW | JPEG |
|---|---|---|
| Color Depth | Up to 68.7 billion colors | 16.8 million colors |
| Brightness Levels | 4,000–18,000 levels | 256 levels |
| Editing Flexibility | Full control | Limited adjustments |
| File Size | Larger (2–6x JPEG size) | Smaller, compressed |
| Recovery Capability | High (shadows/highlights) | Minimal |
If you want professional-grade edits, RAW is essential. Plus, tools like Presets.io offer RAW-optimized presets to simplify your workflow, ensuring consistent, high-quality results.
RAW Format Basics
What RAW Files Are
RAW files act as digital negatives, capturing unprocessed sensor data and preserving every detail without compression or automatic adjustments [3]. Shooting in RAW allows your camera to record up to 14-bit intensity per channel, resulting in 4,096 to 16,384 shades per color. This depth is crucial for making precise edits with presets [3].
RAW vs. JPEG Comparison
Here's a breakdown of how RAW and JPEG differ in performance and flexibility:
| Feature | RAW | JPEG |
|---|---|---|
| Color Depth | Up to 68.7 billion colors (12-bit) or 4.4 trillion colors (14-bit) [4] | 16.8 million colors |
| Brightness Levels | 4,000–18,000 levels [5] | 256 levels |
| File Size | 2–6 times larger than JPEG [3] | Smaller, compressed |
| Adjustment Precision | Full control over edits | Limited editing options |
| Processing Required | Needs post-processing software like Adobe Lightroom | Ready to use immediately |
Data Storage in RAW Files
RAW files are unmatched when it comes to preserving essential image data, making them ideal for detailed editing. They store uncompressed sensor information, offering flexibility in areas like:
- Dynamic Range: Captures more detail in highlights and shadows, allowing for precise adjustments.
- Color Information: Provides access to the entire range of colors captured by the sensor.
- Exposure and White Balance: Gives complete control over brightness and color temperature adjustments.
This extensive data retention enables detailed edits without sacrificing quality. The rich data in RAW files is a key factor in achieving effective and impactful pre-set adjustments, which will be explored in the next section.
How RAW Improves Pre-set Results
Better Color and Exposure Control
RAW files allow for more precise color adjustments when using presets, thanks to their higher bit depth. While JPEGs are limited to 8-bit color depth (16.8 million colors), RAW files capture a staggering 68.7 billion colors. This means smoother transitions between tones and more accurate adjustments [2].
"But all that extra information in RAWs is what gives you the latitude to tweak the white balance and exposure, for example, to a much larger degree than with a JPEG" [1]
This added color depth also makes exposure corrections much more flexible.
Fixing Over and Under Exposure
RAW files excel at recovering details in both overexposed and underexposed areas. Here's how they compare to JPEGs when it comes to exposure corrections:
| Exposure Scenario | RAW Recovery Capability | JPEG Recovery Capability |
|---|---|---|
| Underexposure | Up to -2 stops recovery | Limited recovery |
| Overexposure | +1 to +2 stops recovery | Minimal to no recovery |
| Shadow Detail | Full recovery possible | Often unrecoverable |
| Highlight Detail | Significant recovery | Usually lost permanently |
"Because RAW files contain so much extra data, a photograph actually picks up information that may not be immediately visible. Often times, the darkest darks and lightest lights of a photograph end up lacking information (called 'clipping') when smaller file formats are used. However, RAW files can often recover lost information, allowing photographers to adjust an exposure by several stops." [6]
Preserving Original Image Quality
RAW files maintain the integrity of the original capture through non-destructive editing. As Morrison explains:
"The good thing about photo editing is that Lightroom is not editing RAW photos. So when you export JPEGs from Lightroom, it's creating a unique file, not changing the data in your RAW photo" [1]
This approach ensures that the original file remains untouched, allowing photographers to:
- Test multiple presets without degrading image quality.
- Make extensive edits without worrying about permanent changes.
- Revert to the original file at any time.
- Re-edit photos later using updated software or techniques.
Getting the Most from RAW Presets
Handling Different Light Conditions
RAW files are great for maintaining pre-set consistency, even in tricky lighting situations, thanks to their ability to capture a wide dynamic range. For example, during sunrise or sunset, it’s a good idea to underexpose your RAW images to protect the highlights in the sky. You can then brighten darker areas, like the ground, during post-processing [7].
Here’s how RAW processing can help in various lighting conditions:
| Lighting Condition | RAW Benefit | How Presets Help |
|---|---|---|
| Harsh Sunlight | Recovers details in bright highlights | Keeps skin tones and textures natural |
| Low Light | Reduces noise in shadows | Boosts exposure while retaining detail |
| Mixed Lighting | Captures more dynamic range | Adjusts highlights and shadows selectively |
| Backlit Scenes | Retains detail in both foreground and background | Balances exposure across the image |
Fine-tuning white balance is another key step, which we'll dive into next.
Adjusting White Balance
One of the biggest perks of RAW files? You can adjust the white balance with precision, something JPEGs just can’t match. While JPEGs lock in the white balance during capture, RAW files let you tweak the color temperature as much as needed without losing quality [8].
Photographer Nicole Morrison explains it well:
"Think of a zip file... But all that extra information in RAWs is what gives you the latitude to tweak the white balance and exposure, for example, to a much larger degree than with a JPEG." [1]
To get it right, use Lightroom’s eyedropper tool to set an accurate white balance. Adjust the Temperature and Tint sliders before applying your pre-set for the best results.
Smooth Color Gradients
RAW files also shine when it comes to creating smooth color transitions. Unlike JPEGs, which are limited to 8-bit depth (16.8 million colors), RAW files typically capture images at 12-bit to 14-bit, offering between 68.7 billion and 4 trillion colors [9].
This extended color range is especially helpful when:
- Applying bold color grading presets
- Editing sunrise or sunset photos
- Fine-tuning portraits with subtle skin tone differences
- Working on landscapes with delicate sky gradients
The higher bit depth ensures smooth transitions in colors, reducing issues like banding or artifacts. This capability ties into RAW’s overall strengths, making it ideal for achieving polished, professional edits.

Editing Raw files compared to JPEGs in Lightroom
Solving Common RAW File Issues
RAW files offer incredible editing flexibility, but managing them efficiently requires the right storage, processing, and editing strategies.
Storage Space Requirements
RAW files take up a lot of space. For example, uncompressed full-frame RAW files can be as large as 100 MB, while compressed versions average around 52 MB [10].
| Storage Solution | Best Use Case |
|---|---|
| External SSD | Active projects and frequent access |
| Cloud Storage | Backup, sharing, and remote access |
| NAS System | Studio workflows and team collaboration |
| Archive HDDs | Long-term storage for completed projects |
"Have a solid back up strategy that is automated. Best practice is to have 3 copies of your files. 2 copies on local devices and 1 copy on the Cloud." – Emily Naff, Associate Professor, Photography at Nashville State Community College [11]
Speeding Up RAW Processing
To improve Lightroom performance, try these adjustments:
- Use SSDs for storing catalogs and previews.
- Increase the Camera Raw cache size to at least 20GB [13].
- Follow an efficient editing order: start with denoise, then move to content-aware fixes, lens corrections, global adjustments, and finally local adjustments [12].
"For image export, I find that exporting using the GPU acceleration feature almost halves the time it takes to export images." – Laurence Norah, Travel Photographer and Blogger [13]
These tweaks can make RAW processing smoother and faster, setting you up for success with your chosen editing software.
Best RAW Editing Software
Different RAW editors shine in specific areas, making them suitable for varied workflows:
| Software | Rating | Key Strength | Best For |
|---|---|---|---|
| Adobe Lightroom Classic | 5.0 | Workflow management | Professional photographers |
| Adobe Photoshop | 5.0 | Advanced editing | Detailed retouching |
| Capture One Pro | 4.0 | RAW rendering | Studio photographers |
| DxO PhotoLab | 4.0 | Noise reduction | High-ISO shooting |
"Lightroom Classic is the top workflow software choice for working professional photographers. It shines at letting you import and organize your photo collection, and it has the best tools for correcting and enhancing photos in a raw file process." – Michael Muchmore, PCMag [14]
Each of these tools offers distinct benefits, ensuring efficient RAW file processing while maintaining data quality.
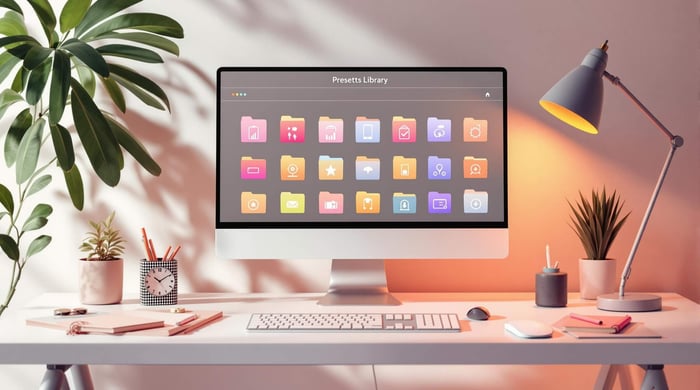
Presets.io: Premium Pre-set Collection

Presets.io takes the power of RAW editing to the next level with a collection of expertly crafted presets. These presets are designed to make the most of RAW file data, giving you more control and simplifying your editing process.
Presets.io Features
Presets.io offers a range of RAW-optimized presets that work seamlessly across popular editing platforms. Here’s what makes their offerings stand out:
| Feature | How It Helps with RAW Editing |
|---|---|
| Multi-Platform Compatibility | Works with major editing software, fitting right into your current workflow |
| Weekly Updates | New presets added regularly to match evolving photography trends |
| Advanced Color Grading | Leverages RAW data for precise, professional adjustments |
| Versatile Collections | Tailored for different photography styles and genres |
The Master Preset Bundle is currently available for $49.00 (discounted from $672.00) and includes a whopping 721 presets for both mobile and desktop platforms [15]. Ready to take your RAW editing to the next level?
RAW Workflow with Presets.io
Using Presets.io with RAW files streamlines your editing process while maintaining high image quality. Their pre-set collections are organized by style - like Moody, Retro Film, and Wedding pre-sets - to fully utilize the depth and flexibility of RAW images.
| Collection Type | Regular Price | Sale Price | Number of Presets |
|---|---|---|---|
| Standard Collection | $27.00 | $12.00 | Style-specific pre-sets |
| Cinematic Bundle | $432.00 | $37.00 | Film-inspired pre-sets |
| Vintage Film Bundle | $324.00 | $37.00 | Classic analog effects |
Here’s how to get started with Presets.io:
- Pick a collection that matches your style, such as Fuji Film or Minimalist.
- Apply a base pre-set to set the tone for your edit.
- Adjust exposure, highlights, and shadows to fine-tune the result.
- Export your final image while keeping the quality intact.
Thanks to its compatibility with leading editing software, Presets.io fits seamlessly into your existing RAW workflow, helping you achieve stunning results without extra hassle.
Conclusion
RAW files hold an incredible amount of data, making them a game-changer for fine-tuning pre-sets. While JPEG can handle 16.8 million colors, RAW files can store up to 281.5 trillion colors with 16-bit depth [2]. This gives photographers far greater control during editing.
When paired with professional pre-set collections, RAW truly stands out. Tools like Presets.io's Master Preset Bundle empower photographers to enhance images in various lighting scenarios without losing quality. The extensive data in RAW files allows for precise adjustments, like tweaking white balance or recovering shadows, making it an essential format for serious editing workflows.
Photographer Nicole Morrison emphasizes this progression:
"Shooting JPEG format is a great place to start. At some point you're going to want more control and you're going to want to move to RAW. Just start somewhere; there's nothing wrong with shooting JPEG." [1]
Another major advantage of RAW is its ability to fix exposure issues without compromising image quality [2]. By using RAW, you can refine your editing process and consistently produce professional-grade results.